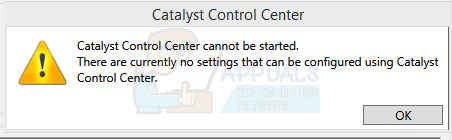
Fix: Catalyst Control Center cannot be started
If you are a Windows 10/8 user then you might see the Catalyst Control Center cannot be started error when trying to run/open the Catalyst Control Center. This problem is usually faced by the Windows 8/8.1 or 10 users who recently updated to these Windows versions. Once this error message start appearing, you won’t be able to open the Catalyst Control Center and, therefore, make any changes in the settings. Since it is the Catalyst Control Center, it will affect the AMD users.
The reason behind this issue is usually related to the driver problems. Either the driver files are corrupt or there is a compatibility issue causing this problem. Making sure you have the latest drivers or completely reinstalling the drivers usually resolves this issue.
Method 1: Install ccc2_install
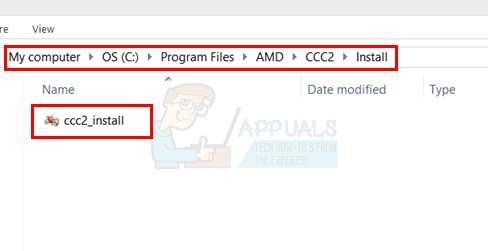
You will have a file names ccc2_install in the AMD folder. Running this file has known to resolve this issue for a huge number of users. So, your first step should be to locate and run this file.
Follow the steps given below to locate ccc2_install and run this file.
- Hold Windows key and press R
- Type C:\Program Files\AMD\CCC2\Install and press Enter
- There should be a file named ccc2_install in this folder. Simply run this file and follow the on-screen instructions.
The problem should resolve after installing this specific file.
Method 2: Reinstall Drivers
This method is simple, since the problem is caused by drivers, simply uninstall and reinstall the graphics drivers.
Note: You need to install both Intel and AMD drivers only if you have an Intel/AMD setup. If you have an AMD processor then you don’t have to download and install the Intel drivers. Keep in mind that you need to install the Intel drivers before installing the AMD drivers.
Note: Before trying to install the drivers, make sure your anti-virus application is disabled. These security applications are known to cause some issues with the installation process. You can simply right click your anti-virus application icon from the system tray (right bottom corner) and select Disable. If you don’t see any Disable option then simply double click the anti-virus application icon from the system tray and look for the Disable option on that panel. Almost all the major anti-virus applications have an option to disable the application temporarily.
For people who have an Intel processor and AMD graphics
Here are the steps for updating your drivers
- Hold Windows key and press R
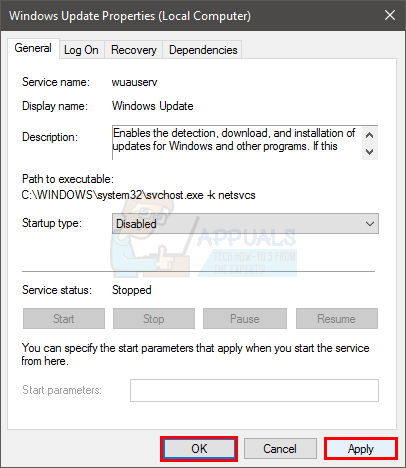
- Type services.msc and press Enter
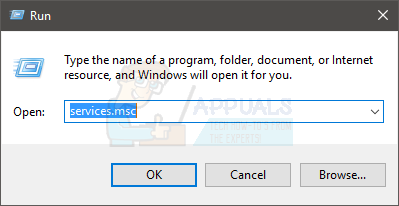
- Locate and double click Windows Update

- Select Disabled from the drop down menu in Startup Type
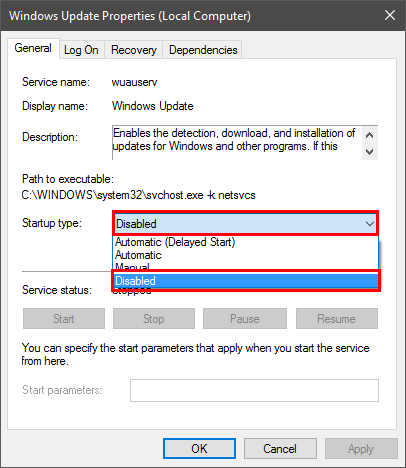
- Click Stop button if the Service Status isn’t set to Stopped
- Click Apply then select Ok
- Now that Windows Update is disabled, we don’t have to worry about Windows automatically updating our drivers
- The first thing you need to do is to download the latest version of Intel drivers. Click here and select your Intel Graphics from the drop down list in View by product. If you don’t know which Intel Graphics you have, follow the steps given below
- Hold Windows key and press R
- Type dxdiag and press Enter
- You should be in the System Check and remember the bit version you have installed. Look in the Operating System line (System Information section). You will have to download the drivers suitable for your bit versions (64-bit or 32-bit)
- Click the Display tab
- Your graphics should be displayed in the Device section
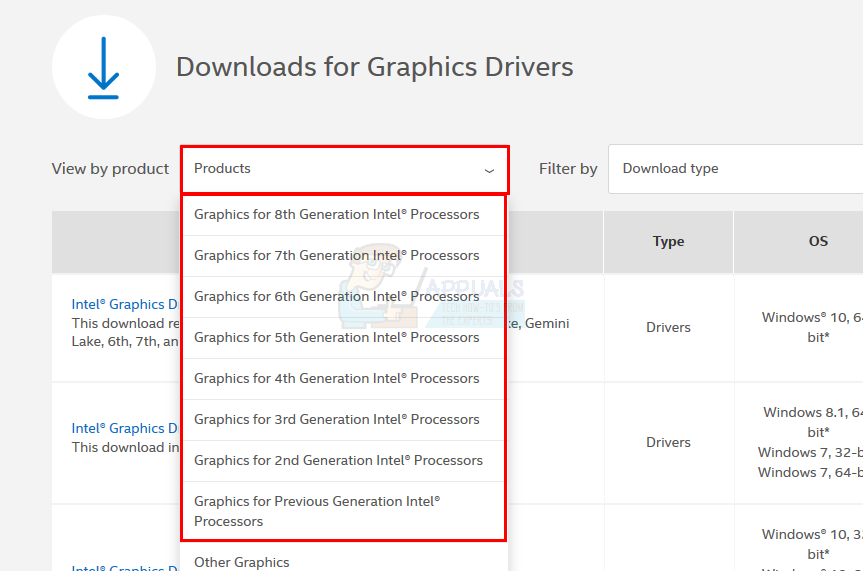
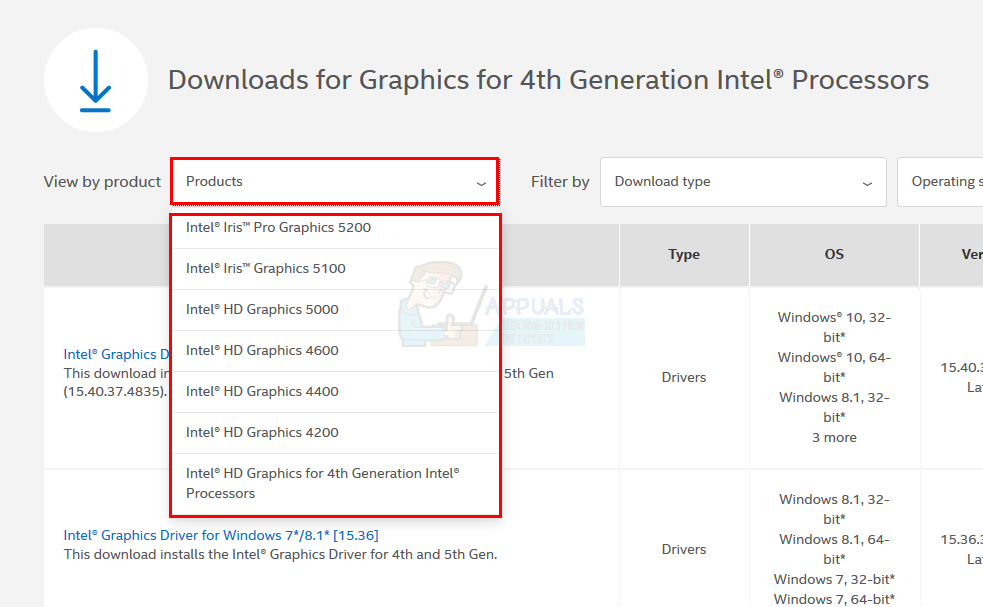
- Click the View by product drop down menu again and select the exact Intel Graphics from the list
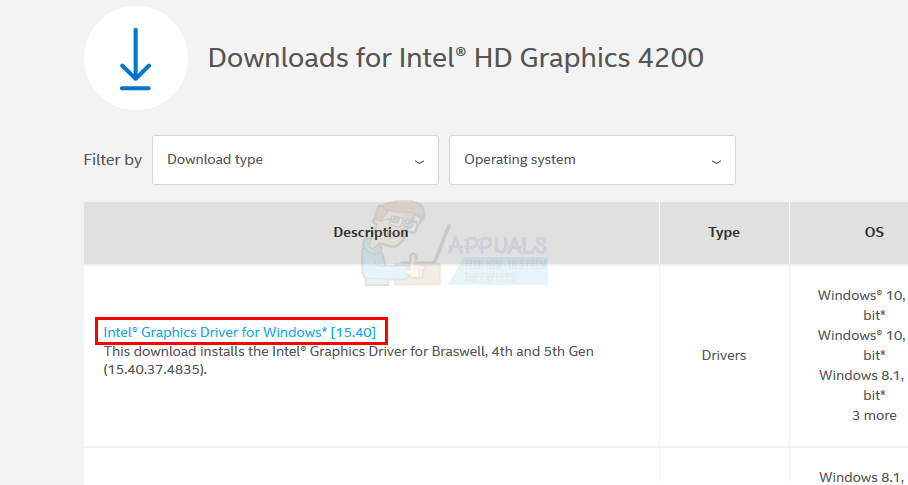
- Click the top link (make sure it is the latest version) and download the drivers appropriate for your Windows Bit version.
- Once the file is downloaded, double click the file and run it. Follow the on-screen instructions
- You should now have the latest version of Intel Graphics installed. We will now guide you on how to install the AMD drivers
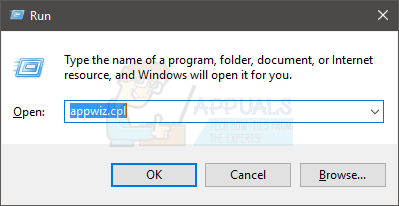
- Hold Windows key and press R
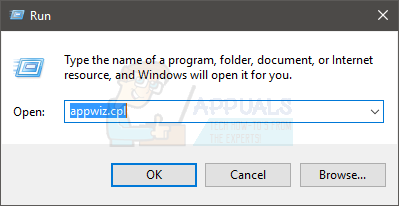
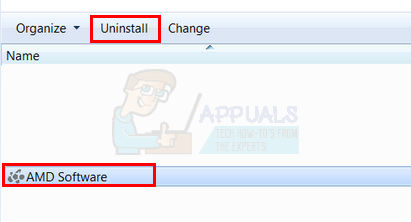
- Type appwiz.cpl and press Enter

- Locate the AMD Software in the list and select it
- Click Uninstall. Click Yes for the confirmation dialog and follow any additional instructions

- Now, we will empty the contents of the AMD folder found in the C drive. Hold Windows key and press R
- Type C:\AMD and press Enter

- Hold CTRL key and press A (this will select all the files)
- Press the Delete key and confirm any additional prompts
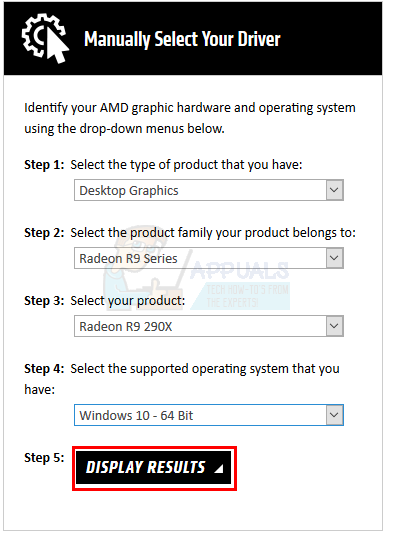
- Once done, click here. Select the appropriate settings from the Manually Select Your Driver section and click Display results. Download the drivers suitable for your Windows version. Note: We would advise you not to use their auto detect tool for driver installation. If you want the best results, download the drivers manually.

- Double click the downloaded file and follow the instructions
Reboot once the AMD drivers are installed.
For people who have AMD processor and AMD graphics
If you have an AMD processors/APU’s then you don’t have to download the Intel graphics drivers. The AMD drivers from their official website will be enough for you. So, here are the complete steps for updating your drivers
- Hold Windows key and press R
- Type services.msc and press Enter

- Locate and double click Windows Update

- Select Disabled from the drop down menu in Startup Type

- Click Stop button if the Service Status isn’t set to Stopped
- Click Apply then select Ok
- Now that Windows Update is disabled, we don’t have to worry about Windows automatically updating our drivers
- Hold Windows key and press R
- Type appwiz.cpl and press Enter
- Locate the AMD Software in the list and select it
- Click Uninstall. Click Yes for the confirmation dialog and follow any additional instructions
- Now, we will empty the contents of the AMD folder found in the C drive. Hold Windows key and press R
- Type C:\AMD and press Enter

- Hold CTRL key and press A (this will select all the files)
- Press the Delete key and confirm any additional prompts
- Once done, click here. Select the appropriate settings from the Manually Select Your Driver section and click Display results. Download the drivers suitable for your Windows version. Note: We would advise you not to use their auto detect tool for driver installation. If you want the best results, download the drivers manually.

- Double click the downloaded file and follow the instructions
Restart your machine when the AMD drivers are installed. You should be good to go.
Method 3: Clean Install
If method 2 didn’t work for you then you might have to perform a clean install of the drivers.
Note: Before trying to install the drivers, make sure your anti-virus application is disabled. These security applications are known to cause some issues with the installation process. You can simply right click your anti-virus application icon from the system tray (right bottom corner) and select Disable. If you don’t see any Disable option then simply double click the anti-virus application icon from the system tray and look for the Disable option on that panel. Almost all the major anti-virus applications have an option to disable the application temporarily.
Note: If you have Intel Graphics and AMD graphics as well then make sure you update the Intel Graphics before installing the AMD graphics. Go to method 2 (if you haven’t already) and follow the steps 1-12 in “For people who have an Intel processor and AMD graphics” section.
- Click here and download the Display Driver Uninstaller Utility. This utility basically clears up the previous graphic drivers and any of their left over files. This is useful because it makes sure that the newer driver is installed properly. A lot of the times your new driver won’t be installed properly because of the previous version and its conflicting left over files.
- Once done, click here. Select the appropriate settings from the Manually Select Your Driver section and click Display results. Download the drivers suitable for your Windows version. Note: We would advise you not to use their auto detect tool for driver installation. If you want the best results, download the drivers manually.
- Now, we will empty the contents of the AMD folder found in the C drive. Hold Windows key and press R
- Type C:\AMD and press Enter

- Hold CTRL key and press A (this will select all the files)
- Press the Delete key and confirm any additional prompts
- Now, it’s time to turn off Windows updates. This is to prevent Windows from downloading and installing the graphic drivers automatically. If your Windows is set to automatic then it might automatically download the graphics drivers. Turning Windows update off for a while will prevent this from happening.
- Hold Windows key and press R
- Type services.msc and press Enter

- Locate and double click Windows Update

- Select Disabled from the drop down menu in Startup Type

- Click Stop button if the Service Status isn’t set to Stopped
- Click Apply then select Ok
- If you are a Windows 7 or 8 user, make sure your Windows are up to date. To download and install the Windows updates, follow the steps given below
- Hold Windows key and press R
- Type control panel and press Enter
- Select Small icons from the drop down menu in front of View By
- Click Windows update
- Select Check for updates
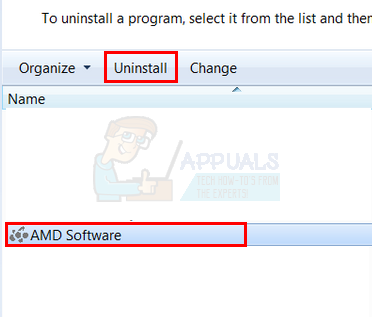
- Hold Windows key and press R
- Type appwiz.cpl and press Enter
- Locate the AMD Software and select it
- Click Uninstall and follow any additional on-screen instructions. Make sure you uninstall everything
- Now we will log in to Safe Mode to run the Display Driver Uninstaller.
- Hold Windows key and press R
- Type msconfig and press Enter

- Select Boot tab
- Check the option Safe Boot in the Boot options section
- Select the option Minimal under the Safe Boot option
- Click Ok
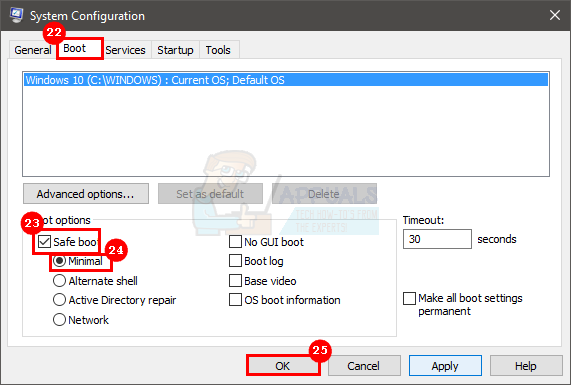
- Windows will ask you to restart. Click Restart
- Once the system reboots, you will be in Safe Mode. Run the Display Driver Uninstaller file
- Select AMD from the drop down menu and click the Clean and Restart (Highly Recommended)
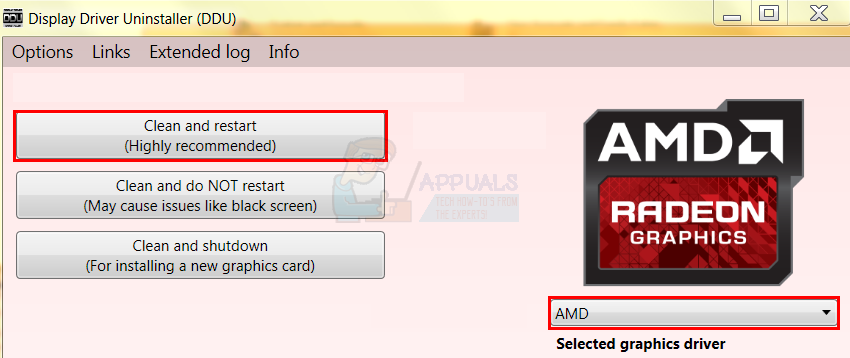
- Let Display Driver Uninstaller do its job. When it’s done, you PC will restart.
- Run the AMD drivers (that you downloaded earlier) once the system restarts. Follow the on-screen instructions to install the drivers
- When the drivers are installed, you need to turn off the Safe Mode option. Hold Windows key and press R
- Type msconfig and press Enter

- Select Boot tab
- Uncheck the option Safe Boot in the Boot options section
- Click Ok
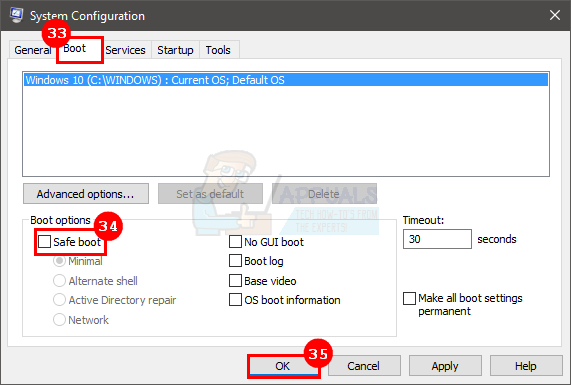
- Windows will ask you to restart. Click Restart
Once the process is completed, you should have a clean install of the drivers and everything should work fine.