Headphone Jack in Mac Not Working? Try these fixes!
No Sound in Headphones While Connected to Mac? Here are the Solutions!
Many Mac users have been complaining for many years that the headphone jack on their laptop suddenly stops working and they are unable to hear anything on their headphones.
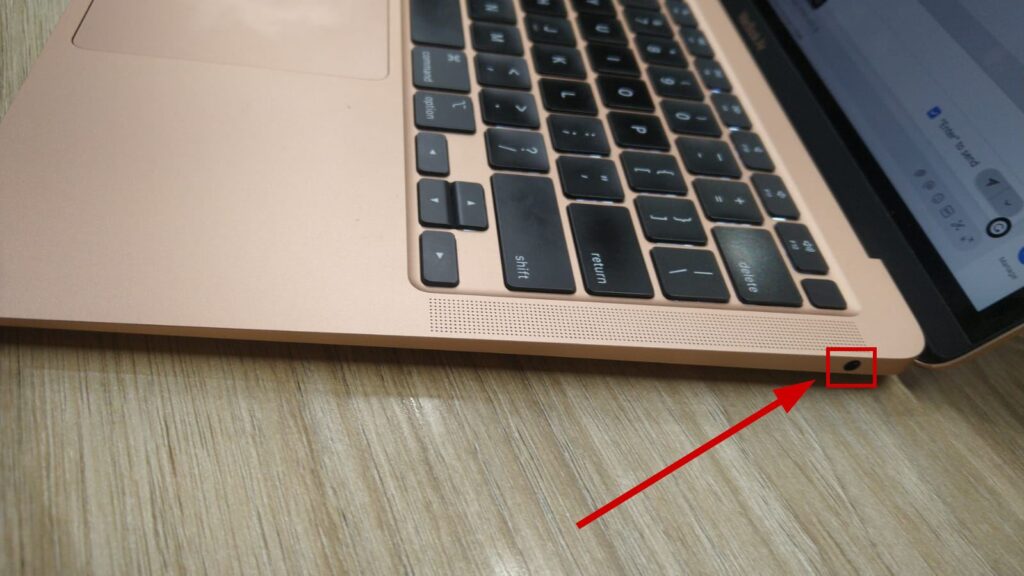
This is a known issue, and it’s usually a problem at the user end and is related to wrong settings more than the jack. However, it’s also possible that the jack can be broken or have a lot of dust, and therefore, it doesn’t recognize the headphones that you insert.
In such cases, you should clean it with a cotton bud or get it replaced if the insides are damaged. But if that’s not the case, then there will be some other causes for this issue, and fortunately, there are multiple solutions to fix that.
One workaround you should try first is as follows:
- Unplug your headphones.
- Close the lid of your MacBook or MBP, i.e., put it to sleep.
- Now plug in your headphones again.
- Wake up your MacBook or MBP now by opening its lid.
- Check the sound now, and it should be fixed.
However, that’s not a permanent solution, and it’s something you’ll need to do each time you want to use your headphones.
Having said that, below we’ll go through 8 solutions to fix this issue with the Mac headphone jack. I’ll also list the steps that you need to follow.
Methods to Fix Mac Headphone Jack Not Working
Mostly, the headphone jack doesn’t work because of dust or if it’s broken. So cleaning or repairing it should solve the issue. But apart from that, selecting the headset as output volume, unmuting the output volume, resetting NVRAM, and some more methods have proven to work.
Before we move on to the actual steps, let’s see how these methods actually help overcome this issue,
- Clean the Headphone Jack: If there are dust particles in the jack, the headphone won’t be recognized, and as a result, it will have no sound. This is the main reason why you should always make sure the jack is clean.
- Check the Headphone Connector: The headphone connector is the metal pin that gets inserted in the jack. Dee if it has scratches or if it’s damaged somewhere. In such cases, try a different headphone and check if that one works.
- Restart your Mac: Restarting your Mac will get rid of any internal system bugs or glitches that could be stopping the headphone jack from functioning properly. Before moving on to the next solutions, make sure you restart your Mac and check your headphones again.
- Select Headset as Sound Output: If ‘Headset’ is not selected as the sound output, then it’s obvious that the sound won’t come from your headphone but rather from the external or internal speaker, depending on which one is enabled.
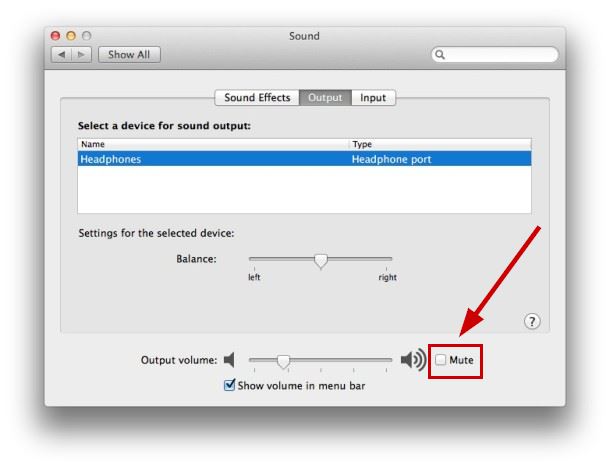
- Unmute Output Volume: It’s obvious that if your output volume is muted, then even selecting Headset as the sound output option will do nothing. Therefore, check whether the output volume is muted. If it is, then unmute it.
- Restart Coreaudiod: In simple terms, Coreaudiod (Core Audio Daemon) manages the audio on your macOS and iOS devices. If there’s an issue with this API, then there will be some problems with the audio and sound on your MacBook. So, simply restarting Coreaudiod will resolve this issue.
- Reset NVRAM: The Non-volatile Random Access Memory (NVRAM) stores multiple settings like time zone, display resolutions, sound volume, and startup disk selection. Now resetting NVRAM is a known and easy method for troubleshooting general issues on Mac like the one we are dealing with.
- Test a New User Profile: It’s possible that the problem is with your current user profile because of a certain process or application. To check if that’s true, make a new user profile and test your headphones again.
1. Restart your Mac
- Click on the Apple menu.
- Select Restart.
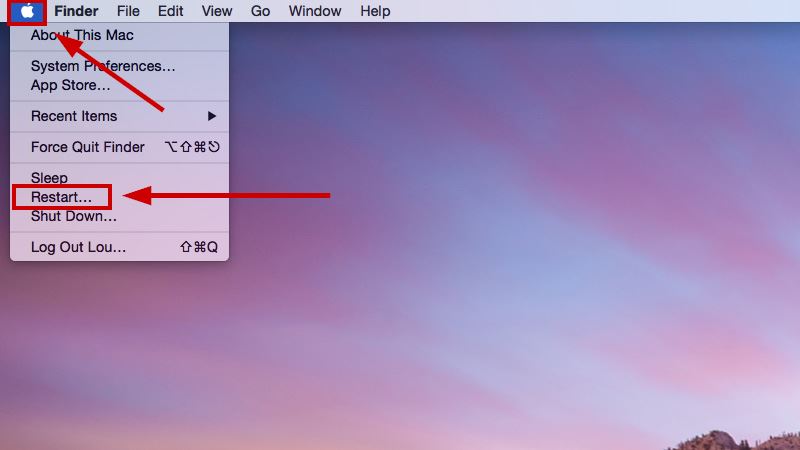
- Once it restarts, plug in your headphones now and check if the problem is resolved.
2. Select Headset as Sound Output
- Select the Apple Logo.
- Go to System Preferences/Settings.
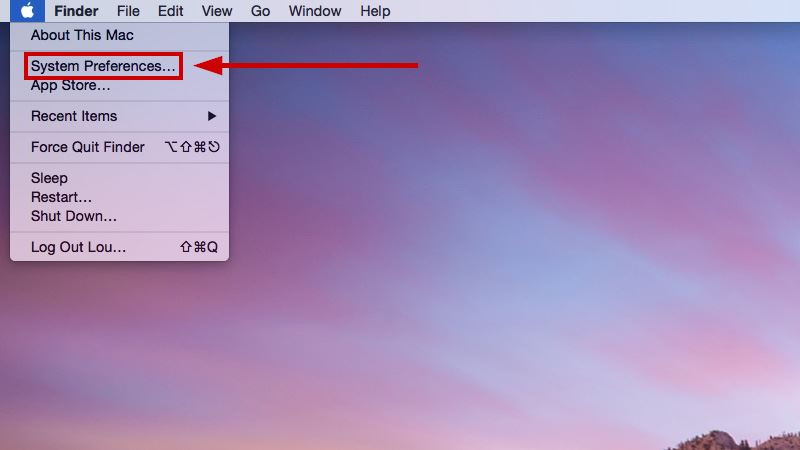
- Select Sound > Output tab.
- Now select Headset as the sound output option.
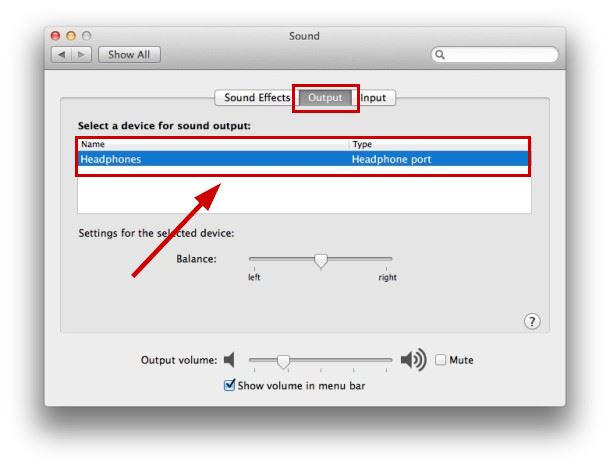
3. Unmute Output Volume
- Click the Apple Logo.
- Select System Preferences/Settings.

- Select Sound > Output tab.
- Uncheck the Mute checkbox.
4. Restart Coreaudio
- Select the Launchpad (six-square) icon in Dock.
- In the search bar, type Terminal and open it.
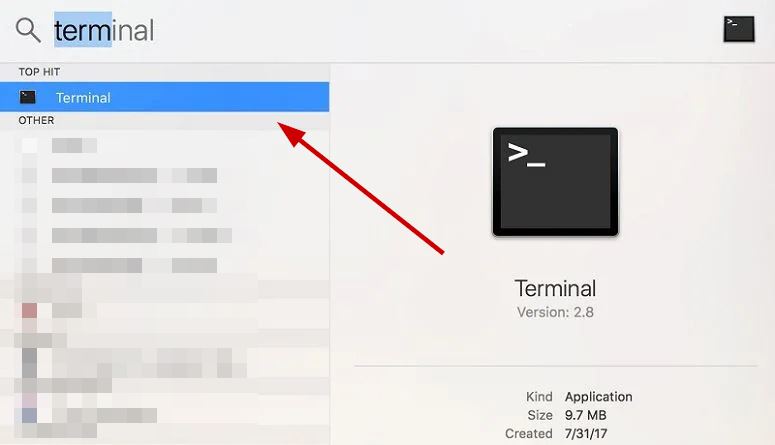
- Alternatively, press Command + Space or F4 and type Terminal.
- Once it opens, execute the command below:
sudo pkill coreaudiod
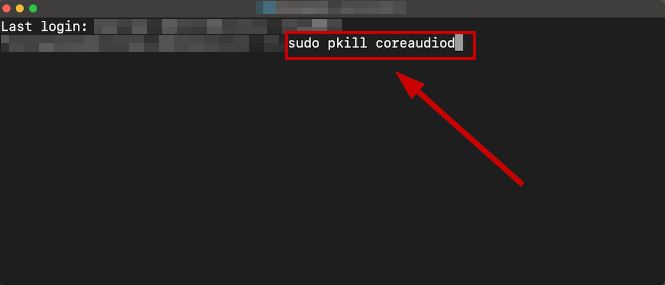
- Enter your admin password if asked.
- Now close the terminal, and Mac will restart Coreaudio itself.
5. Reset NVRAM
- Shut down your Mac.
- Turn on your Mac, and now immediately press the Option, Command, P, and R keys together before the gray screen appears and keep them pressed for about 20 seconds.
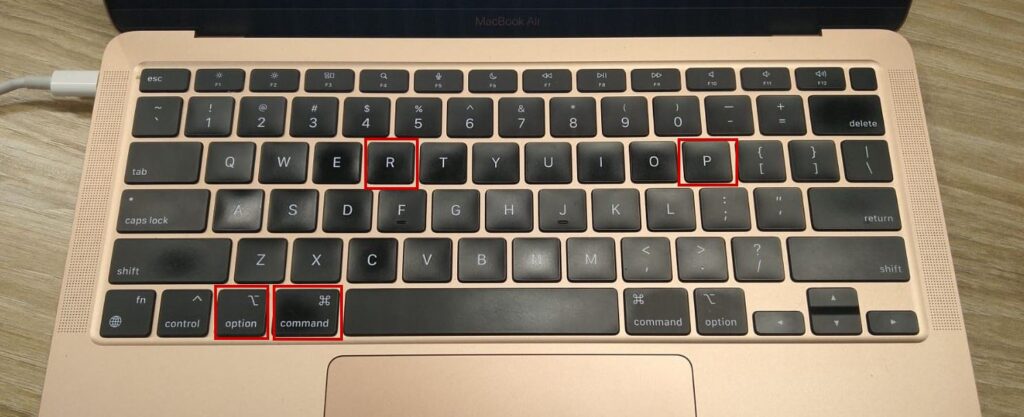
- You might see the Apple logo and hear the startup sound two or three times in the process.
- Once the Mac restarts, some system settings will be reset, so adjust them accordingly.
- Now connect your headphones to your Mac again and see if the jack is working or not.
6. Test a New User Profile
- Select the Apple menu.
- Go to System Preferences > Users & Groups.
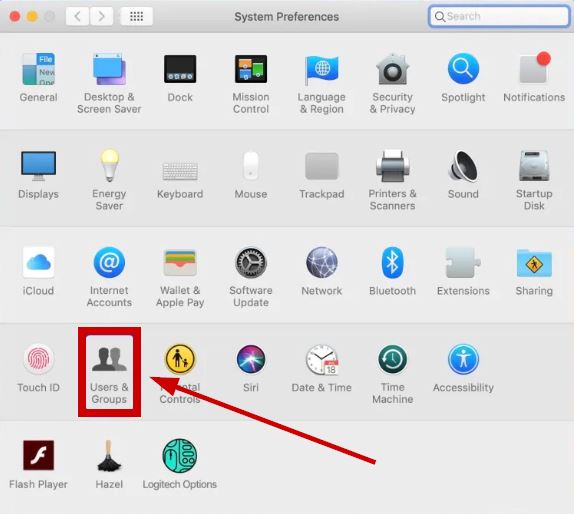
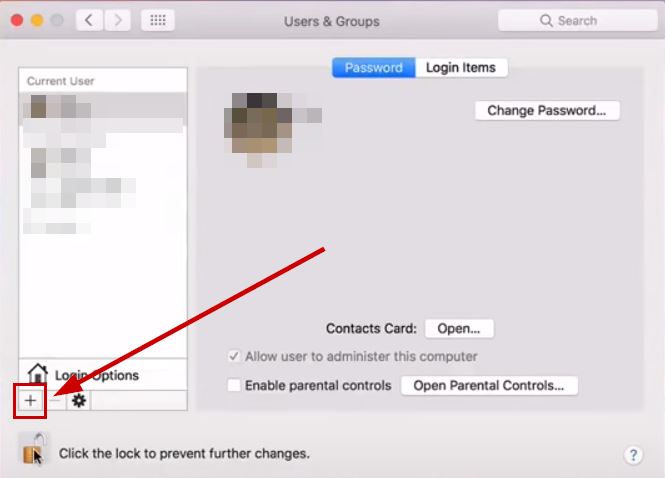
- Select + under the list of users. Click on the lock icon in the bottom left if the option is locked.
- Select the New Account pop-up menu and choose your user type from Administrator, Standard, or Sharing Only.
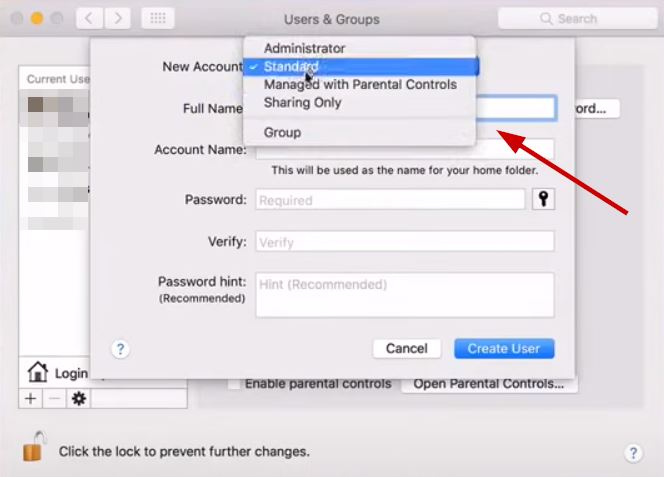
- Enter the account name and select a password.
- Click on Create User.
- Now login to this account and check your headphones.
If the headphone jack on your Mac is still not working, then contact Apple support or get your device repaired at a computer repair store. Besides, if you’re unable to follow any steps mentioned in this article, then let us know in the comments section.
 Reviewed by


