Is your Kodi Not Working? Here’s How to Fix it
Kodi fails to work if the application itself or any of its add-ons are outdated. Since Kodi is a media platform, it requires frequent updates to keep up to date with all new emerging formats. If everything is updated on your machine and you’re still having problems, consider reinstalling the software altogether. This will refresh all modules and fetch fresh files from the server.
Before starting the troubleshooting process, make sure the services you are using with Kodi are working. You can check the social media handles of these services.
1. Relaunch Kodi after Force Closing it
Kodi will fail to operate properly if any of its operational modules are in an error state and need a fresh start. In such a case, relaunching Kodi after force closing will solve the problem.
On an iOS device, tap on the App Switcher and Swipe Up on Kodi. For Android, follow these steps:
- Navigate to Android device Settings > Apps > Kodi.

Force Stop the Kodi App and Clear its Cache - Force Close the app and open Storage.
- Clear the Cache of the Kodi app and check if it is operating properly.
2. Restart the Device and Router
Kodi relies on the network to complete its processes and operations. If the network modules of your device or router are in an error state, Kodi will not be able to utilize them and hence will stop working. To fix this, restart your device and router.
- Power off your devices (TV, streaming device, etc.) and the router.
- Unplug their power cables and wait for a minute.
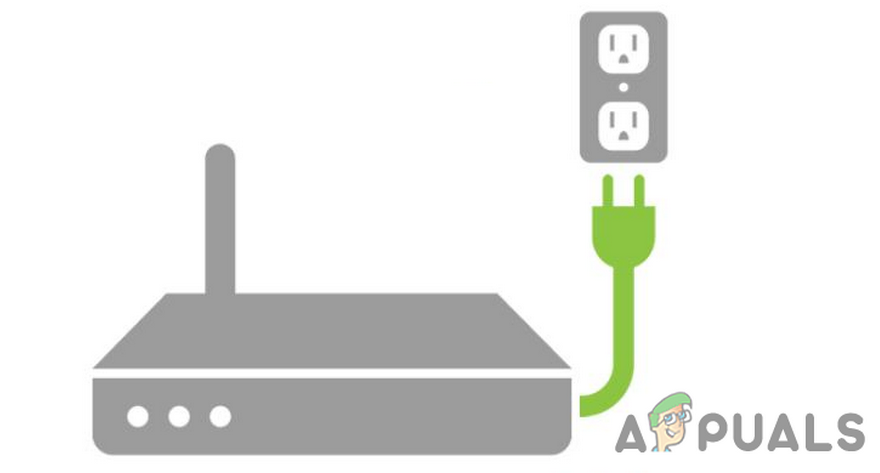
Unplug Your Router from the Power Source - Plug back the cables and power on the router.
- Power on the devices and check if Kodi is operating properly.
3. Set the Device’s Refresh Rate to 60 Hz
Kodi is not compatible with devices that use a refresh rate of more than 60 Hz. If your device’s refresh rate is higher than that, Kodi’s graphic modules will not be able to handle the higher rate.
If it was working properly previously, an OS update might have increased the refresh rate of your device. In this case, setting the device’s refresh rate to 60Hz will resolve the issue.
For iOS devices, navigate to Settings > Accessibility > Motion > Limit Frame Rate. For Android:
- Launch the phone’s Settings and navigate to Display > Motion Smoothness.
- Select Standard and tap on Apply.
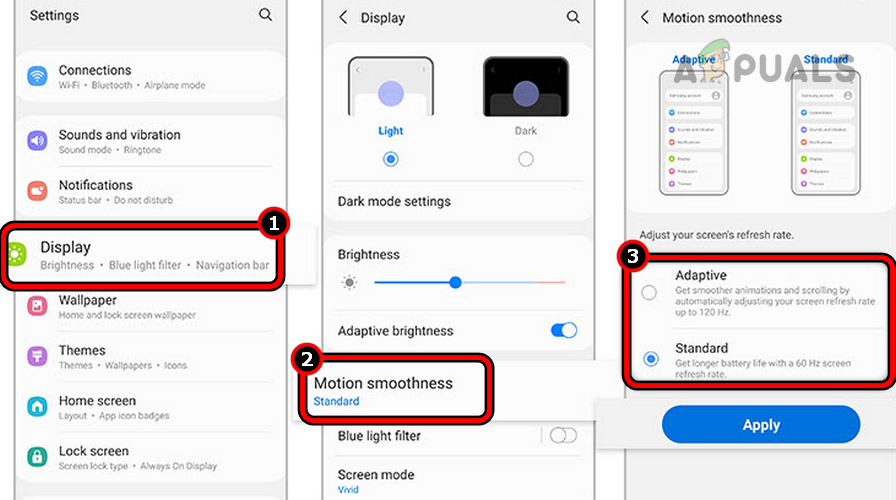
Change Phone’s Refresh Rate to 60Hz - Restart the device and check if Kodi is operating properly.
4. Disable Nord VPN or Change its Protocol
Nord VPN has a known bug where it causes issues with Kodi. Disabling the Nord VPN or changing its default protocol will do the trick here. You can also use some other alternatives. But for now, try disabling all VPNs and diagnose where the issue is coming from.
- Launch the Nord VPN app and click on Disconnect.
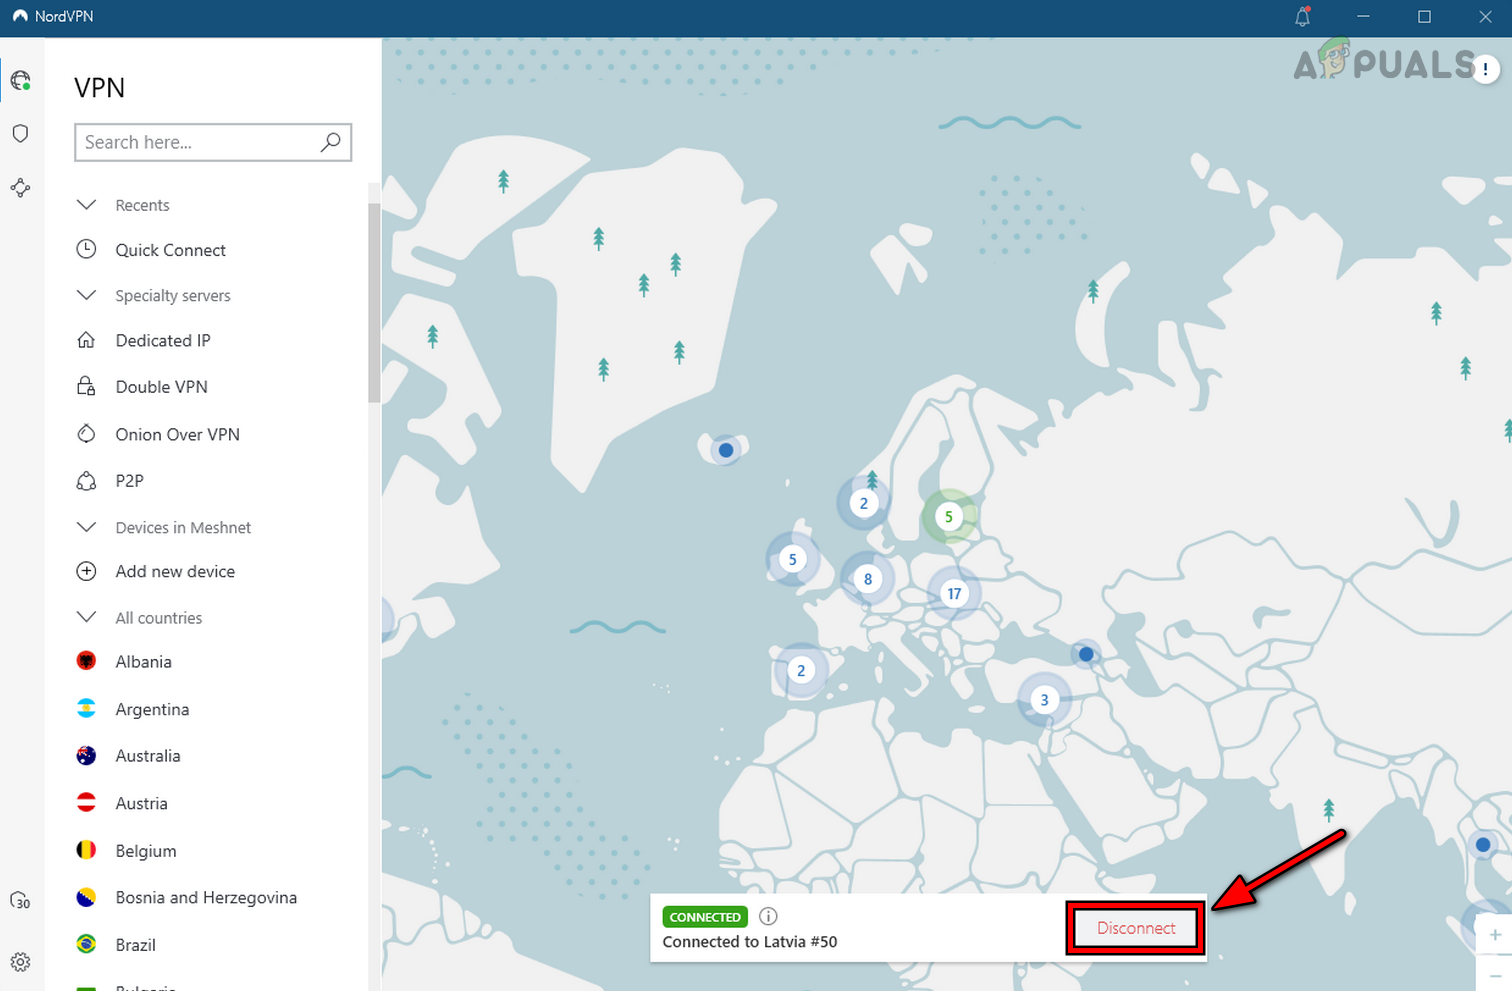
Disconnect Nord VPN - Confirm to disconnect the app and check if Kodi is working properly.
- If so but you want to use the app, launch Nord VPN again.
- Navigate to Settings > Auto-Connect.
- Open VPN Protocol and enable OpenVPN (TCP). Now check if the Kodi is working normally.
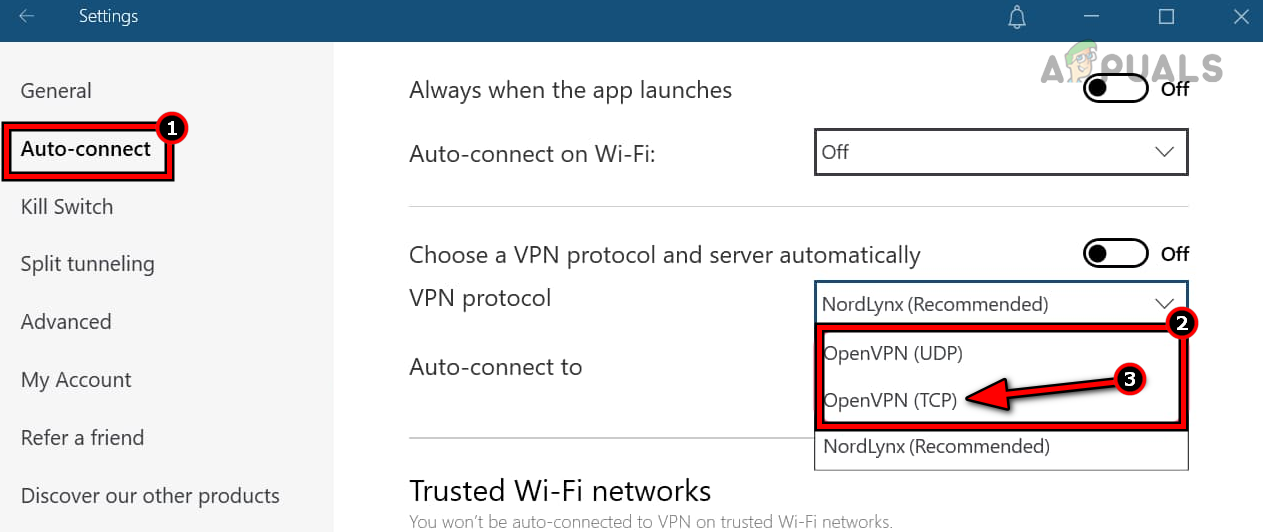
Change the VPN Protocol of Nord VPN to OpenVPN (TCP)
5. Disable the Antivirus of the Device (For PC)
If your antivirus has marked any of the essential Kodi addons as a threat (false positive), it can block the execution of certain Kodi modules. Here, we can try to disable the Antivirus and see if that does the trick.
Lately, the Crew addon has been reported to be detected as a threat. To disable ESET on a Windows PC, follow these steps:
Warning:
- Expand the system tray and right-click on the ESET icon.
- Select Pause Protection and confirm to stop the protection.
- Again, right-click the ESET icon in the system tray and select Pause Firewall.
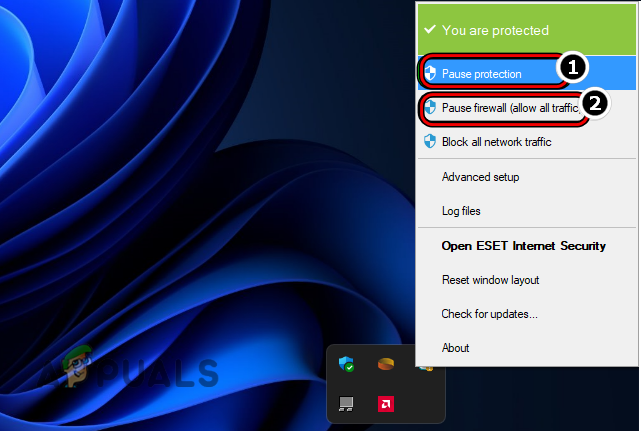
Pause ESET Protection and Firewall - Confirm to stop the firewall and check if Kodi is working normally.
If you are not using a 3rd party antivirus, add Kodi as an allowed app in the Windows Defender settings. If you are using a portable version of Kodi on Windows, you can run that in Sandboxie.
7. Update Kodi Addons to Latest Builds
Kodi is coded in C++ but its add-ons are scripted in Python. We recently observed that a bug in Python broke the required compatibility between Kodi and several of its add-ons. This causes even the most basic operations of Kodi not to work. You can try solving this problem by updating the addons to the latest builds.
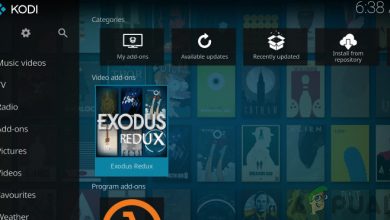
- Launch Kodi and open My Addons (under Categories).
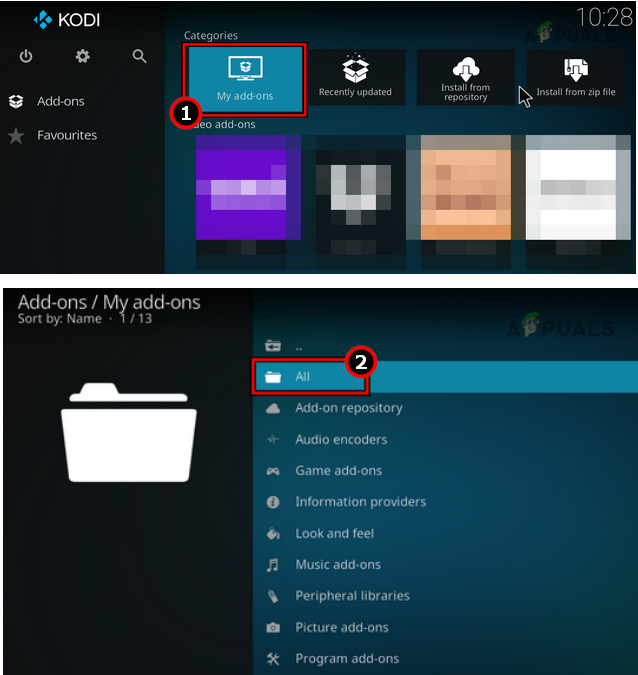
Open My Addons in Kodi and Select All - Select All and go through them one by one to make sure each one is updated or Auto Update is enabled.
Select the Required Addon in Kodi My Add-ons - Once done, relaunch Kodi and check if it is operating properly.
Update or Enable Auto-Update of a Kodi Addon
8. Update Kodi to the Latest Build
An outdated Kodi installation will not be compatible with several of its add-ons and the device’s operating system. This incompatibility will not let the app access modules critical for its operation and hence the app will not work. Here, updating Kodi to the latest build will solve the problem. To update Kodi on an Android device:
- Launch the Google Play Store > Search > Kodi.
- Tap on Update and once updated, check if Kodi is working normally.
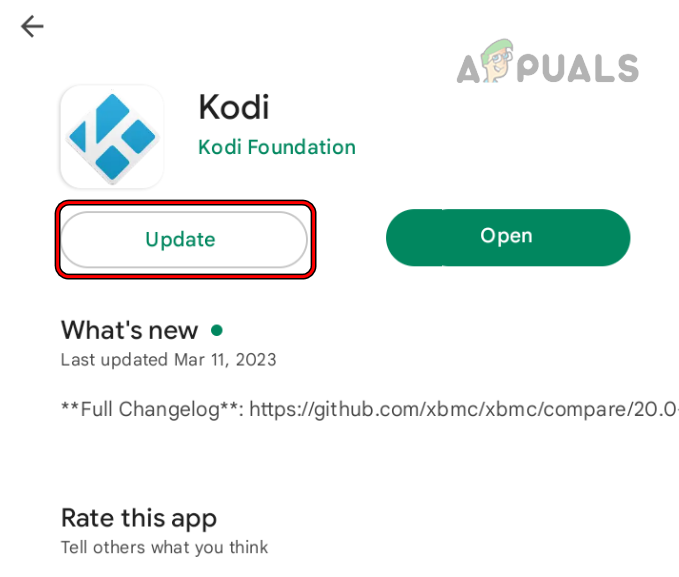
Update Kodi on an Android Device
9. Change Permissions of the Kodi App (Android Only)
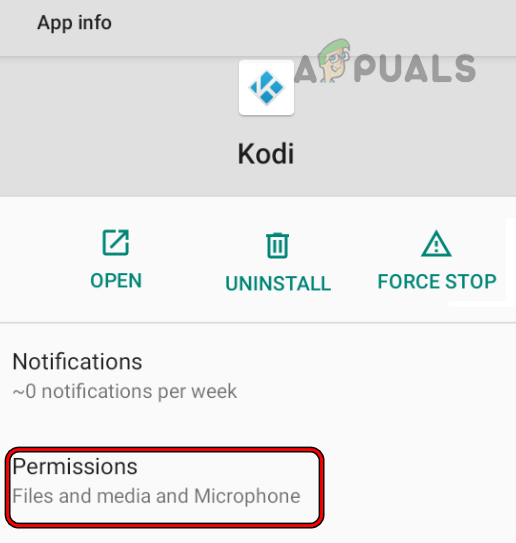
With every update of the OS or the Kodi app, certain permissions of the app are reverted to the defaults. There is a chance that a recent update revoked some important permissions that are crucial for the application. In this case, you can go over the permissions and make sure this isn’t the case.
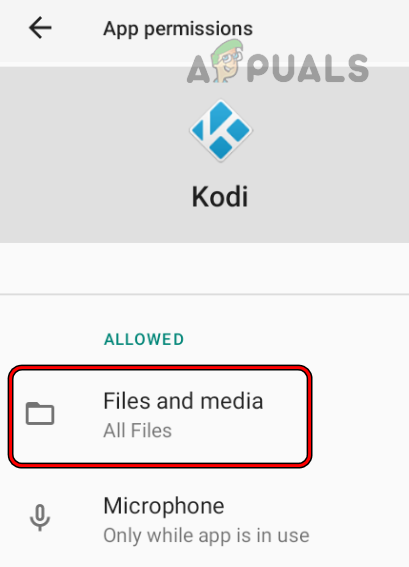
- Launch the Android phone Settings and navigate to Apps > Kodi > Permissions > Files and Media (or Storage).
Open Permissions of the Kodi App on Android - Checkmark Allow All the Time and restart the device. Check if Kodi has started to work properly.
Open Files and Media App Permission of Kodi on Android
10. Disable Auto Clean Addons
Maintenance add-ons such as EZ Maintenance often include an auto-cleaning function that removes Kodi’s cache and temporary data upon launch or exit. However, sometimes removing this temporary data can cause problems.
Here, disabling the Auto Clean feature of your maintenance addon will solve the problem. To do so on EZ Maintenance:
- Launch Kodi and open EZ Maintenance.
- Navigate to Settings > Maintenance.
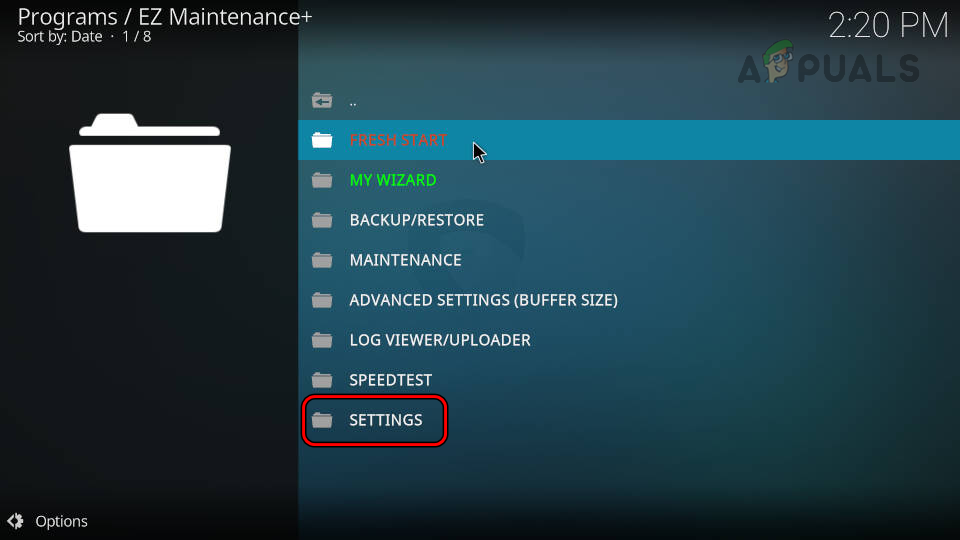
Open Settings of EZ Maintenance Addon on Kodi - Disable all the options under Auto Clean and relaunch Kodi. Check if it is working normally.
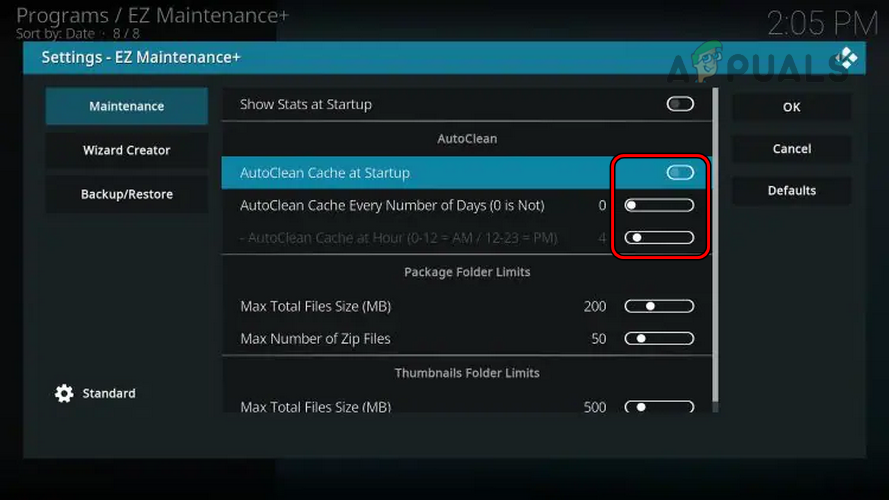
Disable AutoClean Features of EZ Maintenance Kodi Addon
11. Reauthorize your Account with Premium Hoster
Kodi uses premium hosters (such as Real Debrid) to serve the required content. If, after a backend change, the premium hoster fails to authorize your Kodi installation, the application will stop functioning. Here, reauthorizing your account with the premium hoster will solve the problem. To do so for Real Debrid:
- Launch Kodi and navigate to Settings > System.
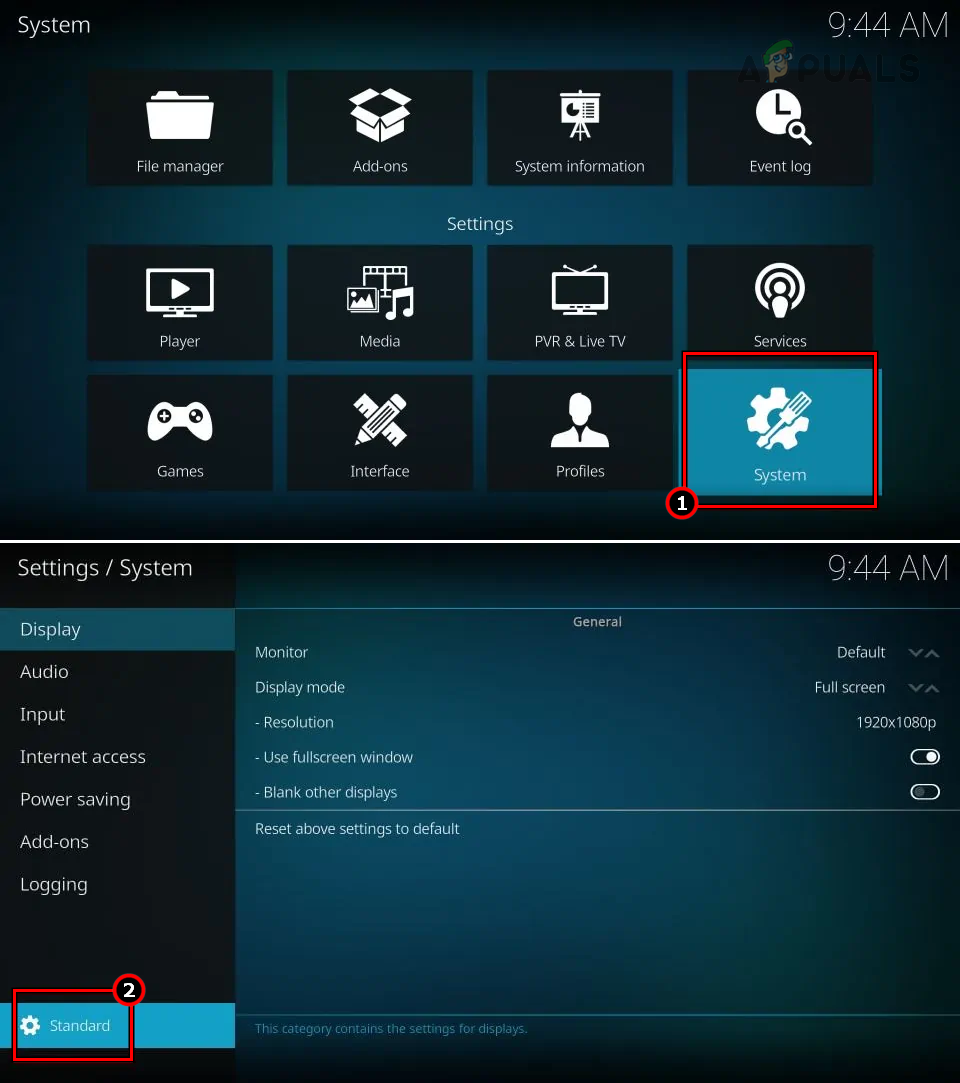
Open System in Kodi Settings and Set it to Advanced - Select Advanced and open Add-ons.
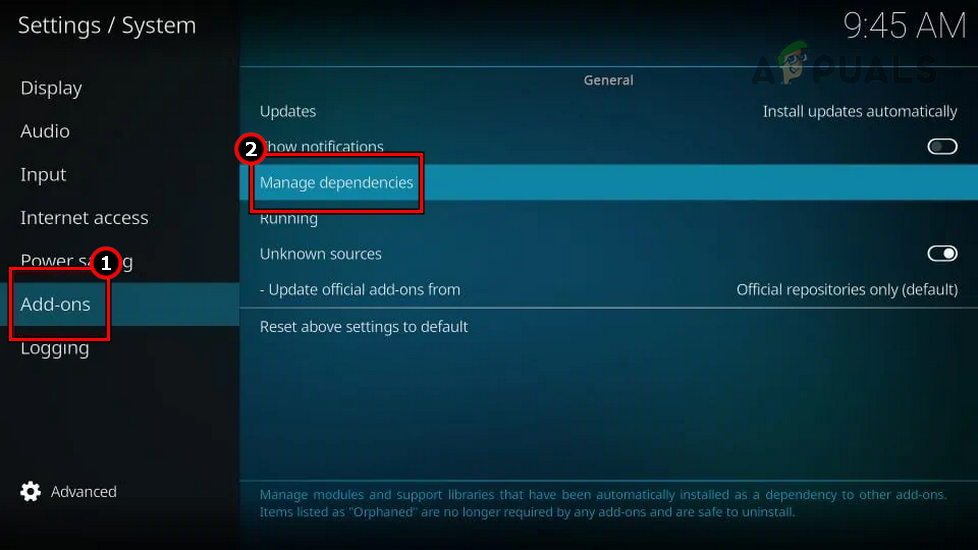
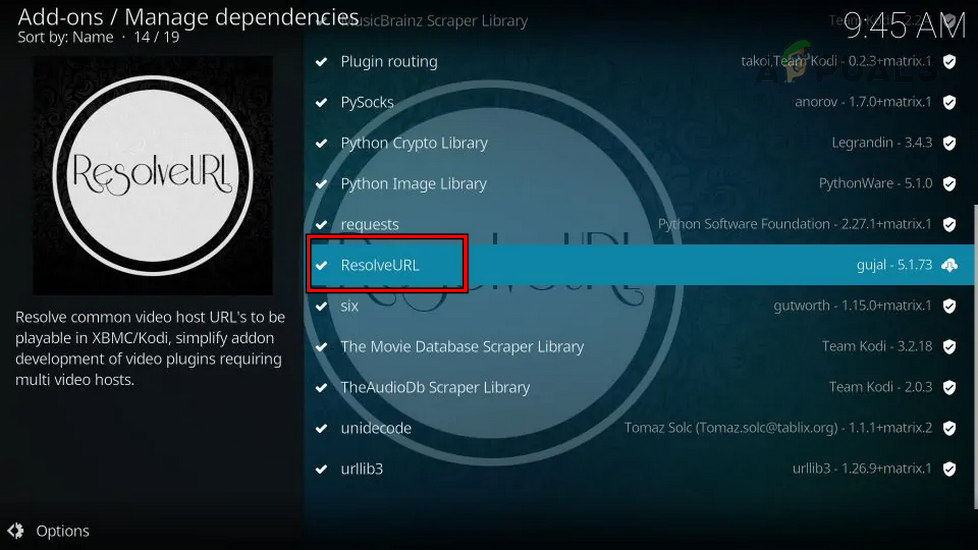
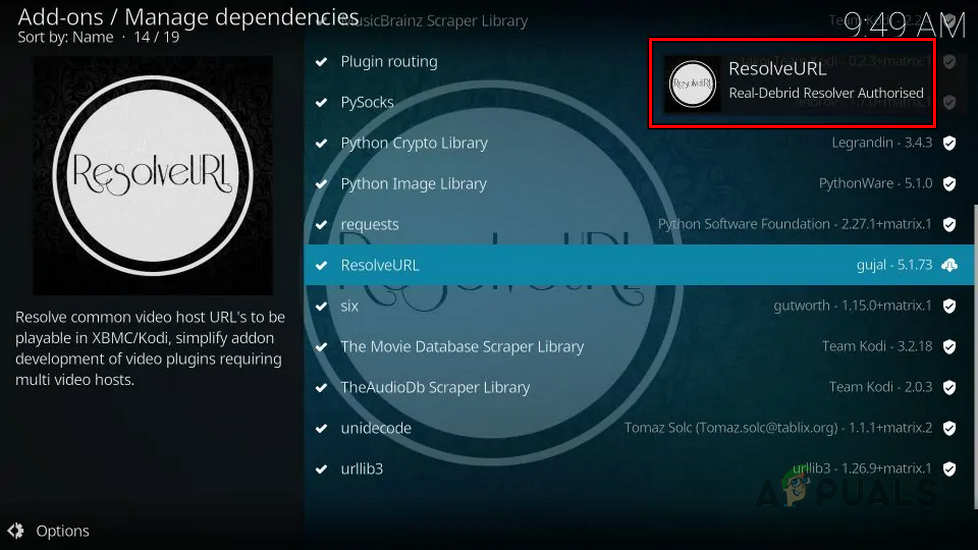
Open Manage Dependencies in the Add-ons Tab of Kodi Settings - Click on Manage Dependencies and open ResolveURL.
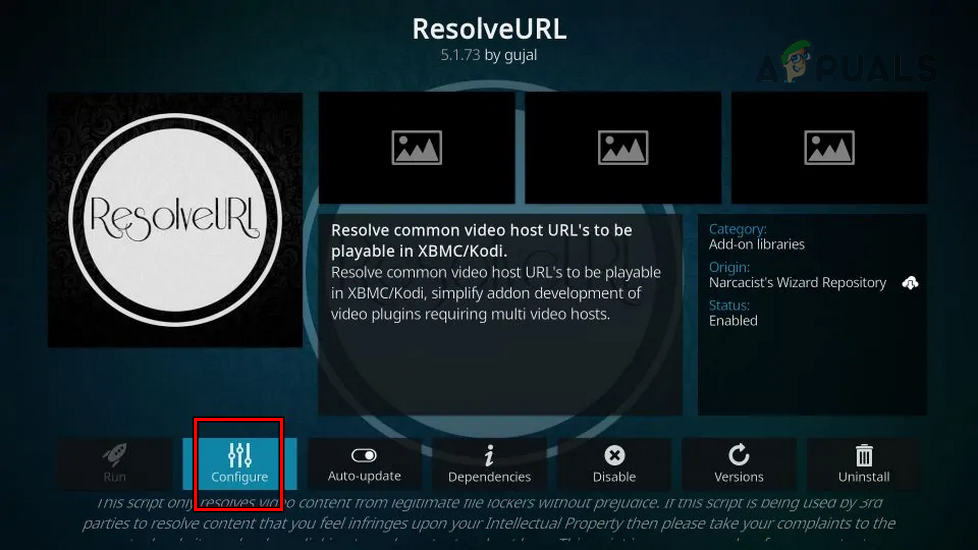
Open ResolveURL in Manage Dependencies of Kodi Addons - Select Configure and click on Universal Resolvers 2.
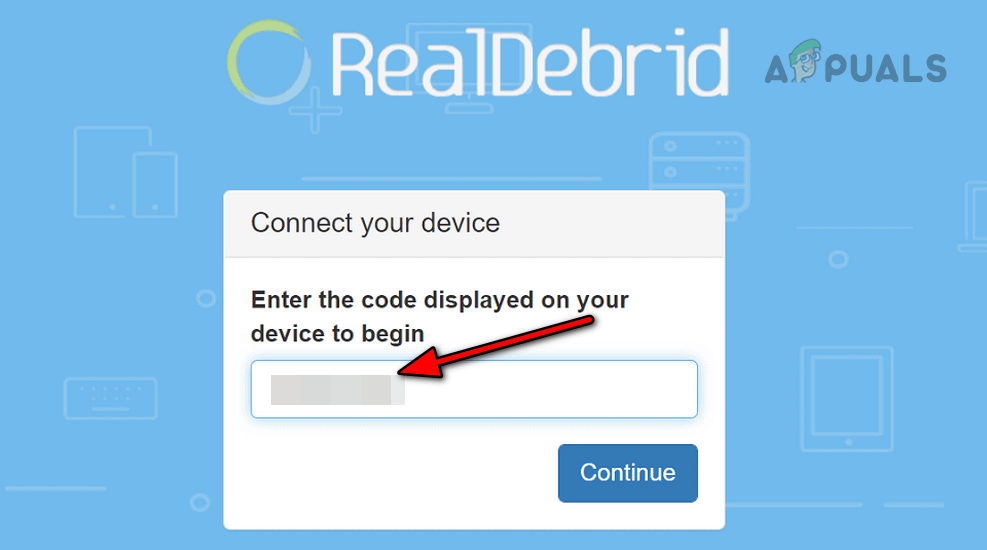
Click on Configure in ResolveURL - Open (Re)Authorise My Account and copy the code.
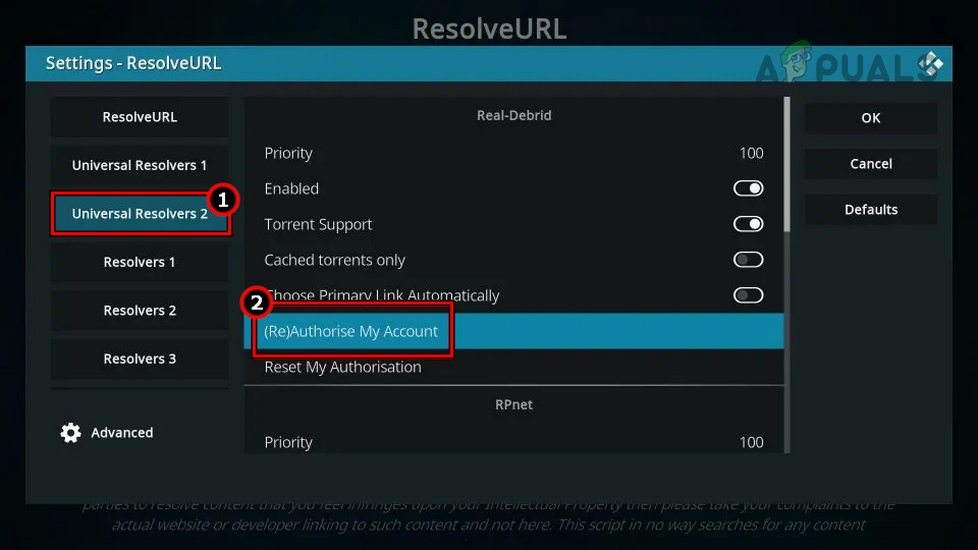
Click on (Re)Authorise My Account in Universal Resolver 2 - Navigate to the Device page of the Real Debrid website and enter the above code.
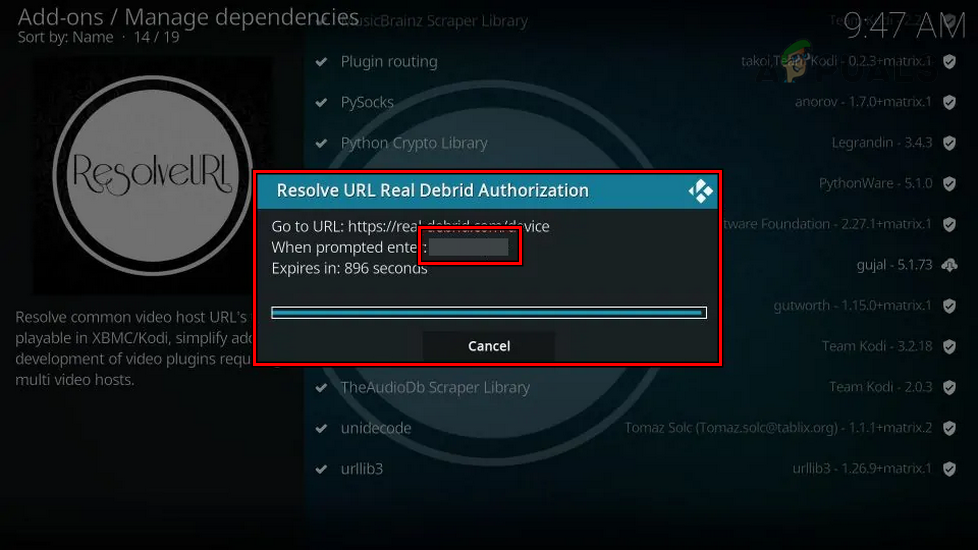
Copy Real Debrid Authorization Code in Kodi - Click on Continue and log in using your credentials.
Enter the Device Authorization Code on the Real Debrid Website - An application-allowed notification will be shown and you will notice a ResolveURL Real-Debrid Resolver Authorized notification on Kodi.
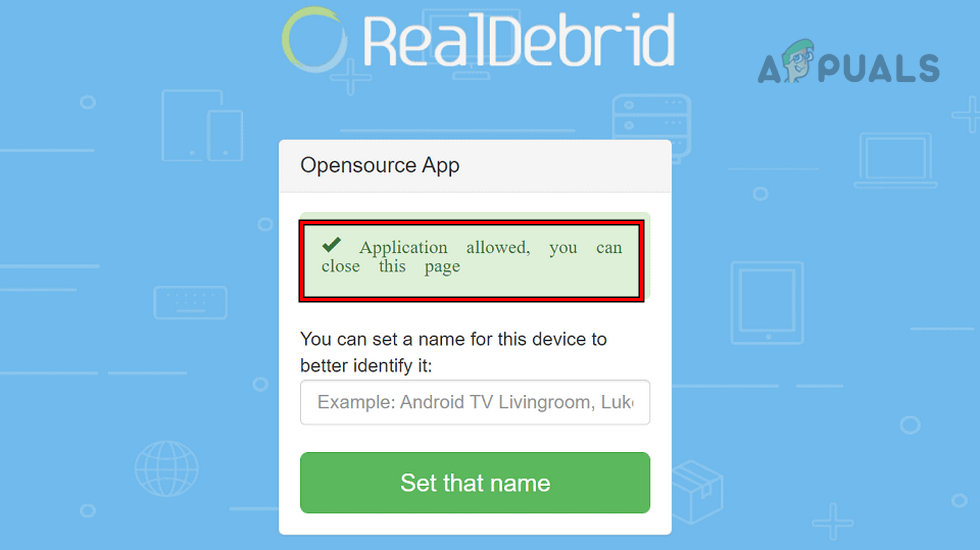
Application Allowed Notification on the Real Debrid Website - Relaunch Kodi and check if it is functioning properly.
Real Debrid Authorised Notification on Kodi - If not, set the preferred cloud location (under the scrapping tab of Kodi) to your bread service (such as Premunize or Real Debrid) and check if it makes the Kodi work.
12. Reinstall Kodi Addons
Addons are mostly third-party and provide additional functionality over the boilerplate application. However, one has to make sure they are updated to the latest build and their files are up-to-date. If due for any reason the installation of the add-ons is corrupt, it will not let your system function properly.
In this case, reinstalling these add-ons will do the trick. Before proceeding, make sure to back up any add-ons related info/data.
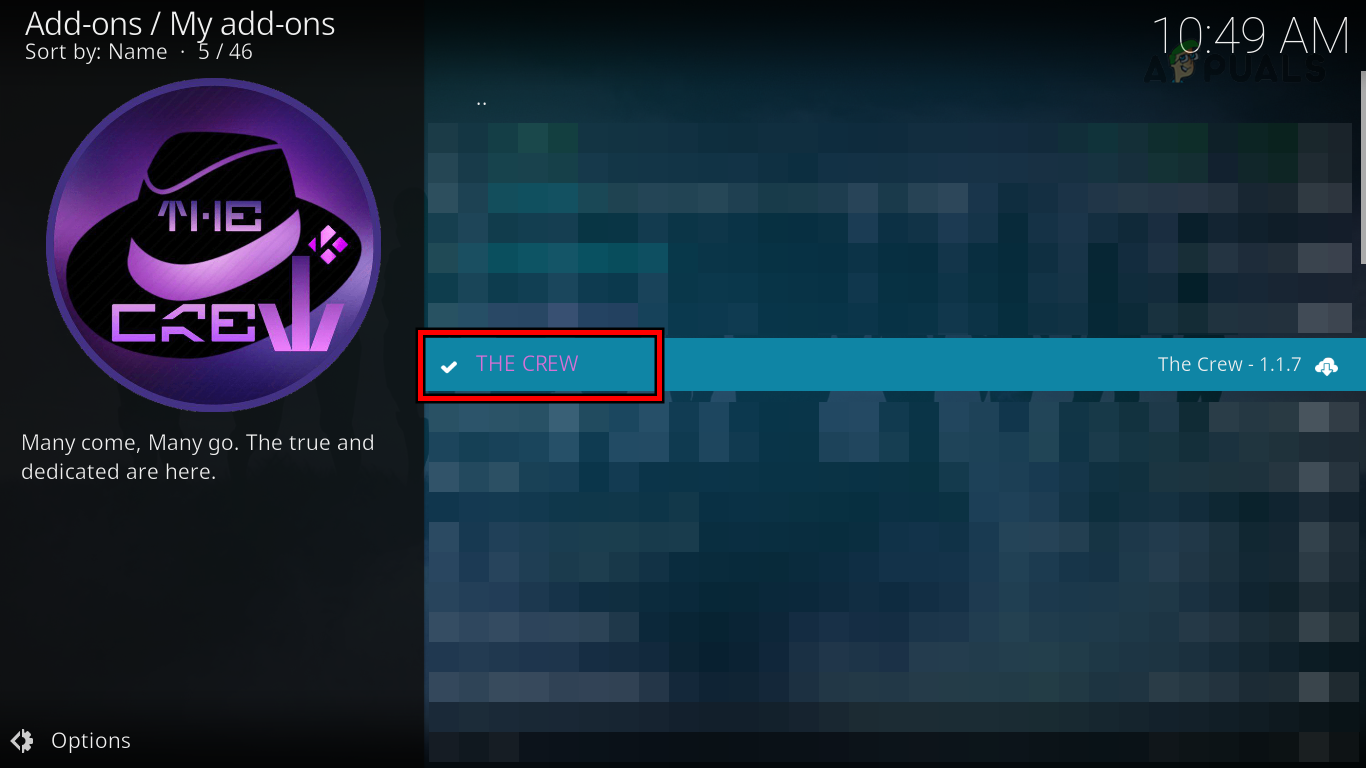
- Launch Kodi and open My Addons.
- Select All and open any of the problematic add-ons.
- Click on Uninstall and once uninstalled, relaunch Kodi.
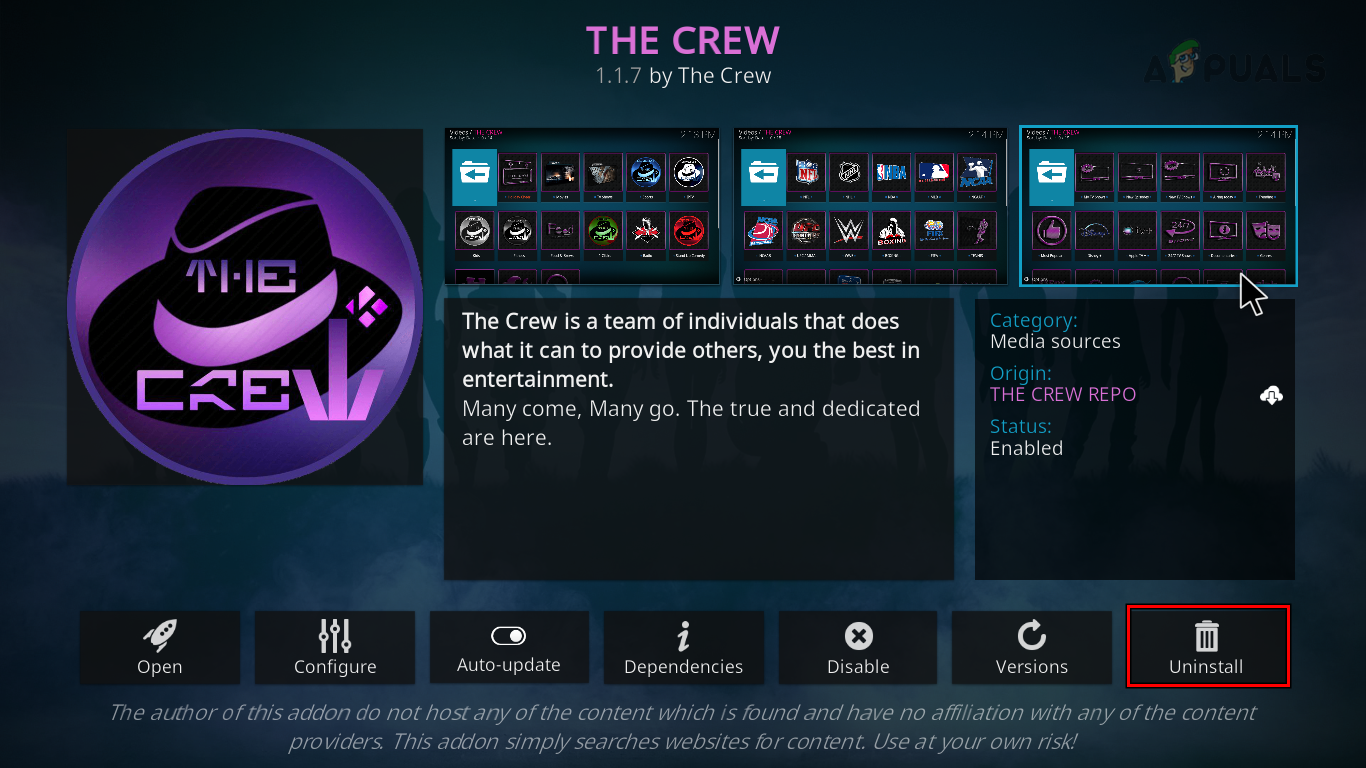
Uninstall Kodi Addon - Check if Kodi is working properly. If so, then you may reinstall the problematic add-ons.
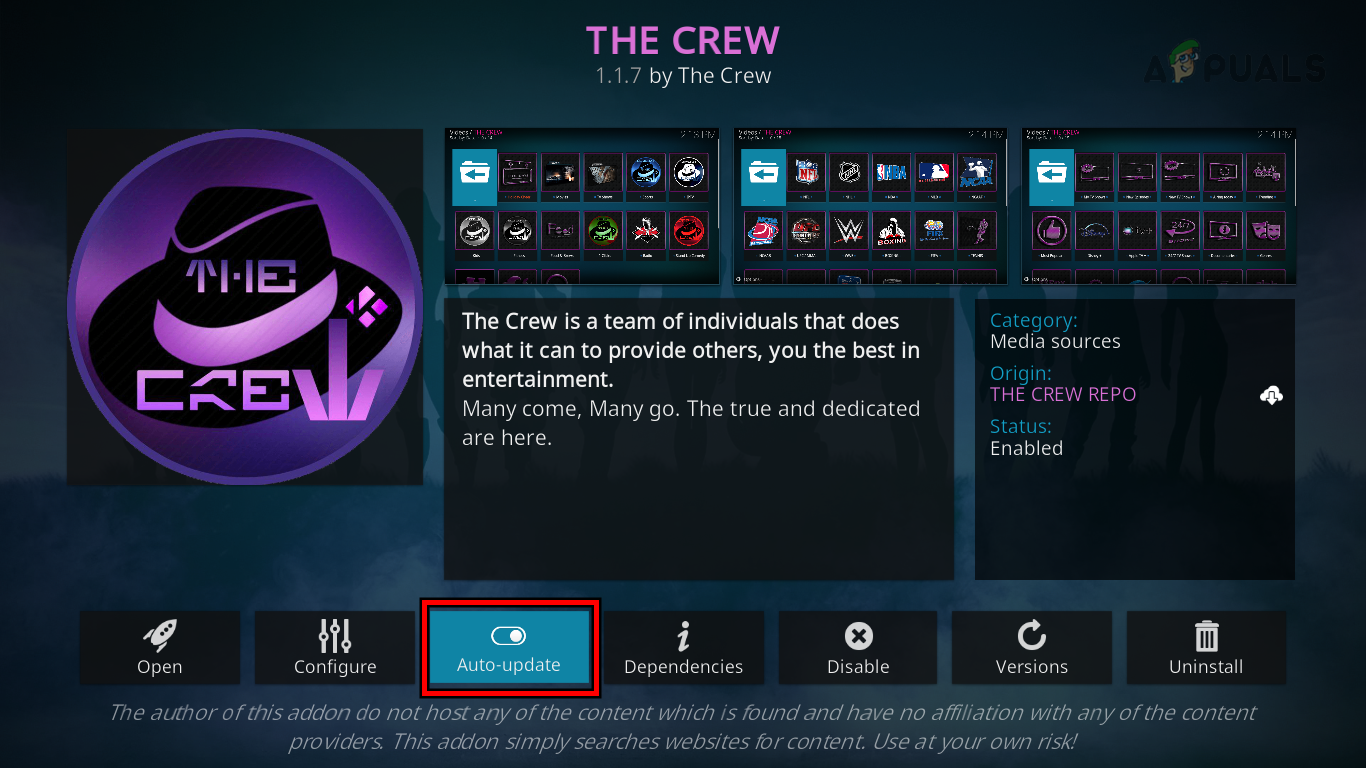
Following is the list of addons reported to cause the Kodi issue.
- A4KSubtitle
- The Loop
- EZRA
- SEREN
- THE CREW
- Opensubtitles.org
- Gismeteo Weather
- Zephyr Skin
13. Reinstall Kodi
If none of the above methods work, we can move ahead and reinstall Kodi from scratch. This will ensure only the latest files are present in your system and the core modules are fetched freshly from the servers.
Before proceeding, back up any data that may be required later. To uninstall Kodi on a Windows PC:
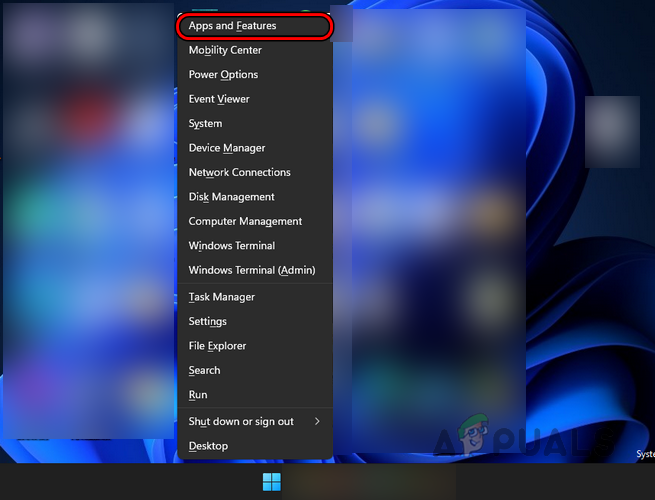
- Right-click on Windows and select Apps & Features.
Open Apps & Features - Locate Kodi and expand its options.
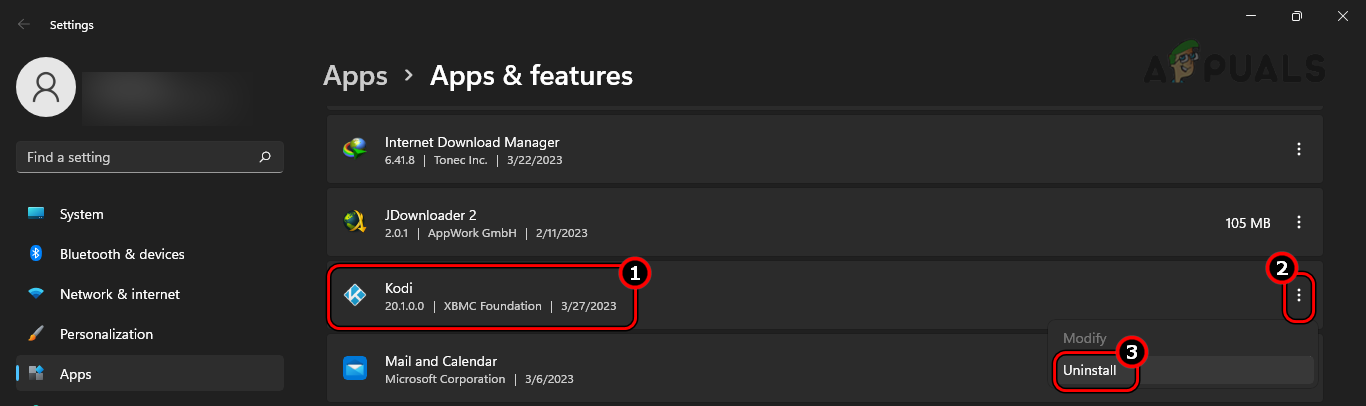
Uninstall Kodi on Windows - Select Uninstall and confirm to uninstall the app.
- Follow the prompts on the screen to uninstall the app and restart the system.
- Right-click on Windows and select Run.
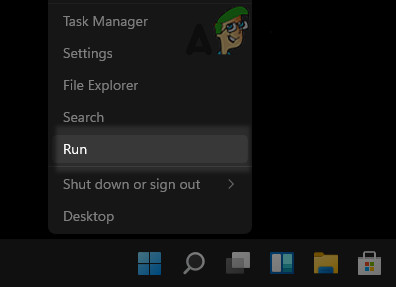
Open the Run Command Box from the Quick Access Menu - Navigate to the following:
%APPDATA%\
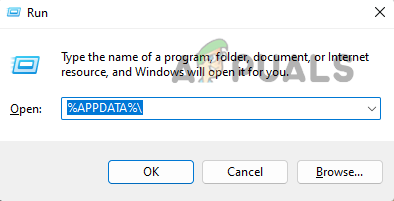
Open Roaming AppData Folder Through Run - Delete the Kodi folder and reinstall Kodi. Check if it is working properly.
15. Disable Reuse Language Invoker
The reuselanguageinvoker is a Kodi plugin inherited from Python. It changes the way the invoker is reused. If during the execution, a backend path change is detected, the plugin will never load and Kodi will get stuck in a busy dialog or a loop.
Here, disabling the Reuse Language Invoker will solve the problem. Umbrella and Fen are two of the famous addons that use reuselanguageinvoker. To Disable Reuse Language Invoker on YouTube addon:
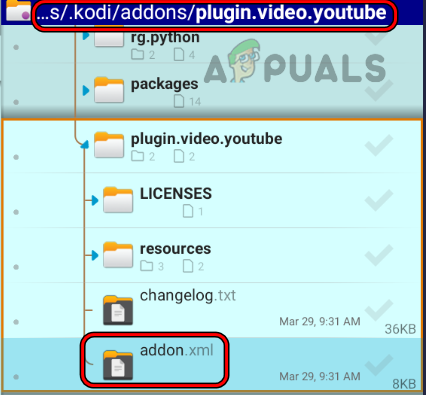
- Use a File Explorer app (such as X-Plore) and navigate to Kodi > Addons > plugin.video.youtube.
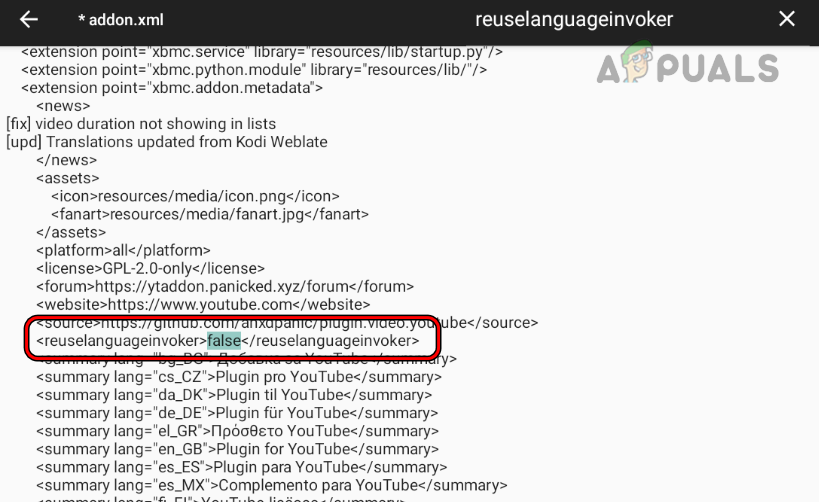
- Open the addon.xml file and find reuselanguageinvoker line.
Open Addon XML File of YouTube Addon - Change it from True to False and close the file.
Change reuselanguageinvoker to False in Addon XML File of YouTube Addon - Install TMDbHelper and launch it.
- Navigate to Settings > Other.
- Disable Rebuild Service Listitems Offscreen and restart your device.
- Launch Kodi and check if it is working properly.
16. Reset Your Device to the Factory Defaults
In there is event of an unsuccessful OS update, the critical components of your device will become invalid. When Kodi tries to access these components, it will fail to execute properly. The issue can be resolved by restoring the device to its original factory settings.
Before resetting, make sure to back up your data and fully charge the device. To reset an Android phone:
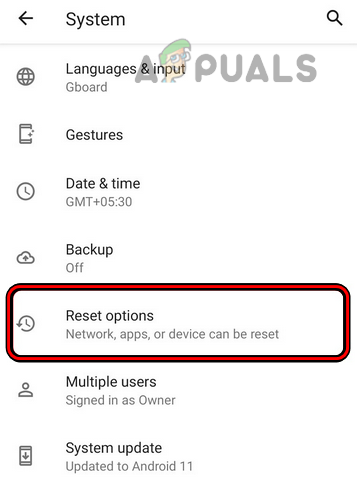
- Launch Android phone Settings and navigate to System > Reset.
Open Reset Options in the Android Phone Settings - Select Factory Data Reset and follow the prompts on the screen to complete the process.
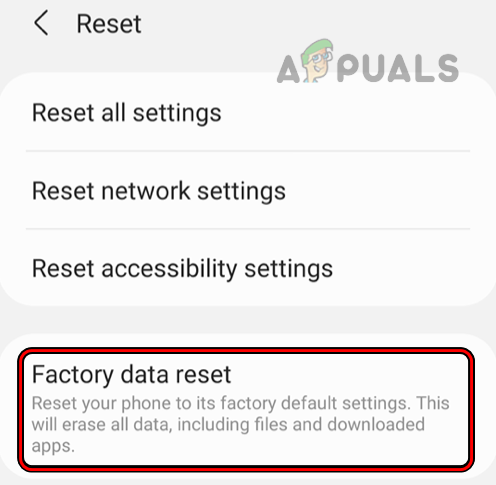
Factory Data Reset an Android Phone - Once done, install Kodi and hopefully, it will be working correctly.
- If not and you are a member of the OS Insider program (like an Xbox Insider), unenroll your device from Insider and reinstall Kodi. Check if it is operating properly.
If the issue persists, you can use an older version of Kodi as the latest version is reported to be incompatible with several Python-based addon libraries.


While all of this is good advice usually, none of this solves the current problem. I have done almost all of the steps and nothing has worked. Apparently, this issue is the current update of urllib3. The current version is 2.1.0 and it seems to have caused the problem. Users on reddit have reported that if a previous version of urllib3 is installed, it will regain full functionality. I do not know how to do this. But there are people on reddit that do. Check in the addons4kodi subreddit for information. Apparently, an app called umbrella will work with coco scrappers, and the installation and configuration of the app and scrappers is complicated.