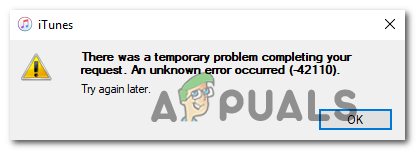
[FIX] iTunes Error -42110 when Purchasing or Downloading Media
Some Windows and Mac users are reporting that they are continually receiving the 42110 error message in iTunes when attempting to purchase video and audio media from iTunes. Other users are reporting that they see this error code when attempting to download media that they have previously purchased.
When troubleshooting this issue, you should start by ensuring that you’re running the latest iTunes version. The auto-updating function of iTunes on Windows is unreliable, so you might need to do the update manually.
Once you confirm that you have the latest version, attempt to clear the SC Info folder. This method is reported to be effective by both macOS and Windows users.
Method 1: Update iTunes to the Latest Version
As several affected users have confirmed, the 42110 error message in iTunes can also occur due to the fact that you’re using an outdated iTunes version that is no longer allowed to establish connections with the server.
If this scenario is applicable, you should be able to fix the issue by updating your iTunes version to the latest version.
Keep in mind that while on macOS the auto-updating function is almost flawless, there are a lot of Windows users reporting that iTunes simply stopped updating with no manual user intervention. This seems to be an ongoing issue that Apple hasn’t resolved yet.
If you suspect that your iTunes version is outdated, access the Help menu from the ribbon menu at the top and click on Check for Updates.
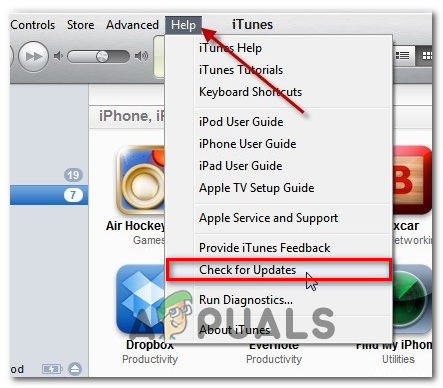
iTunes will then begin scanning for new versions and in case a new build is available, the utility will automatically download & install it.
In case the auto-updating function doesn’t find a new version on Windows even though you have confirmed that your iTunes version is outdated, follow the instructions below to install the latest version of iTunes manually:
- Open up a Run dialog box by pressing Windows key + R. Next, type ‘appwiz.cpl’ and press Enter to access the Programs and Features menu.

Type appwiz.cpl and Press Enter to Open Installed Programs List - Once you’re inside the Programs and Features menu, move down to the list of installed applications and locate iTunes. Once you see it, right-click on it and choose Uninstall from the newly appeared context menu.
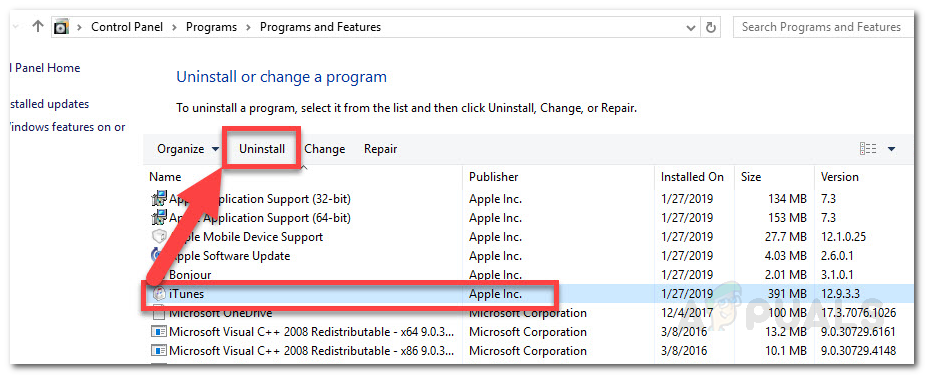
Uninstalling problematic application - Once you get to the uninstallation window, follow the on-screen instructions to complete the uninstallation. Once the operation is finished, click on Publisher (on the top of the list) and then proceed to uninstall everything that is published by Apple Inc.
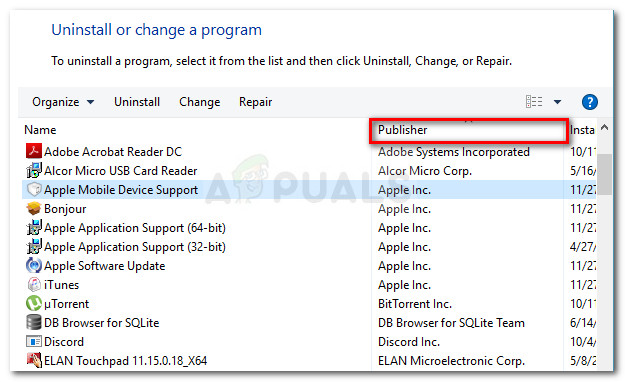
Click the Publisher column to order the app results - Once every Apple is uninstalled, restart your machine and wait for the next startup to complete.
- Next, visit this link (here) from your default browser, scroll down to the Looking for other versions section and click on Windows to download the latest iTunes version for this OS.

Downloading the desktop version of iTunes - After the download is complete, double-click on the installation executable and follow the on-screen prompts to complete the installation.
- Restart your computer replicate the same issue in iTunes to see if the 42110 error message has been fixed.
In case the same problem is occurring, move down to the next potential fix below.
Method 2: Removing the SC Info Folder
As it turns out, one of the most common causes that will actually spawn this error is a corrupted SC Info folder that iTunes needs in order to facilitate data exchange between the Apple server and the end-user PC or Mac.
As it turns out, the corruption inside the SC folder that ultimately leads to this error is fairly common on both Windows and macOS. And in both cases, the fix is to remove the SC Info folder completely in order to force iTunes to create a new equivalent that is completely healthy.
Since this issue occurs on both Mac and Windows, we created two separate guides that will accommodate both scenarios. Follow whichever guide is applicable to the OS that you’re using.
Removing the SC Info folder on Windows
- Ensure that iTunes and every associated instance is completely closed.
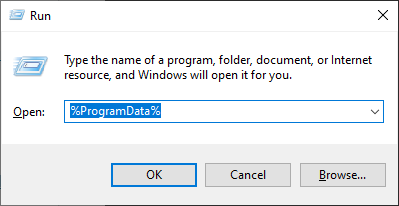
- Press Windows key + R to open up a Run dialog box. Inside the text box, type ‘ProgramData%’ and press Enter to open up the ProgramData folder (hidden by default).
Accessing the ProgramData folder - Once you’re inside the ProgramData folder ensure that Hidden items option is enabled. To do this, click on the View option from the ribbon bar at the top, then check the box associated with Hidden Items. After you do this, every item that was previously hidden will become visible.

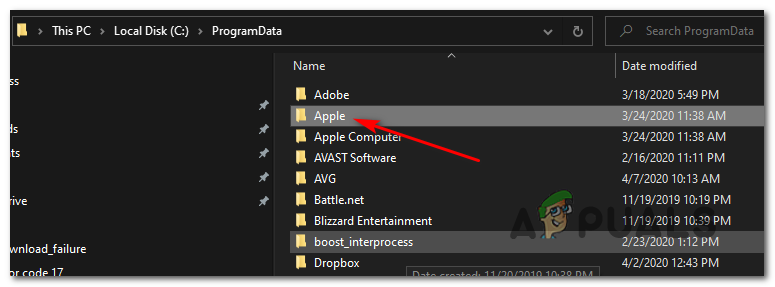
Click View Then Check Unhide Hidden Items To Make Sure All The Folders Are Shown - After every hidden item has become visible, double-click on the Apple folder and then access the iTunes folder.
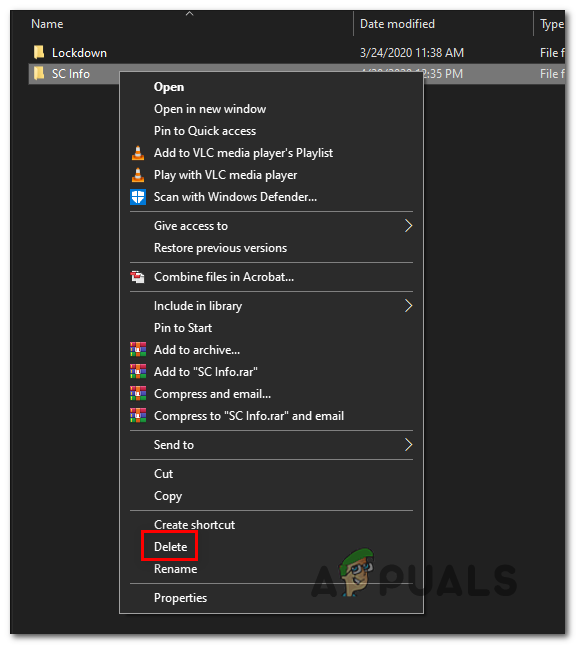
Accessing the Apple/iTunes folder Once you’re inside the iTunes folder, right-click on the SC Info folder and choose Delete from the newly appeared context menu to get rid of it.
Deleting the SC Info folder inside iTunes folder - Restart your computer and launch iTunes once the next startup is complete in order to force the program to create a new SC Info folder.
- Repeat the action that was previously causing the 42110 error message and see if the problem is now fixed.
Removing the SC Info folder on Mac
- Quick iTunes and any other program that you currently have open (besides the Finder app).
- Click on the Finder icon from the launch bar at the bottom of the screen, then use the ribbon bar at the top to click on Go > Go to Folder.
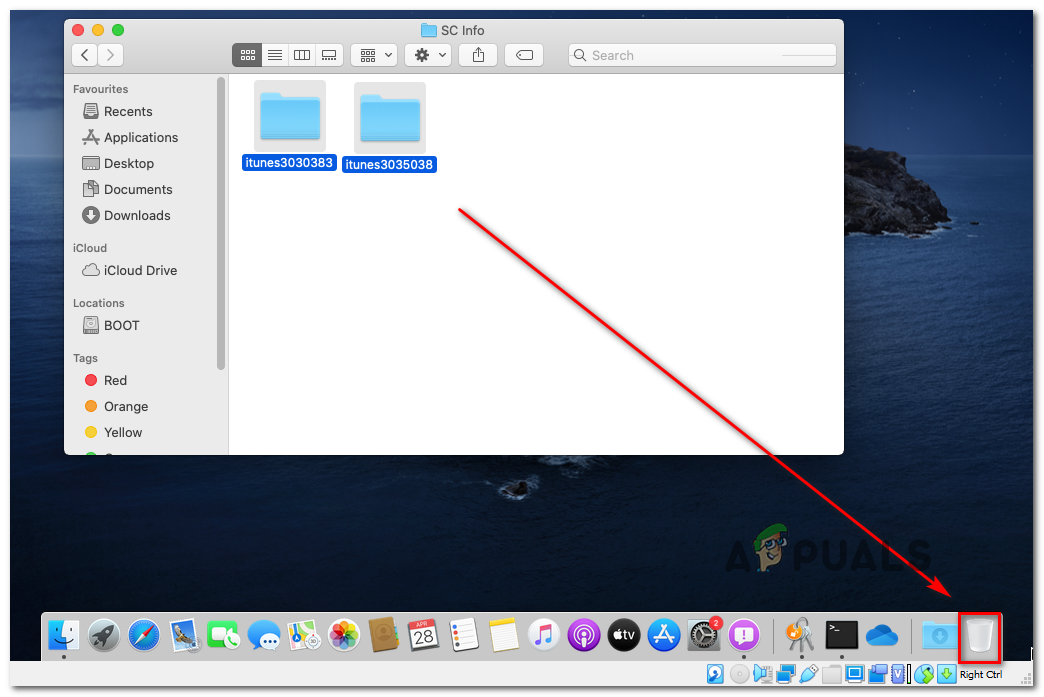
- Inside the text box associated with Go to the folder window, paste “/Users/Shared/SC Info” and hit Enter to navigate to that location.

Navigating to the SC Info folder on macOS - Once you’re inside the SC Info folder, select everything inside and drag the entire contents to the trash box.
Clearing the contents of the SC Info folder - Restart your Mac and launch iTunes once the next startup sequence is complete to see if the issue is now resolved.