Fix: Intel i211 Gigabit Network Adaptor Not Working
 Reviewed by Muhammad Zubyan
The main cause of the Intel i211 Gigabit Network Connection issues is incompatible drivers. It seems that the newer drivers released for this Ethernet Controller/Adapter have severe compatibility issues with different hardware and software, resulting in network connection problems.

However, there may be some other factors involved that can prevent the adapter from functioning properly. To help you figure out what exactly is causing the issues with your Intel i211 Gigabit Network Connection, this guide will walk you through all the possible causes of this problem and their respective solutions.
What Causes the Intel i211 Gigabit Network Connection to Stop Working?
After reviewing the cases of different users that are experiencing this issue, it seems like the main culprit of this problem is incompatible drivers. But there may be some other factors that can be the real reason behind this issue. The list below contains all of its possible causes:
- Faulty Ethernet Cable: The Ethernet Cable may not be properly plugged into the i211 Adapter and/or the router. This loose connection can lead to all sorts of connection problems. Furthermore, the Ethernet Cable may even be damaged or faulty, which could be causing network problems.
- Driver Incompatibility Issue: This issue arises for most people after updating their Windows or updating their i211 Adapter drivers to the latest version, indicating that there’s a compatibility issue between the adapter drivers and the software of the system.
- Invalid IP Configuration and/or Corrupt Winsock Catalog/DNS Cache: Your system’s IP address may be incorrect, or your Winsock Catalog, or DNS Cache may have become corrupted. The DNS Cache stores the translated IP addresses of websites for quicker connection time. The Winsock Catalog is a collection of network settings that act as an interface (a bridge) between applications and internet protocols, enabling the applications to connect to online servers. Sometimes, the Winsock Catalog and/or DNS Cache become corrupted, resulting in connection problems.
- Incorrect BIOS Settings: Your Ethernet Connection may be disabled in your system’s BIOS/UEFI Settings, which would explain why the Network Adapter is not working properly.
How Can I Fix the Intel i211 Gigabit Network Connection Not Working Issue?
Keeping the main causes of this issue in mind, the solutions become very simple. Since the main cause of the error is a driver issue, we can solve it by updating or downgrading the drivers. But if that doesn’t resolve the problem, there are many other solutions for us to try.
Below, we’ve given a list that contains all the best solutions for this error and how each solution helps to resolve the issue.
- Plug In Your Ethernet Cable Properly: This first solution acts as a prerequisite. Whenever you are experiencing connection problems, it’s always advised to check your Ethernet Cable to confirm that it’s plugged in properly. If your Ethernet Cable is loosely connected or damaged, it will be the leading cause of this connection error. To check whether the cable is connected properly, look for the LED indicator on your system’s Ethernet Port.
- Run Windows Network Diagnostics: The built-in Network Diagnostics feature is often overlooked by users, but it’s a very useful tool for solving connection issues with just a click of a button. By running the Windows Network Diagnostics tool, there’s a high chance Windows will automatically detect and fix the error. And even if it isn’t able to fix it, it will at least tell you where the error originates from.
- Check the Status of the Adapter on Device Manager: If you open Device Manager and check the i211 Adapter’s Device Status, it will tell you what the problem is with the device. It may say something like “The device has an invalid IP configuration” or “Windows cannot initialize the device drivers”. This will make it much easier for you to find the appropriate solution for the issue.
- Update Drivers (If Using Windows 11): If you’re using Windows 11 and have outdated drivers installed for the i211 Ethernet Adapter, they may have become incompatible with your version of Windows. Therefore, updating to the latest version of the drivers can resolve your issue.
- Reset Network Settings: If Device Manager says that the Adapter “does not have a valid IP configuration“, it means that the cause of the error is either an erroneous IP, corrupted DNS Cache, or corrupted Winsock Catalog. So renewing the IP and resetting the DNS Cache and Winsock Catalog can fix your issue, as this will assign a new IP Address to your system and reset its DNS Cache and Winsock Catalog to default. Keep in mind that this is a completely safe thing to do.
- Check BIOS Settings: The Ethernet/LAN Setting could be disabled in your system’s BIOS/UEFI Settings, preventing your i211 Adapter from functioning as intended. To check whether this is the case, you have to navigate to your system’s BIOS and ensure that the “Network Boot“ option is enabled. The name of this setting may be different on your system.
- Roll Back Drivers: The latest drivers for this Ethernet Controller seem to be specifically made for Windows 11, as many Windows 10 users are reporting that the drivers are simply not working for them. So if you’re using Windows 10, rolling back/downgrading to an older version of the drivers will most likely resolve the issue.
1. Plug In Your Ethernet Cable Properly
On the backside of your system, look for the Ethernet Cable (shown in the image below). If the cable is plugged in properly, you will see a Green/Yellow/Orange light blinking on the Ethernet Port.
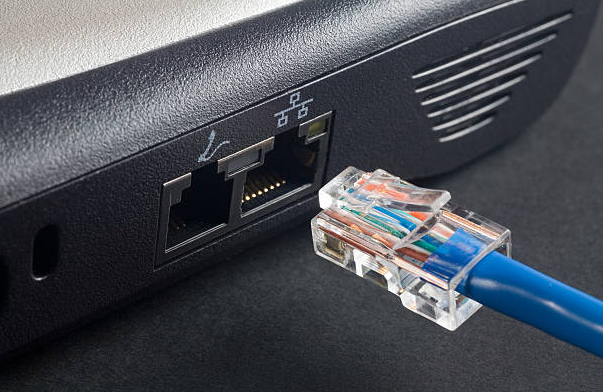
If you do not see any light on the Ethernet Port, follow the steps below:
- Grab the plastic end of the Ethernet Cable.
- Pinch the clip/tab on the cable gently and pull the cable out.
- Wait for a few seconds.
- Plug the cable back in gently. You will hear a click sound when you plug it in).
- If there is still no blinking light on the port, go to your router and follow the same process.
If you still do not see a blinking light on the port even after following these steps, try plugging the cable into a different port on your router. If that doesn’t work, it likely means that your cable is faulty/damaged, and you will need to invest in a new one. Luckily, you can get good ethernet cables for very cheap.
2. Run Windows Network Diagnostics
- Press Windows Key + I at the same time to open Settings.
- Click on the “Network & Internet” option.
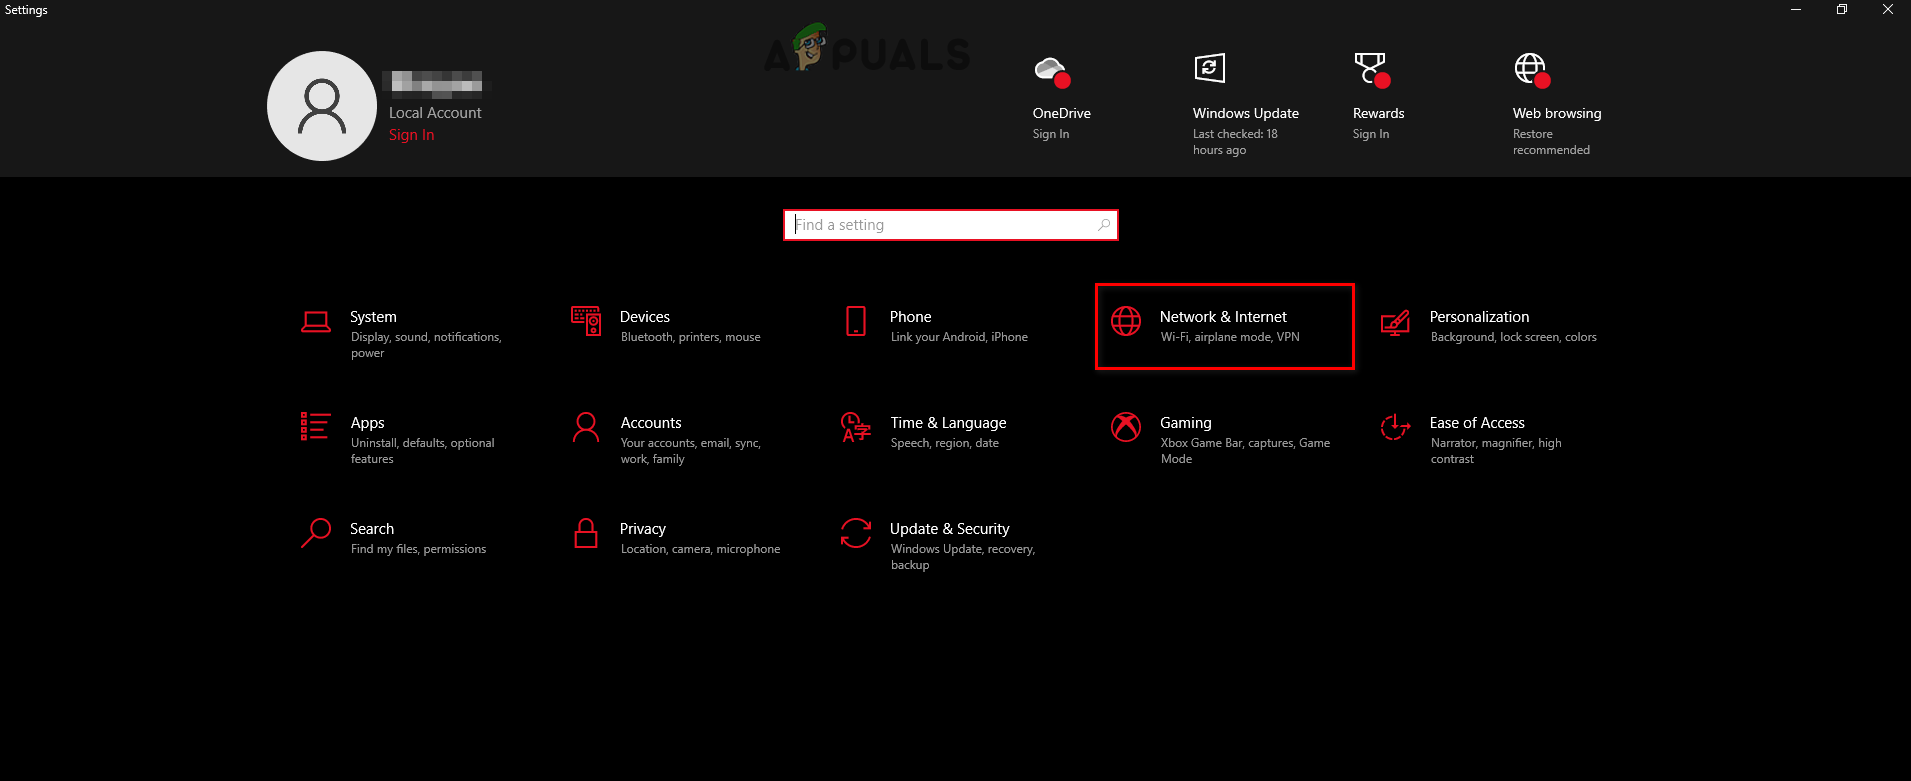
Opening Network and Internet Settings - Select the “Network Troubleshooter” option.
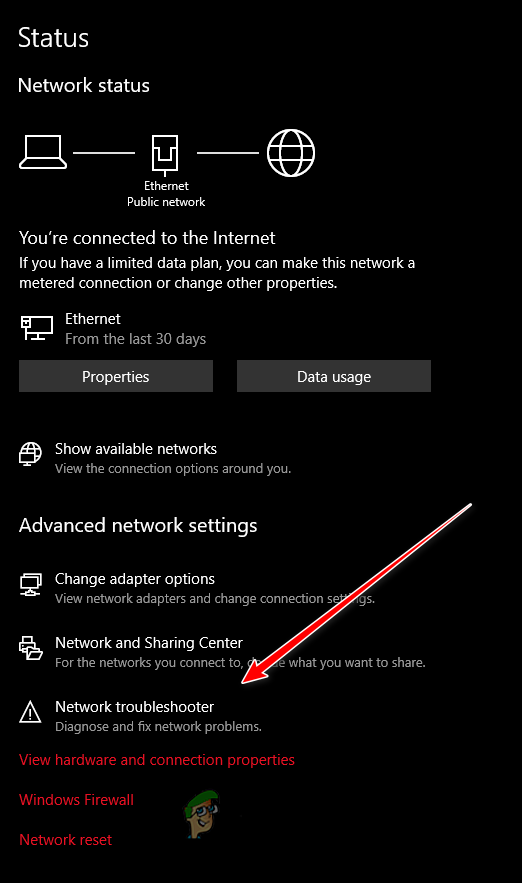
Running the Network Troubleshooter/Diagnostics Tool - Wait for the diagnosis to complete.
- Check the results.
3. Check the Status of the Adapter on Device Manager
- Press the Windows Key on your keyboard to open the Start menu.
- Type Device Manager and hit enter.

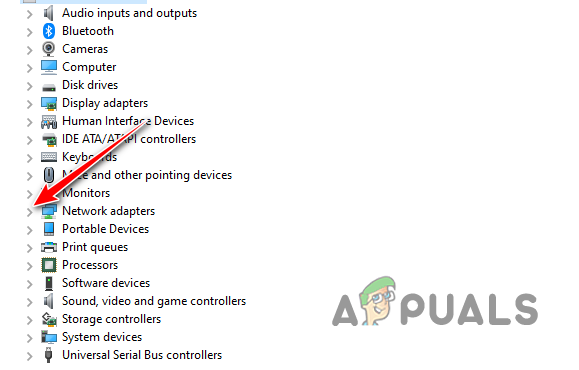
Opening Device Manager - Click on the arrow next to “Network Adapters.”
Expanding the Network Adapters List - Right-click on Intel i211 Gigabit Network Connection and select Properties.
- Check the Device Status.
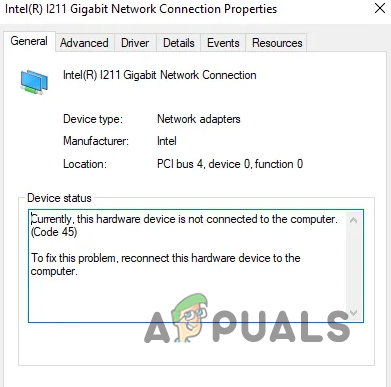
Checking the status of the Ethernet Controller
4. Update Drivers (If Using Windows 11)
- Visit the official Intel by clicking here.
- Download the Intel Ethernet Adapter Complete Driver Pack.
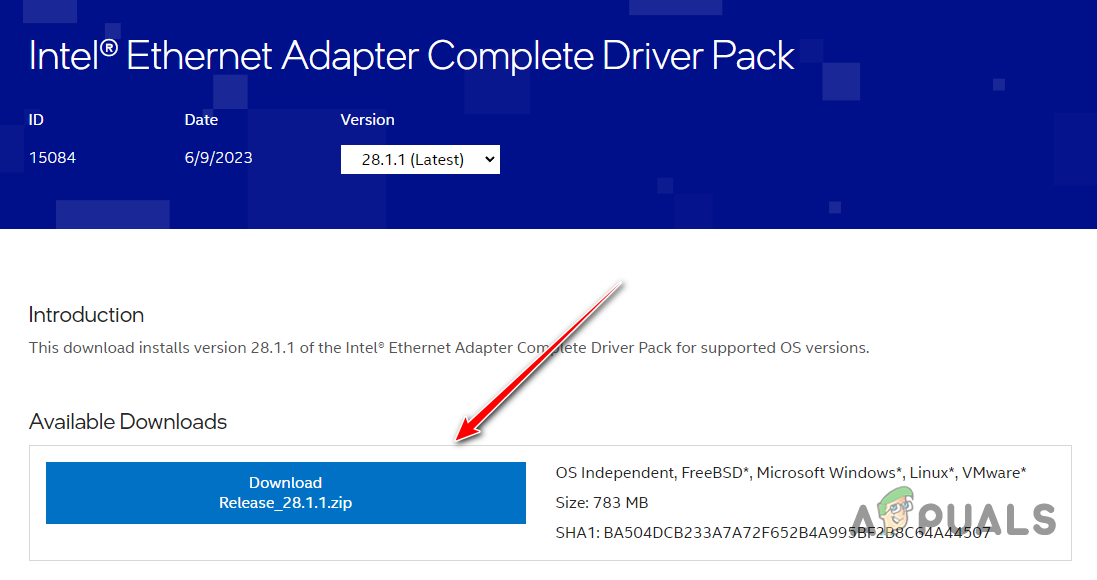
Downloading the Intel Ethernet Adapter Complete Driver Pack - Create a folder called “Ethernet Drivers” in a directory of your choice (such as the Documents or Downloads folder).
- Move the driver ZIP file into the folder.
- Right-click on the ZIP file and select “Extract Here.”
- Once the files are extracted, double-click on the file named “Autorun.”
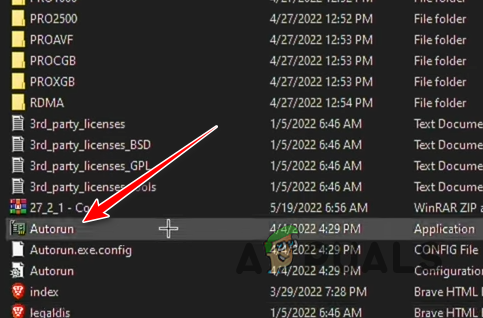
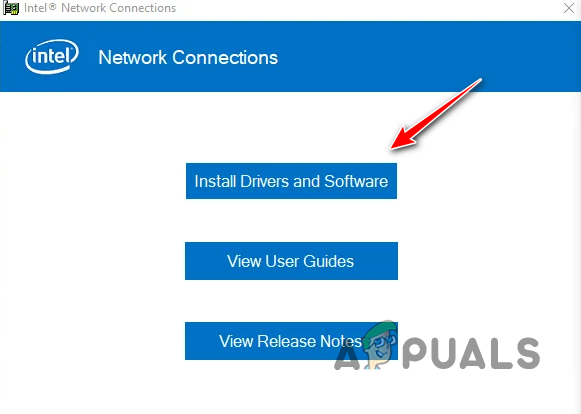
Running the Autorun File - In the new menu that appears, click on “Install Drivers and Software.”
Installing New Drivers - Press Next and accept the License Agreement.
- Make sure that all the checkboxes are selected in the Setup Options.
- Press Install and wait for the installation to complete.
- After the driver installation has finished, a menu will open which will give allow you to tweak the settings of the Ethernet Adapter. Close this menu as you don’t need to change any settings for now.
5. Reset Network Settings
- Press Windows Key + R at the same time to open the Run dialog box.
- Type cmd and press enter.
- In Command Prompt, enter the following commands one by one and press Enter after typing each one:
ipconfig /flushdns
ipconfig /release
ipconfig /renew
netsh winsock reset
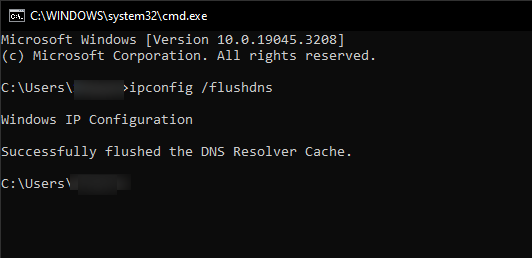
Entering the Commands into Command Prompt - Restart your computer.
6. Check BIOS Settings
- Press Windows Key + I together to open Settings.
- Select the “Updates and Security” option.
- From the list of options on the left, select “Recovery.”
- Click the “Restart now” button under Advanced Startup.
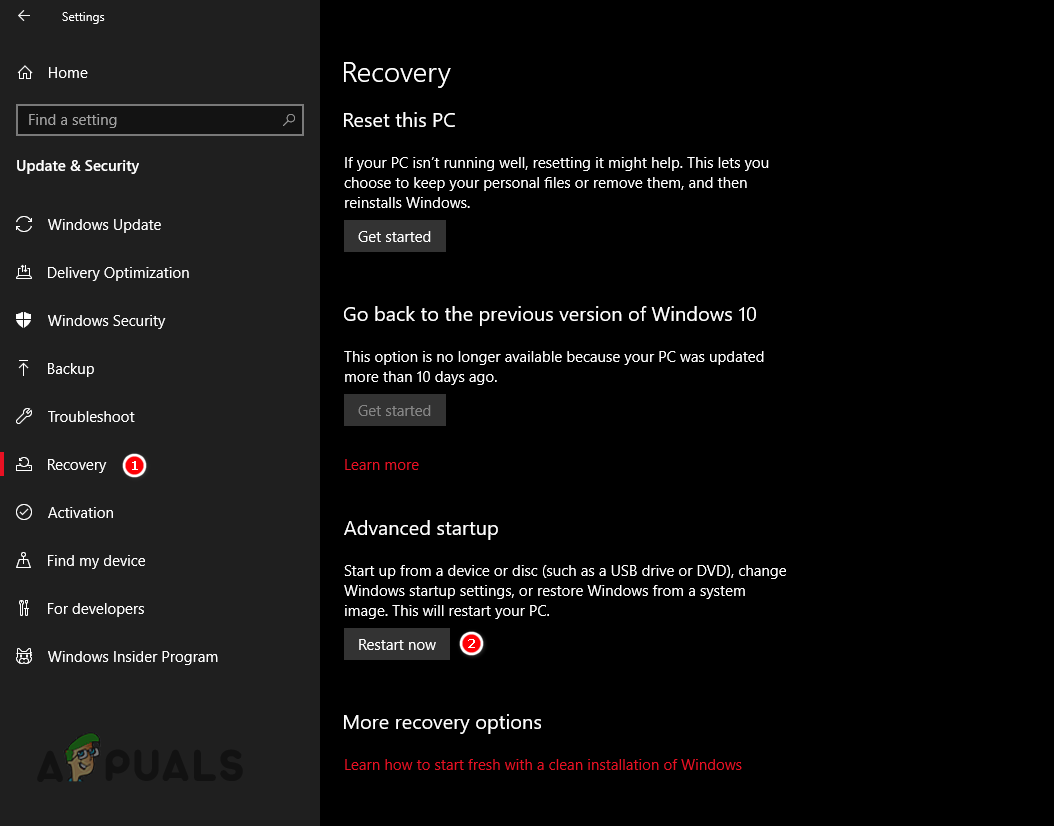
Going into Advanced Startup Menu - Select Troubleshoot > Advanced Options > UEFI Firmware Settings.
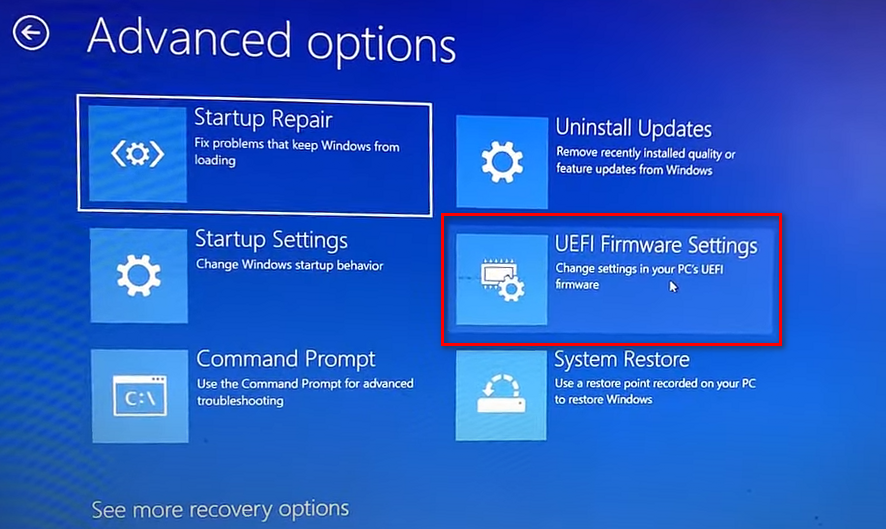
Opening UEFI Firmware Settings Menu - Press the Restart button and wait for the system to restart.
- Once the UEFI menu has loaded up, use the arrow keys on your keyboard to look for a setting named “Network Boot”. The name of the setting may be different in your system’s UEFI menu.
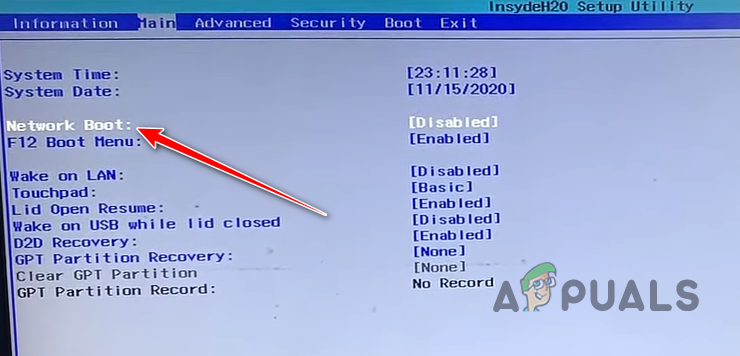
Enabling Network Boot in BIOS - Once you’ve found it, press the Enter key on the setting and then select Enable.
- Press F10 to save and exit the UEFI menu.
Note: If you do not see a UEFI Firmware Settings option in the Advanced Startup menu, you will have to access the BIOS in an alternative way. But before you do that, there are two important things you need to note:
- There is no universal key on the keyboard that is used to enter the BIOS on all types of systems. Laptops/PCs from different manufacturers have different keys for entering the BIOS (F2, F10, F12, ESC, DEL, etc). To check what key you need to press on your system, Please refer to our detailed guide on this topic.
- The BIOS of different laptops/PCs have different layouts and even different names for settings. Therefore, we cannot tell you where exactly you will find this setting and what it will be named. Search online to find out where the setting is located in your BIOS.
Keeping the aforementioned notes in mind, follow the steps below to access your system’s BIOS:
- Restart your computer.
- As soon as the computer begins the boot process (begins to start back up), press the BIOS key.
- In the BIOS menu, use the arrow keys on the keyboard to look for a setting named “Network Boot”. The name of the setting may be different in your system’s BIOS.
Enabling Network Boot in BIOS - Press the Enter key on the setting and then select Enable.
- Press F10 to save and exit the BIOS.
7. Roll Back Drivers
- Press Windows Key + R at the same time to open the Run dialog box.
- Type devmgmt.msc in the search bar and press Enter.

Opening Device Manager Using Run Dialog Box - In the Device Manager menu, click on the small arrow located next to “Network Adapters.”
Expanding the Network Adapters List - Right-click on Intel i211 Gigabit Network Connection and select the Properties option.
- In the Properties menu, navigate to the Drivers tab.
- Press the “Roll Back Driver” button.
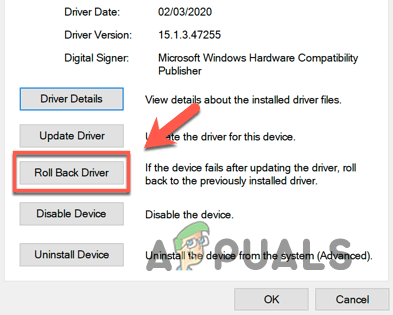
Rolling Back the Drivers - Wait for the downgrade process to finish.
- Restart your computer.
Note: If the Roll Back Driver option is greyed out, it means that your system deleted the older driver file. In this case, you’ll need to downgrade the drivers manually. For that, simply download the older drivers from the internet, uninstall the current drivers through the same menu in Device Manager, and then install the driver file you’ve downloaded.
Still Not Solved?
Have you tried all of the solutions listed above and your issue still hasn’t been resolved? In that case, you should look into contacting the Intel Customer Support Team. Visit their official website, select “Support for Intel Products” and click on “Ethernet Products”. If you live in a region where Intel offers support, you can either do a Live Chat with Intel’s Virtual Assistant, submit a service request, or call them and talk to an agent over the phone. If Intel is unable to offer you support for any reason, try contacting the retailer or distributor from whom you purchased this Ethernet Controller for help.
Frequently Asked Questions- FAQs
If your Ethernet Cable is plugged in correctly, you will see a blinking light on the Ethernet Port. The color of this light may be green, yellow, or orange.
No, not at all. Renewing your IP, flushing the DNS Cache, and resetting the Winsock Catalog will not harm your system in any way. In fact, it may even improve your connection speeds.
As long as you’re only tweaking the Network Boot setting and not touching anything else, you will be perfectly fine.
To navigate through the different menus and settings in the BIOS, you have to use the arrow keys on your keyboard. You cannot use your mouse to click on the settings in the BIOS.
Reviewed by Muhammad Zubyan


