Fix: Arrow Keys not Working
The keyboard is the single, most useful peripheral device in a computer. Before the Graphical User Interface, keyboards were used for everything. The arrow keys and other cursor-movement keys were used to move the cursor to the point of insertion in DOS, unlike the simplified way of using a mouse in GUI. The arrow keys retain their importance and are now used in PC games to move characters, and in most programs to move the cursor among other things. Usually, you do not expect the up and down key to work together; or the left and right key to work together since they will conflict. However, especially in PC games, the left and up key, down and right, or any such variation is expected to move the character diagonally.
For laptops, there has been an issue with the arrow keys where the up key cannot be used together with the left key. This means the character cannot move in the forward and left direction simultaneously or jump up while moving to the left depending on the game. This becomes a problem especially for car racing and action games. However, the issue occurs only when the combination of the two keys is used. Otherwise, pressing a single key works as expected. The issue has been experienced in Dell Inspiron 5559, Dell N4050, and the Dell E6400 among others. This article will explain why this issue occurs and how it can be resolved.
Why the Up Key + Left Key cannot be combined in Dell laptops
This issue seems to occur in laptops keyboard. Using an external keyboard will work fine but that will just add to the bulk you carry around. This is because the fixed laptop keyboards are controlled by the BIOS (basic input, output system). The keyboard keystrokes are received and placed in the 15-character type-ahead buffer that is maintained by the BIOS. If the BIOS does not decode this keystrokes properly, then your keyboard will not function correctly. It is likely that the arrow keys in question cause a conflict when decoding hence the “up + left” stroke is canceled. To resolve this, we must update the BIOS. Below is how you can update your Dell BIOS.
Update your BIOS firmware
Computer manufacturers nowadays make BIOS chips using flash memory. This means they can easily update the firmware to fix bugs or add new support. Computer manufacturers provide the updated BIOS firmware on their online download centre. We are going to use a comprehensive example of the Dell BIOS update since this issue mostly occurs in Dell laptops. To update your BIOS:
- Go to your manufacturer’s support website. For the Dell users, go to their website here
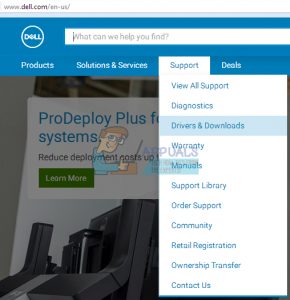
- Click on support, go to ‘drivers and downloads’
- If you are visiting the website for the first time, you will get a screen to enter your service tag. Otherwise your browser cookies will show the recent products you browsed. There are three ways to get your drivers. One is to use the service tag, the other is to automatically detect your system and the other is to manually search for your drivers. We are going to use the fastest; using a service tag.
- Check the bottom of your laptop, or in the battery compartment. You should get a sticker labeled “service tag (S/N).” Type the 7-character alphanumeric code into the dell website support page and click submit.

- Dell will load the product related to the service tag. From this page, you can choose to detect updates automatically or find your drivers by yourself. Click on the ‘Find it myself’ tab.
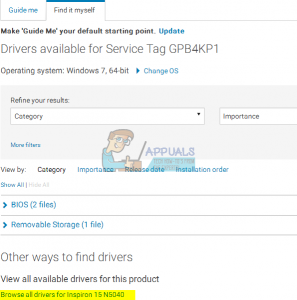
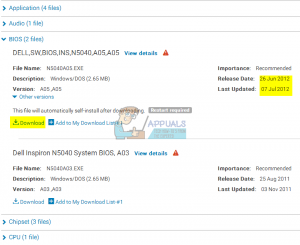
- If you don’t see your BIOS firmware, click on “Browse all drivers for Inspiron [Your laptop version].” Click on the BIOS section to expand it and download the latest BIOS firmware.
- Close all other programs running (recommended) and then go to the file you download and run it. You should be very carefully from here on because any mistake could brick your motherboard if no restore mechanism is available.
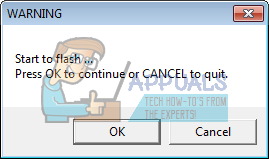
- The first prompt you get is to flash your BIOS chip. Click ok to continue with clearing the chip.
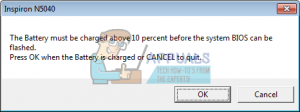
- You might get another safety warning that needs the battery (at least 10% charged) and the AC adapter plugged in before flashing. This makes sure that the flashing operation is not interrupted by a power loss. Click OK to continue after making sure your battery and AC adapter are plugged in.
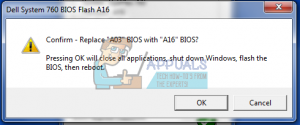
- If you are successful, you will get a prompt to replace the flashed BIOS. Click OK.
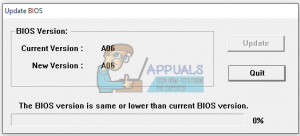
- The computer will then restart with the BIOS update. DO NOT DISTURB THE COMPUTER DURING THIS TIME and certainly do not cut the power. If you do, then it is likely you will kill the computer entirely. Once the computer loads into Windows some of the BIOS updates will re-launch automatically but then will tell you that you have the latest version already so just click cancel/quit.
Note that the interface of your BIOS update might be different. Just follow the screen prompts to install it. Check out our guide here for more information, and other methods of updating the Dell BIOS firmware.
For HP users, you can find information of different ways to update the HP BIOS for desktops and laptops here.
For Lenovo users, you can find information of different ways to update the LENOVO BIOS for desktops and laptops here.
For Gateway users, you can find information of different ways to update the Gateway BIOS for desktops and laptops here.
If you are using an MSI motherboard, you can find our guide on how to update the BIOS on it here.