The Ultimate Guide to AMD Sunshine – Stream PC Games to Your Phone
Looks like the sun is beneficial for gamers after all!
 Reviewed by Huzaifa Haroon
Do you want to play high-quality PC games on your phone? Not only is it entirely possible but it’s easy, as explained in our previous detailed guide. In our breakdown, we mentioned a solution similar to Moonlight, but for PCs with AMD GPUs called “Sunshine“.
In fact, the great thing about this software, like with any other open-source tool, is that it works with GPUs from all manufacturers.
However, Sunshine can be a bit tough to set up, especially for a beginner, and that’s why we’ve decided to help you out. Learn all about Sunshine below; its requirements and capabilities, along with how to set it up to start streaming games through it.
Table of Contents:

What is Sunshine?
Sunshine is a fork of Moonlight. It’s an app that allows you to stream games from your PC to your phone. Functionally, it is similar to Moonlight except for the fact that Moonlight only supports NVIDIA GPUs, while Sunshine supports both NVIDIA and AMD GPUs, along with Intel GPUs.
Sunshine is available for Windows, macOS, Linux (Debian, Fedora and Ubuntu only). Since Sunshine is a fork of Moonlight, it works on iOS and Android through the Moonlight app, available on the Google Play Store and App Store.
Requirements of Sunshine
Host PC Requirements:
The host PC running games and Sunshine, needs to satisfy the following minimum specifications:
- CPU: Intel Core i3/Ryzen 3 or above
- RAM: 4 GB or above
- OS: Windows 10/11 (Windows Server not supported)
For other OSs:- macOS 11.7 or above
- Linux Debian 11 (bullseye)
- Linux Fedora 36 or above
- Linux Ubuntu 20.04 (focal) or above
- GPU: NVIDIA GTX 745/AMD HD 7730/ Intel GMA X4500HD or better
- Network: 5GHz connection, 802.11ac Wi-Fi, ideally connected via Ethernet.
For a complete list of requirements, check here.
Client Phone Requirements:
As Sunshine uses the Moonlight app on mobile devices, the requirements are the same ones as set by the Moonlight app:
- Android version 4.1 or later. Recent devices are more than capable of handling the Moonlight app.
- iOS version 9.3 or later.
- Network: 5GHz connection, 802.11ac Wi-Fi.
- A controller or gamepad is highly recommended.
Setting Up Sunshine on a Windows PC
Downloading the latest version
- Go to the latest releases section on GitHub. From the list of setup files here, download the one marked in the photo below.
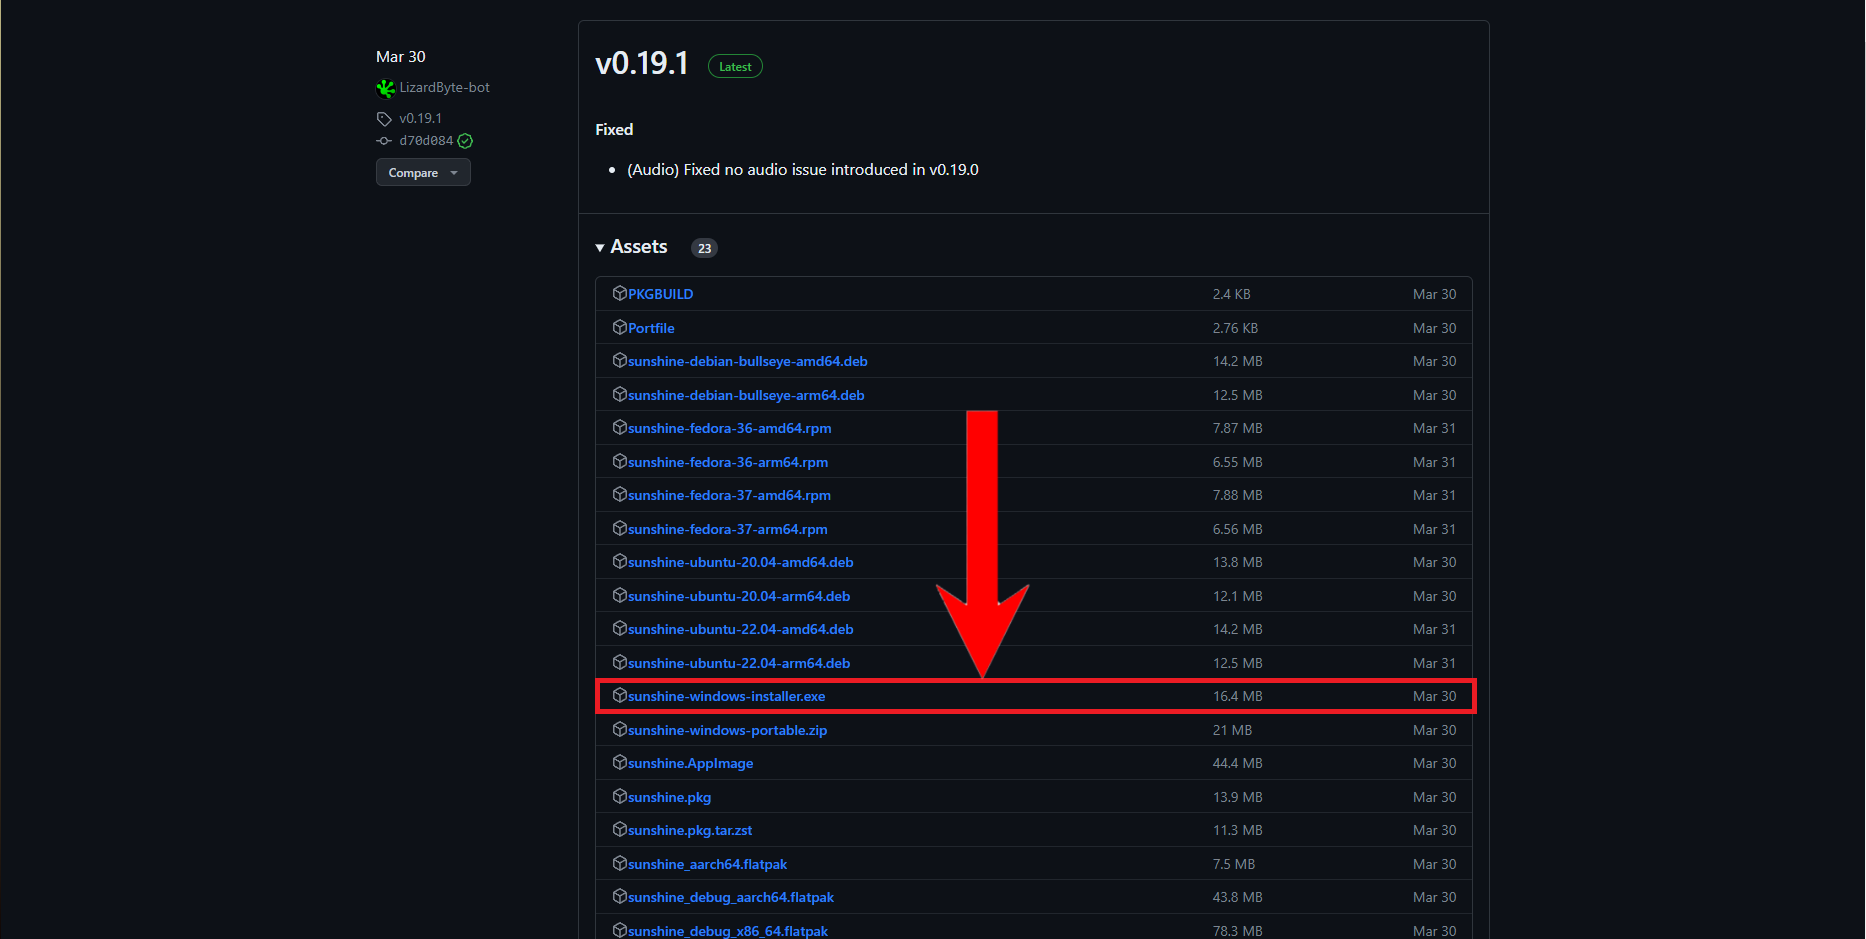
Download this file - Once the setup is downloaded, run it.
Installing Sunshine through the Setup
- Upon running the setup, this screen should greet you. Click Next.
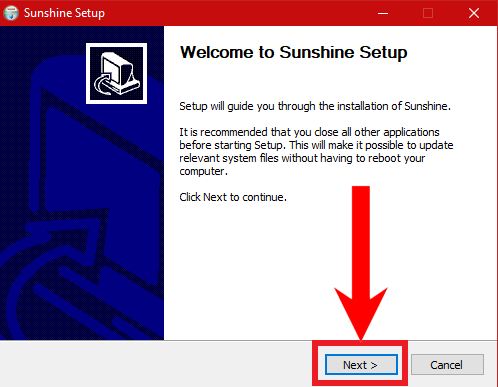
Click on Next - Following the welcome screen, the license terms should appear. Straightaway, click on I Agree. (Let’s be honest, most of us don’t read these).
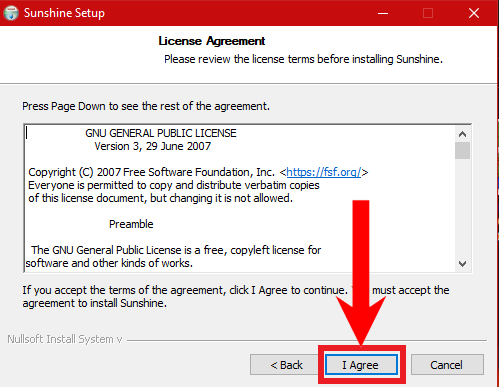
Click on I Agree - Next, you’ll be asked the destination path of the Sunshine app. Accordingly, choose the desired path by clicking on Browse. When done choosing, click Next.
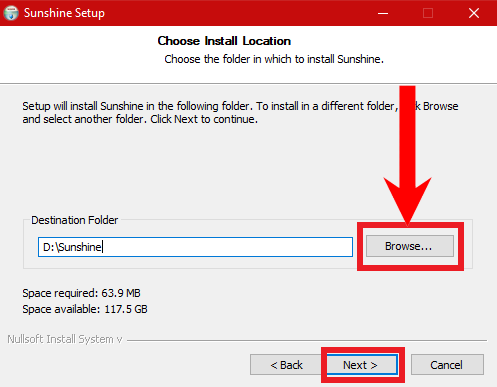
Choose your desired path on the File Explorer by clicking on Browse - Now, you’ll be asked to create a Start Menu folder. Alternatively, you can choose not to create one by clicking on the Do not create shortcuts checkbox. Similarly to the previous steps, click Next when done with your choice.
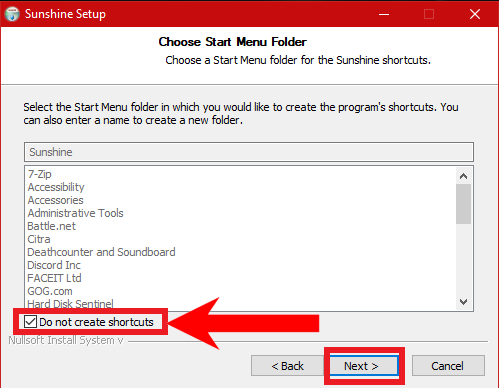
Click on the checkbox if you don’t want to create a Start Menu shortcut - After this, it will ask you the components you want to install. By default, all components are selected. Since the app barely takes up 70 MB, it’s better to install all the components. Click on Next.
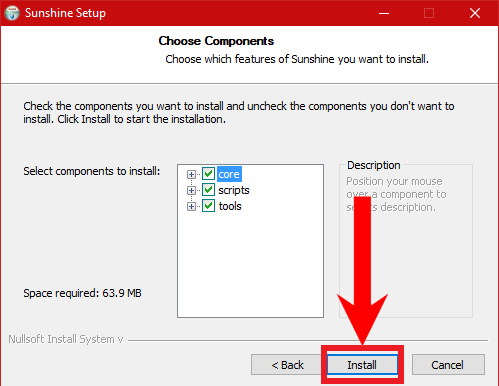
Click Next - Finally, the installation progress will begin. Wait for it to complete. It shouldn’t take more than a few minutes.
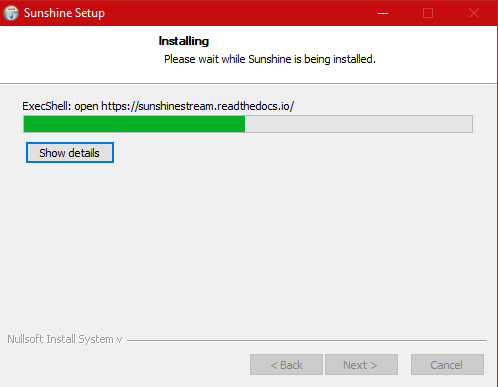
Wait for the installation process to complete - Lastly, click Finish when the installation process completes.
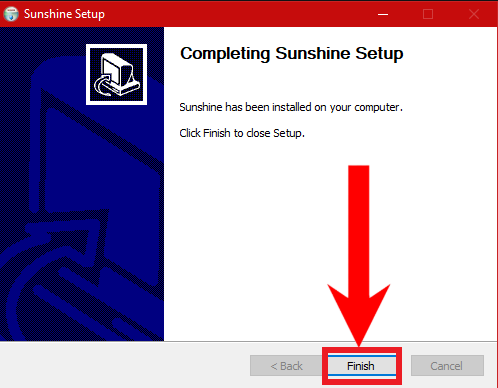
Click on Finish
Setting up the app on the host PC
- Open up File Explorer and navigate to where you installed Sunshine. Right-click on the Sunshine app and select Run as administrator.
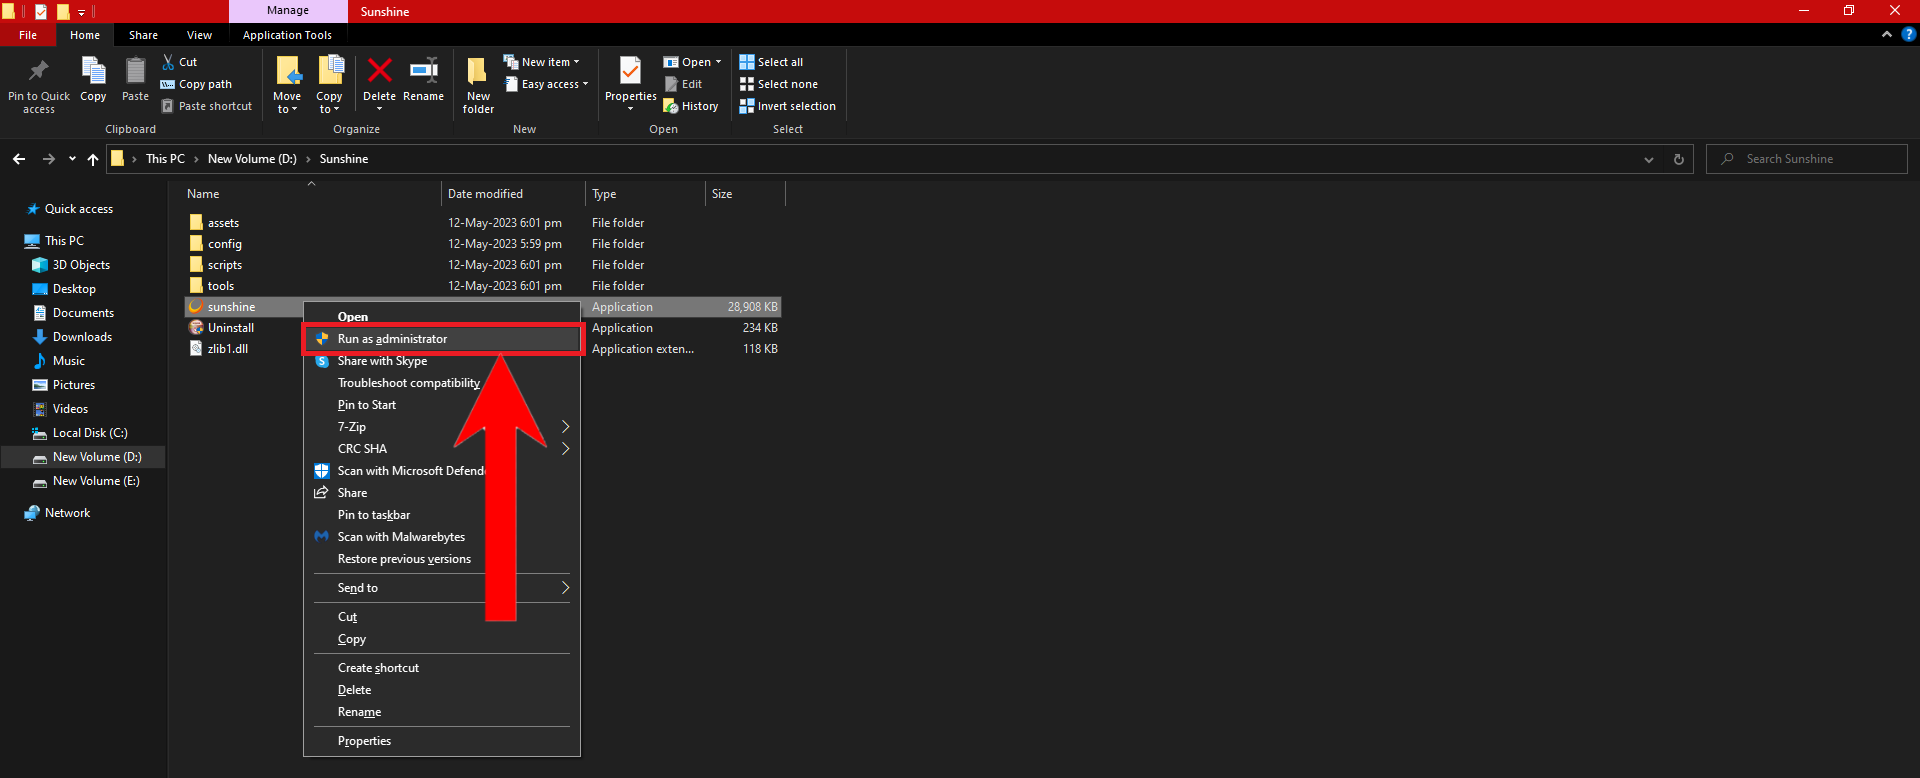
Right-click and select Run as administrator -
Straightaway, the app will launch and start running some tests. When it finally stops, it will give a web address where you can configure its settings. Copy this address by right-clicking or by pressing Ctrl+C.
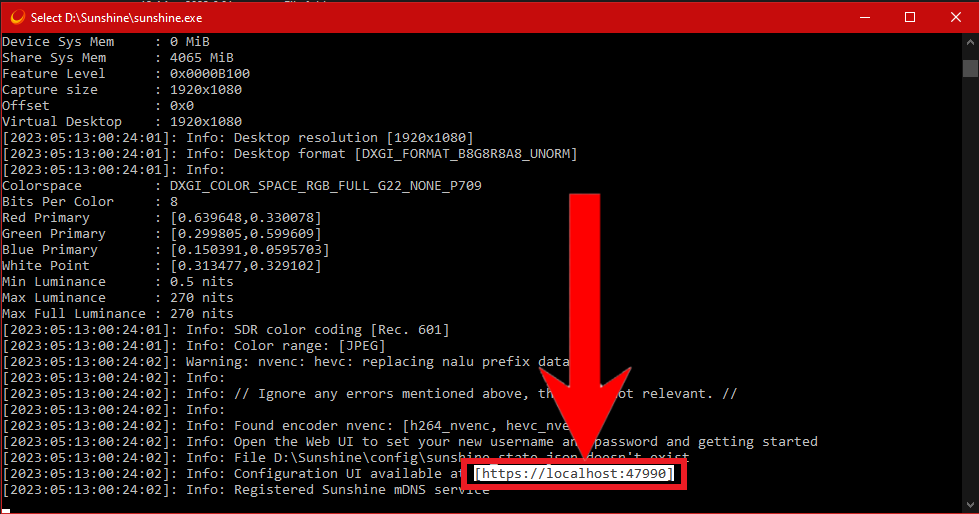
Copy this web address - Next, open up your browser and paste the address you copied on the search bar. Hit Enter.
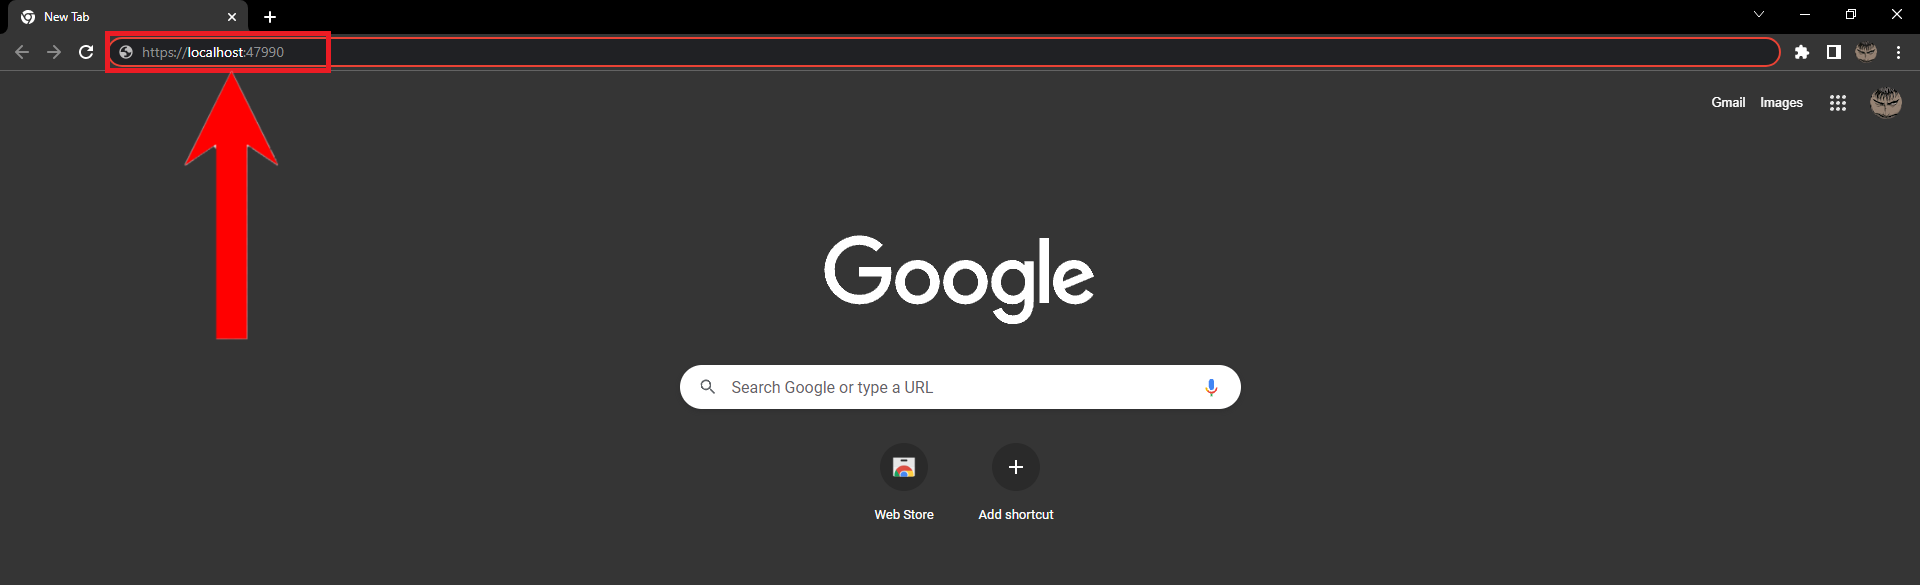
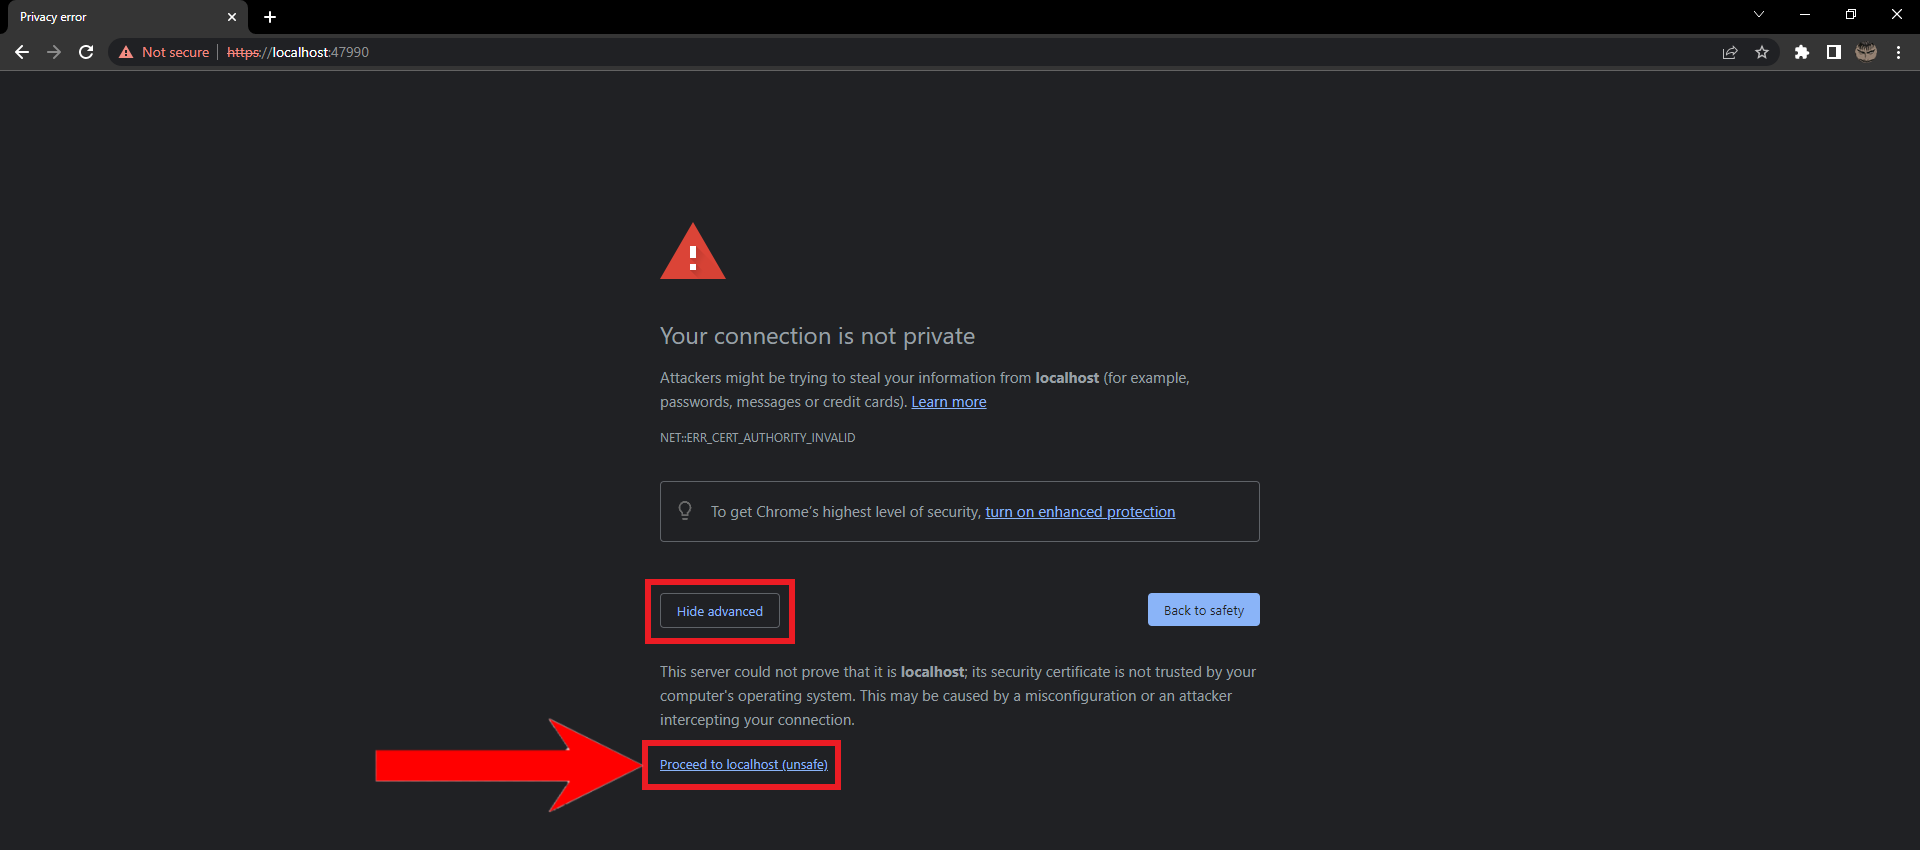
Paste and hit Enter - A warning page will appear that will inform you that the website is unsafe. Ignore it and click on Advanced and then click on Proceed to localhost (unsafe).
Click on Proceed to localhost (unsafe) - After that, you’ll be directed to a sign-up page. Enter your desired username and password and click Login

Click Login after choosing your username and password -
Consequently, the page will reload and ask you to login. Enter the username and password you created previously, and click on Sign In.

Enter the username and password you just created -
Your Sunshine web UI should open. Click on Configuration.
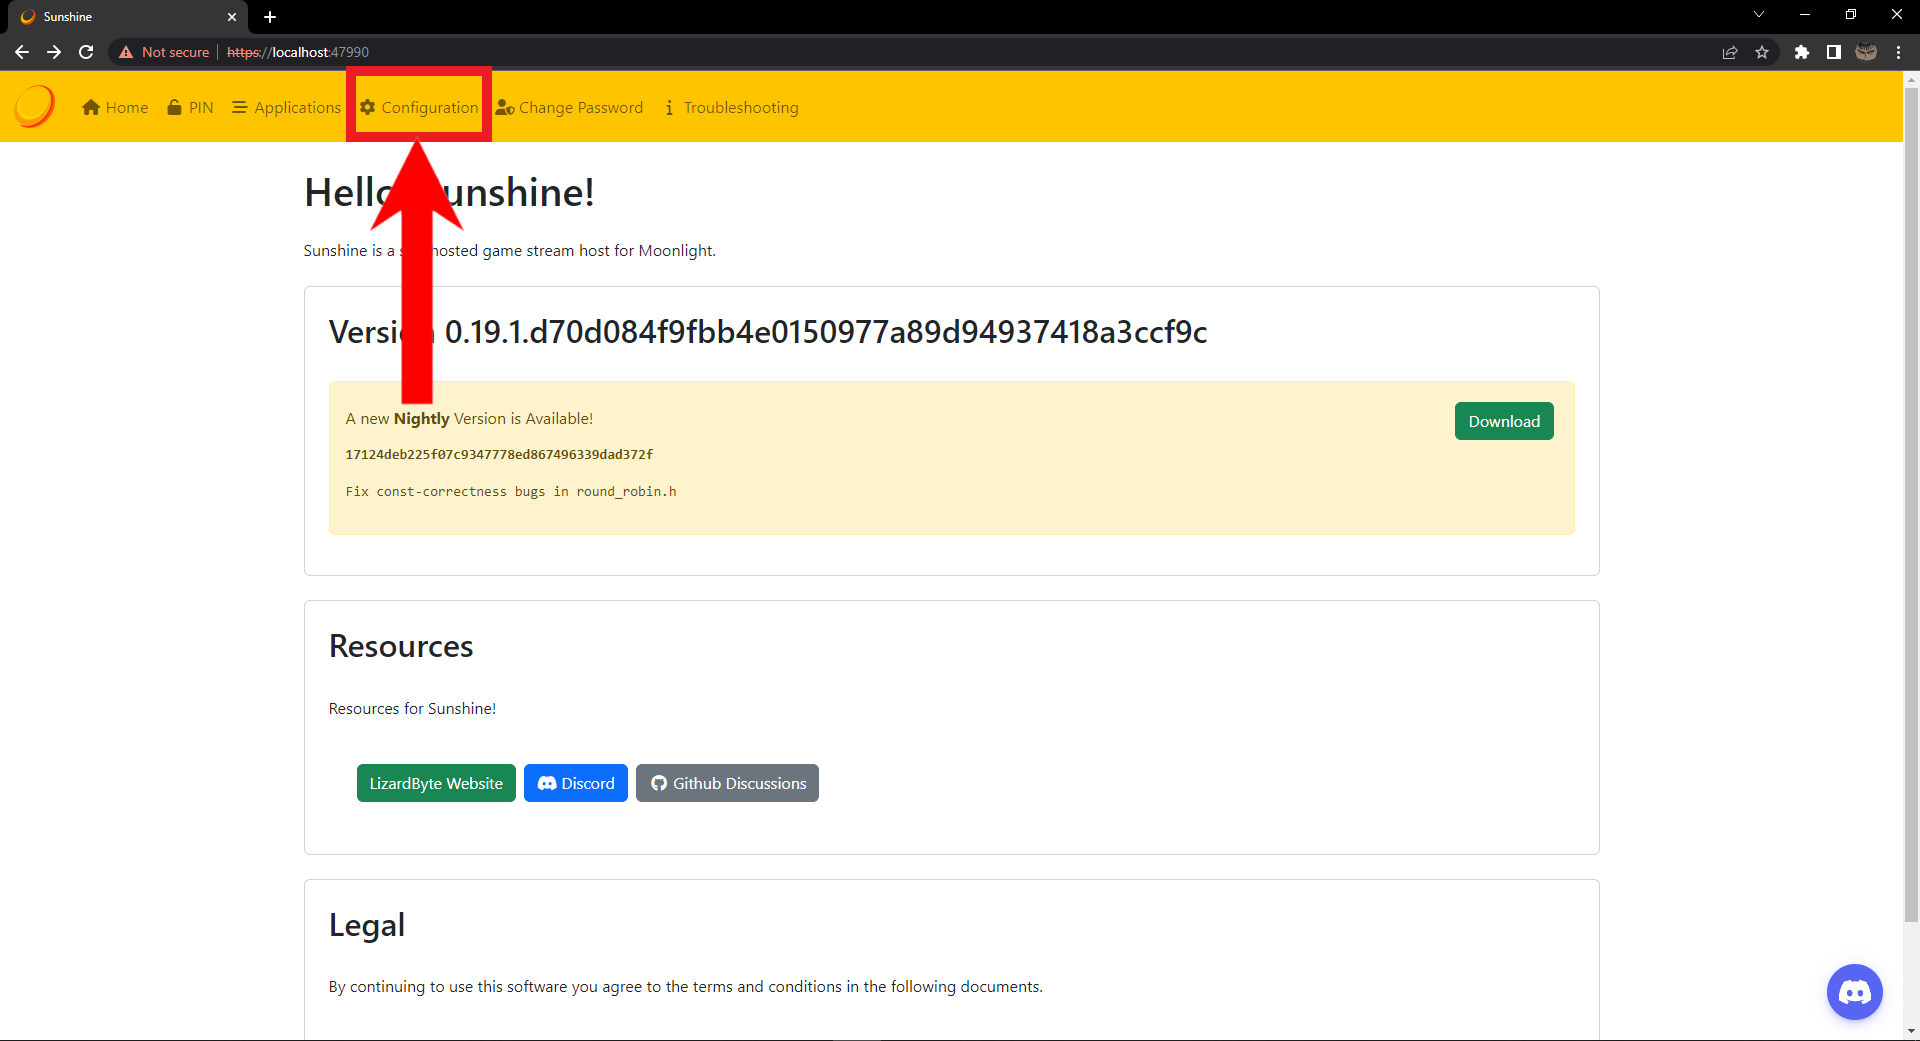
Click on Configuration
Configuring audio and video settings
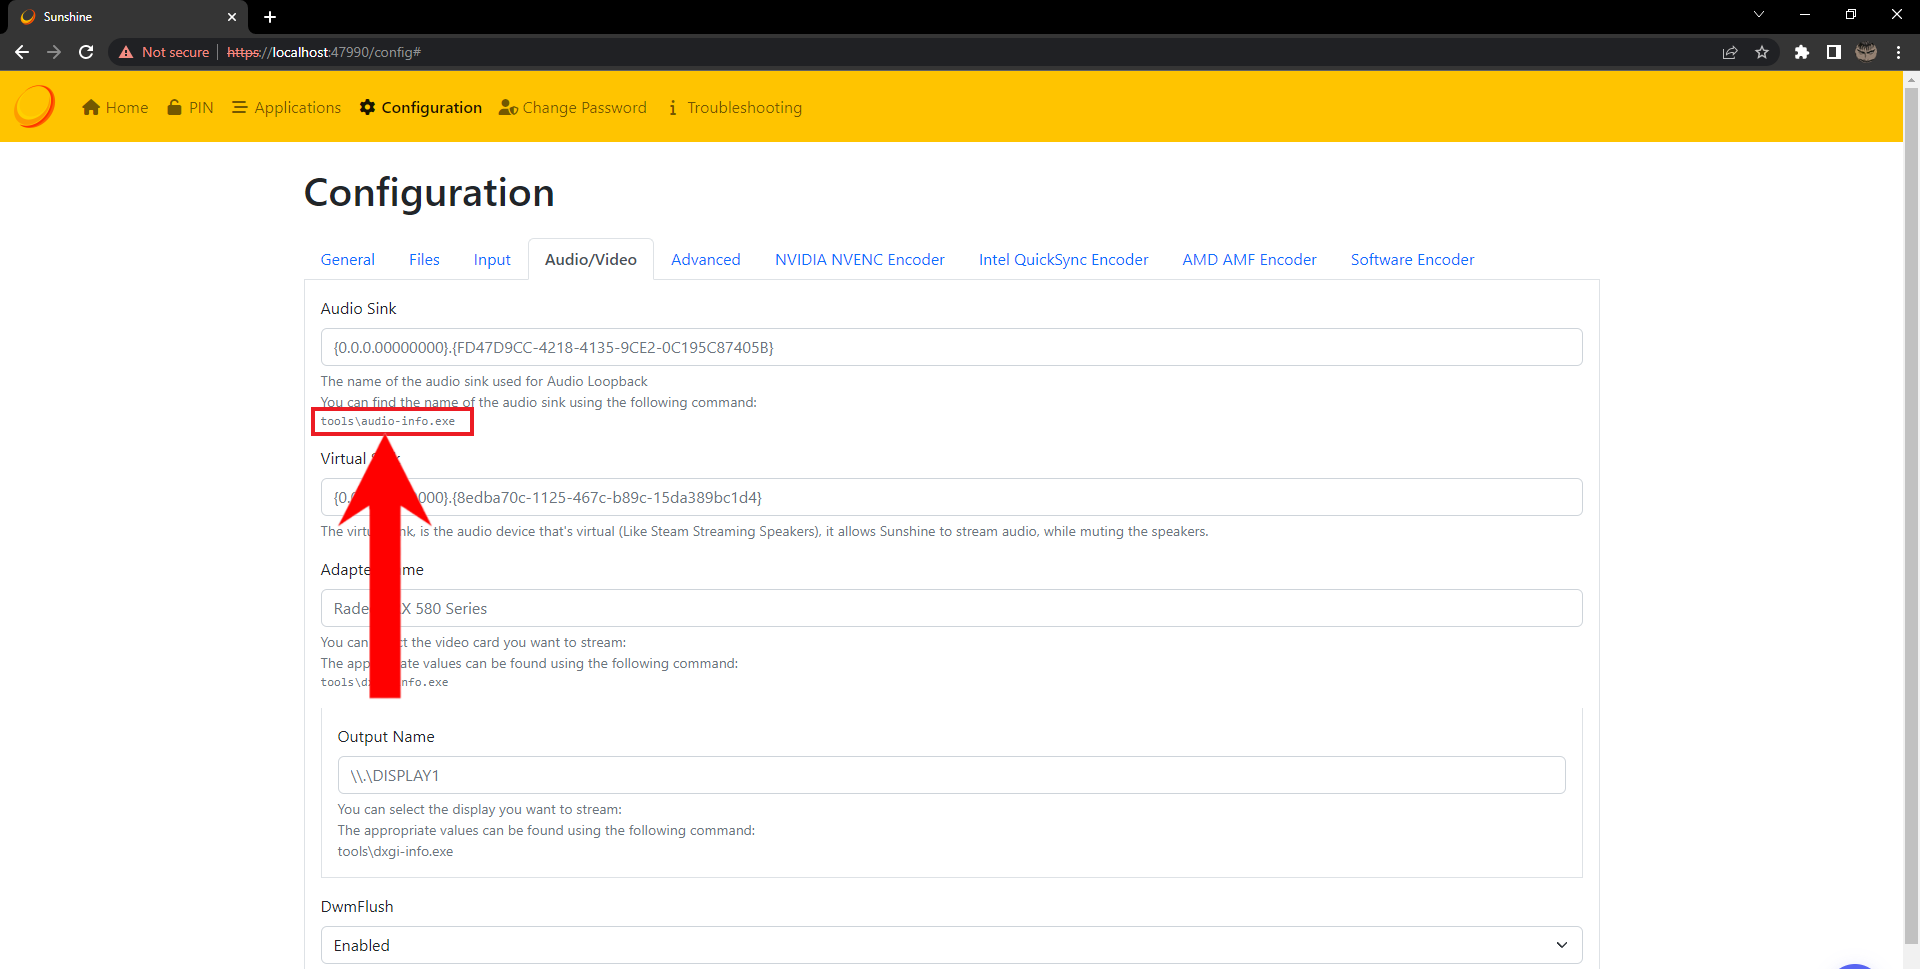
- To configure Sunshine’s audio and video settings, click on the Audio/Video tab in the Configuration section.

Select Audio/Video - In order to define the audio output device for Sunshine, we’ll need to run a command in CMD or PowerShell. Copy the command given.
Copy this code - Next, open the folder where the Sunshine is located. Hold down Shift and right click. From the right-click menu, choose Open PowerShell window here. If it shows Open command window here, you can also choose that.
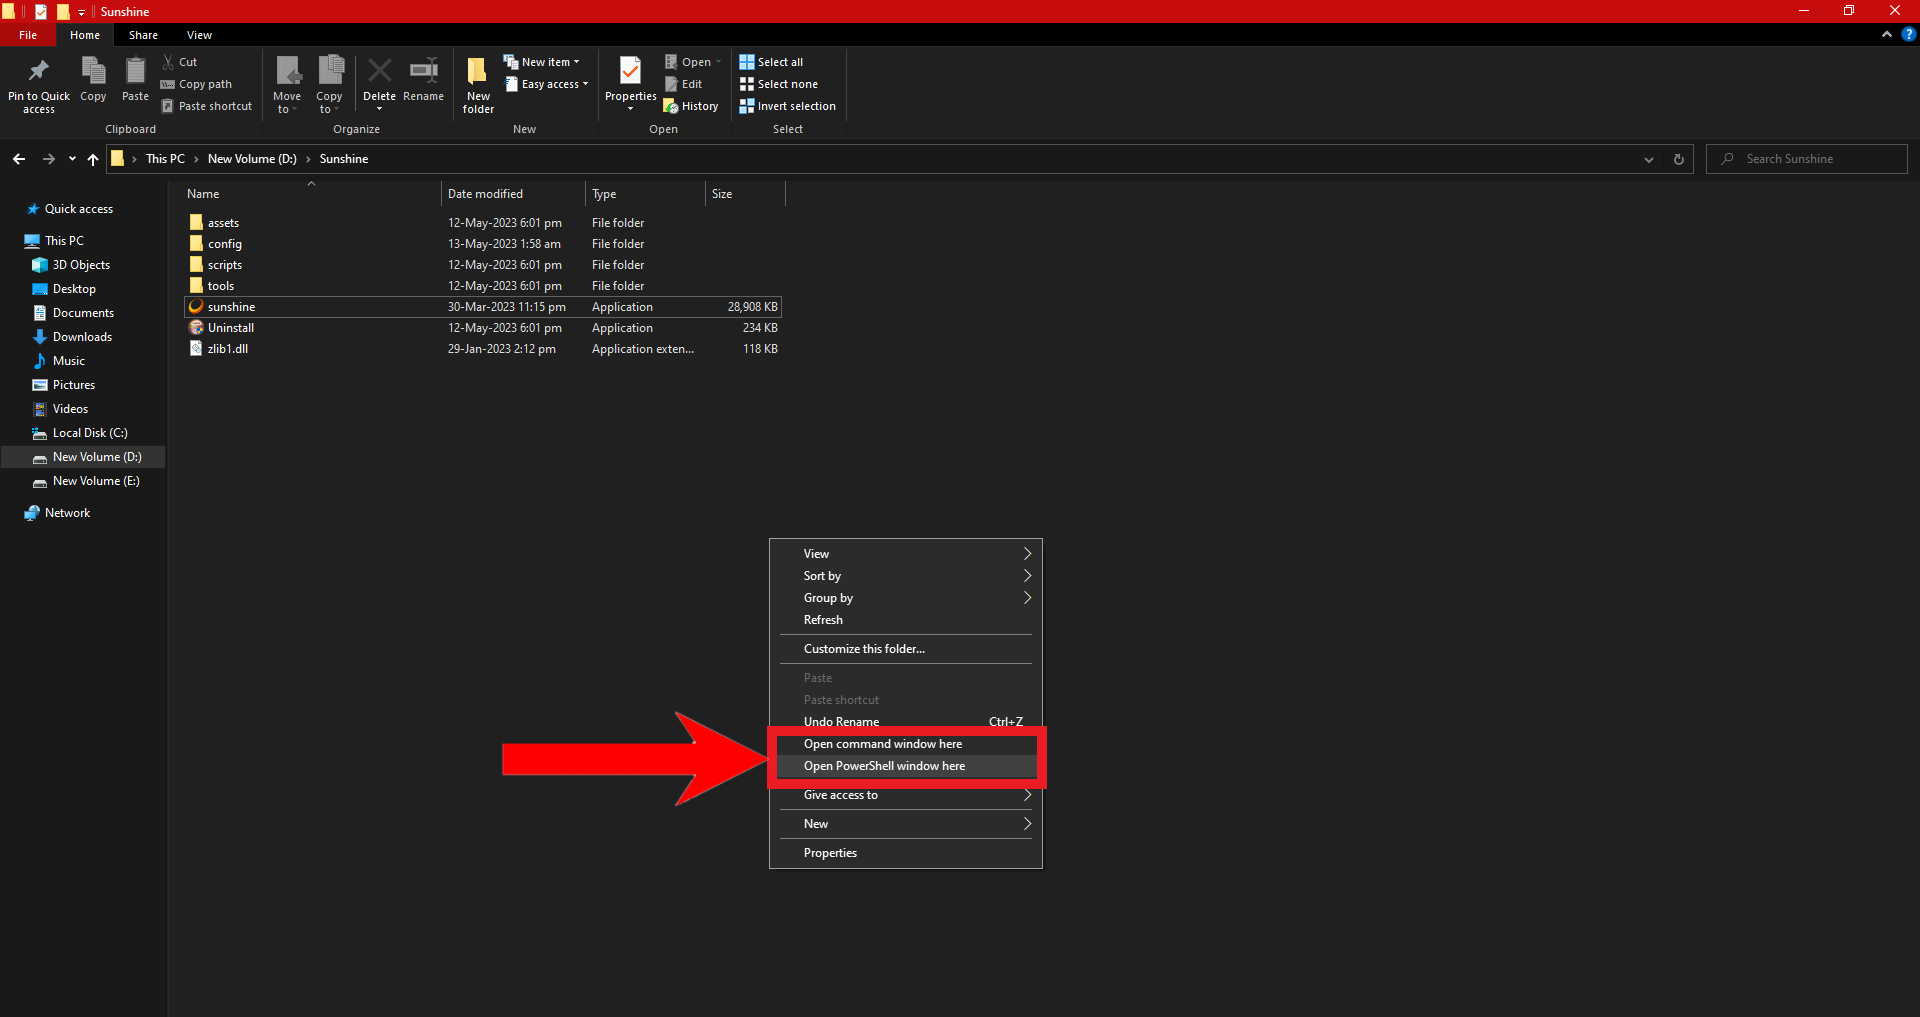
Choose any one from the two - Once the command window or PowerShell window is open, paste the command you copied earlier by right-clicking. Hit Enter to run the command.
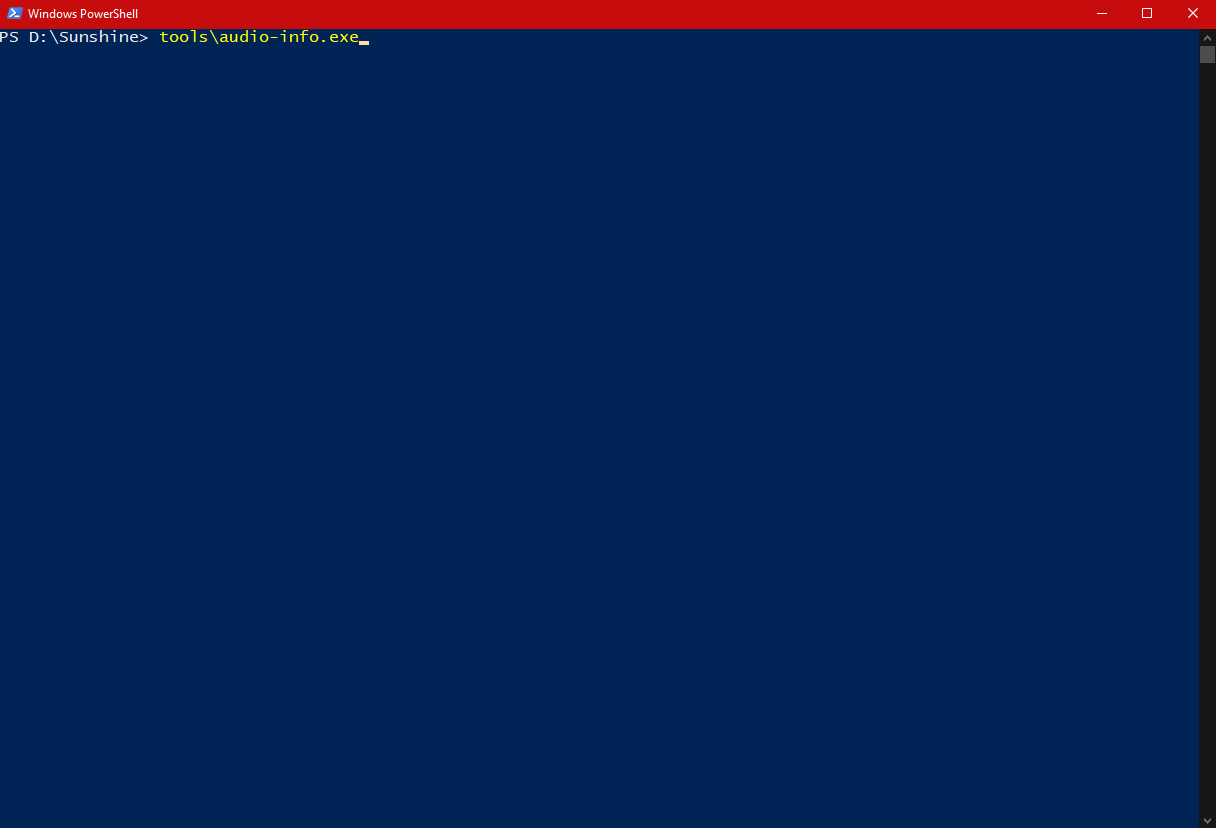
Paste the command and run it - Upon running the command, it should display your audio output devices. Each device will be accompanied by Device ID. Copy your desired device’s ID by highlighting it with the cursor and pressing Ctrl+C or right-clicking.
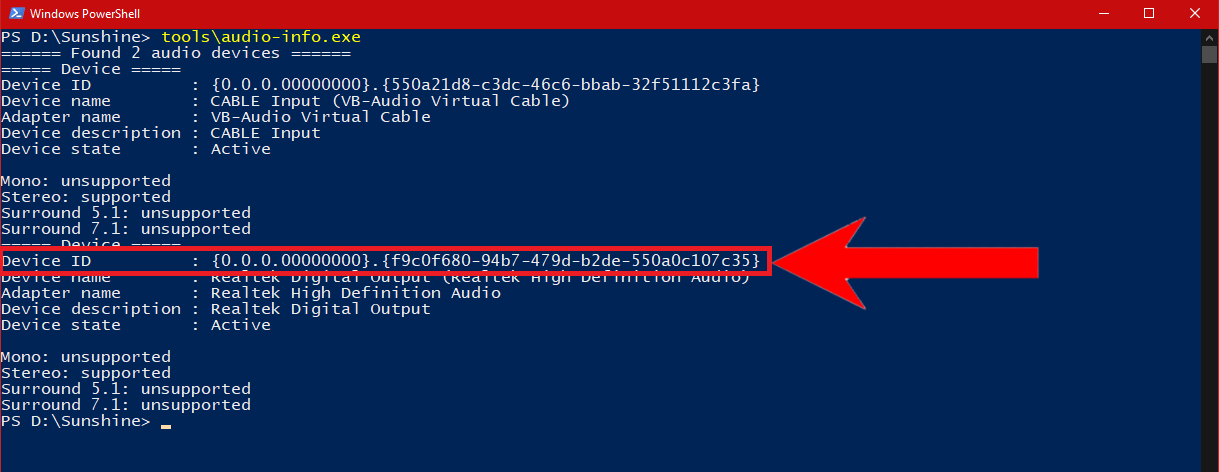
Copy the Device ID of your desired device - Now, paste the ID in the Audio Sink bar.

Paste the ID here - Next, we’ll have to define what GPU the app will use and which display’s stream will be broadcasted. To do this, we’ll need to run another command, which has fortunately given to us by the Sunshine developers.
Paste the ID here 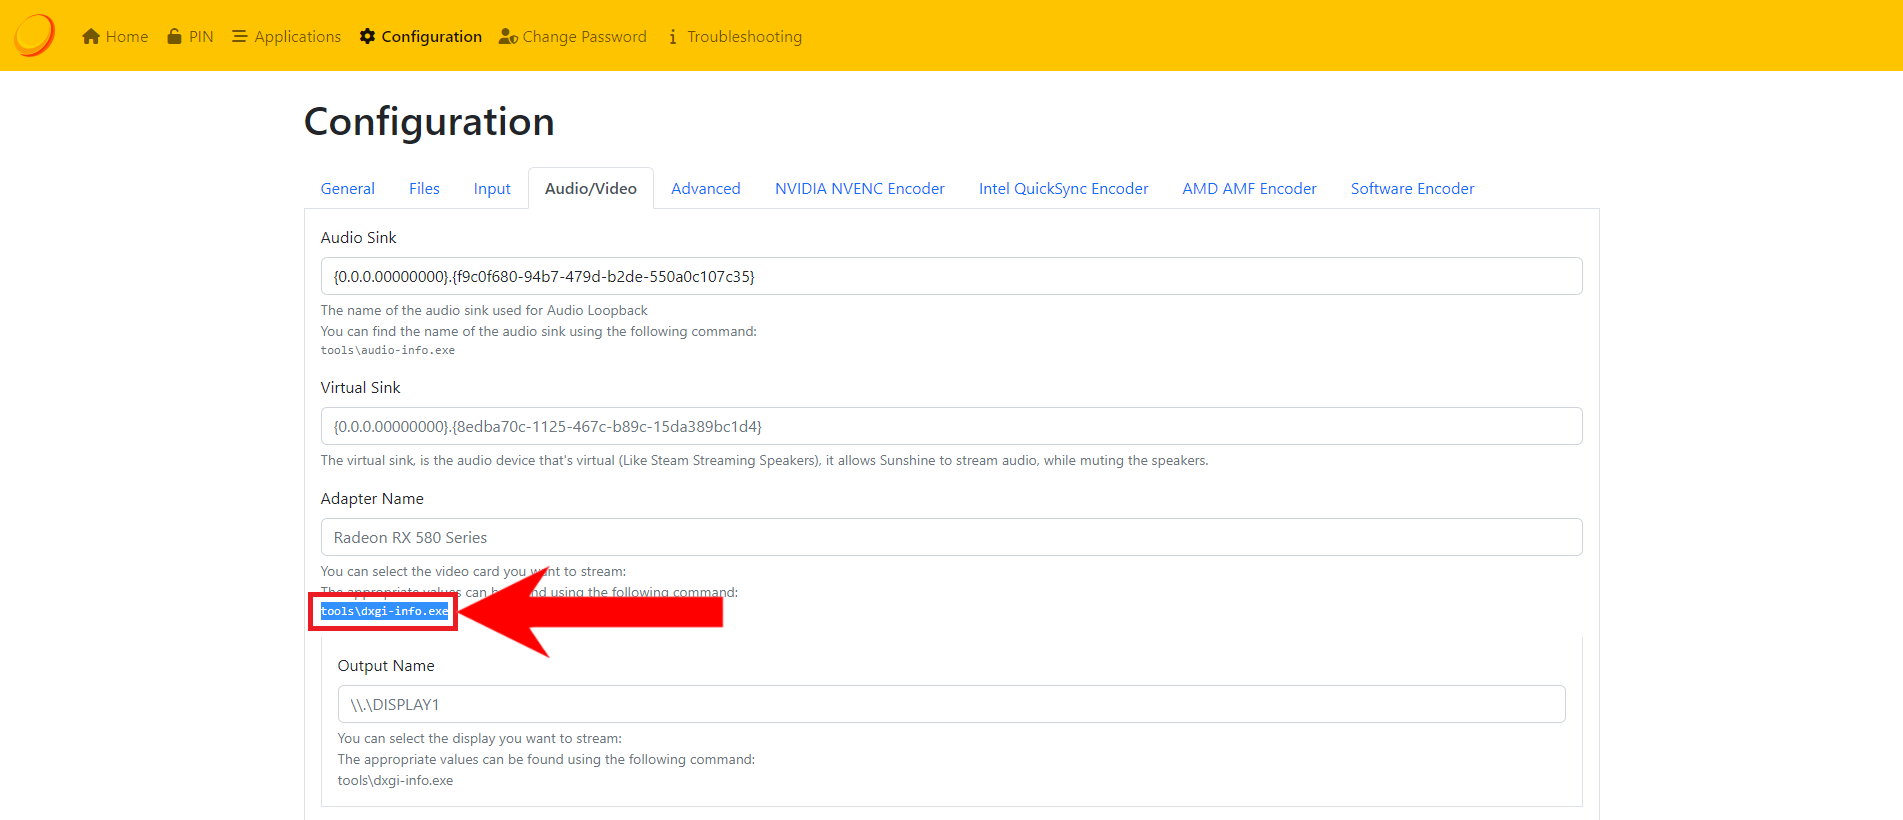
Copy this command - On the same PowerShell/command window, paste the command and run it.
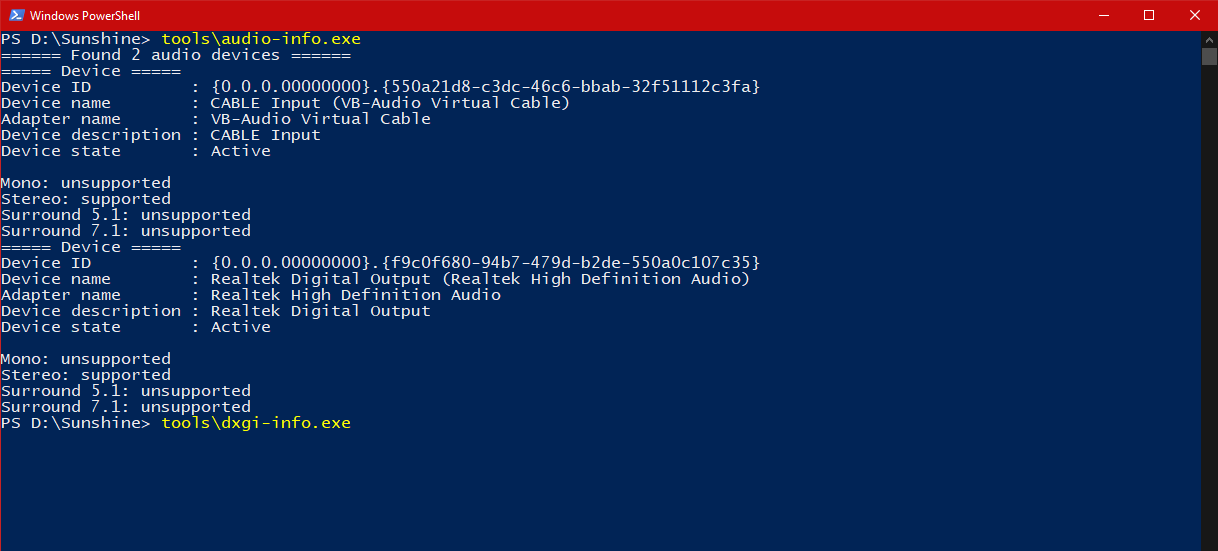
Run the command - From the information displayed, copy your GPU name.
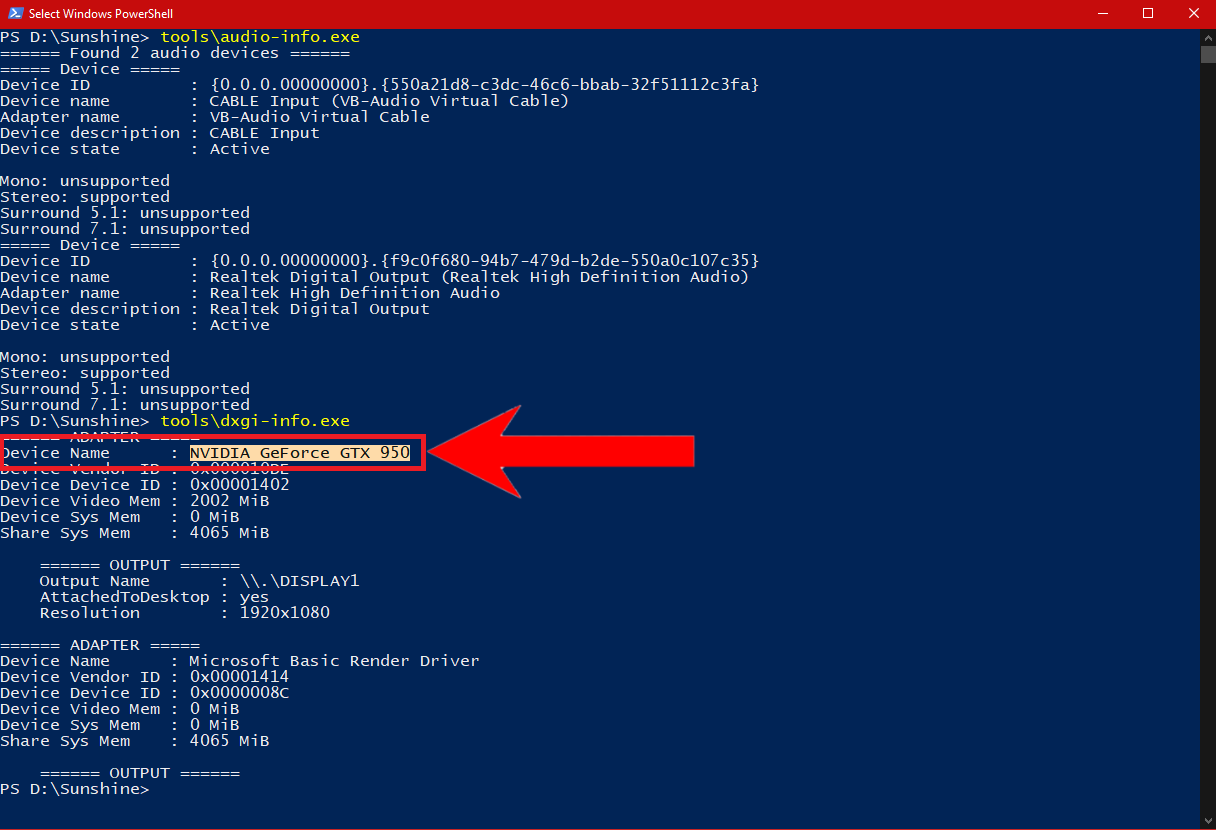
Copy your GPU name - Paste it in the Adapter Name.
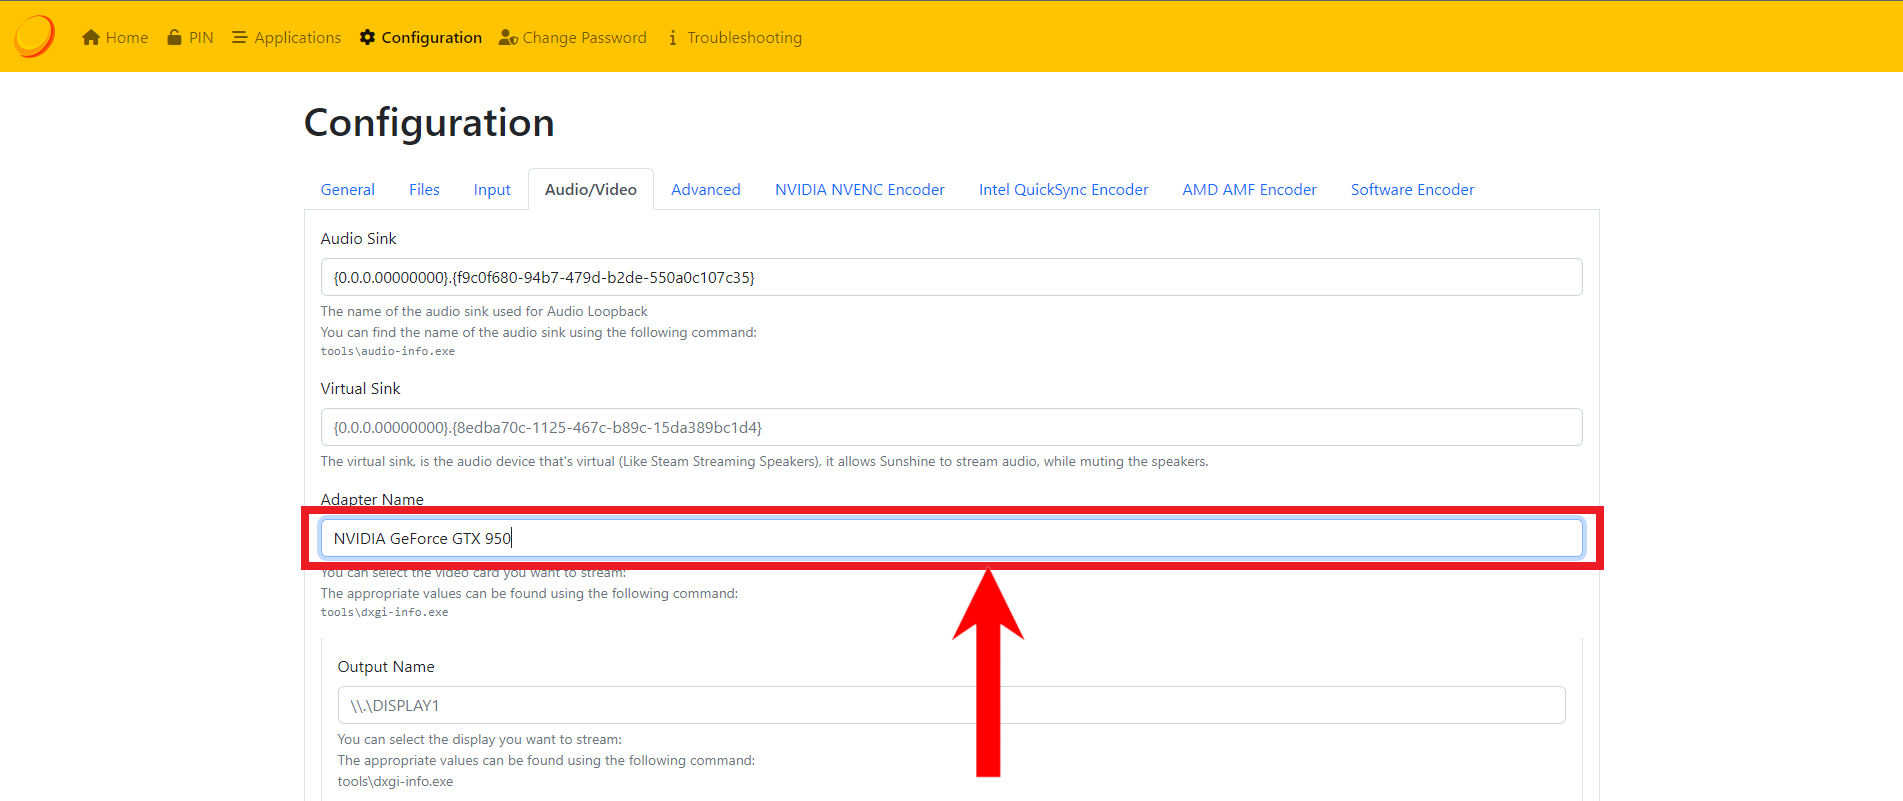
Paste the name in the Adapter Name tab - Similarly, open the PowerShell/command window again. This time, copy the display name. It should be labelled as Output Name. Users with multiple displays need to find their desired display and copy its name.
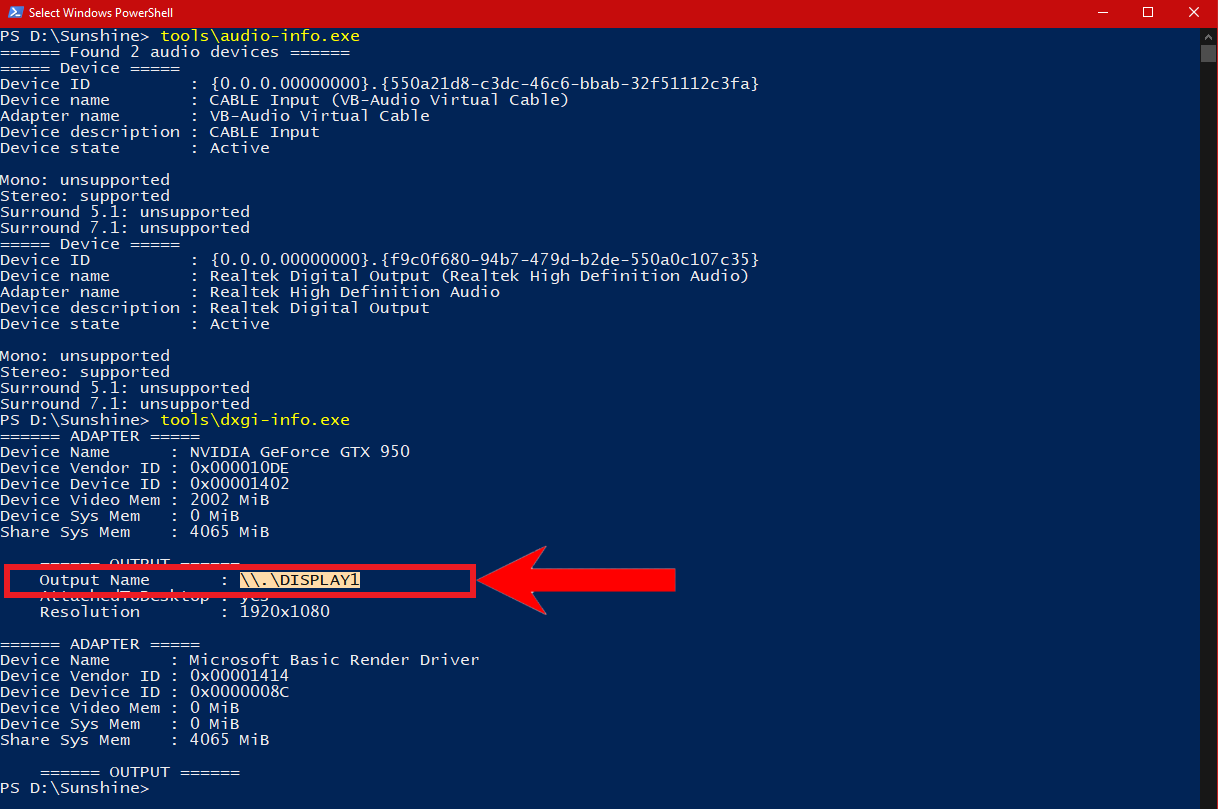
Copy the display name - Likewise, paste it in the Output Name bar.
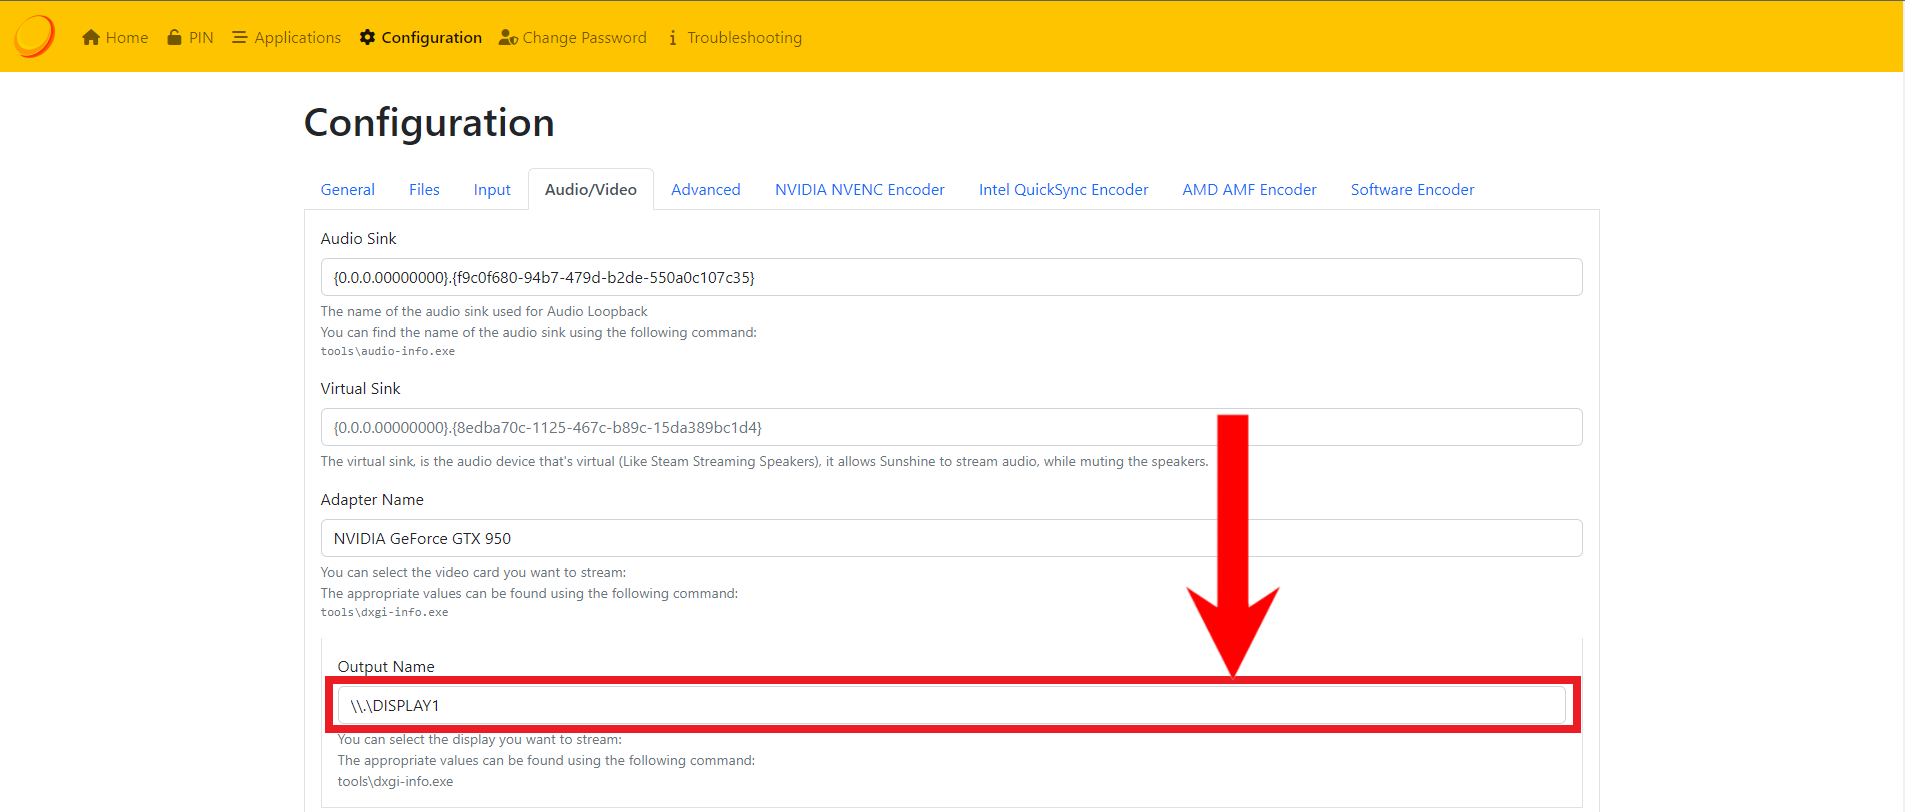
Paste it in the Output Name bar - Finally, hit Save.
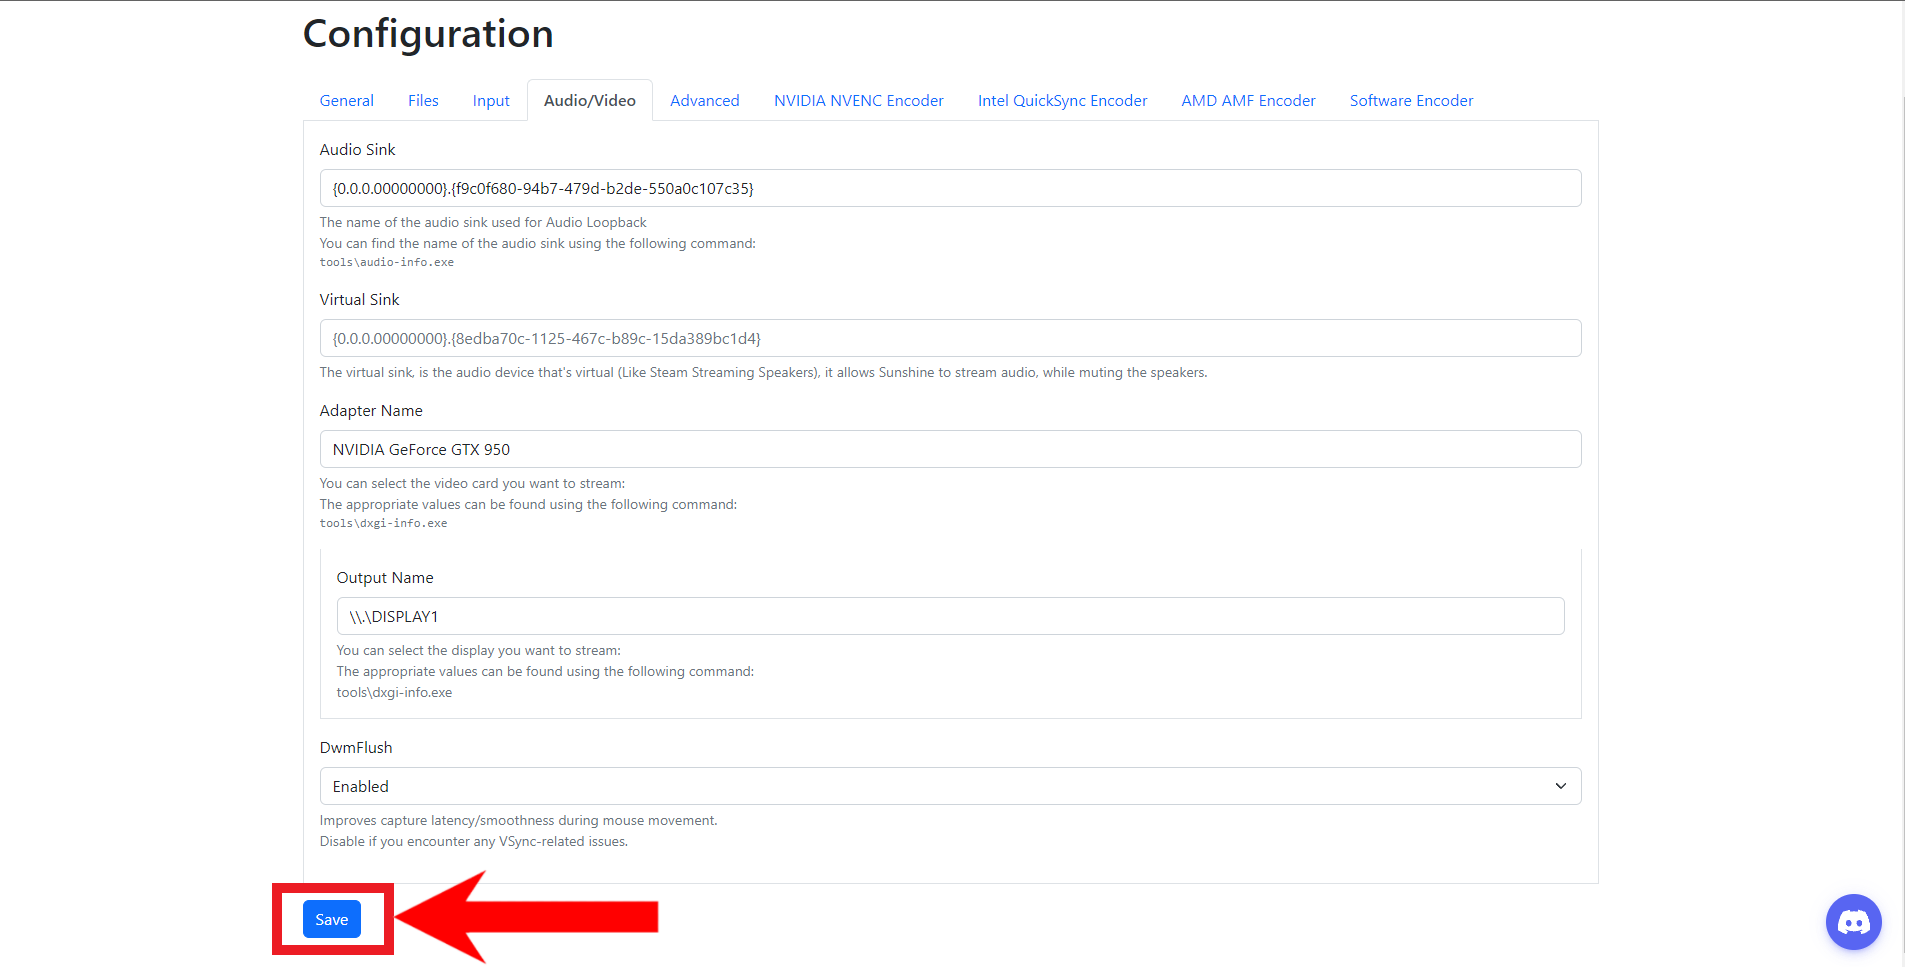
Click on Save
Configuring advanced settings
- Click on the Advanced tab.
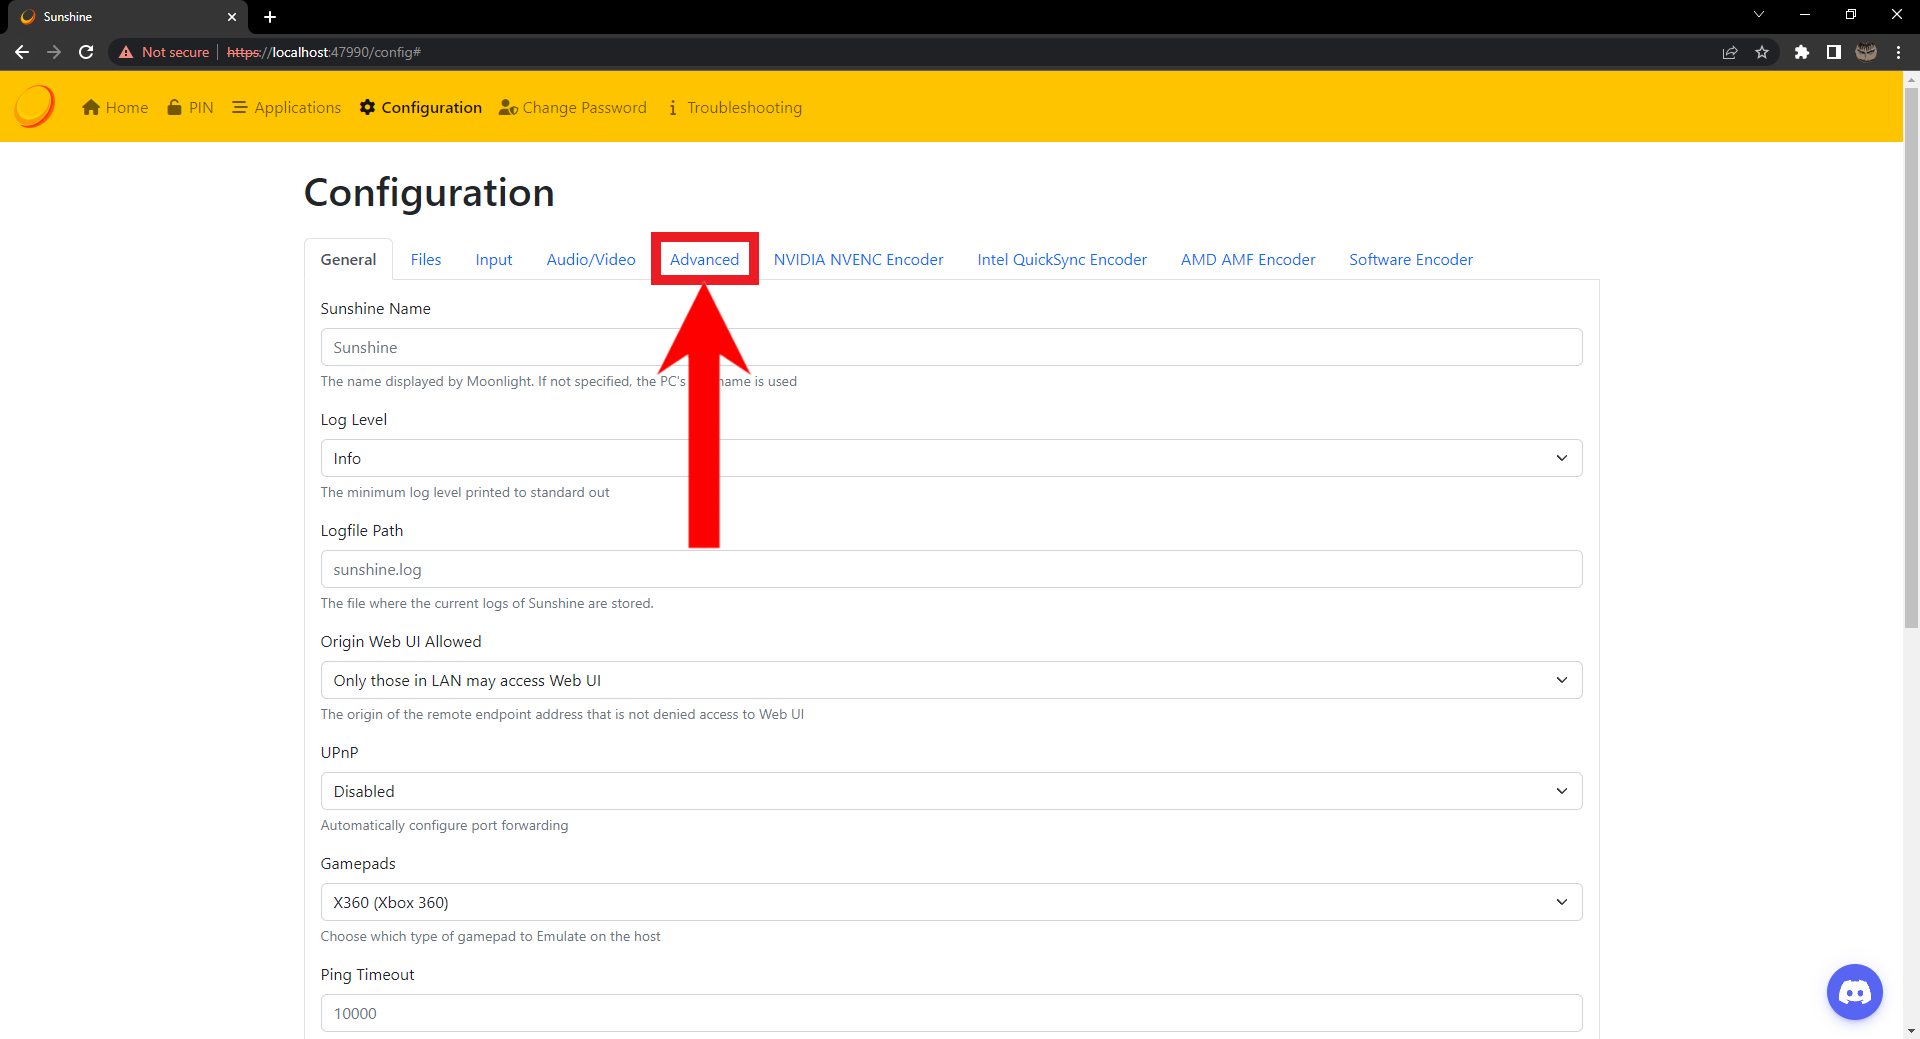
Click on Advanced - Now, scroll down and find the Force a Specific Encoder option. Click on it to open a drop-down menu.
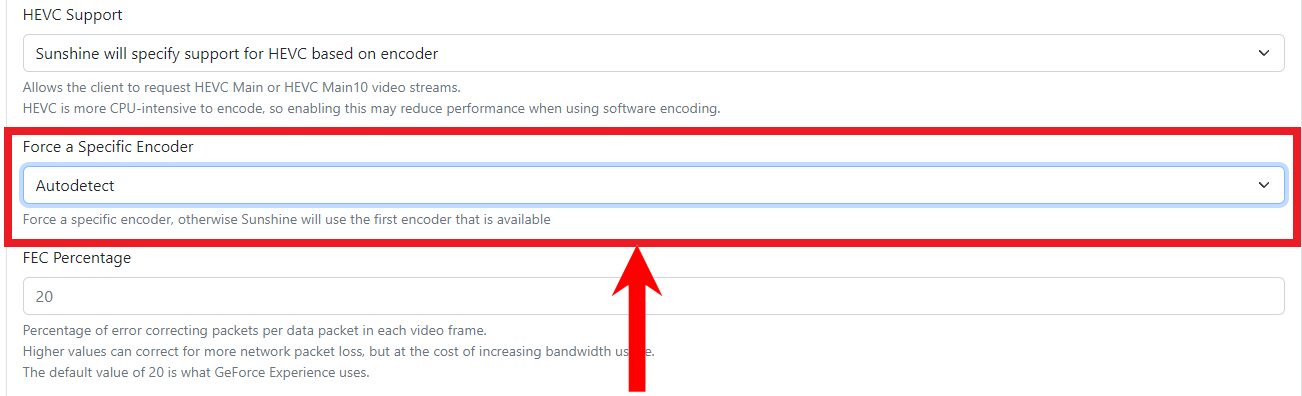
Click on it to open the drop-down menu - From the drop-down menu, choose the encoding based on the GPU you are using. If it’s an AMD GPU; choose AMD AMF/VCE. If it’s a NVIDIA GPU; choose NVIDIA NVENC. For Intel GPUs; Intel QuickSync.

Select an option based on the kind of GPU you have - Lastly, scroll down and click Save.
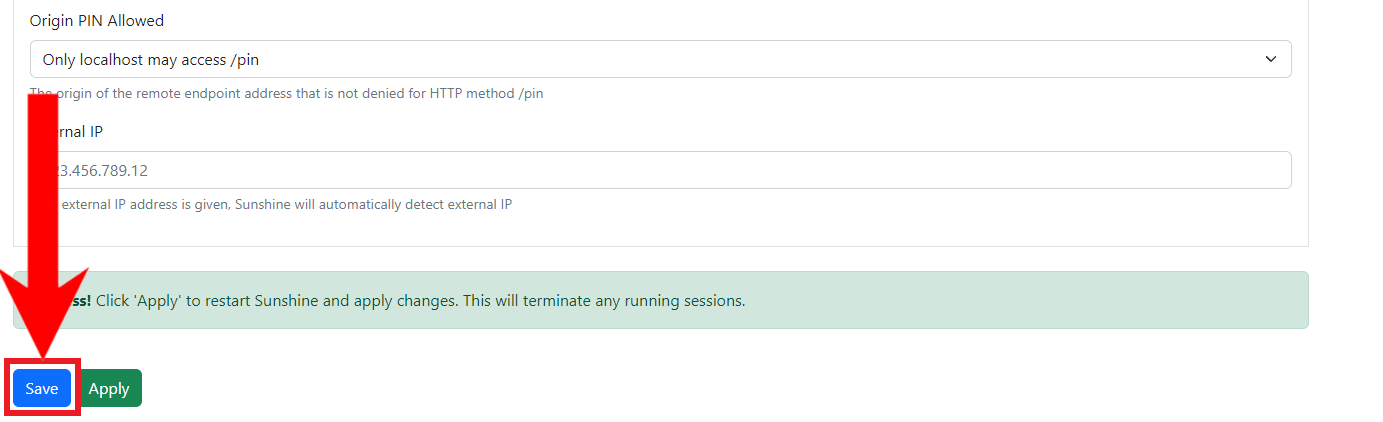
Hit Save - Finally, hit Apply to save your changes to your Sunshine app.

Enabling GameStream for Sunshine (Only for NVIDIA GPUs)
Since Moonlight and Sunshine are third-party clients of NVIDIA’s GameStream protocol, GameStream must be enabled for your NVIDIA GPU. Follow the steps below to enable GameStream for NVIDIA GPUs:
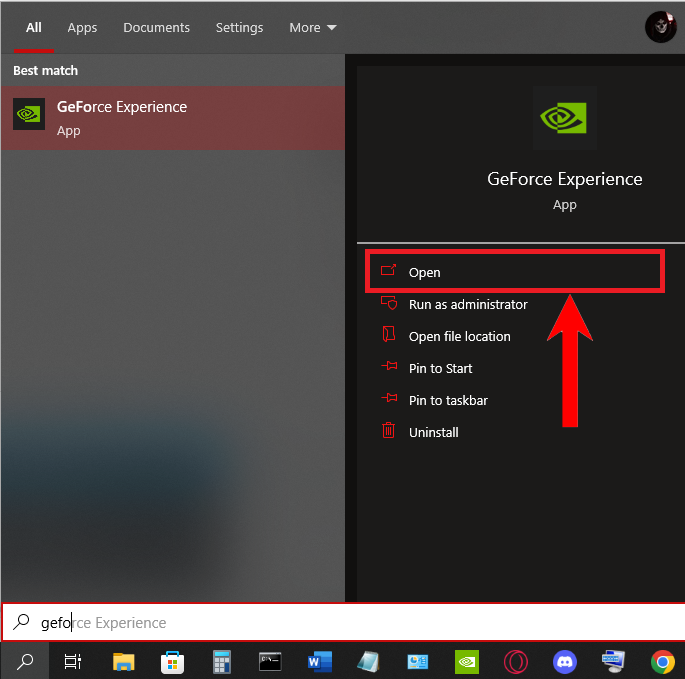
- Click on the Search button on your Taskbar.

Click on the Search icon - Now, begin typing GeForce Experience into the Search bar. Almost instantly, the app should show up. Click Open. Follow our guide to troubleshoot if the app is not opening.
Open the GeForce Experience app - Once the app opens, click on the settings icon to open up the Settings.
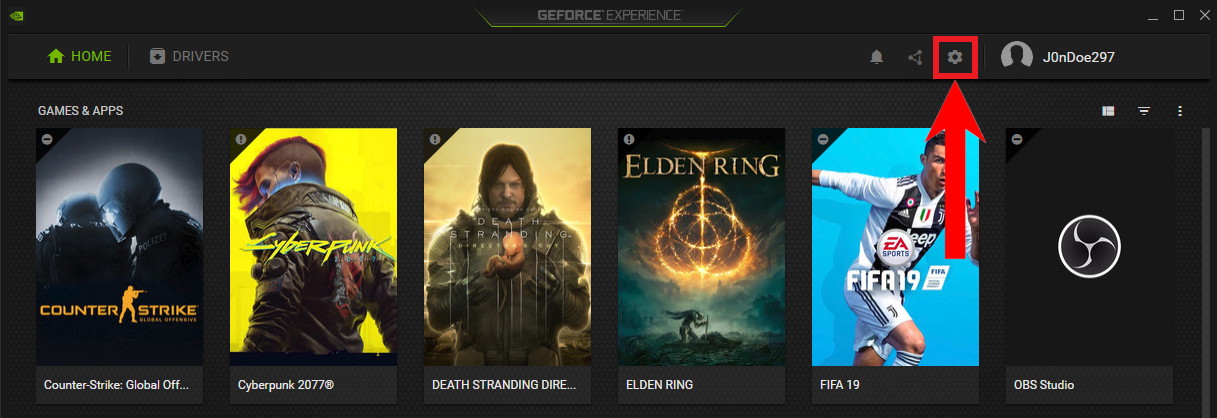
Click on the Settings icon - In Settings, click on Shield.
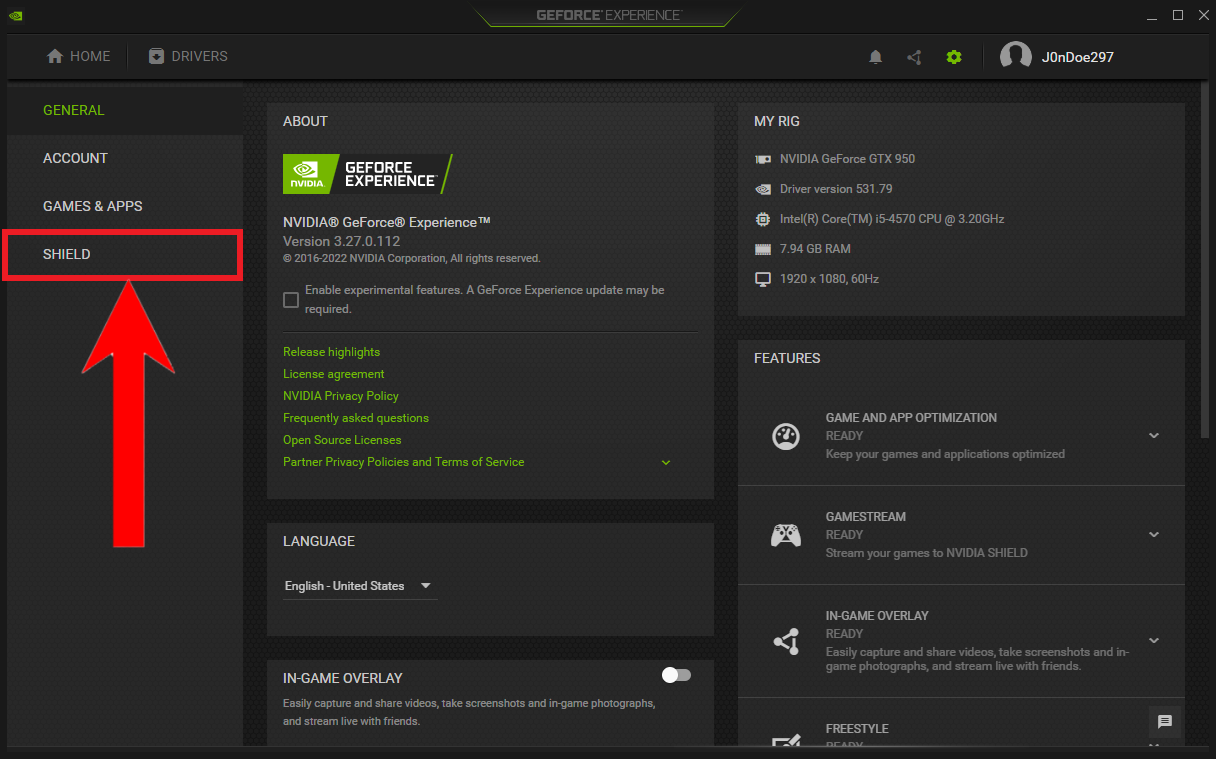
Click on Shield - Finally, turn the GameStream switch on
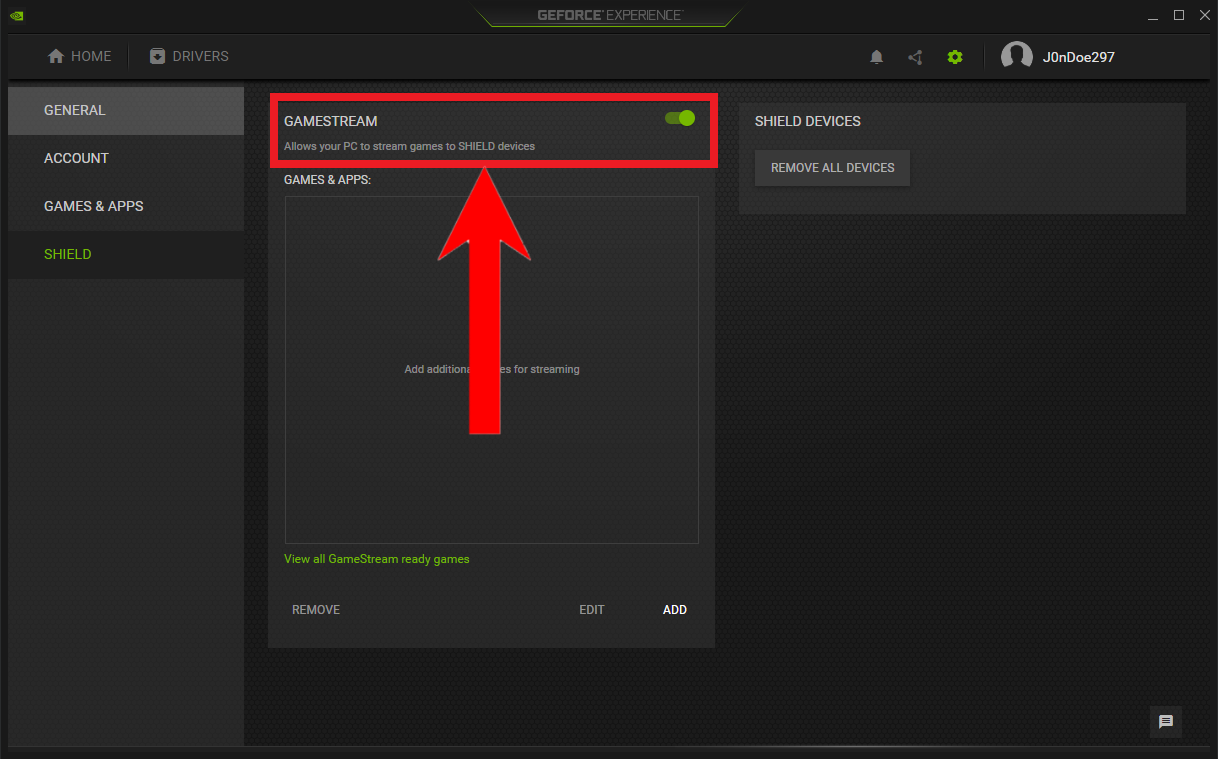
Turn the GameStream switch on
Finding out your PC’s IP address
Since GameStream is only available for NVIDIA GPUs, AMD and Intel GPUs must find another way to connect to the client’s Moonlight app. This is achievable by noting your PC’s IP address. In order to find your PC’s IP address, follow the given steps:
- On your desktop, hover your cursor on the Start button.

Hover the cursor on Start - Now, right-click on the Start button. From the menu, choose Windows PowerShell.

Choose Windows PowerShell - Next, copy this command and paste it in PowerShell by right-clicking. Run the command.
ipconfig /all
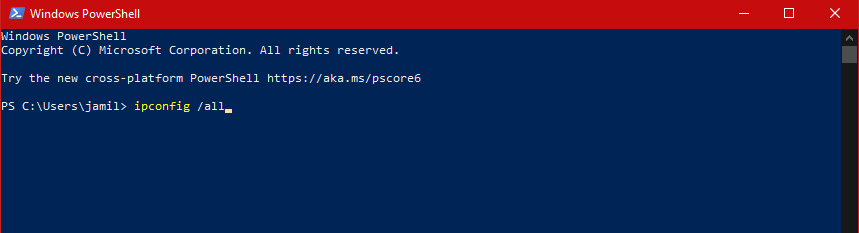
Run the command in PowerShell - From the output displayed, copy this IP address. Keep its saved on Notepad as we’ll need it later on.
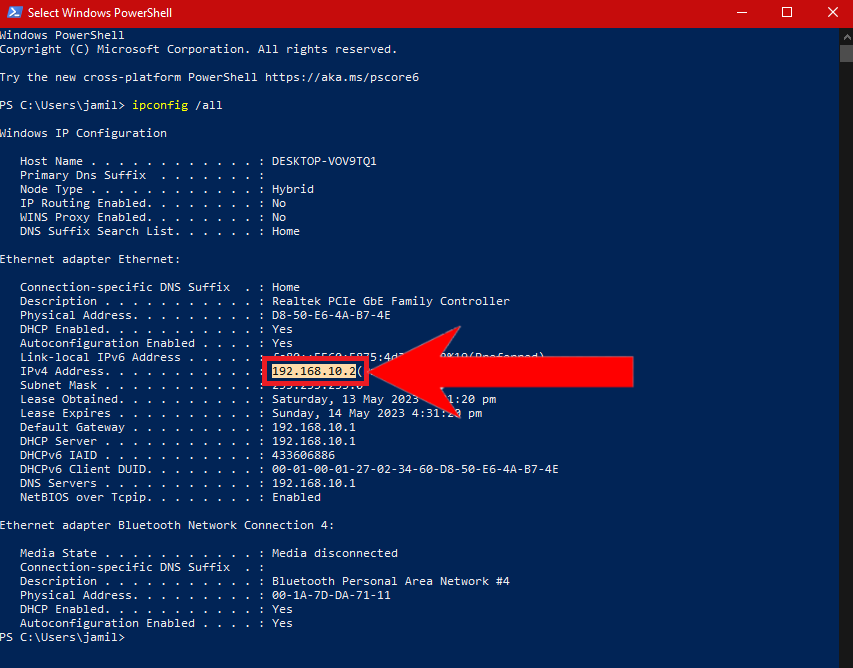
Copy this IP address
Setting Up Sunshine Through the Moonlight App On Your (Client) Mobile Device
Linking the Moonlight app with the Sunshine service on the host PC
Download the Moonlight app for your mobile device (Android or iPhone). Similar to as you’ve done till now, follow the steps below to link the Moonlight app with the Sunshine service on your PC and begin streaming:
- Open the Moonlight app on your mobile device. Straightaway, it will begin searching for your PC.
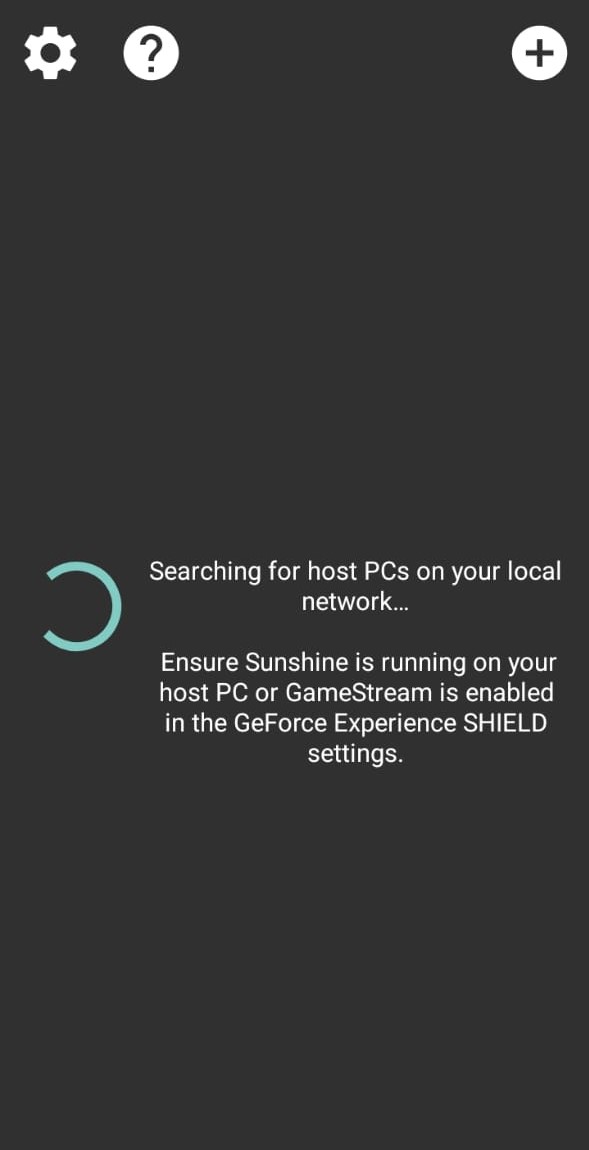
Searching for a host PC - If the host PC has GameStream enabled, the app should pick them up in a matter of few seconds. For AMD and Intel GPU-centric PCs, tap the plus icon on the Moonlight app.
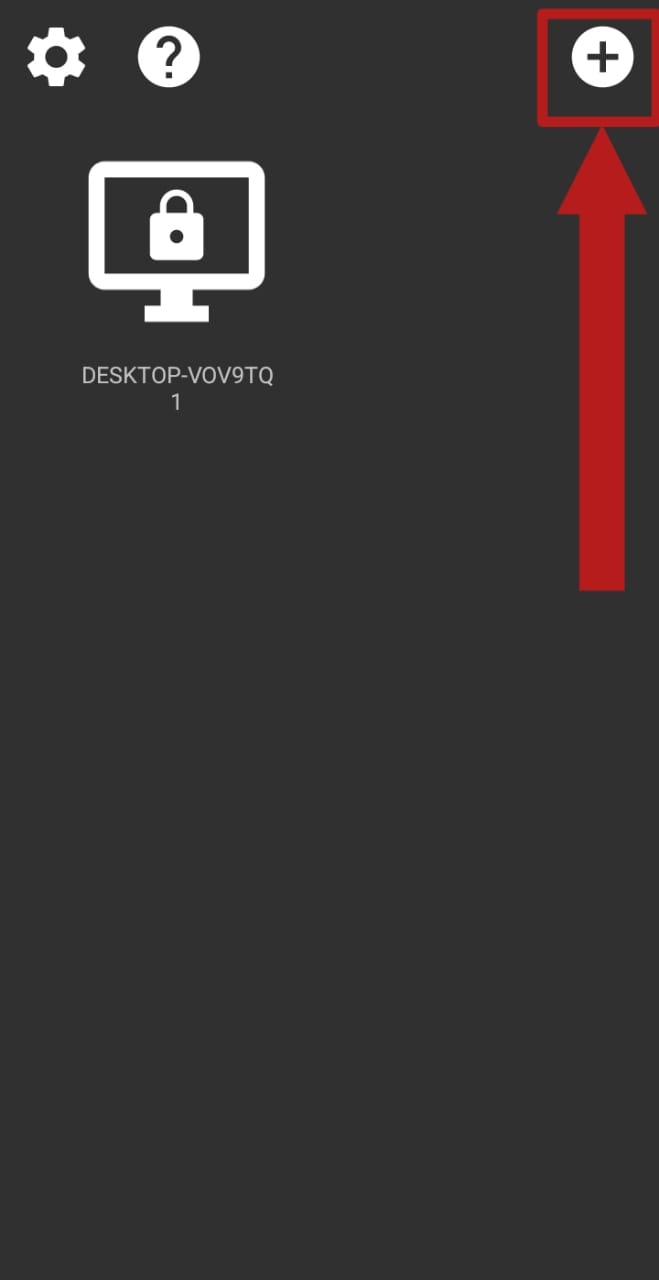
Press the plus icon on the top-right corner - Consequently, it will ask you to enter the IP address of your PC. Enter the IP address we instructed you to copy previously and tap OK.
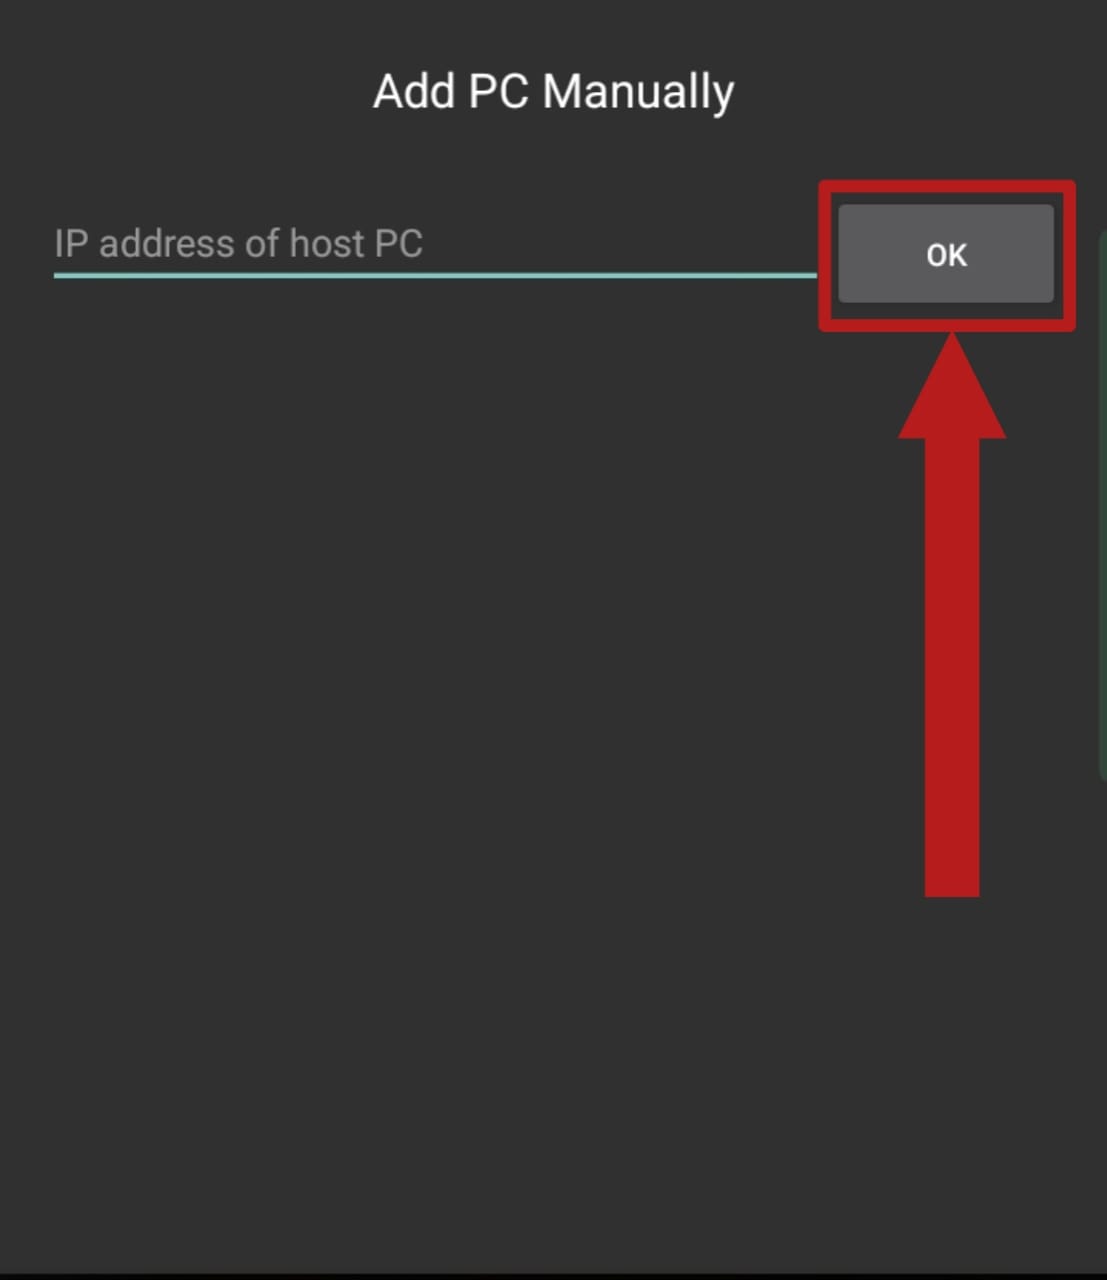
Enter the IP address and press OK - Consequently, your PC will be added in the list of available devices. Select your PC.

Select your PC - Next, it will display a PIN and instruct you to enter it on the web UI of Sunshine. On your host PC, open the Sunshine web UI as you did previously.
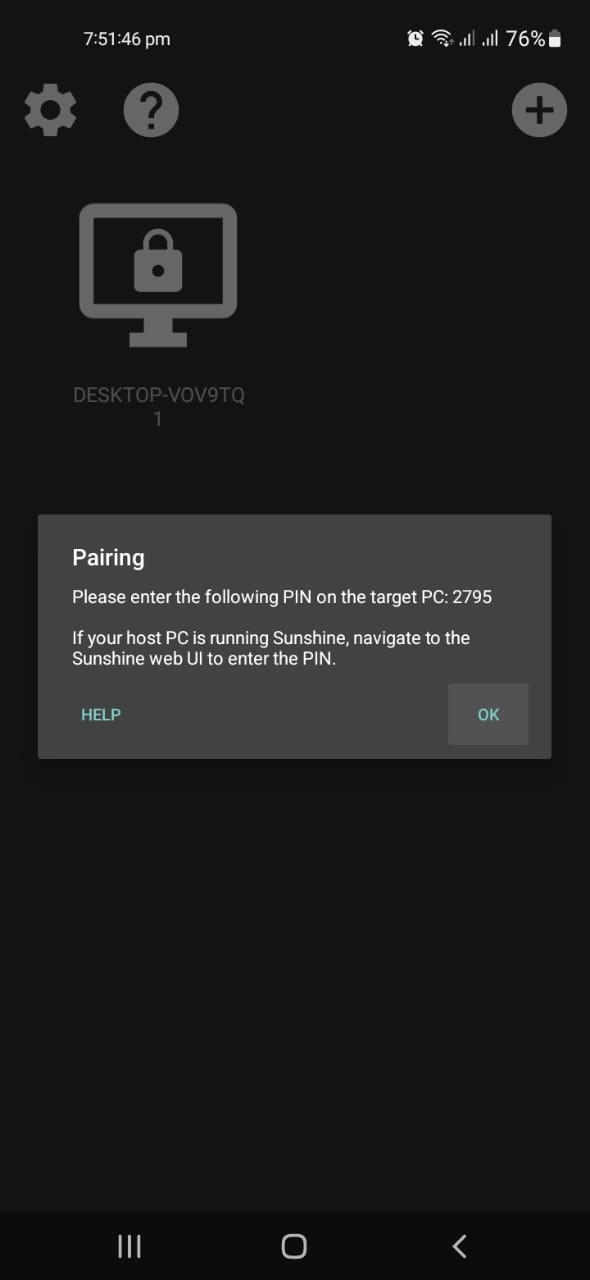
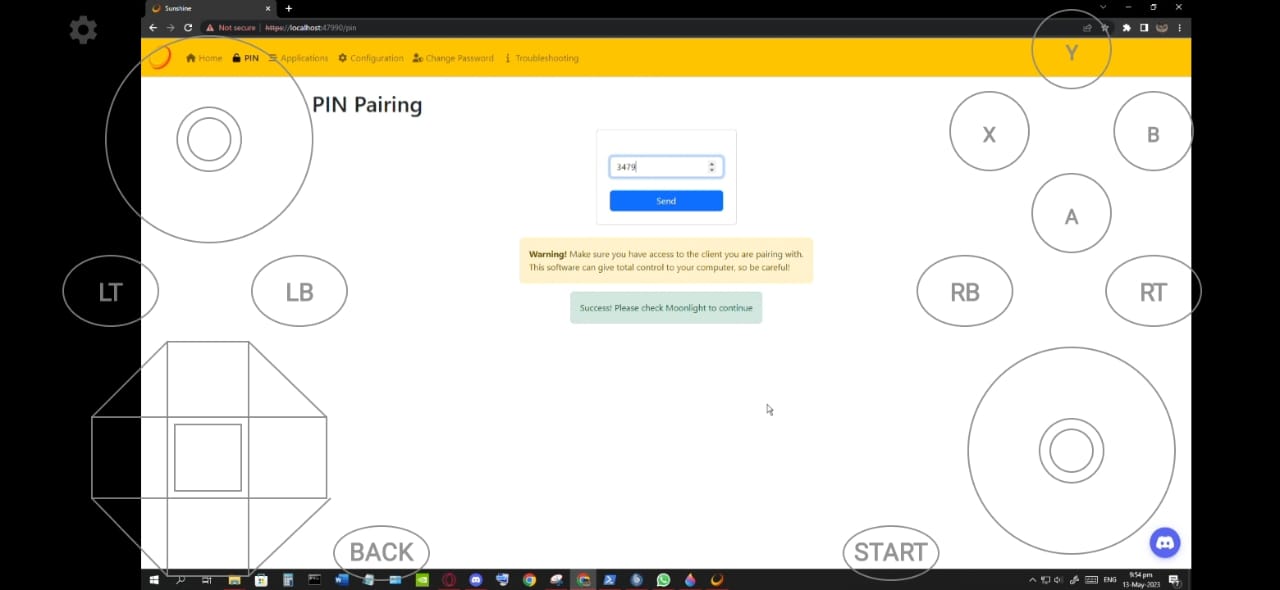
Note this PIN - Navigate to the PIN section. Enter the PIN shown to you earlier. You’ll have to do this quickly.
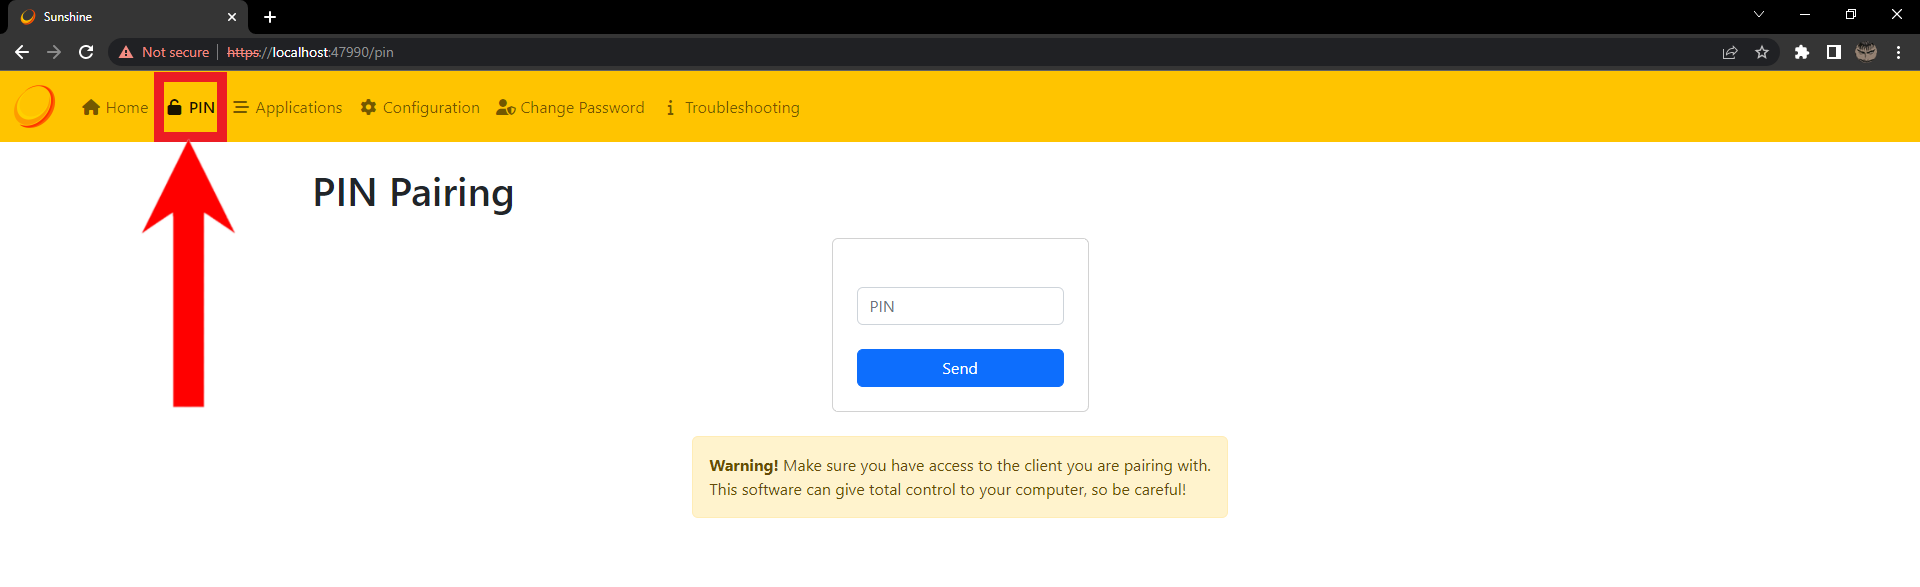
Navigate to the PIN section - Hit Send when you’ve entered the PIN.

Hit Send when you’ve entered the PIN - Your mobile device should be connected to your host PC now.

The Moonlight app will now be connected to your Sunshine service
Streaming to your device
To begin streaming, simply select any one of the options shown to you.
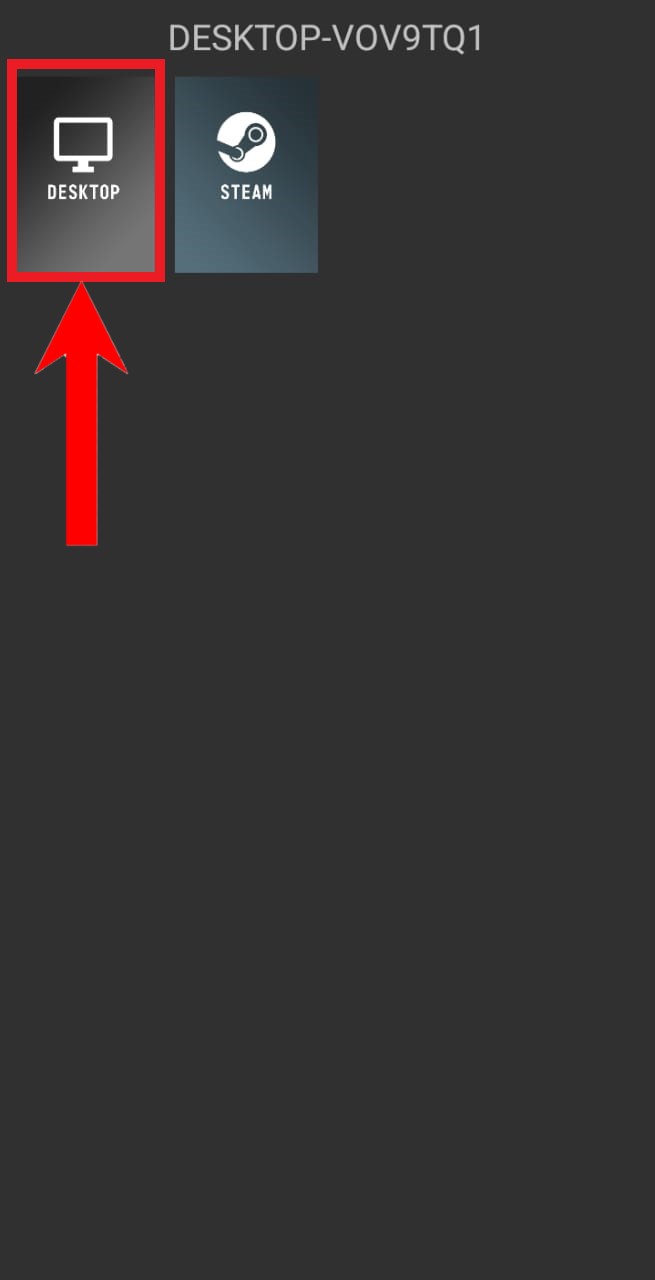
If you’ve chosen Desktop, you can stream any app you want. In the event that you choose Steam, you can stream any of Steam apps and games, along with the Steam store itself.
Troubleshooting
As is true with every piece of software, you can face issues while streaming with Sunshine. The most common of all will be an error where you successfully connect to the host PC but get no video signal. This usually happens after a system restart but can occur randomly as well. Thankfully. it’s a pretty easy fix.
The reason for this issue is a change in the display’s output name. To solve this issue, we basically repeat the Output Name step to find out the new name and replace it:
- Go to your Sunhine root folder, right-click while holding Shift and select “Open a Powershell window here.”
- Paste this command: tools\dxgi-info.exe and hit Enter. Afterwards, simply copy the display’s Output Name.
- Now, go to your Sunshine local host in your browser and log in.
- Once in, click on the Configuration button at the top and go to the Audio/Video tab.
- In here, look for the “Output Name” field and paste the copied name here.
- Hit Save and then hit Apply, and that’s it.
Another batch of common errors are when you get a port-forwarding error message and fail to connect altogether. All you need to do here is restart your Moonlight app. Close it and clear it from your recents, then relaunch it. If that doesn’t work, then restart your phone and you should be good to go.
READ MORE: The Ultimate Guide to Vimm’s Lair – Classic Games & ROMs ➜
The Future of Mobile Gaming
Sunshine not only demonstrates the immense potential of mobile gaming but also offers a en enticing peek into its future. Although mobile devices may not yet match PCs in terms of power and thermal capabilities, streaming PC games to mobile platforms while the PC shoulders the processing load is truly revolutionary, paving the way for further breakthroughs.
With Sunshine, you can even stream games remotely, as long as your home PC is switched on. To learn more about the endless possibilities Sunshine brings to the table, check out the full documentation here. Happy streaming!
Reviewed by Huzaifa Haroon