Fix: ‘Windows Subsystem For Linux has no Installed Distributions’ Error
Bash is a Unix Shell and a form of a command language that was first introduced in 1989. It has been widely distributed as the default Login shell for Linux and MacOS. Although it is mostly seen in Linux and Marcos, there is a version that can be installed on Windows 10. However, a lot of complaints have been coming in of users who are unable to use Bash on Windows 10 and a “Windows Subsystem For Linux has No Installed Distributions” error is seen while trying to do so.

What Causes the “Windows Subsystem For Linux has no Installed Distributions” Error?
After receiving numerous complaints from multiple users, we decided to investigate the issue and devised a set of solutions that fixed the error for most of our users. Also, we looked into the reasons due to which this error is triggered and listed them below.
- Missing Distributions: Upon installing bash for Windows, there are certain additional files that need to be installed for the Windows Subsystem. If these files can’t be downloaded automatically from the Microsoft Store, this error is triggered.
- Disabled Service: In certain cases, the LxssManager service that is usually running in the background might be blocked after a recent update. This can prevent the operating system from acquiring all the necessary files in order to run the bash shell which might trigger the error.
- Wrong Default Distribution Selected: If Ubuntu hasn’t been selected as the default distribution for the operating system it might trigger this error. Because Ubuntu is an essential distribution for running the bash shell.
Now that you have a basic understanding of the nature of the problem, we will move on towards the solutions. Make sure to implement these in the specific order in which they are presented to avoid conflict.
Solution 1: Installing Distributions Manually
If certain distributions cannot be downloaded and installed automatically, we can try to install them manually through the command prompt. Therefore, in this step, we will be running a command to install essential distributions. For that:
- Press the “Windows” + “R” buttons simultaneously to open the Run prompt.
- Type in “cmd” and press “Shift” + “Ctrl” + “Enter” to grant the administrative privileges.
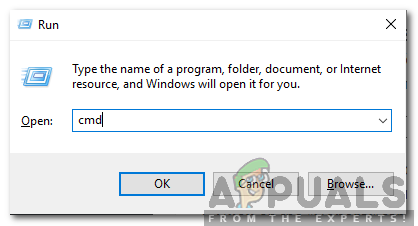
Typing cmd in the Run Prompt and pressing Shift + Alt + Enter to open an elevated Command Prompt - Type in the following command and press enter.
lxrun /install

Initiating Lxrun /install command Note: Try running this command in Powershell if it doesn’t work in Command Prompt.
- This will trigger the download from the Microsoft Store, press “Y” to initiate the downloading process if asked by the command prompt.
- Check to see if the issue persists.
Note: This command can also be executed on the Power Shell (Administrator). But if it isn’t recognized, download and install Ubuntu from the Microsoft Store and try running the command.
Solution 2: Wait for 10 Minutes
For some users, the problem fixed itself after 5 to 10 minutes. Often after a reboot, certain processes and services take some time to start. Due to this, the error might be triggered if you try to run bash too soon after the startup. Therefore, it is recommended to wait for at least 10 minutes after booting up your computer before you proceed with the steps below.
Solution 3: Installing Ubuntu
If Ubuntu hasn’t been installed on your computer, it can trigger this error because it is a very important distribution that is required in order to run bash. In order to download and install Ubuntu follow the steps below.
- Restart your computer and log in to your account.
- Click on this link to open the download page.
- Click on the “Get” option and then select the “Open Microsoft Store” option.

Clicking on the “Get” option - Once Microsoft Store loads up, click on the “Get” option to begin downloading the Ubuntu Distribution.
- Once the downloading process finishes, click on the “Install” option that appears in place of the “Get” option.
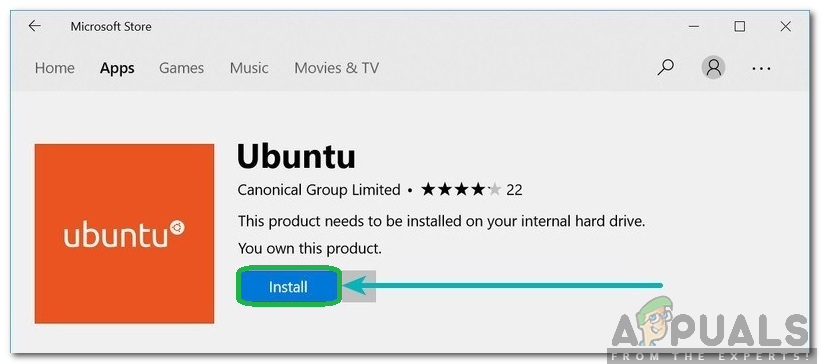
Clicking on the “Install” option - Ubuntu will now be installed on the computer.
- Check to see if the issue persists.
Solution 4: Starting LxssManager Service
It is possible that the LxssManager Service has been disabled due to which this error is triggered. Therefore, in this step, we will be manually starting the LxssManager Service. For that:
- Press “Windows” + “R” keys simultaneously to open the Run prompt.
- Type in “Services.msc” and press “Enter“.
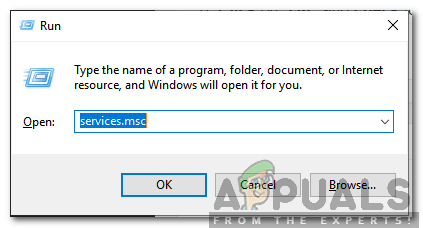
Typing in “Services.msc” and pressing Enter - Scroll down and double click on the “LxssManager” service.
- Click on the startup type dropdown and select “Automatic“.
- Click on the “Start” option and select “Apply“.
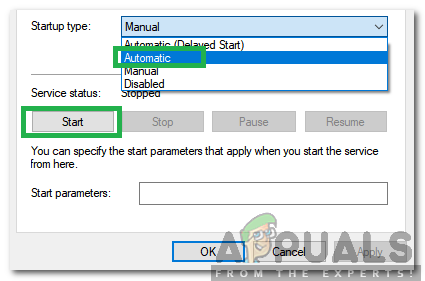
Selecting Automatic as the startup type and pressing enter - Click on “OK” and check to see if the issue persists.


