How to Fix the Rainbow Six Siege Voice Chat not Working on Windows?
Rainbow Six Siege is an awesome tactical multiplayer shooter developed and published by Ubisoft. Its focus on environmental destruction and cooperation between team members has launched it to success but many users have failed to enjoy the tactical advantage of using voice chat as it simply doesn’t work in the game.
There have been many different methods players have used to resolve the problem over the years and we have decided to gather the most helpful ones and provide step-by-step instructions. Follow them below carefully and the problem should be gone in no time!
What Causes Voice Chat Not to Work in Rainbow Six Siege?
This problem has quite a long list of possible causes which can be attributed to it. We recommend you check out the causes to identify your scenario and possibly resolve the problem faster than usual. Check out the full list below!
- No default recording device – A single recording device needs to be selected as default on your computer. This will signalize the game which device to access and the problem should cease to appear.
- Antivirus issues – Some antivirus tools may prevent the game from accessing your hardware and you might need to add it to the list of exceptions to resolve the problem.
- Audio drivers – Your currently installed audio drivers may be too old or corrupt. This can cause all sorts of audio issues and we highly recommend you update them as soon as possible.
- Asus Sonic Studio – This is a program that was reported to not work well along with the game’s voice chat settings so we recommend you simply uninstall it if you are not dependent on it.
- DNS address – This might seem weird but changing the default DNS address your computer uses managed to resolve the problem for many users!
Solution 1: Choose a Default Recording Device
Many users have reported that the problem was caused by the fact that no device was selected as the default recording device. You can resolve that quite easily and that is what makes this method so useful. It will only take a minute and it has a great chance in resolving your problem in an instant. Follow the steps below to choose the default recording device!
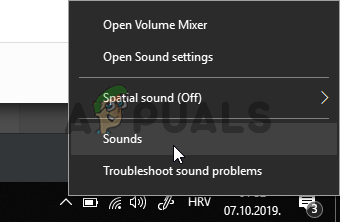
- Right-click the speakers icon at the bottom right part of your screen. It’s located at the system tray at the right part of your taskbar. Choose Sounds from the context menu which will appear.
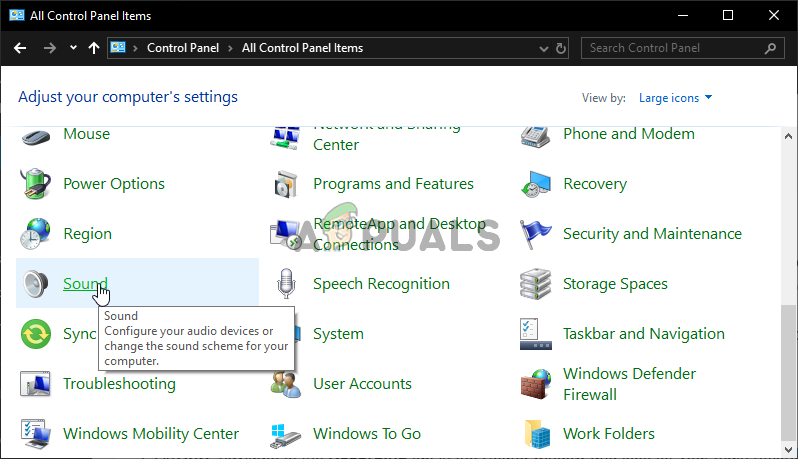
- Alternatively, you can use the Win Key + R key combination to open the Run dialog box. Inside the box, type “control” and click the OK button to open the Control Panel. Even more easily, you can simply search for Control Panel with the Start menu open.
- Once inside Control Panel, change the View by option to Large or Small icons at the top right part of your screen. Scroll down until you reach the Sounds option inside. Left-click to open it.
- Anyway, navigate to the Recording tab in the Sound window and look for your main recording device. It should have a green checkmark at the bottom right part of its icon. Left-click to select it and click the Set Default button below. Click OK to confirm your changes and check to see if voice chat starts working in Rainbow Six Siege!
Solution 2: Add Rainbow Six Siege as an Exception in Your Antivirus
Users have reported having antivirus issues regarding the game. Of course, the game is not malicious but that is something quite difficult to prove to security software. However, uninstalling it should be the last resort. Before that, you can add an exception for the game’s executable or folder and your antivirus should allow it through each time it runs. Follow the steps below and check to see if that managed to resolve your problem!
- Open the antivirus client by double-clicking its icon available at the system tray (right part of the taskbar at the bottom of the window) or by searching for it in the Start menu or after opening Search/Cortana.
- The Exceptions or Exclusions option is located in different places when it comes to different antivirus tools. It can often be found easily without much hassle but here are some quick steps on how to find it in the most popular third-party antivirus tools:
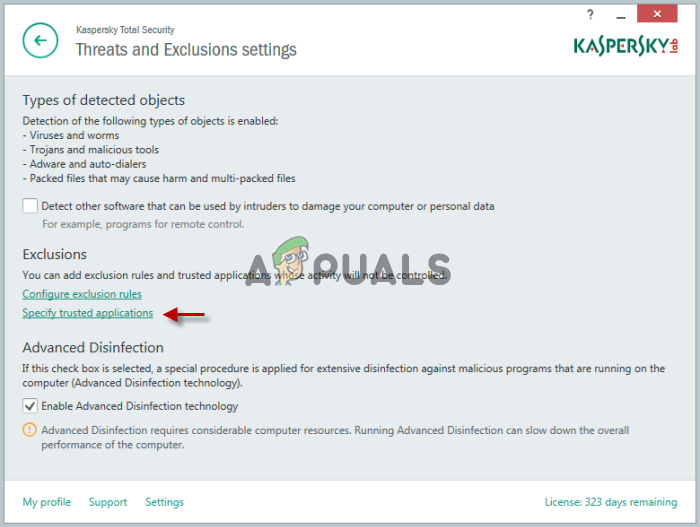
Kaspersky Internet Security: Home >> Settings >> Additional >> Threats and Exclusions >> Exclusions >> Specify Trusted Applications >> Add.
AVG: Home >> Settings >> Components >> Web Shield >> Exceptions.
Avast: Home >> Settings >> General >> Exclusions.
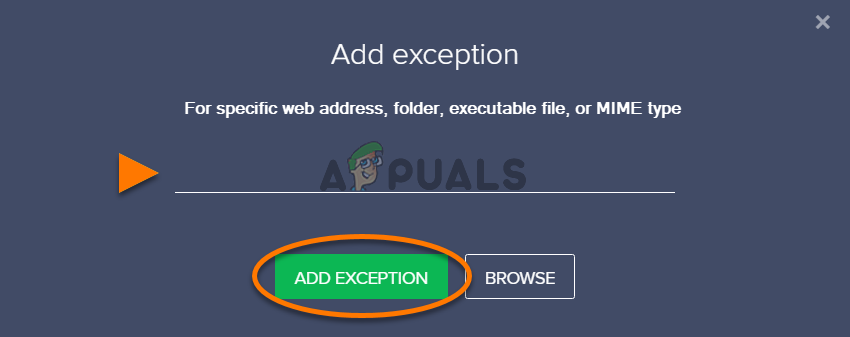
- You will need to add the Rainbow Six Siege executable or folder in the box which will appear prompting you to navigate to the game. The executable should be in the same folder where you decided to install the game. By default, it’s:
C:\Program Files (x86)\Steam\steamapps\common
- Check to see if you are now able to play the game and use voice chat properly. If it still won’t work, try restarting your computer and try again. The last step would be to uninstall the antivirus and try a different one if the problem keeps appearing.
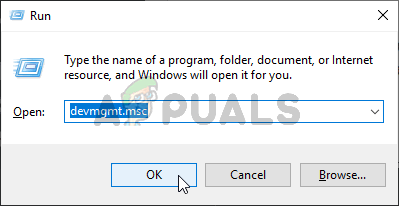
Solution 3: Reinstall Audio Drivers and Update Them to the Latest Version
Such microphone issues are quite often caused by audio device drivers and you should consider updating them, especially if you haven’t done that in a while. This way, you can uninstall the current drivers that may be causing this problem and install fresh, new drivers that might not cause this error to appear. Make sure you follow the steps below!
- First of all, you will need to open the Device Manager. Tap Windows Key and R keys at the same time and type “devmgmt.msc” in the box which will appear to open the Device Manager.
- You can also search for the Device Manager by clicking the Start menu button at the bottom-left part of the screen, the Windows key or the Search/Cortana Simply type “Device Manager” afterward and left-click the first result.
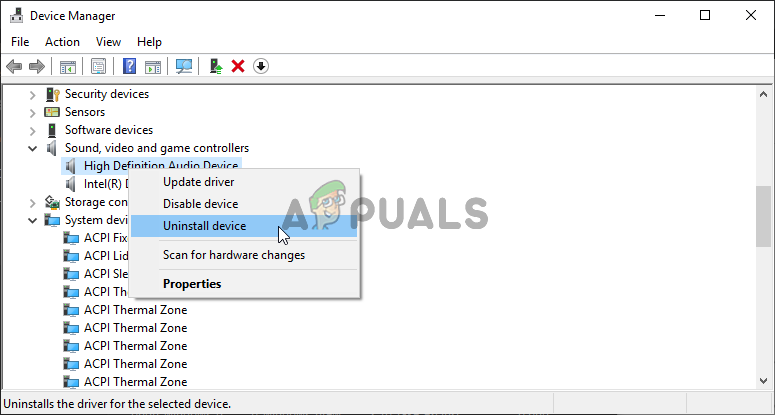
- After that, expand the Sound, video and game controllers section, right-click your main audio device, and choose the Uninstall device option from the context menu which will appear. Also, make sure you confirm any prompts asking you to confirm your choice.
- You can now visit your manufacturer’s website and look for drivers manually. Enter the required data about your computer and your operating system, and download the latest driver. Run the installer on your computer, follow the instructions on-screen, and that’s it.
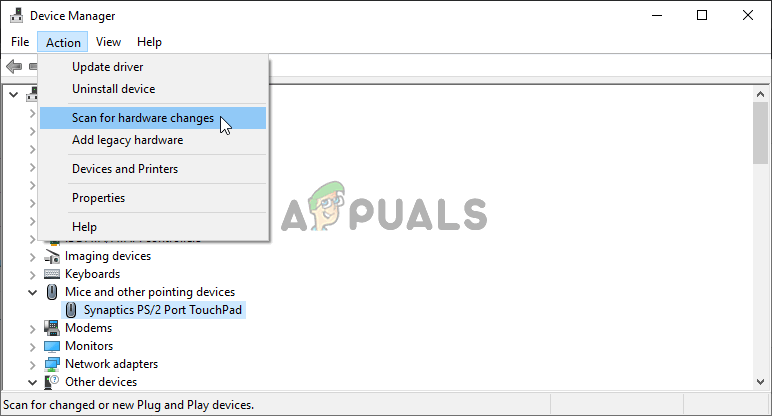
- Alternatively, you can simply click the Action option at the menu bar at the top of the window and choose the Scan for hardware changes option inside. It will find that you have uninstalled a driver and the latest one found by Windows will be installed automatically.
- Reopen Rainbow Six Siege and check to see if voice chat has started working!
Solution 4: Update Windows to the Latest Version
There are pros and cons when it comes to Windows Update. It often breaks as many things as it’s able to fix. In this particle scenario, Windows Update is seen as a savior as many users were able to resolve the problem simply by downloading and installing the latest updates to Windows 10. Make sure you follow the steps below to do the same and, hopefully, resolve the problem.
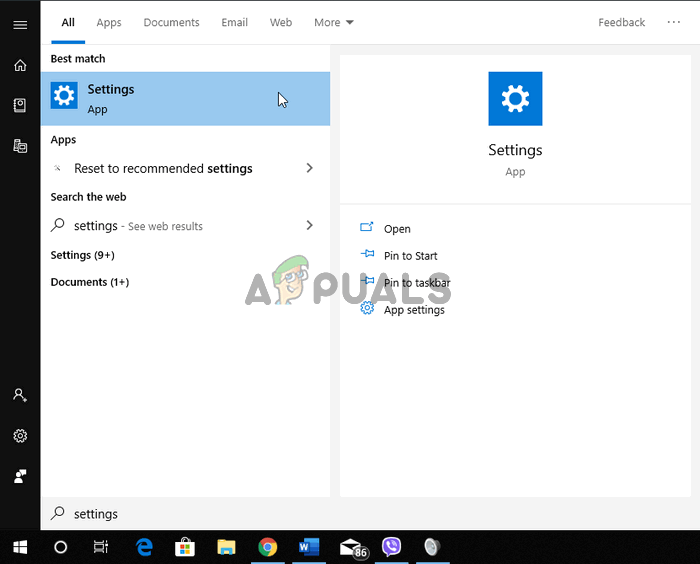
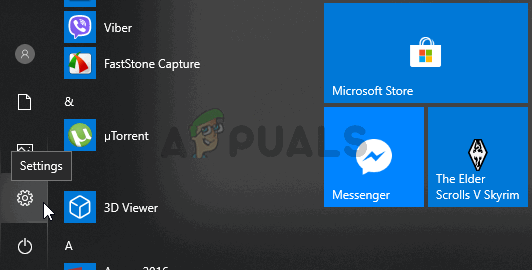
- Open Settings by clicking the Start menu button and click the cog icon in the bottom left corner. Alternatively, you can simply search for Settings in the Start menu or use the Windows Key + I key combination.
- Inside the Settings app, click to open the Update & Security Make sure you stay in the Windows Update tab. If no updates are being displayed inside, click the Check for updates button to look for more.
- If there are updates ready to be installed or if the search from Step 2 find a new version of Windows to update to, its description should be available below, along with the Download and install now

- Click this button and wait for windows to finish downloading and installing the update. You will probably need to restart your computer to complete the download. Check to see if the problem is resolved afterward!
Solution 5: Uninstall Asus Sonic Studio
If you are an Asus user and if you have this program installed on your computer, you should consider uninstalling it. It’s an audio manager for Asus devices and many users have reported voice chat problems with Rainbow Six Siege with this program installed. Follow the instructions below to uninstall it completely!
Windows 10:
- Open Settings by clicking the Start menu button and click the cog icon in the bottom left corner. Alternatively, you can simply search for Settings in the Start menu or use the Windows Key + I key combination.
- Once inside, click to open the Apps section which should immediately list all programs you have installed on your computer. Locate the Asus Sonic Studio entry in the list, left-click its entry once, and select the Uninstall button which will appear.
- Follow the instructions which will appear on the screen in order to complete the uninstallation wizard.
Other versions of Windows:
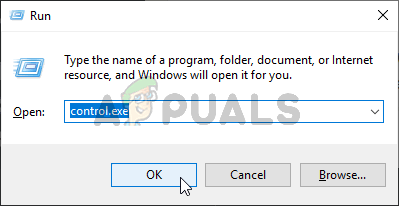
- On other Windows versions, you can use the Win Key + R key combination to open the Run dialog box. Inside the box, type “control.exe” and click the OK button to open the Control Panel. Even more easily, you can simply search for Control Panel with the Start menu open.
- Once inside Control Panel, change the View by option to Category at the top right part of your screen. Click the Uninstall a program button under the Programs section in Control Panel.
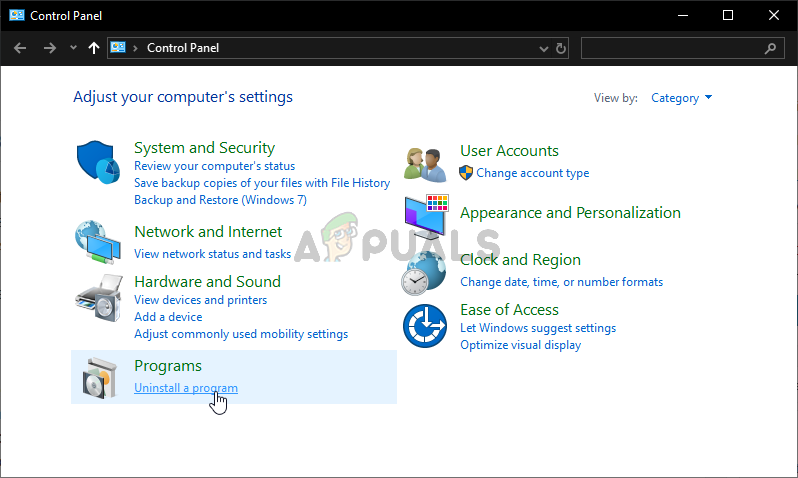
- Locate Asus Sonic Studio in the list of installed programs on your computer, left-click to select it, and click the Uninstall button from the menu above. You can also right-click its entry and choose Uninstall from the context menu which will appear.
- Once again, follow the instructions on-screen to uninstall it and check to see if voice chat has started working while playing Rainbow Six Siege.
Solution 6: Edit the Configuration File
If you are unable to resolve the problem in-game or by any of the methods we have presented above, there is an easy way to attempt a solution by simply editing a configuration file located in your Documents folder. This should reset the voice chat capture mode and you should be good to go. Make sure you follow the instructions below carefully!
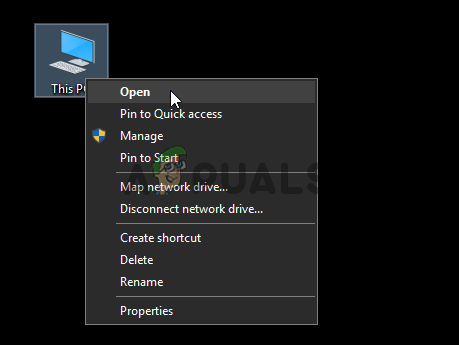
- Make sure the game is closed before proceeding! Locate the This PC entry on your Desktop and double-click to open it. Alternatively, you can simply open a folder on your computer and left-click This PC from the navigation menu at the left side of the folder window.
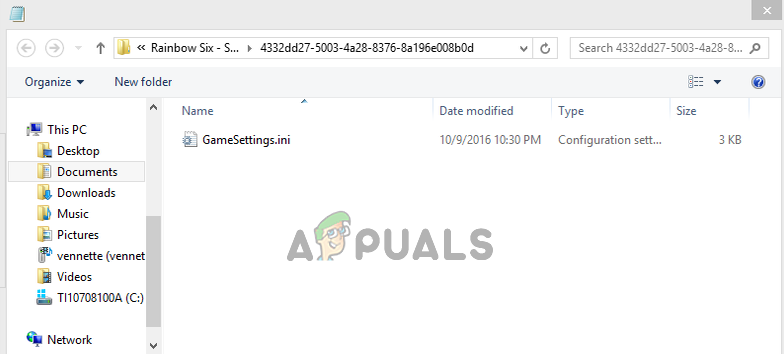
- Anyway, under the Devices and drives section inside This PC, make sure you double click your Local Disk (C:) Navigate to Users >> YourUserName >> Documents >> My Games >> Rainbow Six – Siege.
- Once inside the Rainbow Six – Siege folder, make sure you open the folder named like your UplayID. It might be a seemingly random string of letters and numbers if you haven’t set up your ID properly. Open this folder.
- Inside this folder, right-click the GameSettings configuration file and choose to open it with a text editor such as Notepad. Other text editors are okay as well.
- After opening it, use the Ctrl + F key combination to open the Find You can also click Edit from the menu bar at the top of the window and choose Find from the menu which will appear.
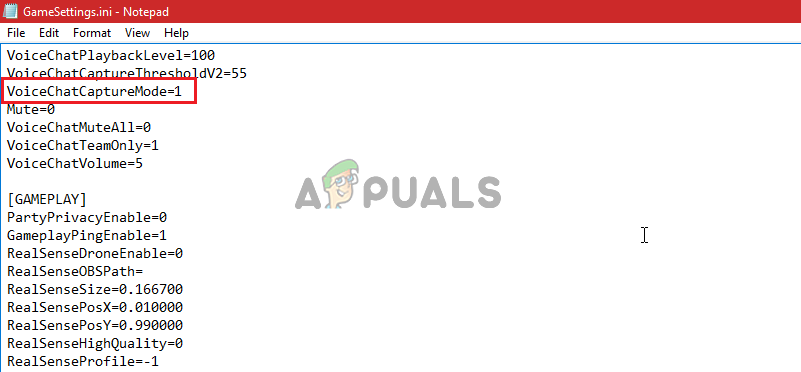
- In the Find what text box, make sure you type “VoiceChatCaptureMode”. Change the number next to this option to 1. Use the Ctrl + S key combination to save the changes or click File >> Save. Reopen the game and check to see if the same problem still appears!
Solution 7: Decrease the Voice Chat Record Threshold
This is a simple in-game setting which was driving players mad for a long time. Basically, if the threshold is set too high, you won’t be able to use voice chat properly. All you need to do to resolve the problem is to decrease the voice chat record threshold by following the steps we have prepared below.
- Open the game by double-clicking its icon on the Desktop. If it’s installed via Steam, open your Steam client from the Desktop or by searching for it in the Start menu or the Search/Cortana window and left-click the first result which will appear.
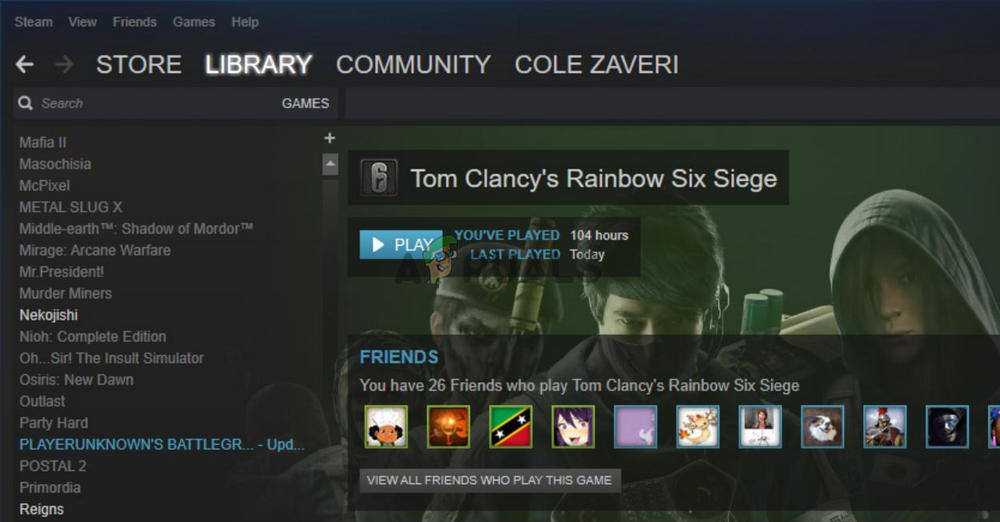
- Once the Steam client opens, click the Library button from the top of the window, right-click the Rainbow Six Siege entry in the list of games you have installed, and choose Play Game from the context menu which appears.
- Once the game’s home screen appears, click the cogs icon at the top right part of the screen and choose Options from the dropdown menu.

- Navigate to the Audio tab inside the options section and look for the Voice Chat Record Threshold Make sure you decrease it from its high value to something around 20. Click the Apply button below and check to see if voice chat has started working properly!
Solution 8: Use Cloudflare’s DNS Address
Changing the default DNS address your computer uses to connect to the Internet with the free one provided by Cloudflare can resolve the voice chat issue with the game. Many users have benefitted from this method and you can easily be one of them if you follow the instructions below!
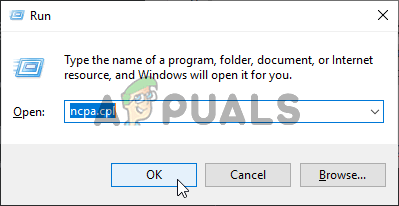
- Use the Windows Key + R key combination to open the Run dialog box. Type “ncpa.cpl” inside the bow without the quotation marks and click OK.
- Alternatively, you can search for Control Panel in the Start menu and left-click the first result. Change the View by option inside Control Panel to Category and click the Network and Internet section to open it.
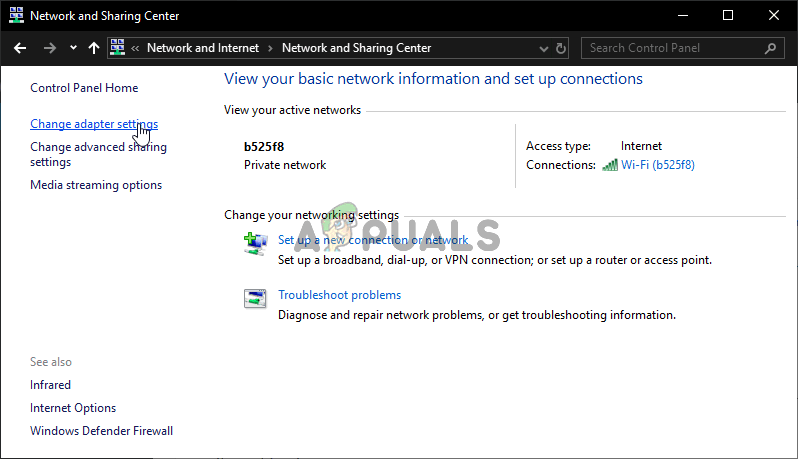
- Once inside, click to open the Network and Sharing Center. From the left-side menu, choose the Change adapter settings
- Anyway, right-click the network adapter you use to connect to the Internet and choose Properties from the context menu which will appear.
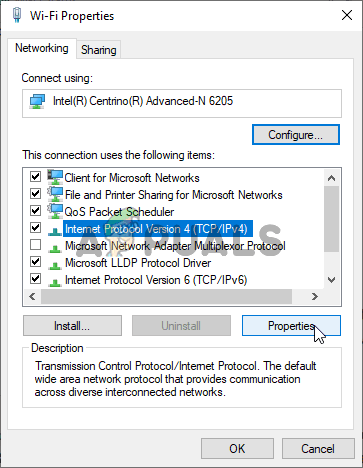
- Locate the Internet Protocol Version 4 (TCP/IPv4) entry in the “This connection uses the following items” list, left-click to select it, and click the Properties button below.
- Change the second radio button to Use the following DNS server addresses. Set the Preferred DNS server to 1.1.1.1 and the Alternate DNS server to 1.0.0.1 and check the Validate settings upon exit box.
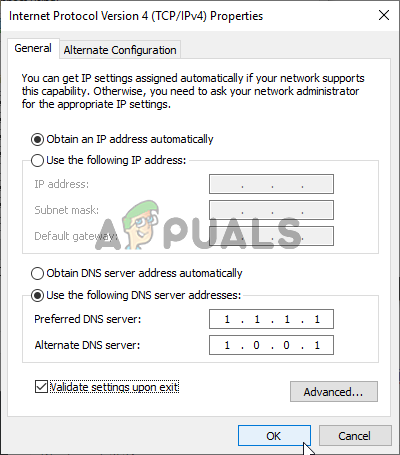
- Apply the changes you have made by clicking the OK button and check to see if voice chat has started working properly!
Solution 9: Enabling Stereo Mix
In some cases, the stereo mix feature from the recording panel might be disabled due to which this error is being encountered. Therefore, in this step, first, we will enable the stereo mix and then change the recording quality of the microphone to work more smoothly with the game. For that:
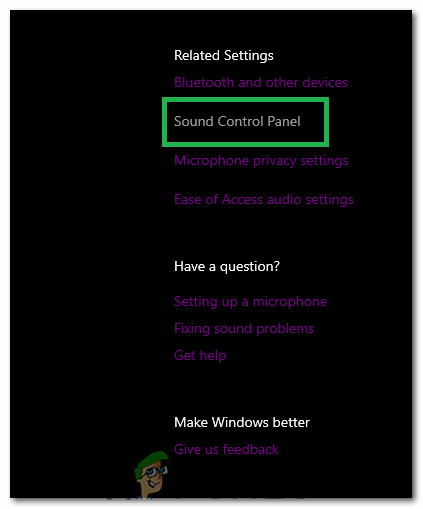
- Navigate to your desktop and right-click on the “Speaker” icon on the bottom right of the system tray.
- Select “Open Sound Settings” and then click on the “Sound Control Panel” button.
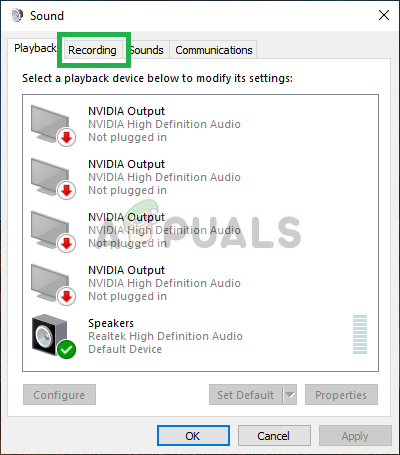
Selecting the “Open Sound Control” Panel option - Once in the sound control panel, click on the “Recording Tab” and in this tab, right-click on the “Stereo Mix” option and select “Enable”.
Clicking on the recordings tab - Now right-click on your microphone in the recording tab and select “Properties”.
- Go to “Advanced’ and click on the “Quality” dropdown.
- From here, select the very first option in the list and then start the game. Start going downwards across the list one by one until you find one that fixes the error.
- Check to see if the issue persists.
Solution 10: Configuring Microphone Privacy
In some cases, the Microphone privacy settings might be preventing it from working during the gameplay. Therefore, in this step, we will be changing some WIndows’ Privacy settings in order to allow the recording of your voice. For that:
- Press “Windows” + “I” to open the settings.
- Click on “Privacy” and then select “Microphone” from the left pane.
- Click on the “Allows Apps to Access Microphone” toggle and then scroll down to allow apps to access your microphone.
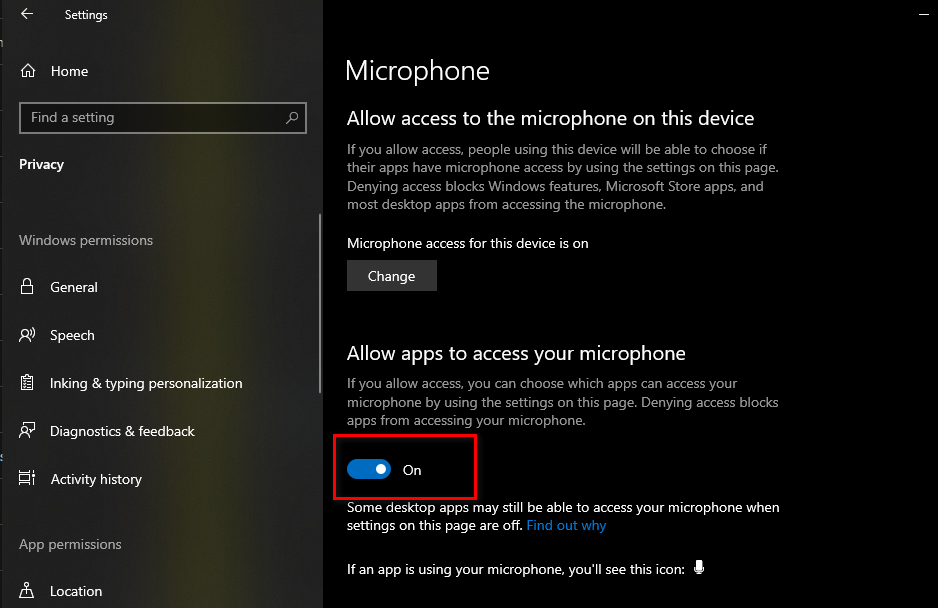
Allowing UWP apps to access the microphone - Turn ON the toggle in front of individual apps as well which you intend to use for VOIP.
- Check to see if the issue persists.
If the issue still persists and you are all that determined to get it fixed, the only workaround left is to perform a reinstall of Windows and check if that fixes your issue.


thx for help, solution 6 helped me