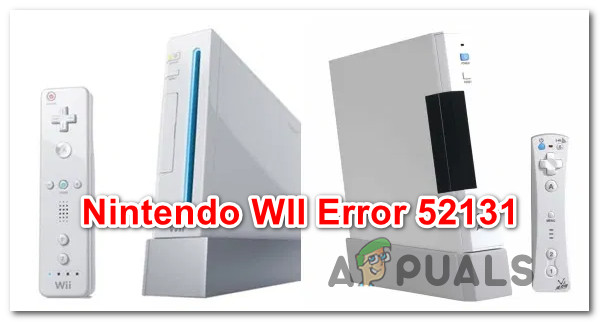
How to Fix Nintendo Error Code 52131
Some Nintendo gamers are reporting that they always end up seeing the error code 52131 when attempting to connect to the internet from their home network. This issue is reported to occur on both Nintendo WII U and the newest Nintendo Switch Model.
After analyzing various user reports, it turns out that there are several different reasons why this issue might occur and all of them are network-related. Here’s a list of potential culprits that might be causing this error code:
- TCP or IP inconsistency – A generic TCP or IP issue related to temporary data assigned to your router might be responsible for your inability to connect your Nintendo console to the internet. In this case, you should start your troubleshooting guide by restarting or resetting your router.
- Wireless interference – As it turns out, some type of network interference can also be responsible for this particular issue when attempting to connect your Nintendo console to the Internet. Several users dealing with the same issue have reported that they were able to fix the issue by changing the default communication channel of their router to either 1 or 11.
- The router is incorrectly placed – Under certain circumstances, you might expect to see this error occurring due to a problematic placement of the router that facilitates a weak signal or some type of interference caused by other electronics. In this case, there are a series of adjustments you can do to your router placement and the wireless devices that you use to make sure your wireless signal is not affected by another signal.
- Bad DNS Range – According to some affected users, a bad DNS range can also be the underlying cause of this particular issue. Some users that found themselves in a similar situation have fixed the issue by migrating their DNS to the range provided by Google.
Now that you are up to speed with every potential culprit that might be causing this error code, here’s a list of methods that should allow you to resolve the 52131 error code:
Method 1: Restart or Reset your Router
Since this issue can be related to a generic TCP or IP issue related to temporary data assigned by your router, you should begin this troubleshooting guide by resetting your router and seeing if this ‘quick fix’ resolves the 52131 error.
If this scenario is applicable, you have 2 different ways of fixing this problem:
- Restart your router – This operation will simply refresh your current IP and TCP data that your router is using (without making any persisting changes that might affect your network interaction). But if the problem is not related to TCP and IP cached data, this method will not do much for you.
- Resetting your router – If the restart procedure ends up being ineffective in your case, resetting your currently saved router settings will revert the device to the factory state (in addition to clearing the cached data). But keep in mind that if your ISP is using PPPoE, this operation will also reset the currently saved credentials.
A. Restarting your Router
You should start with this procedure since it doesn’t run the risk of affecting your immediate access to the Internet. Start with a simple router reboot to clear the currently saved Internet Protocol data and Transmission Control Protocol data.
To perform a reset on your network device, identify the power/switch button on your router (typically located on the back of the device) and press it once to cut off the power. After you do this, go ahead and disconnect the power cable from the power outlet and wait for 1 full minute or more.
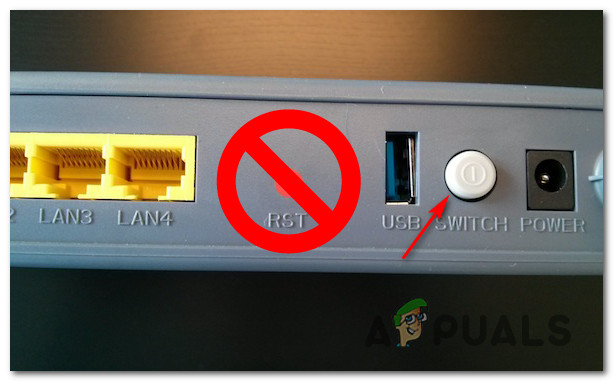
Note: Make sure to disconnecting the power after you turn your router off – It is an essential step since it allows the power capacitors enough time to drain and clear any temp data that they are currently maintaining in between restarts.
If restarting didn’t fix the problem, move down to resetting your network restart.
B. Resetting your Router
If the restart didn’t resolve the issue in your case, the next step is to go for a complete router reset to ensure that no setting or network-related cached data is currently causing the 52131 error.
NOTE: It’s important to understand what this operation will do to your current home router setup. First of all, it will reset your router back to its factory resets, which means that any forwarded ports, blocked items, and any other custom settings.
Furthermore, if your ISP is using PPPoE, a router reset will mean that the currently saved credentials will be ‘forgotten‘ by your network device. Once you go through with the reset procedure, you’ll need to recreate the PPPoE connection from scratch.
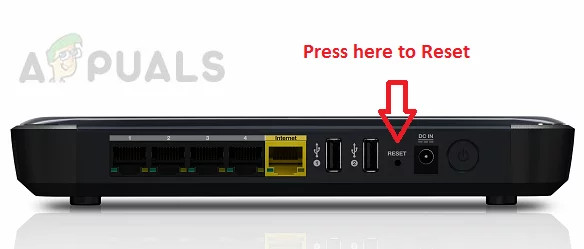
Once you understand the consequences of this operation, you can initiate a router reset by finding the reset button (typically located on the rear of your router). Once you locate it, press and hold on it until you see all the front LEDs flashing at the same time.
After your router is reset, re-establish the internet connection by reinserting the PPPoE credentials supplied by your ISP (if necessary) and see if you are now able to connect your Nintendo console to the Internet.
If you’re still dealing with the same 52131 error, move down to the next potential fix below.
Method 2: Changing your Router’s Channel to 1 or 11
Since the most common reason why this error might occur is some kind of wireless interference, you should advance by changing your router’s channel to a range that is considered safe from interference – Generally, channels 1 and 11 are considered safe since they usually don’t overlap with other channels.
Some users seeing the same 52131 error have reported that the issue was finally resolved after they changed the default router channel and restarted their home network.
If you’re looking for specific instructions on how to do this, follow the instructions below:
- Make sure that your PC is connected to your home network (or the network your Nintendo console is currently connected to).
- Open a web browser and type your router’s IP address into the address bar and press Enter. Typically the address of your router is either 192.168.0.1 or 192.168.1.1.
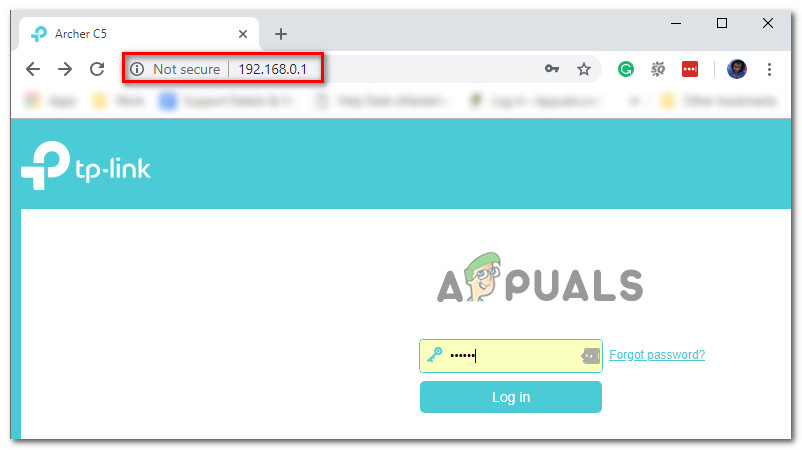
Accessing the router’s page Note: If the two addresses above don’t allow you to access your router, you’ll need to find out the IP address of your router.
- At the login page, insert your credentials to get in. If you haven’t changed the default login, the default username and password should be either ‘admin’ or ‘1234’.
Note: If the default credentials don’t work, look for the correct credentials on the bottom of your router or search online for the login credentials specific to your router. - Once you are successfully signed in to your router settings, look for the Advanced menu.
- Inside the Advanced menu, look for the Wireless Settings and change the current Channel settings from Auto to either 1 or 11 before saving the changes.
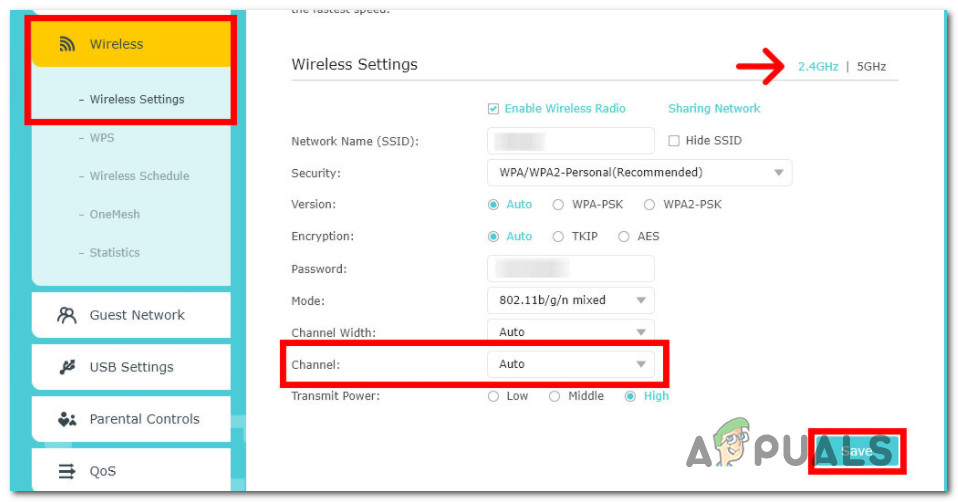
Changing the Channel settings of your Router Note: Keep in mind that if you’re using a dual-band router, you need to adjust the channels for both 2.4 GHz and 5GHz.
- Once you have successfully saved your settings, reboot your router before attempting to connect your Nintendo console to the internet once again.
In case the attempt to connect to the Internet results in the same 52131 error, move down to the next potential fix below.
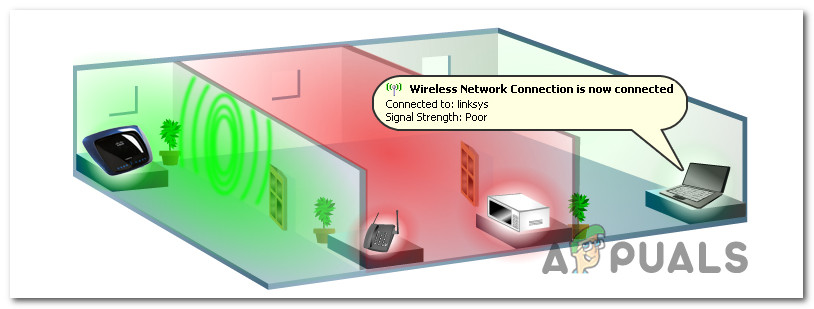
Method 3: Make sure your Router is correctly placed
If you made sure that you are using a non-interoperable channel for your router, the next thing you should do is ensure that your router is correctly located in your house.
Make sure that your router is away from walls and off the floor and placed in a central location. Also, it’s good practice to keep it away from metal objects such as metal filing cabinets which are known to cause interference.
Another potential cause for the 52131 error is noise from cordless devices, phones, and wireless electronics such as wireless keyboards, headphones, or cell phones. Devices using 2.4Ghz frequency are especially prone to causing interference with home routers.
Note: Older microwave models can also cause wireless interference if they are placed in close proximity to the router.
Generally, it’s good practice to avoid electronics that use the 2.4 GHz frequency and instead go for devices that use the 5.8GHz and 900 MHz frequencies.
If you already ensured that your router is correctly placed and you are still seeing the same error when connecting your Nintendo console to your home network, move down to the next potential fix below.
Method 4: Switching to Google’s DNS (Nintendo Switch ONLY)
Some gamers that were encountering this issue on Nintendo Switch have reported that in their case, the error code was resolved and they were able to connect to the internet without issues after they made the switch from the default DNS range to the equivalent provided by Google.
In case the 52130 error is caused by a DNS-related network inconsistency, the instructions below should allow you to rectify the issue and connect to the internet without issues.
Follow the instructions below to make the switch from the default DNS range to the Google equivalent on your Nintendo Switch console:
- At the Home window of your Nintendo Switch console, choose System Settings (gear icon).
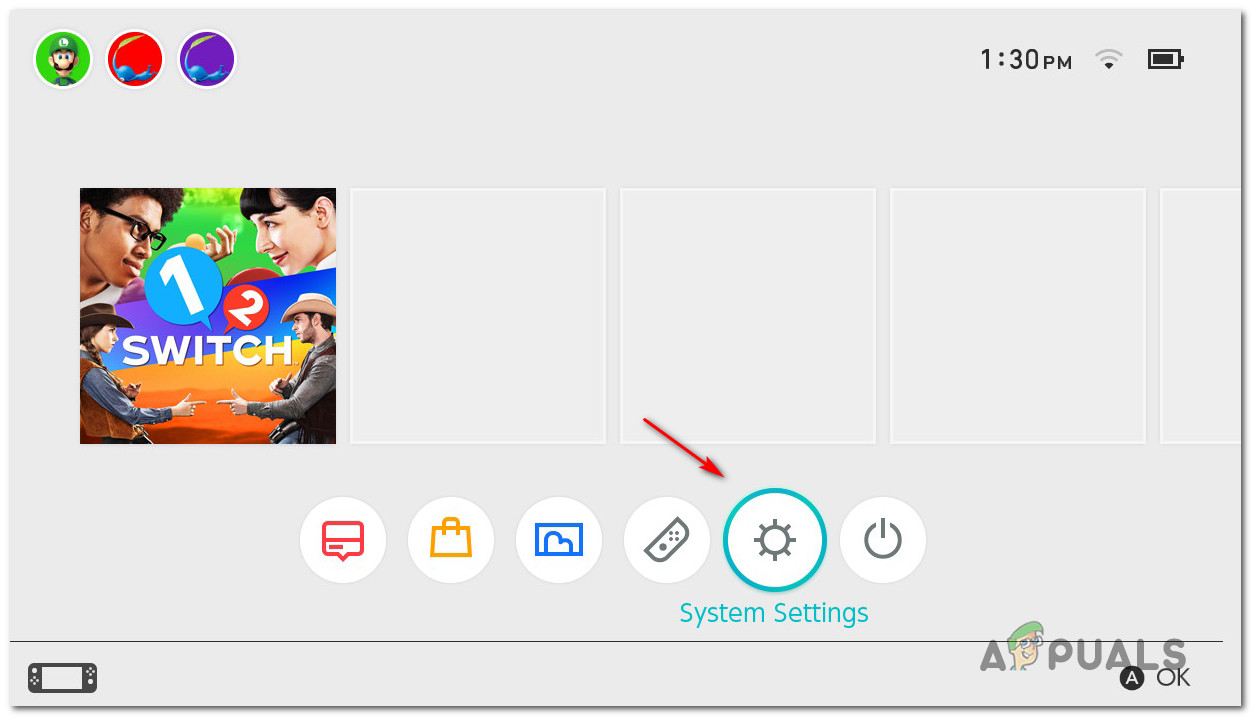
Accessing the System Settings inside Nintendo Switch - Inside the System Settings menu, select the Internet tab from the menu on the left, then go over to the right menu and choose Internet Settings from the list of available options.
- After you do this, your Switch console will begin generating a list with all the available Wi-Fi connections. After the list is fully populated, select your Wi-Fi connection from the list (under Registered Networks).
- Go ahead and select the correct settings, then choose Change Settings and scroll down to the DNS Settings menu.
- From the DNS Settings menu, adjust the menu to say Manual so you can edit the DNS.
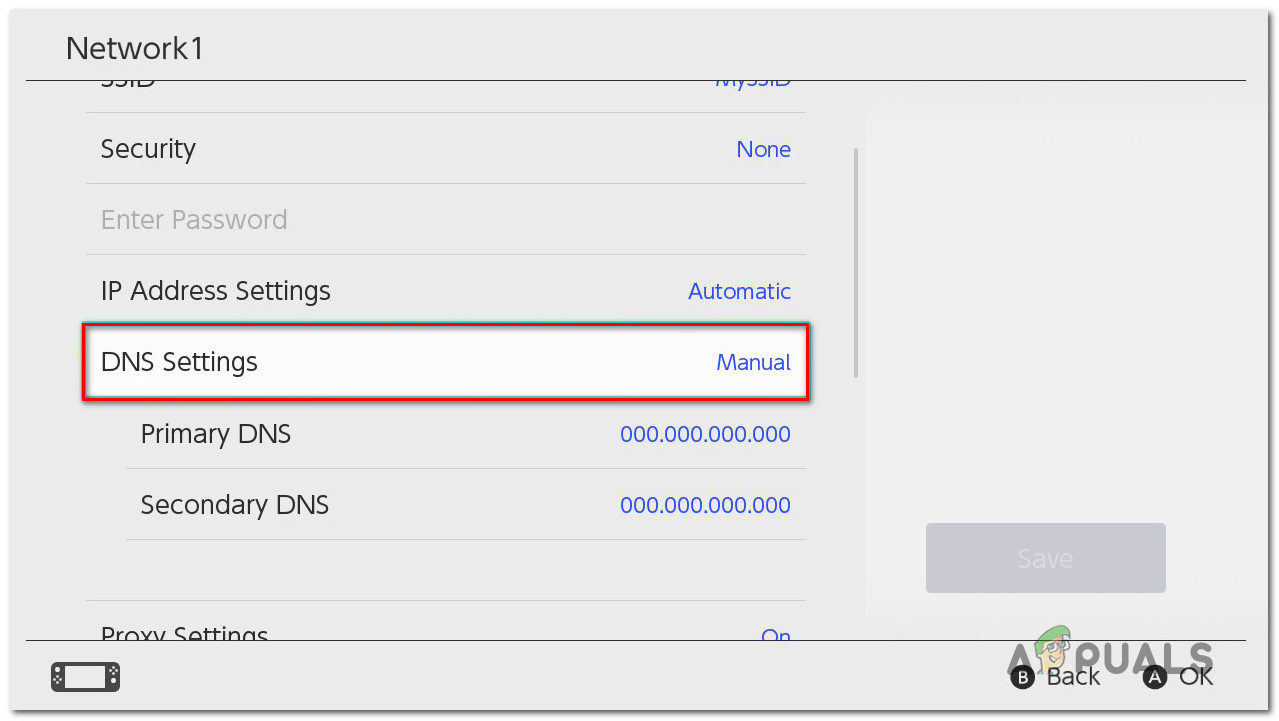
Modify the DNS settings on Switch - Under Primary DNS, press and hold the B button to delete the current value, then add 8.8.8.8 and press A to save the configuration.
- Under Secondary DNS, press and hold the B button to delete the existing Secondary DNS. Next, delete the existing value as you did before and add 8.8.4.4 and press A to save the changes.
- Attempt to reconnect again and see if the connection is successful this time.