[5 Ways to Fix] ‘Headphones not showing up in playback devices’
The problem appears when users connect their headphones to their Windows 10 computer but they are unable to hear sound from them, nor do they appear in Playback Devices. All sound playing on the computer is played through the speaker and the computer doesn’t even seem to register the headphones at all.
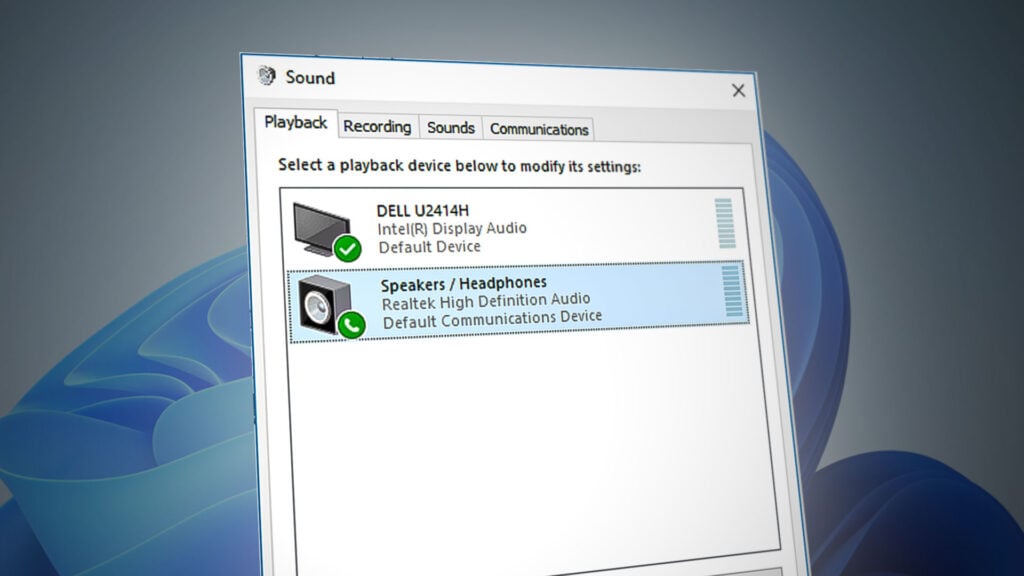
This is quite a common issue in Windows 10 and it can often be resolved easily. Before starting, make sure you know it’s not a hardware issue with the headphones by connecting them to some other device. There are many methods which worked for other users so make sure you follow the instructions we have prepared below.
What Causes Headphones not to Show up in Playback Devices on Windows 10?
The causes of this problem are not numerous and they are usually related to some bugs or non-related activities users may have done. Check out the list below:
- Headphones are disabled by default – Users have reported that they found their headphones disabled in Playback devices so make sure you check there and enable them.
- Realtek HD Sound – For some reason, this sound manager was to blame and the problem went away after users uninstalled it.
- Drivers are old or outdated – Old drivers are always a cause of many problems so consider updating them.
Solution 1: Locate it in Disabled Devices
It’s quite possible that Windows 10 has somehow automatically disabled the headphone sound output as it often considers it unnecessary and it’s never set as default. This is quite a big mistake by Microsoft as hiding the device under Playback devices was definitely unnecessary. Make sure you check whether this is the cause of your problem!
- Right-click on the Volume icon located at the bottom right part of your screen and choose the Playback devices An alternative way would be to open Control Panel on your PC and set the View by option to Large icons. After that, locate and click on the Sounds option in order to open the same window.
- Stay in the Playback tab of the Sound window which just opened up.
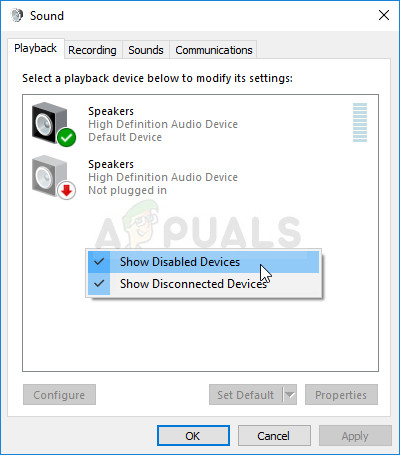
- Right-click anywhere in the middle of the window and check the boxes next to the Show Disabled Devices and Show Disconnected Devices Your headphones should now appear.
- Left-click on the newly appeared headphones and click the Set Default button below which should switch the sound to them as soon as they’re connected.
Solution 2: Uninstall Realtek HD Sound Software
Even though the software is highly appreciated as a great audio manager, users have reported that their headphone only started working after they uninstalled this piece of software. You can try reinstalling if afterward to see if the problem comes back!
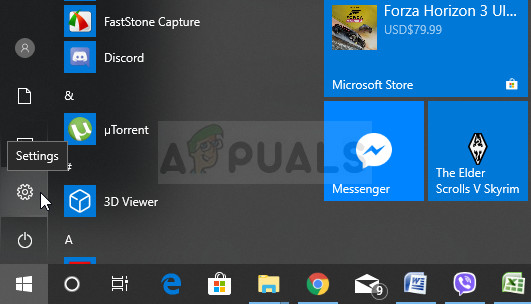
- Click on the Start menu and open Control Panel by searching for it. Alternatively, you can click on the gear icon in order to open settings if you are using Windows 10.
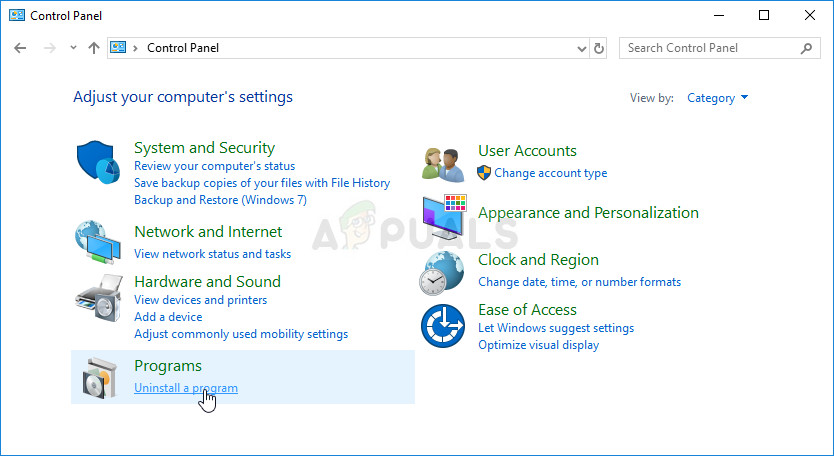
- In Control Panel, select to View as – Category at the top right corner and click on Uninstall a Program under the Programs section.
- If you are using the Settings app, clicking on Apps should immediately open a list of all installed programs on your PC.
- Locate the Realtek HD Audio Manager tool in Control Panel or Settings and click on Uninstall.
- Its uninstall wizard should open so follow the instructions to uninstall it.
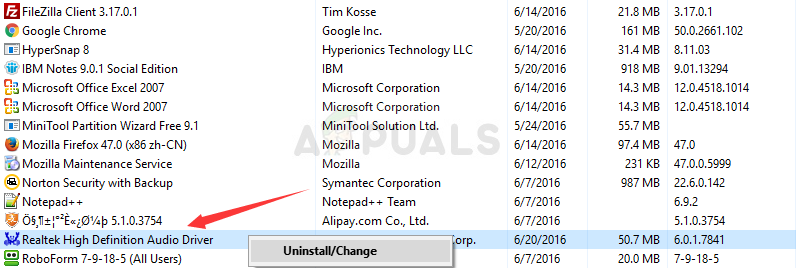
- Click Finish when the uninstaller completes the process and restart your computer to see whether errors will still appear. Make sure you check to see if the problem has disappeared before trying to reinstall Realtek HD Sound!
Solution 3: Change Microphone Settings
Users who have recently installed a microphone or a webcam (with integrated microphone) might have an issue where these devices have been selected as default. By changing certain microphone settings, users have been able to resolve their problem with headphones so make sure you check it out below!
- Right-click on the Volume icon located at the bottom right part of your screen and choose the Recording devices An alternative way would be to open Control Panel on your PC and set the View by option to Large icons. After that, locate and click on the Sounds option in order to open the same window.
- Stay in the Recording tab of the Sound window which just opened up.
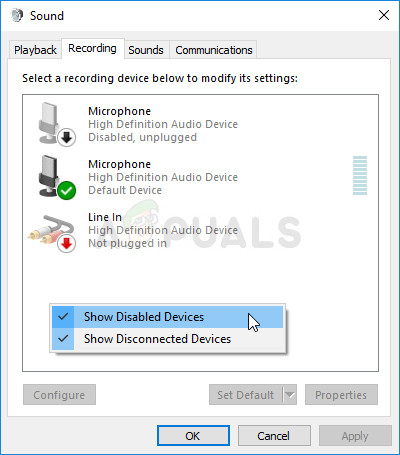
Show disabled recording devices - Right-click anywhere in the middle of the window and check the boxes next to the Show Disabled Devices and Show Disconnected Devices An entry named Stereo Mix should appear.
- Right-click on the newly appeared Stereo Mix entry and click the Enable button below in order to activate it. Left-click it afterward and click the Properties button at the bottom right part of the window.
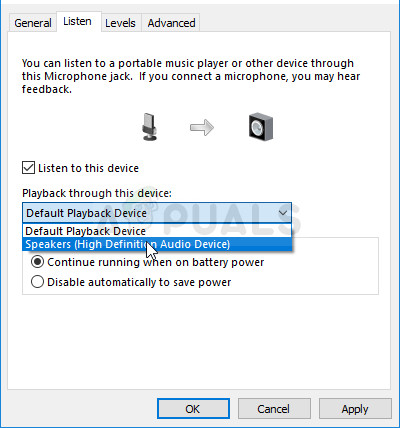
Listen to this device - Navigate to the Listen tab and check the box next to the Listen to this device In the Playback through this device menu, make sure you choose your second audio option (other than headphones) before clicking OK. Check to see if the problem has been resolved.
Solution 4: Update the Drivers for the Device
Updating the driver is a great method for resolving many different problems regarding hardware and this problem is no exception. If none of the methods above were able to help, uninstalling the current driver and replacing it with a newer one should do the trick. Follow the steps below!
- Click the Start menu at the lower-left part of the screen, type in “Device Manager” afterwards, and select it from the list of available results by simply clicking the first one.
- You can also press the Windows Key + R key combination in order to bring up the Run dialog box. Type in “devmgmt.msc” in the dialog box and click OK in order to run it.

- Since you want to update the driver for your headphones, expand the Sound, video and game controllers Right-click on your headphones in the list and choose Update driver from the context menu.
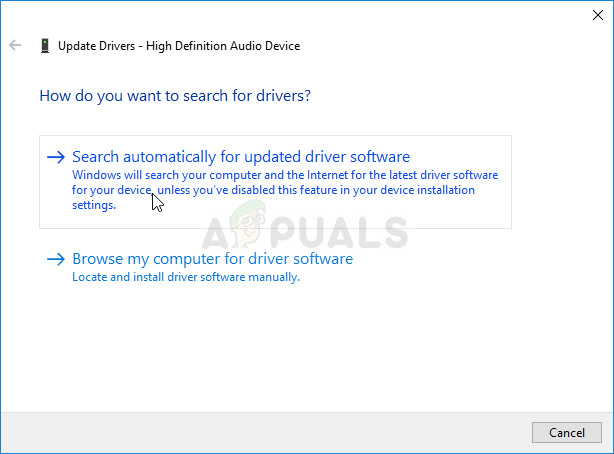
- Choose the Search automatically for updated driver software option from the new window and wait to see if the utility is able to find newer drivers.
- Check to see if your headphones appear under Playback devices in sound settings!
Solution 5: Run the Built-in Audio Troubleshooter
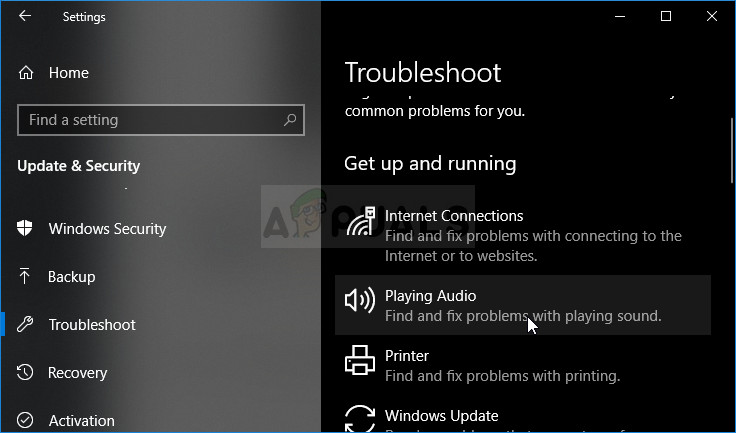
This solution was suggested by a Microsoft professional and it helped plenty of people, unlike other generic responses users usually receive. This solution is quite helpful as you will run the in-built Playing Audio troubleshooter which will try to identify and solve the error. Follow the instructions carefully:
- Search for Settings in the Start menu and click on the first result which pops up. You can also click directly on the cog button at the lower left part of the Start menu or you can use the Windows Key + I key combination.
- Locate the Update & security section at the bottom part of the Settings window and click on it.
- Navigate to the Troubleshoot tab and check under the Get up and running
- Playing Audio troubleshooter should be right there at the bottom so make sure you click on it and follow the instructions on screen.
- Check to see if the problem has been resolved and if your headphones appear under Playback Devices!


