How to Fix 0x0000007F BSOD (Blue Screen of Death)
This 0x0000007F BSOD (Blue Screen of Death) is reported to appear at random intervals with no apparent trigger. This problem is only reported to occur on Windows 7, Windows 8.1, and Windows Server.
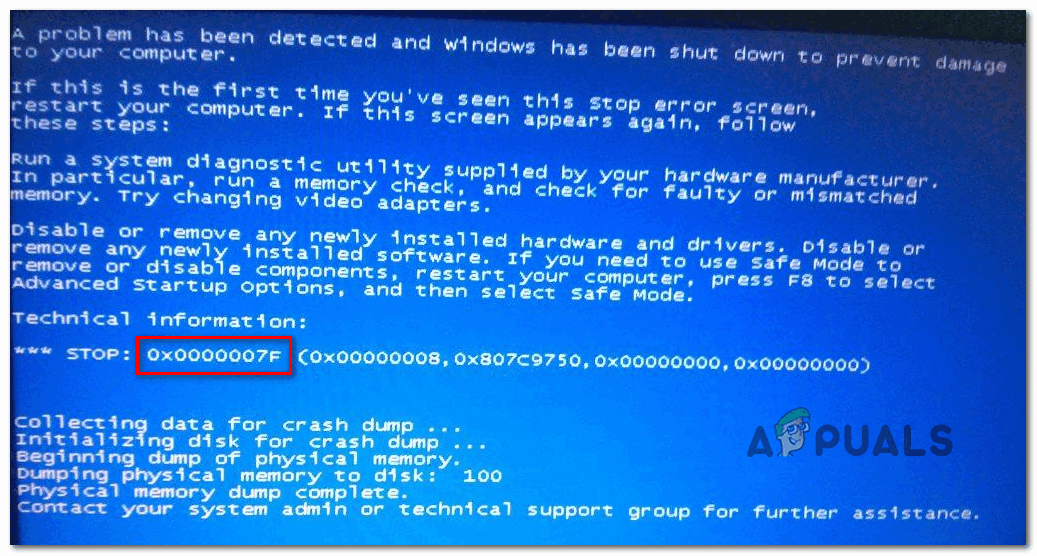
As it turns out, there are several different causes that might end up causing this particular BSOD:
- Looping iaStor.sys kernel file – One of the most common causes of this issue is a looping kernel file called iaStor.sys. This file is related to the IDE / ADA and ATAPI drivers and might end up causing unexpected BSODs in case you’re working with a corrupted or badly installed dedicated drive. If this scenario is applicable, you should be able to fix the issue by using Device Manager to uninstall each IDE ATA and ATAPI controller in order to force your operating system to reinstall the generic equivalents.
- Overprotective 3rd party AV – Another potential culprit that might end up causing this problem is an overprotective action caused by your 3rd party antivirus suite. One of the most common culprit is McAffee Internet security. In this case, try fixing the issue by disabling the real-time protection or uninstalling the 3rd party av.
- Temperature spike caused by HP utility – As it turns, out HP laptops and desktops might be bloated by two different utilities (HP Credential Manager and HP Protect Tools Security Manager Suite) that are known for being huge memory hoggers and spiking the CPU temperature with over 20°C in some cases, which might end up producing a BSOD. In this case, you can fix the issue by uninstalling the problematic applications.
- Insufficient Kernel space – If you’re using Symantec or Norton AVs, it’s likely that you’re seeing this BSOD critical error due to insufficient kernel space to process kernel drivers. In this case, you can expand the available kernel space by using Registry Editor to create a KstackMinFree key.
- System File Corruption – In certain circumstances, this problem can also be created by an underlying system file corruption that you will not be able to fix conventionally. If this scenario is applicable, you should be able to fix the problem by resetting every Windows component with a procedure like a clean install or repair install.
Method 1: Uninstalling IDE / ADA / ATAPI Controllers
As it turns out, one of the most common culprits that will end up causing this type of BSOD is a lopping iaStor.sys file that ends up producing a critical crash. As most affected users have reported, this happens due to an inconsistency with the IDE / ATA / ATAPI controllers.
If this scenario is applicable, you should be able to fix this problem by using Device Manager to uninstall every IDE, ATA, and ATAPI driver in order to force your operating system to install the generic equivalents. In most cases, users encountering the 0x0000007F error have reported that the BSODs stopped after uninstalling their dedicated IDE, ATA or ATAPI drivers.
Here are step by step instructions guide on doing this:
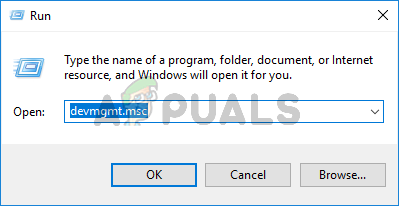
- Press Windows key + R to open up a Run dialog box. Next, type ‘devmgmt.msc’ and press Enter to open up Device Manager. If you’re prompted by the UAC (User Account Control), click Yes to grant administrative privileges.
Type devmgmt.msc and Press Enter to Open Device Manager - Once you’re inside Device Manager, scroll down through the various sections and expand the drop-down menu associated with IDE ATA/ATAPI controllers.
- Once you’re inside the IDE ATA/ATAPI controllers, start to systematically uninstall every controller by right-clicking on each of them and then choosing to Uninstall device from the context menu.
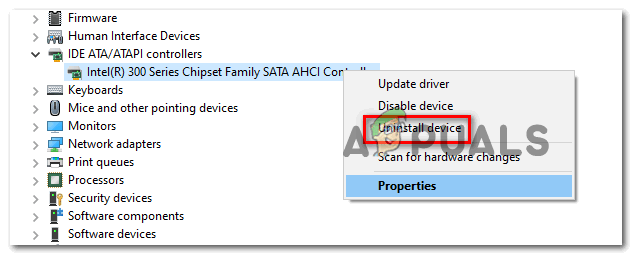
Uninstalling the device using Device Manager - Go ahead and uninstall each item under IDE ATA/ATAPI controller, then restart your computer. At the next computer startup, your operating system will install the generic equivalent drivers and you should no longer encounter the same annoying 0x0000007F BSOD.
In case the same problem is still occurring even after you uninstalled the dedicated drivers and replaced them with generic equivalents, move down to the next potential fix below.
Method 2: Disabling / Uninstalling the 3rd party AV (if applicable)
As it turns out, there are several overprotective Antivirus suites that might very well be facilitating the 0x0000007F BSOD by blocking an essential kernel process due to a false positive. This is commonly reported to happen with McAfee Internet Security, but there might be other 3rd party suites that will cause the same behavior.
If this scenario is applicable, you should be able to fix this critical Blue Screen of Death by disabling the real-time protection or uninstalling the 3rd party suite altogether.
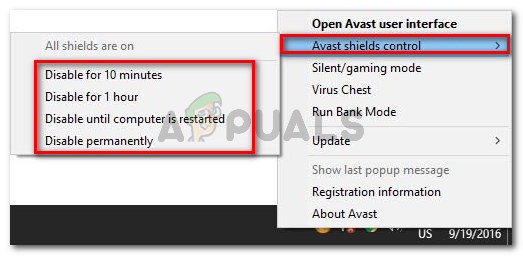
Start simple by disabling real-time protection and see if the BSOD stops occurring. But keep in mind that this operation will be different depending on the 3rd party suite that you’re using. However, in most cases, you should be able to disable the real-time protection directly from the taskbar icon.
Once you disable the real-time protection, monitor the situation, and see if the BSOD returns, if it does and you’re using an AV suite that also includes a firewall component, keep in mind that the same security rules might remain in place even after you disable the real-time protection.
In this case, the only way to eliminate your 3rd party AV suite from the culprit list is to simply uninstall it and see if the BSODs stop occurring. Here’s a quick guide on how to do this:
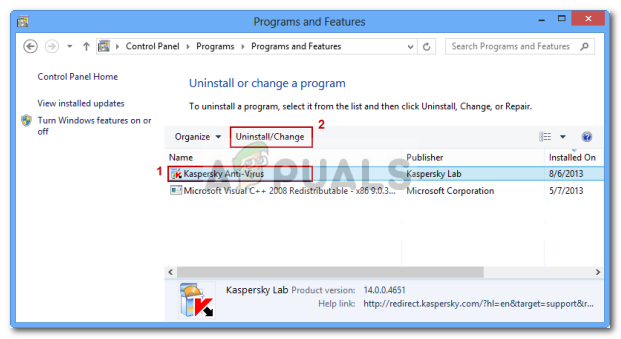
- Open up a Run dialog box by pressing Windows key + R. Next, type ‘appwiz.cpl’ and press Enter to open up a Programs and Features window.

Type appwiz.cpl and Press Enter to Open Installed Programs List - Once you’re inside the Programs and Features screen, scroll down through the list of installed applications and locate the 3rd party security suite that you plan on uninstalling.
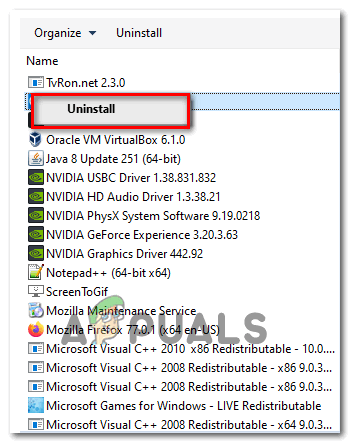
- After you manage to locate the 3rd party AV suite, right-click on it and choose Uninstall from the newly appeared context menu.
Uninstalling Antivirus Using Control Panel - Inside the uninstallation screen of your AV, follow the on-screen prompts to complete the uninstallation, then restart your computer once the operation is complete.
- Monitor the situation and see if you are still seeing the 0x0000007F BSODs.
In case the same problem is still occurring, move down to the next potential fix below.
Method 3: Uninstall HP Credentials Manager (if applicable)
If you use an HP laptop or a connected device and you have previously installed HP Credentials Manager or HP Protect Tools Security Manager Suite, there’s a high chance that you’re seeing these types of BSODs due to extremely high CPU and GPU temperatures.
Even though both of these suites are genuinely developed and maintained by HP, they are both huge memory hoggers and known to cause massive temperature spikes (especially with older CPU models). There are documented cases when this utility ends up hogging over 50% of CPU resources and raising the temperature with more than 20 degrees.
In case this scenario is applicable, you should be able to stop these apparently random BSODs from occurring by uninstalling HP Credentials Manager or HP Protect Tool Security Manager Suite (depending on the suite you have installed):
Note: Keep in mind that these two tools are in no way essential. The functionality offered by HP Credential Manager is already present natively on Windows (Credential Manager). And as for HP Protect Tool Security Manager Suite, it’s inferior to Windows Defender and a huge memory hogger.
- Press Windows key + R to open up a Run dialog box. Next, type ‘appwiz.cpl’ and press Enter to open up the Programs and Features menu.
Type appwiz.cpl and Press Enter to Open Installed Programs List - Once you’re inside the Programs and Features screen, scroll down through the list of installed applications and locate HP Credential Manager or HP Protect Tool Security Manager Suite.
- After you manage to locate the problematic tool, right-click on it and choose Uninstall from the newly appeared context menu to begin the uninstallation.
Uninstalling the Problematic suite - Inside the uninstallation screen, follow the on-screen instructions to complete the uninstallation.
- Once the operation is complete, restart your computer and see if the problem is now fixed.
In case the same problem is still occurring, move down to the next potential fix below.
Method 4: Adding the KStackMinFree value (if applicable)
In case you’re seeing this error when running Symantec Antivirus or Norton Antivirus, it’s very likely that the issue is occurring due to the fact that your computer lacks sufficient kernel space to process kernel-more drivers.
When Symantec Antivirus begins a system scan or examines a file for viruses, it will request file access from the system. Over time, these types of requests can add to the kernel space that your computer consumes until it’s too full to function properly.
If this scenario is applicable, you should be able to fix this issue by using the Registry Editor to add the KStackMinFree value to the registry. What this value does it it specifies the minimum kernel space that must be available for Symantec Antivirus or Norton Antivirus system real-time protection to request file access.
In case you are indeed using one of these two security suites, follow the instructions below to create the KStackMinFree value using Registry Editor in and fix the 0x0000007F BSOD:
- Press Windows key + R to open up a Run dialog box. Next, type ‘regedit‘ inside the text box and press Enter to open up the Registry Editor.
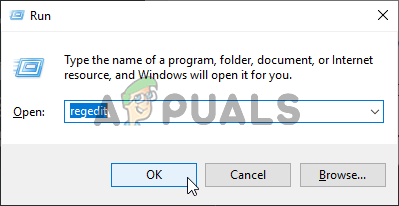
Opening the Registry Editor Note: When prompted by the UAC (User Account Control), click Yes to grant administrative privileges to the Registry Editor utility.
- Once you’re inside the Registry Editor, use the menu on the left section to navigate to the following location:
HKEY_LOCAL_MACHINE\SOFTWARE\Symantec\Symantec Endpoint Protection\AV\Storages\Filesystem\RealTimeScan
Note: You can either get to this location manually or you can paste the location directly into the navigation bar at the top and press Enter to get there instantly.
- With the RealTimeScan selected, move over to the right-hand section, right-click on an empty space and choose New > DWORD Value.
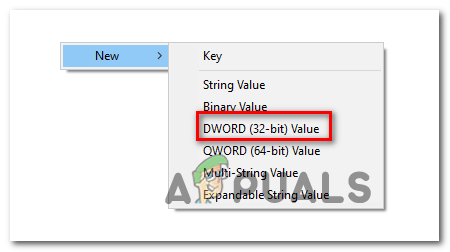
Creating a New Dword (32-bit) value - Name the newly created KStackMinFree and press Enter to save the changes. After you create this value, right-click on it and choose Modify from the newly appeared context menu.
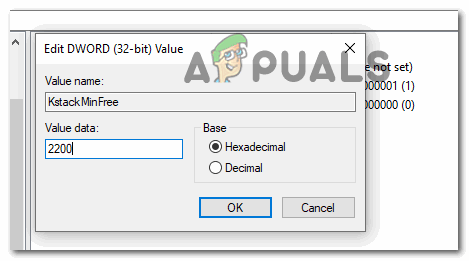
- Next, in the Edit Dword (32-bit) Value menu set the Base to Hexadecimal, then set the Value data to 2200 and press Ok to save the changes.
Configuring the KstackMinFree - Once the modification is complete, save the current changes, and restart your computer in order to allow the changes to take effect.
- After the modification is complete, monitor the situation and see if the problem is still occurring.
In case the same problem is still occurring, move down to the next potential fix below.
Method 5: Forcing a Repair Install
If none of the instructions below have worked for you, it’s likely that you’re dealing with an underlying system file corruption that you will not be able to fix conventionally. In this case, you should be able to fix the problem by resetting every Windows component in order to ensure that there aren’t any corrupted OS files that might end up causing this type of BSOD.
When it comes to doing this, you have two options that you can choose from:
- Repair Install (in-place repair) – This operation should be the preferred approach if you have a compatible Windows installation media to use. It allows you to reset every relevant Windows component without the deletion of your personal files. Even more, this procedure will not touch, application games, and even some user preferences.
- Clean install (in-place reinstall) – This is the easier procedure out of the bunch as you don’t need a compatible installation media and you can deploy this operation directly from the GUI Windows menu. But keep in mind that unless you back up your data in advance, you run the risk of losing every personal file, game, and application present on the OS drive.


