How to Reinstall Windows 7 Without a Disc
Many Windows computers that come with Windows 7 out of the box are sold and shipped without Windows 7 installation discs, and many Windows 7 users end up misplacing or losing track of their Windows 7 installation discs. In such cases, users can end up stumped if they ever need to reinstall Windows 7 on their computers. Computers that aren’t accompanied by a Windows 7 installation disc when they are sold or shipped often come with ‘recovery discs’ or ‘recovery partitions’ that are meant to be used to restore them to the exact way they were when they were taken out of the box.
Unfortunately, if you go the recovery disc or partition route, your computer will be restored to the exact way it was when you booted it up for the very first time – bloatware and manufacturer-installed programs included, you won’t be reinstalling vanilla Windows 7. In addition, restoring your computer to the way it was when you started it up for the very first time isn’t always as effective as completely reinstalling Windows from scratch when it comes to fixing issues and problems with Windows.
Reinstalling Windows from scratch is not only one of the best and most effective solutions to an extremely wide range of different problems pertaining to Windows but doing so also ensures that your computer runs on a standard, completely vanilla and bloatware-free installation of Windows. Thankfully, though, not having a Windows 7 installation disc is far from the end of the world. You can successfully and quite easily reinstall Windows 7 even if you don’t currently have a Windows 7 installation disc on you. How would something like this go, you ask? Well, here’s what you need to do in order to reinstall Windows 7 on a computer if you don’t have a Windows 7 installation disc:
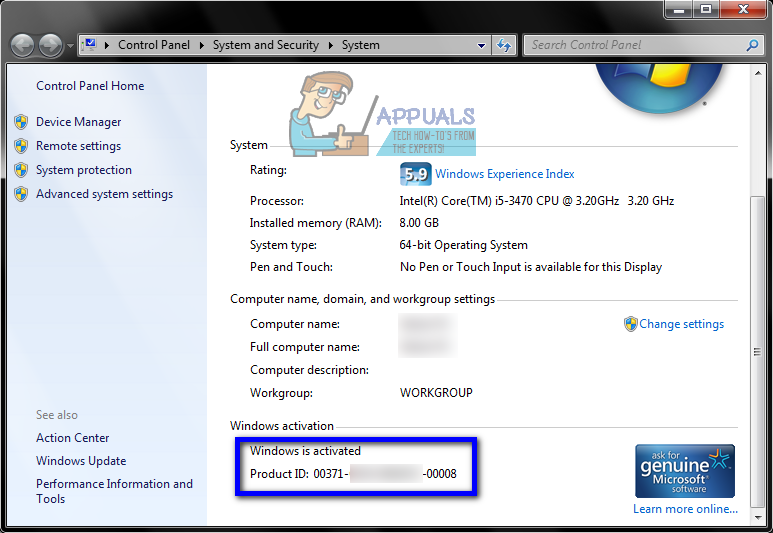
- First and foremost, you are going to have to find your alphanumeric Windows 7 product key (which, typically, is 25 characters long). If you can still log in to Windows on your computer, you can find your product key by right-clicking on Computer on your Desktop or in the Start Menu, clicking on Properties and scrolling down to the Windows activation section. The Product ID described under the Windows activation section is your Windows 7 product key. If you can’t log in to Windows on your computer, however, look for your Windows 7 product key on any stickers on the body of your computer or in documentation that came with your computer when you purchased it.

- Create a Windows 7 installation medium. Obviously, you can’t install Windows 7 on a computer unless you have something to install Windows 7 from. If you don’t have a Windows 7 installation disc, however, you can simply create a Windows 7 installation DVD or USB that you can boot your computer from use to reinstall Windows 7. Create a bootable Windows 7 installation medium.
- Reinstalling Windows 7 will permanently delete any data stored on your computer (at least on the same partition of your computer’s hard drive that you’ll be installing Windows 7 on), so be sure to back up any files and data you don’t want to lose. Once you’re ready to go ahead with the installation, insert the Windows 7 installation DVD or USB you created into your computer and restart it.
- On the very first screen, you see while the computer boots up, press the respective key on your keyboard to get into your computer’s BIOS or Setup. The key you need to press will be clearly described on the first screen you see while your computer boots up.
- Navigate to the Boot tab of the BIOS.
- Configure the Boot order of your computer to first boot from the CD-ROM (if you’re using a Windows 7 installation CD/DVD) or from USB (if you’re using a Windows 7 installation USB).

- Save the changes you have made to the BIOS and exit it.
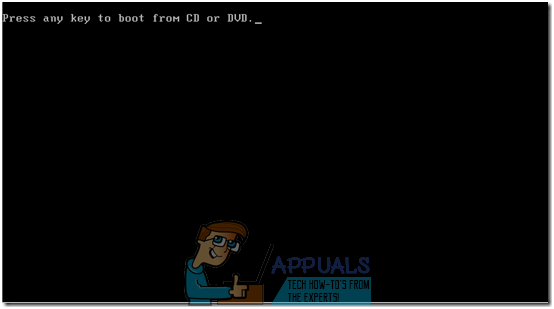
- When the computer boots up, it will try to boot from the installation CD/DVD or USB and ask you to press any key on your keyboard to boot from the medium. When it does, simply press any key to proceed.
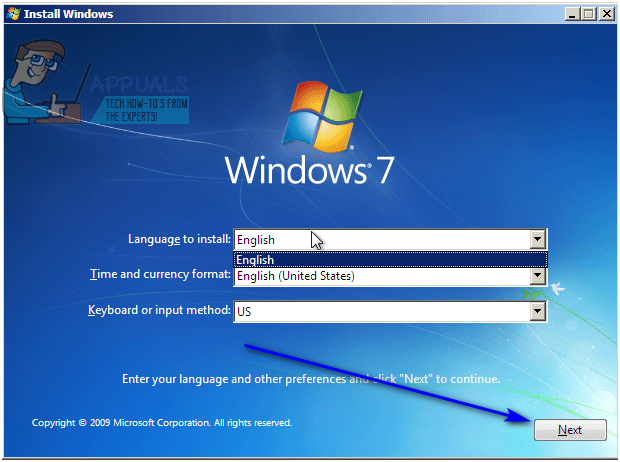
- Agree to Microsoft’s Terms of use, configure your language and other preferences on the Install Windows page and click on Next. Also follow any other onscreen instructions you see until you get to the Which type of installation do you want? page.
- On the “Which type of installation do you want?” page, click on Custom (advanced).
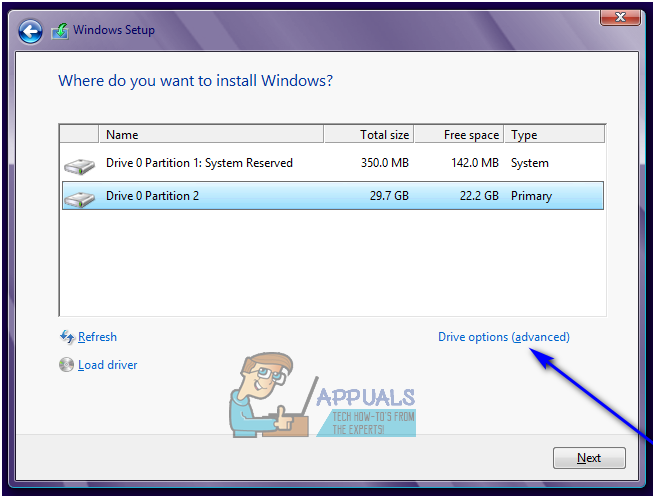
- On the “Where do you want to install Windows?” page, click on Drive options (advanced), click on the partition of your computer’s hard drive that Windows 7 is currently installed on to select it, and click on Delete.
- Click on Yes in the resulting popup to confirm the action. Once you do so, Windows 7 and all other data on the selected hard drive partition will be completely and permanently erased.
- Once the hard drive partition has been successfully wiped clean, click on it to select it as the destination for the new installation of Windows 7, and click on Next.
- Simply wait for Windows 7 to be installed. The process can take anywhere between a few minutes to over an hour (depending entirely on how fast your computer is), and your computer will automatically restart on multiple occasions throughout the installation process so there’s no need to worry when that happens.
- Once the preliminary installation of Windows 7 has been completed, you will be asked to set Windows 7 up by creating a user account for yourself and configuring a few different preferences. Simply follow the onscreen instructions and prompts, and the installation will start being finalized once you do. Once the installation has been successfully completed, you will be taken to your Desktop.
Not having a Windows 7 installation disc or losing the one you had isn’t something that can keep you from reinstalling Windows 7 on a computer – all you really need to do is create a new Windows 7 installation medium (it can be a DVD or a USB or even a CD) altogether and use it to reinstall Windows 7 like you normally would with any Windows 7 installation disc.
Key is to match the Windows install type with your original installation (home, home premium, professional. … Then reenter the saved key at install, or activate after installation with the key.