How to Edit an Existing GIF?
Nowadays GIFs are pretty common on many sites and social media platforms. Users can create GIF files by choosing many different settings and effects for them. However, some users will want to edit the existing GIF that they download from the Internet. Editing a GIF file is not as simple as editing a single layer of the image, it requires a program that can open each frame of GIF file for editing. In this article, we will show you the methods through which you can easily edit the existing GIF files.
Editing an Existing GIF on Online Site
An online site is always the best and quickest solution for editing the GIF files. It does not require any installation of software, due to which it saves both time and storage space for the user. Nowadays, most online sites provide many features for editing GIFs. The user just needs to upload their GIF on the site and they will be able to edit it. Once the editing is completed, it provides the save option for downloading the GIF back to the system. There are many different sites that provide different quality and features, we are going to use the EZGIF site. Follow the below steps to try it out:
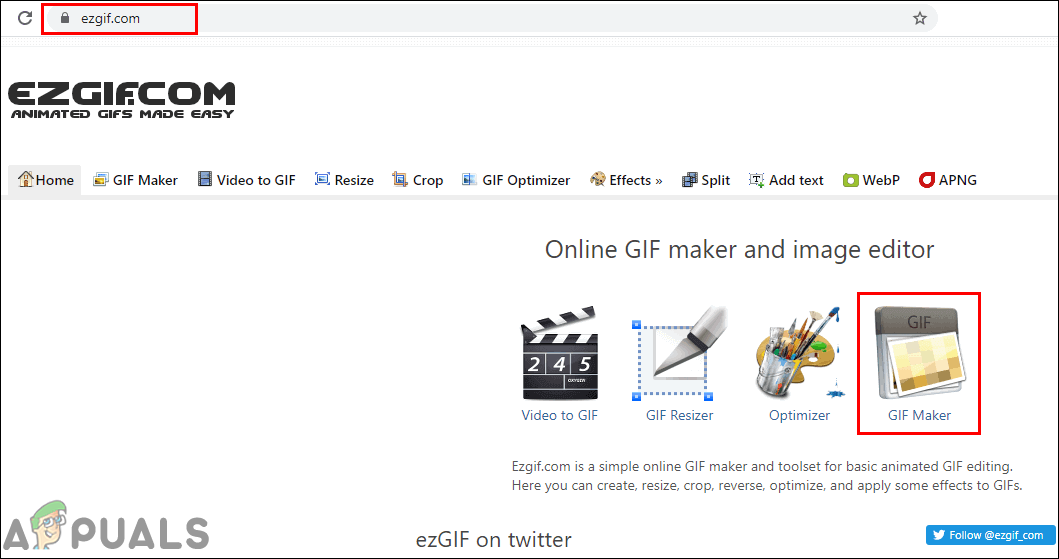
- Open your browser and go to the EZGIF site. Click on the GIF Maker icon to open the page.
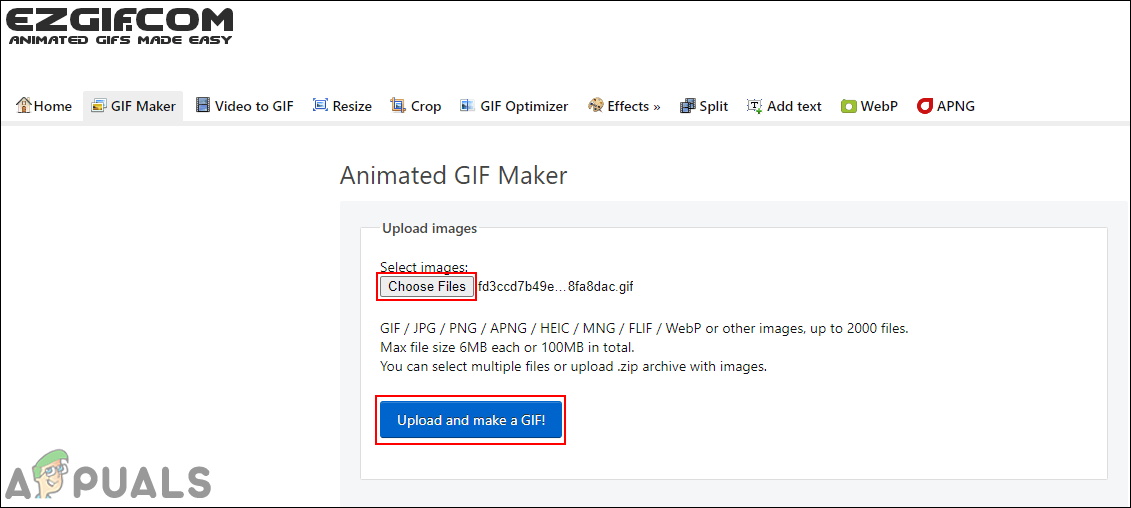
Opening GIF maker in EZGIF site - Click on the Choose Files button to select the GIF that you want to edit. Once selected, click on the Upload and make a GIF button to upload the GIF file.
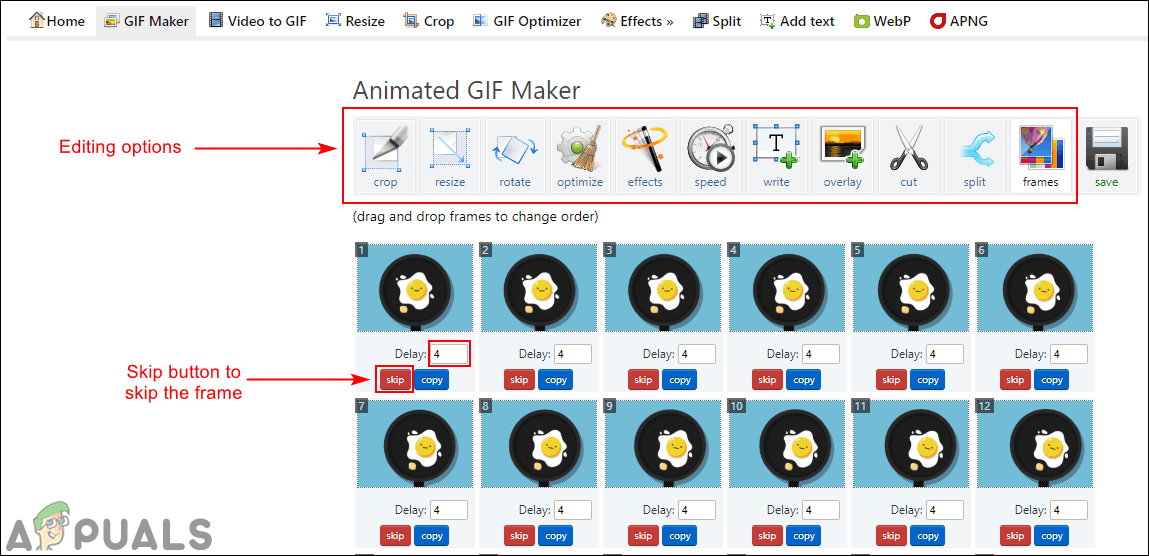
Uploading the GIF file - It will provide different options where you can crop, resize, rotate, add text, and edit your GIF with much more stuff. You can also set time for each frame and skip frames by clicking the skip button under it.
Editing the GIF file - There is also an option for the loop of GIF at the bottom. You can add the number of times you want it to play or leave it empty for forever loop. After you’re done, click on the Make GIF or Create GIF button.
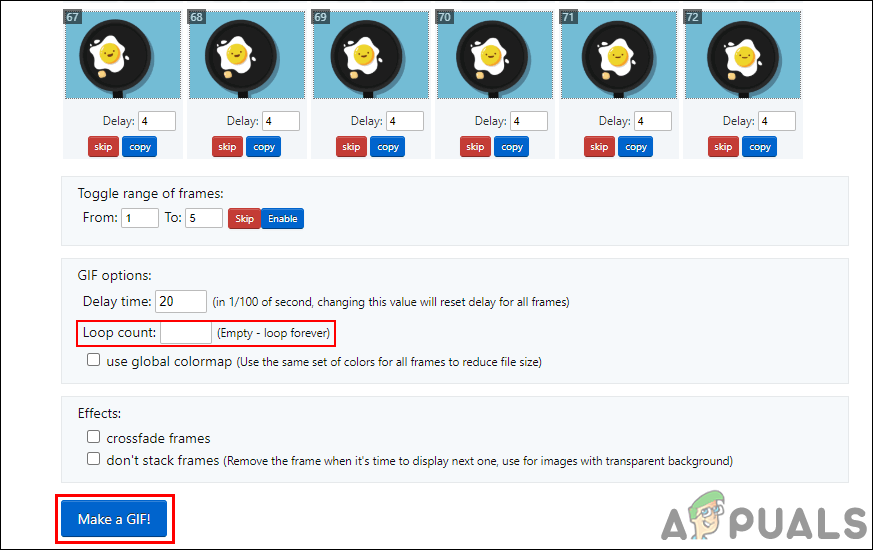
Setting the loop settings and making the GIF changes - This will apply your changes to the GIF and preview it down below. You can click on the Save button to save the GIF file to your system.
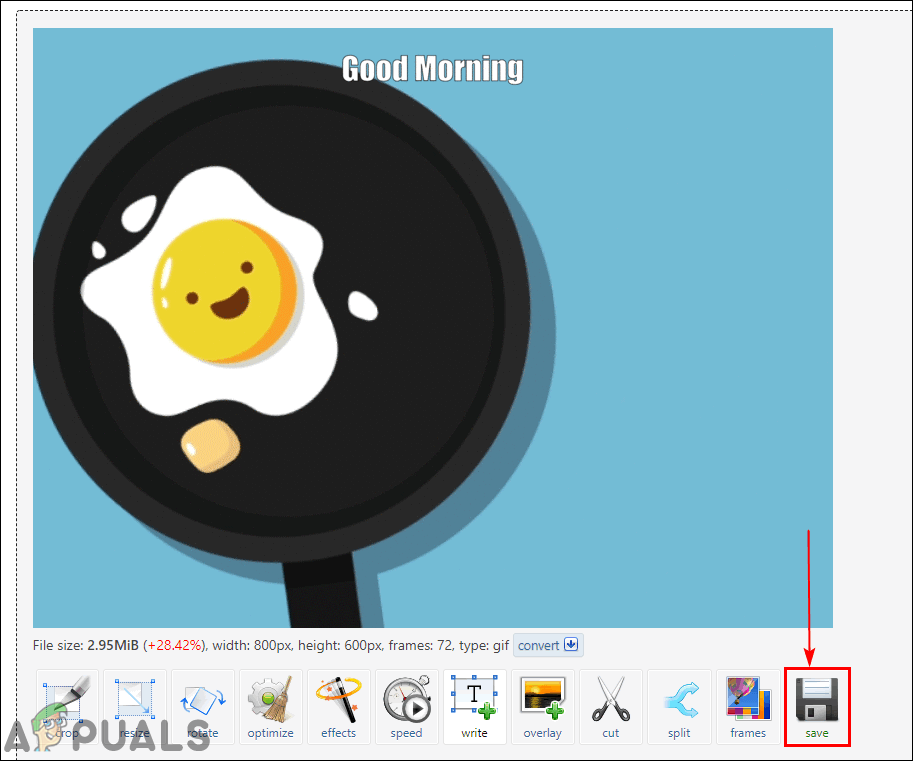
Saving the GIF file
Editing an Existing GIF in Photoshop
One of the most famous programs for editing the GIF files is Adobe Photoshop. When it comes to editing photos and GIFs, photoshop is the first choice for most users. Photoshop provides the timeline feature where the user can easily edit each frame of the GIF and preview it for checking. It is a bit complicated for the beginners but by following our steps, you can easily get the idea about how you can edit GIF files in photoshop.
- Open the GIF file into your Photoshop program by drag and drop or by using the open feature.
- You will find each frame as a layer in the layer panel on the right-side. Click on the Window menu in the menu bar and select the Timeline option.
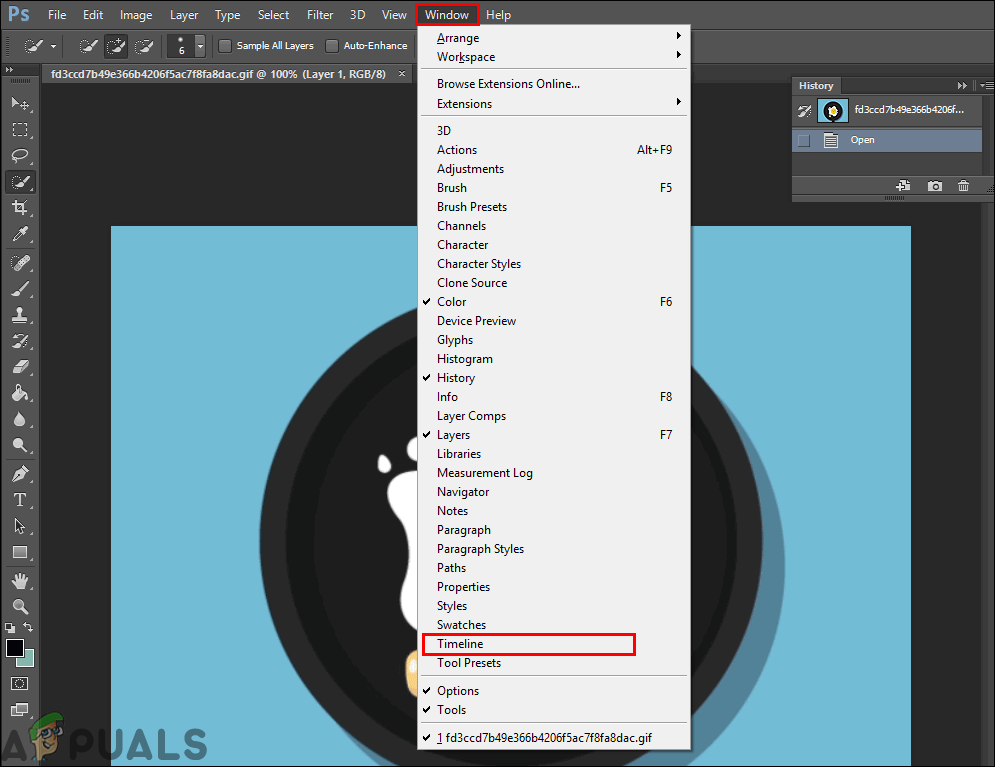
Opening the timeline window - This will bring the timeline at the bottom through which you can edit the timing between each frame and also play the GIF to check the changes.
Note: You can also select the Other option, where you can define the custom value for frame delay.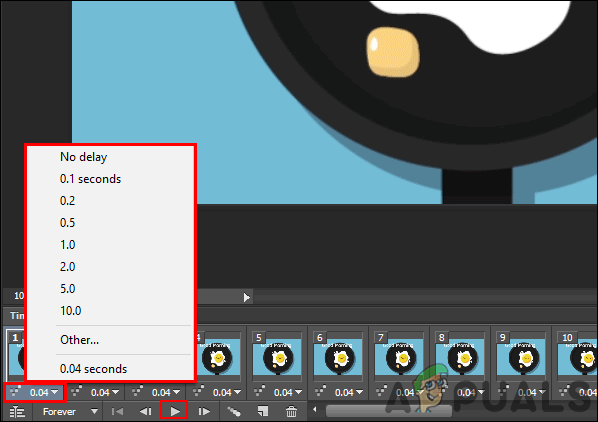
Setting the timing between each frame - You can also change the number of times the GIF should be played. Most of the GIFs will be set to forever, however, you can change it to the number of times you want it to play.
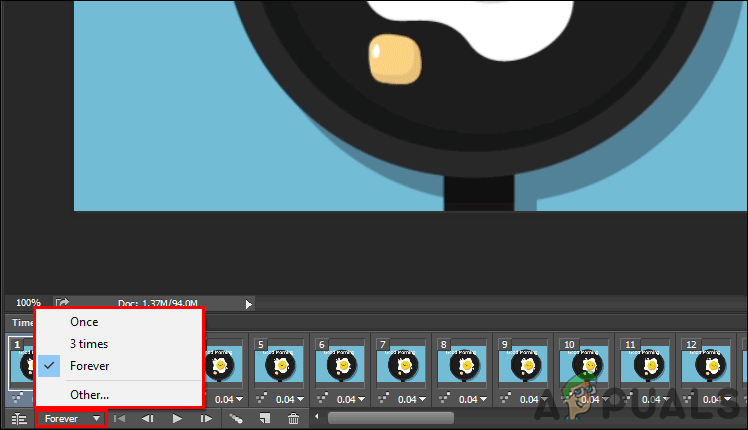
Loop settings for GIF - You can also add text to your GIF by clicking the Type Tool. Add the text about whatever you want and it will appear in a new layer.
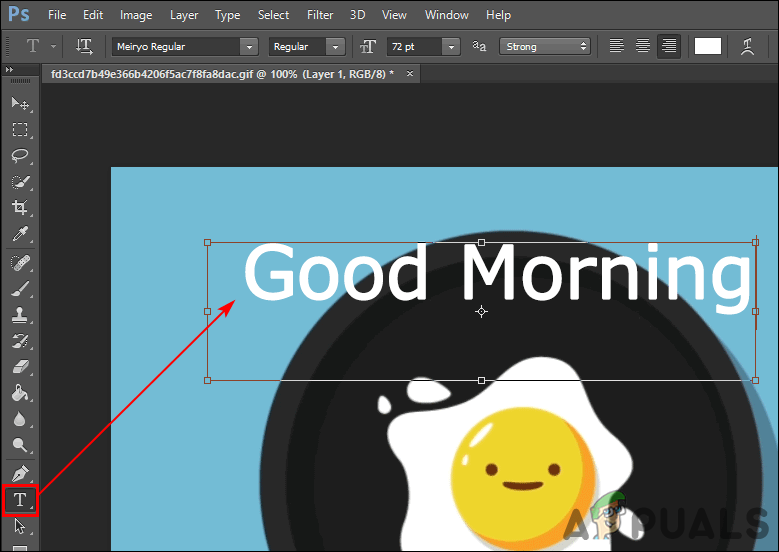
Adding text to GIF - Now you can move this text to any position between layers. If you put the text layer at the top, it will show text throughout all the GIF frames.
Note: You can also merge the text to only a specific layer in the layer panel.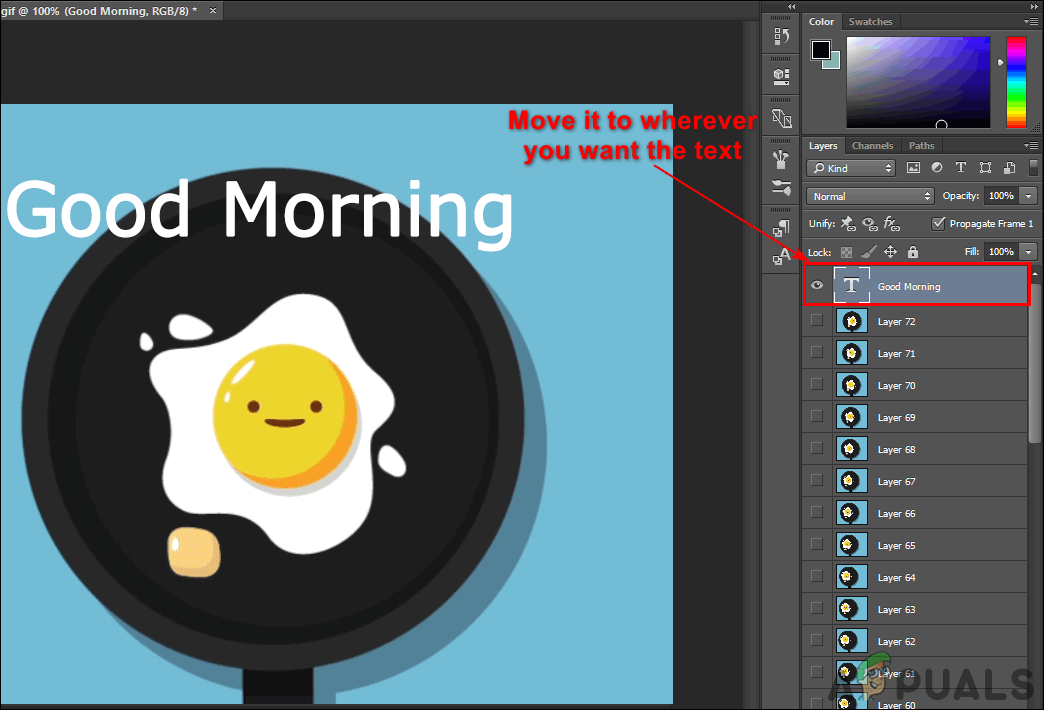
Moving text layer to top to apply on all layers - Finally, once you are done with editing your GIF. You can click on the File menu, choose Export, and select Save for web option.
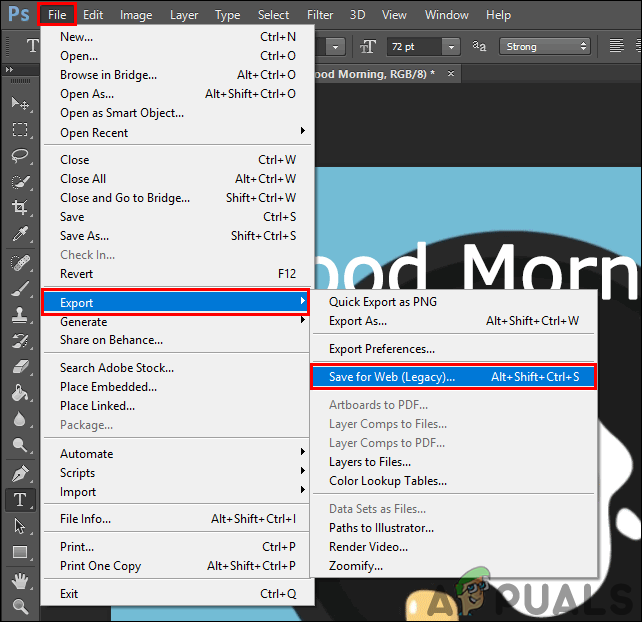
Exporting GIF file - You can change the quality of the GIF in the Preset drop menu. Click on the Save button and provide the name to save your GIF file.
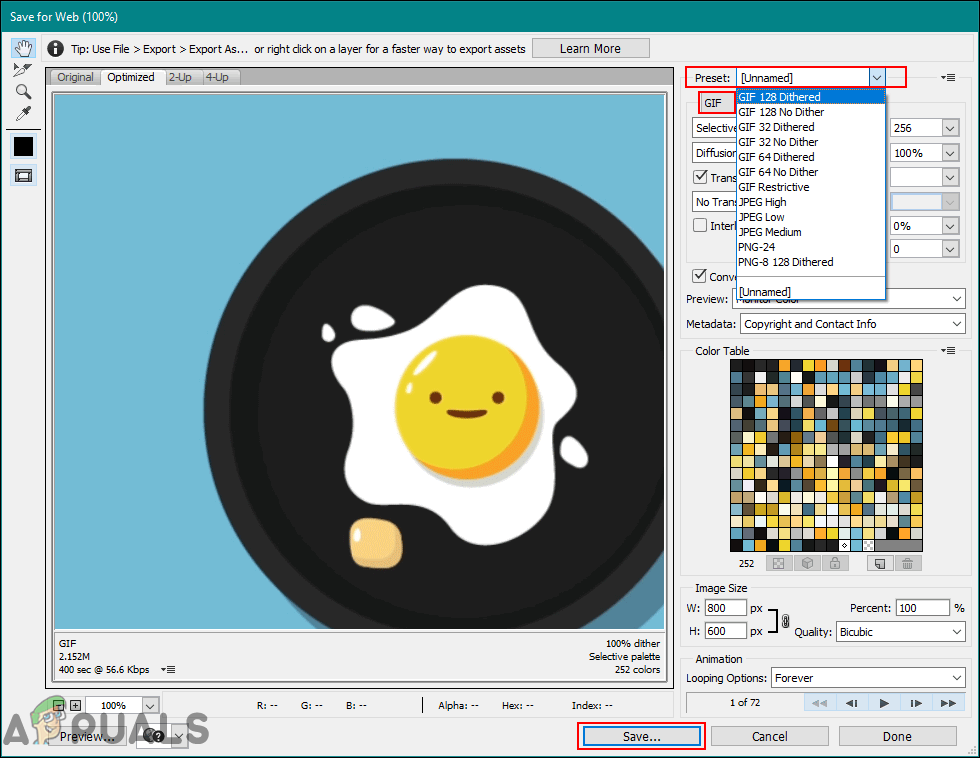
Saving GIF file with different quality
Editing an Existing GIF in GIMP
GIMP is another photo editing software that is similar to photoshop. However, GIMP is a free and open-source program that you can download easily from the official site. It will also show the frames of GIF in the form of layers. The complexity of editing a GIF depends on the number of frames in GIF. In photoshop, you can put the text (edited) layer at the top of layers to apply it to all other layers, however, in GIMP, you need to put that layer in between each layer. Anyway, editing a GIF is still possible in GIMP, follow the below steps to try it out:
- Open your GIMP program by double-clicking the shortcut or searching it through the Windows search feature. Click on the File menu in the menu bar and choose the Open option to open your GIF file into GIMP.
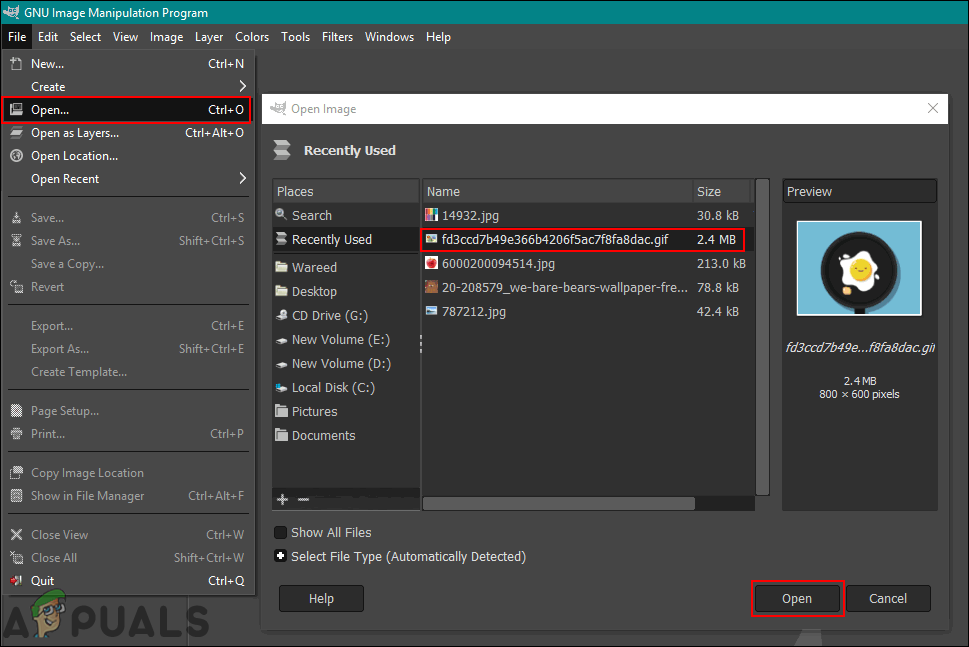
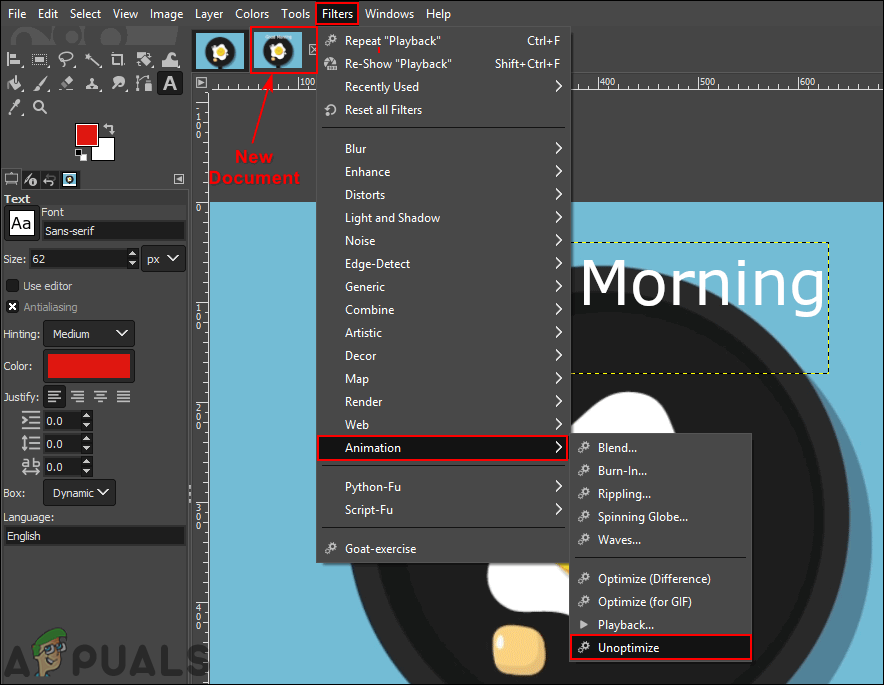
Opening GIF file in GIMP - Click on Filters, choose Animation, and then select the Unoptimize option. This will open the unoptimized image in a new document and it will be easier to edit each frame.
Unoptimizing the GIF - You can select and edit each layer (frame) differently or create a new layer and put that layer between each layer.
Note: You can create a text layer and add that between each layer to have text on your GIF. You can press Ctrl + Shift + D button to duplicate the text layer and then add them between each layer.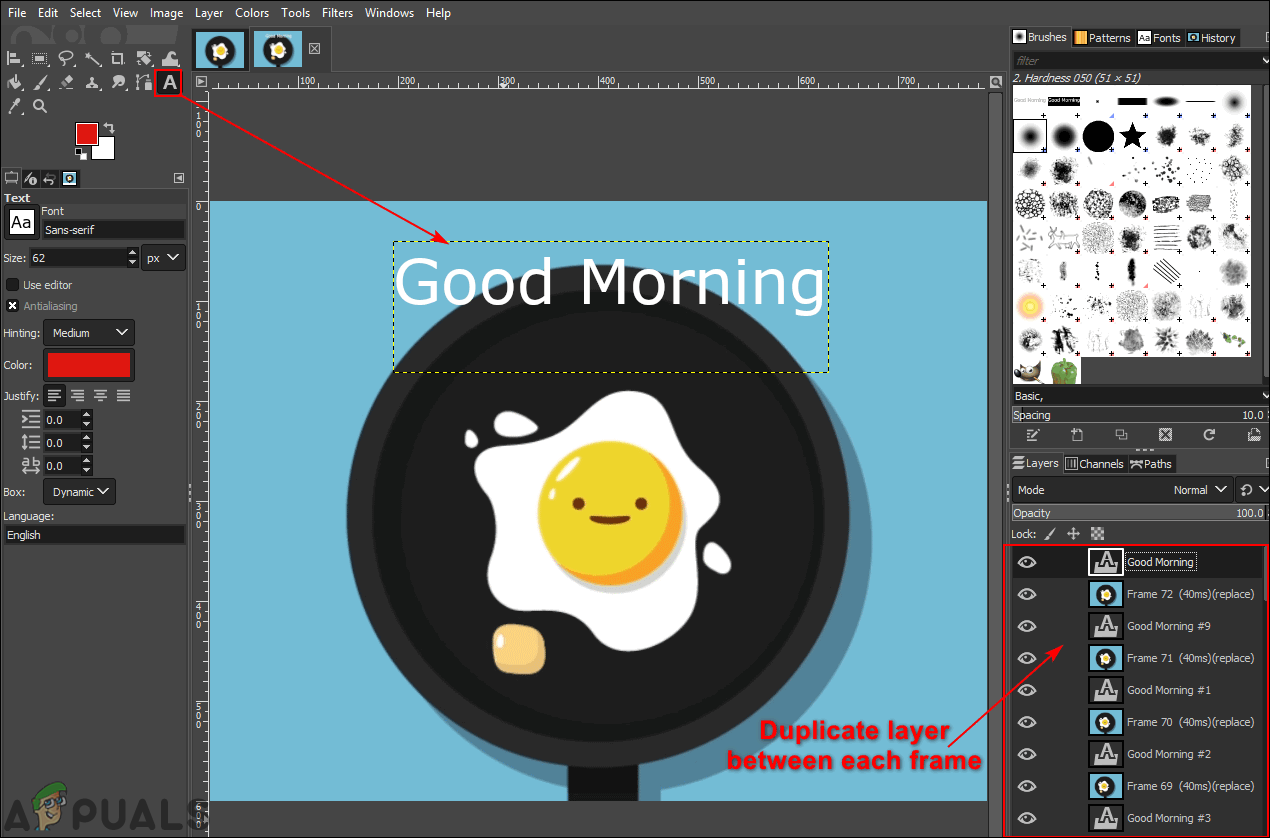
Creating a new text layer and putting in between all layers - You can merge the new editing layers with the original GIF layers. Right-click on the text or editing layer and choose the Merge down option to merge it.
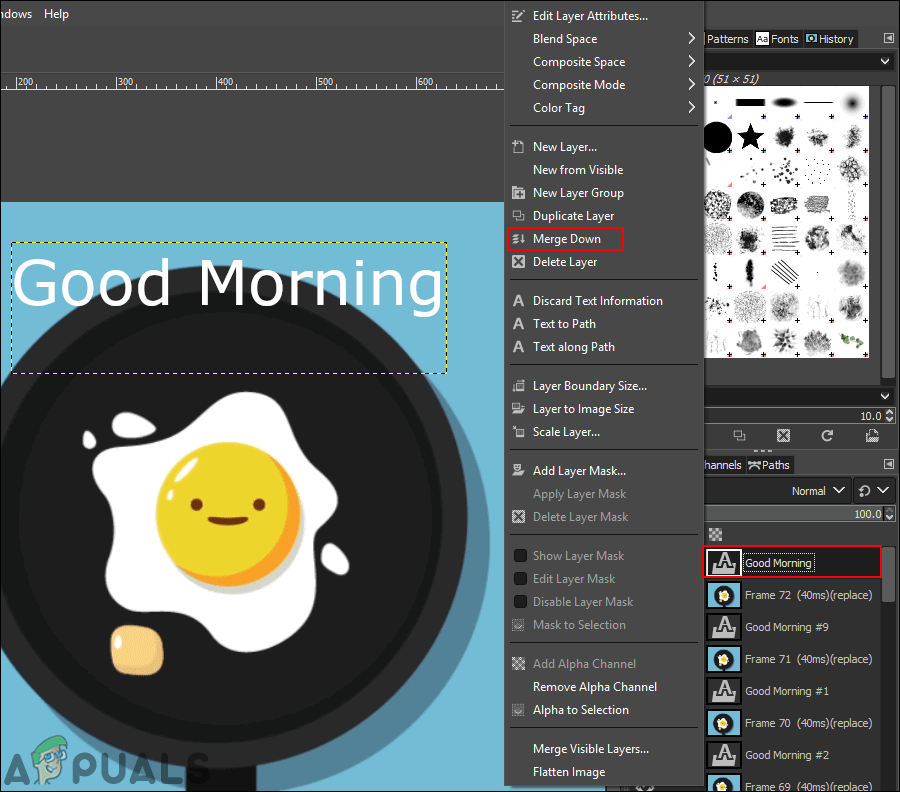
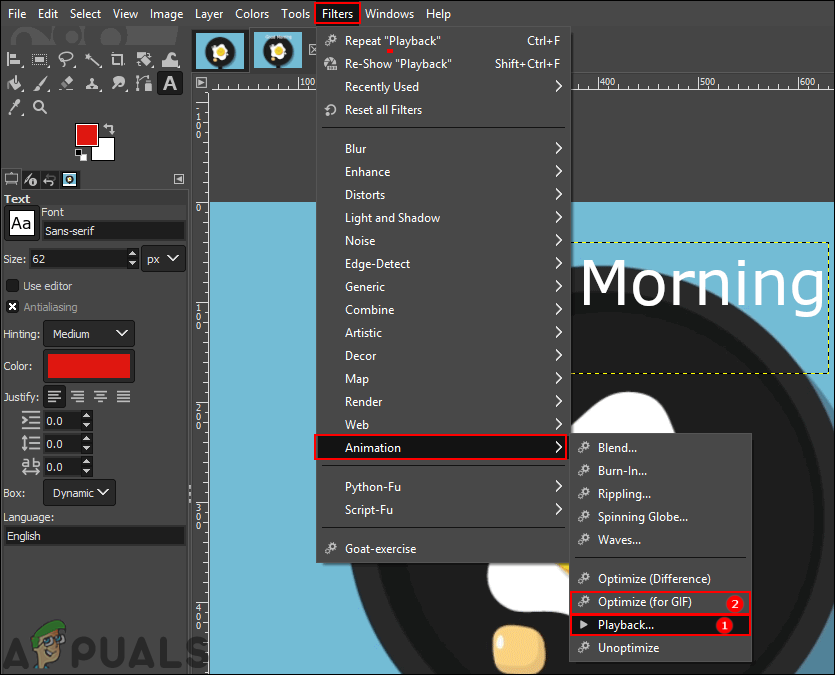
Merging the new text layer to each frame - After editing, you can also check the preview of the GIF by clicking on the Filters menu, choosing Animation, and then selecting the Playback option.
- Once you are done with the editing, click on the Filters menu, choose Animation, and then select the Optimize for GIF option. It will optimize the GIF back again and open as a new document.
Checking the changes in playback - Finally, click on the File menu in the menu bar, choose Export As option. Provide the GIF name and extension. Click on the Export button to save the GIF file.


