How to Disable Task View on Windows 10
With the release of Windows 10, Microsoft introduced virtual desktops that allow users to operate multiple desktops on one screen. Using the Task View feature, users are able to see all currently open applications, as well as all desktops that are open.
Users who do not want to use this feature have options available. It is possible to not use any virtual desktops and to bypass the feature altogether, opting instead for the traditional Windows experience of moving between apps by selecting them on your taskbar.
To remove Task View from your Windows 10 experience, simply follow the below method.
Method 1: Removing the Button
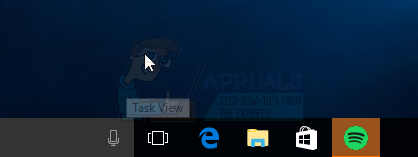
Task View cannot be technically removed from Windows 10, but access to the feature can be stopped by removing the button. The Task View button can be seen to the right of the Cortana search bar on your taskbar. It appears as one square with two squares either side and behind it.
- Locate the button on your taskbar and right-click it to reveal a menu.
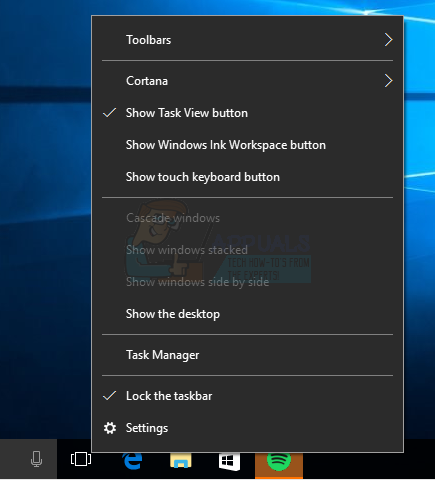
- In the menu, select Show Task View Button. As this is switched on, the option will have a tick next to it. Click it and the tick will go away, along with the button.
Method 2: Disable the Swipe Feature
For Windows 10 users with a touch-enabled device, it is possible to occasionally enter Task View accidentally by swiping left from the edge of the screen. To stop this from happening, you should disable this swipe feature.
Windows 10 Pro, Enterprise and Education editions can do this by opening the Local Group Policy Editor. If you’re running a Home version of Windows 10, then first enable GPEDIT from here
- Logged in as an administrator, open Local Group Policy Editor by entering the term into the Start search bar, and click the top result.
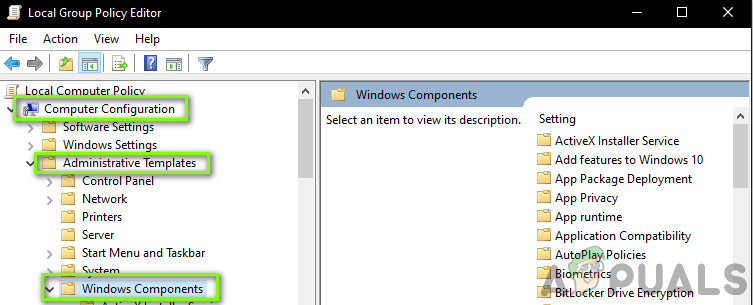
- When the window opens, scroll down in the left window and locate and click Computer Configuration. In the drop-down menu, then select Administrative Templates and then Windows Components. In this final drop-down, you will see a folder named Edge UI. Click this folder.
Edge UI - In the right pane, double click on Allow edge swipe to edit the feature.
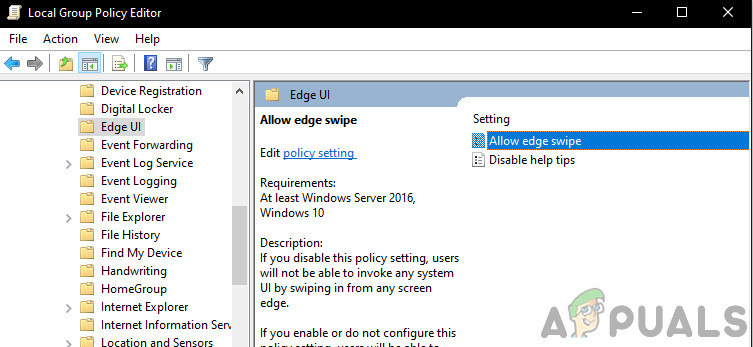
Allow edge swipe - Select Disabled and then click Close the window, and restart your PC to bring the changes into effect.
Method 3: Tweak the Registry to Disable Task View
You can disable the task view by changing its values in the registry. Make sure that you follow the steps carefully. For added protection, back up the registry before you modify it. Then, you can restore the registry if a problem occurs. For a quick tutorial on how to back up and restore the registry, find a guide on our website here.
- Press the Windows Key + R to open Run
- In the run box, type regedit and hit enter to open the registry
- Navigate to the following registry key:
HKEY_CURRENT_USER\SOFTWARE\Microsoft\Windows\CurrentVersion\Explorer\Advanced
- On the right-hand side of the editor, look for ShowTaskViewButton.
- Right-click on ShowTaskViewButton, and then click on Modify.
- Change the Value Data from 1 to 0.
- Restart your computer.
You can also re-enable the task view by setting the value back to 1.
Method 4: Restrict and Remove Task View Icon from Windows 10 Taskbar
Apart from disabling the Task View, this method will also remove the option to show/hide the Task View button from the taskbar context menu. In other words, you can use this method to restrict users from enabling or disabling the Task View button in Windows 10 Taskbar. For a quick tutorial on how to back up and restore the registry in order to avoid mistakes, find a guide on our website here.
- Press the Windows Key + R to open Run
- In the run box, type regedit and hit enter to open the registry
- Now go to the following key:
HKEY_CURRENT_USER\Software\Microsoft\Windows\CurrentVersion\Explorer
- Create a new key under Explorer key and set its name as MultiTaskingView
- Create another new key under MultiTaskingView key and set its name as AllUpView so the final key path would be:
HKEY_CURRENT_USER\Software\Microsoft\Windows\CurrentVersion\Explorer\MultitaskingView\AllUpView
- Now select AllUpView key and in right-side pane create a new DWORD Enabled and set its value to 0.
- Restart your computer
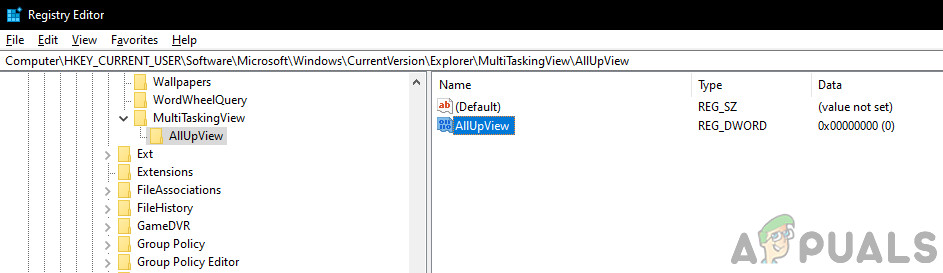
AllUpView – Regedit
You can always re-enable the task view by setting the value above to 1.
If you have advanced skills, you can always open a notepad file and save your registry edit keys as .reg files or .bat files.
I don’t have a folder named Edge UI in that position in the Group Policy Editor? (on Windows 10 Home).