Fix: Context Menu Opening Slow in Windows 11
 Reviewed by Muhammad Zubyan
A slow context menu in Windows 11 can be the outcome of various factors, which can include the inclusion of third-party options, the visual performance settings of your Windows environment, the addition of Windows Terminal, and more. These factors can contribute to slowing down the context menu overall, thus making it sluggish and not optimal for usage.
The context menu is frequently used for various purposes, which is why it needs to be quick and snappy. In this article, we will list down a number of methods that you can use to remove the sluggish behaviour of the right-click menu in Windows 11.
Fix Slow Context Menu in Windows 11
The file explorer window can also cause the context menu to become slow. This was known to occur due to a memory leak in the File Explorer app. As such, if you are running an older version of Windows on your computer, this might be causing the issue altogether. With that said, let us look at the different methods available that can help you isolate the issue.
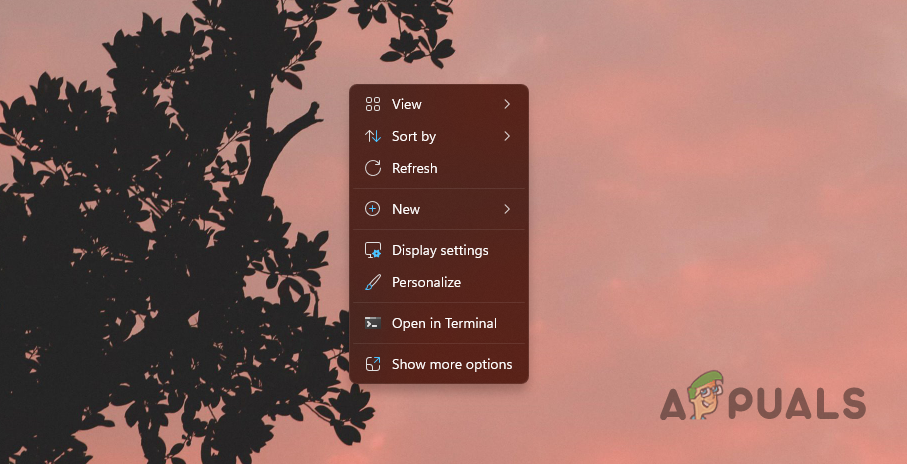
- Remove Terminal Option: The first step you should take in resolving the above issue is to remove the Open in Terminal option from the context menu. This can occur when the terminal app is encountering issues which results in a slower fetch of the required data causing a delay in the context menu loading state.
- Install Windows Updates: If you are running an older build of Windows on your computer, that can cause the laggy right-click menu issue as well. This is usually due to a memory leak in the File Explorer app on older versions of Windows 11 which has been since patched. As such, you can easily overcome the problem by updating Windows on your system.
- Update Graphics Drivers: In some instances, the display drivers can also result in a sluggish context menu. This happens when the video drivers are either damaged or due to an inconsistency with the drivers. In such a scenario, you will need to reinstall the video drivers on your PC to overcome the problem.
- Perform SFC Scan: Another possible reason for a slow right-click menu in Windows 11 can be the system files on your computer. If the system files are bad, you will encounter various unintended behaviors on your computer. To resolve this, you will need to perform an SFC (System File Checker) scan on your computer. This will scan the system files and repair them in case of any damage.
- Change Performance Options: The performance options of the visual effects on your computer can also render a slow context menu. This can happen when the appearance of Windows is prioritized on your PC over performance. In such a state, you will have to change the performance options to resolve the issue.
- Remove Third-Party Context Menu Options: The inclusion of third-party options in the context menu is another reason for a laggy and sluggish context menu. In this scenario, you will have to edit the context menu via the Windows Registry to remove the unwanted options. This should circumvent the issue in case of a cluttered context menu.
- Perform a Clean Boot: Finally, the last option to resolve the issue would be to perform a clean boot. In some cases, the third-party applications can interfere with the context menu which can cause it to become slow. Performing a clean boot will start Windows with only the required services running in the background, thus preventing any third-party apps from interfering with the context menu. If the problem goes away in a clean boot, you will have to identify the culprit program by enabling the services one by one.
1. Remove Terminal Option
- Open the Run dialog box by pressing the Win key + R on your keyboard.
- Then, type in regedit and hit Enter.

Opening Windows Registry - In the Windows Registry, navigate to the following path:
COMPUTER\HKEY_LOCAL_MACHINE\SOFTWARE\Microsoft\Windows\CurrentVersion\Shell Extensions

Navigating to Shell Extensions Path - There, right-click on Shell Extensions and select New > Key.
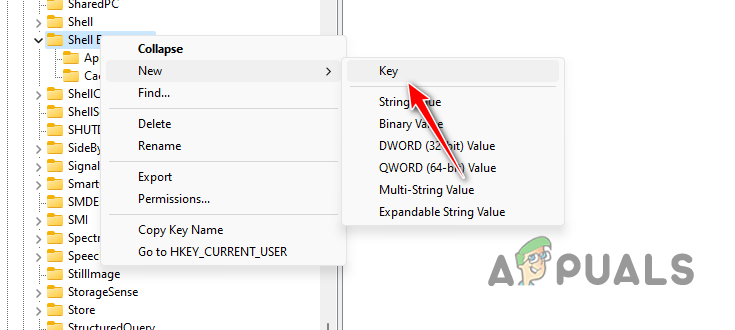
Creating New Shell Extension Key - Then, name the new key Blocked.
- After that, double-click the Blocked key and on the right-hand side, right-click and select New > String Value.
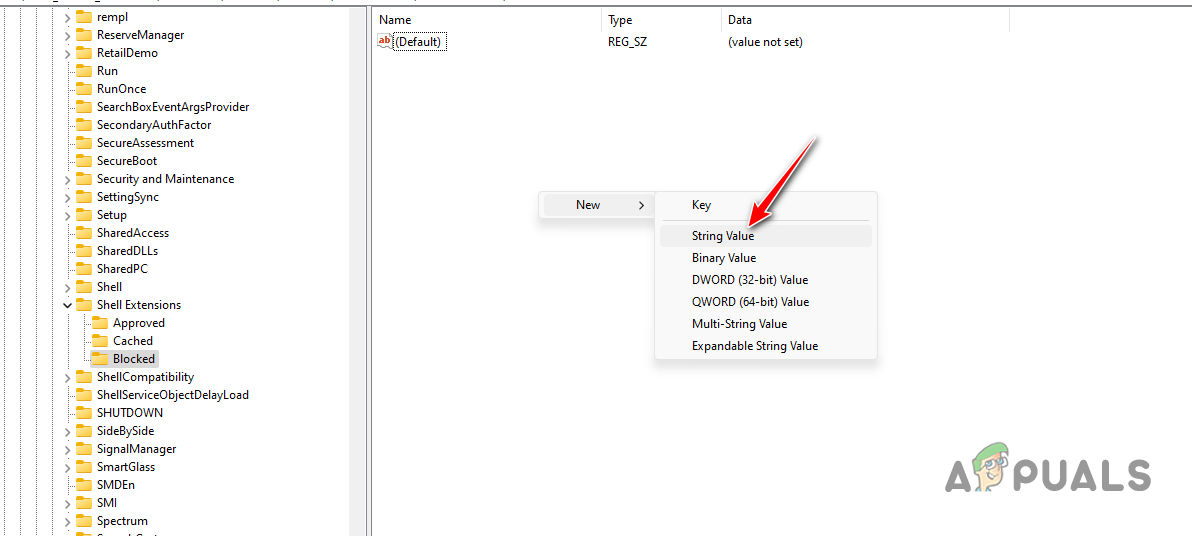
Creating New String Value - Copy the following text and paste it as the name of the key:
{9F156763-7844-4DC4-B2B1-901F640F5155} - Then, double-click the key and enter WindowsTerminal as the value.
- Restart your computer and see if the issue is still there.
2. Install Windows Updates
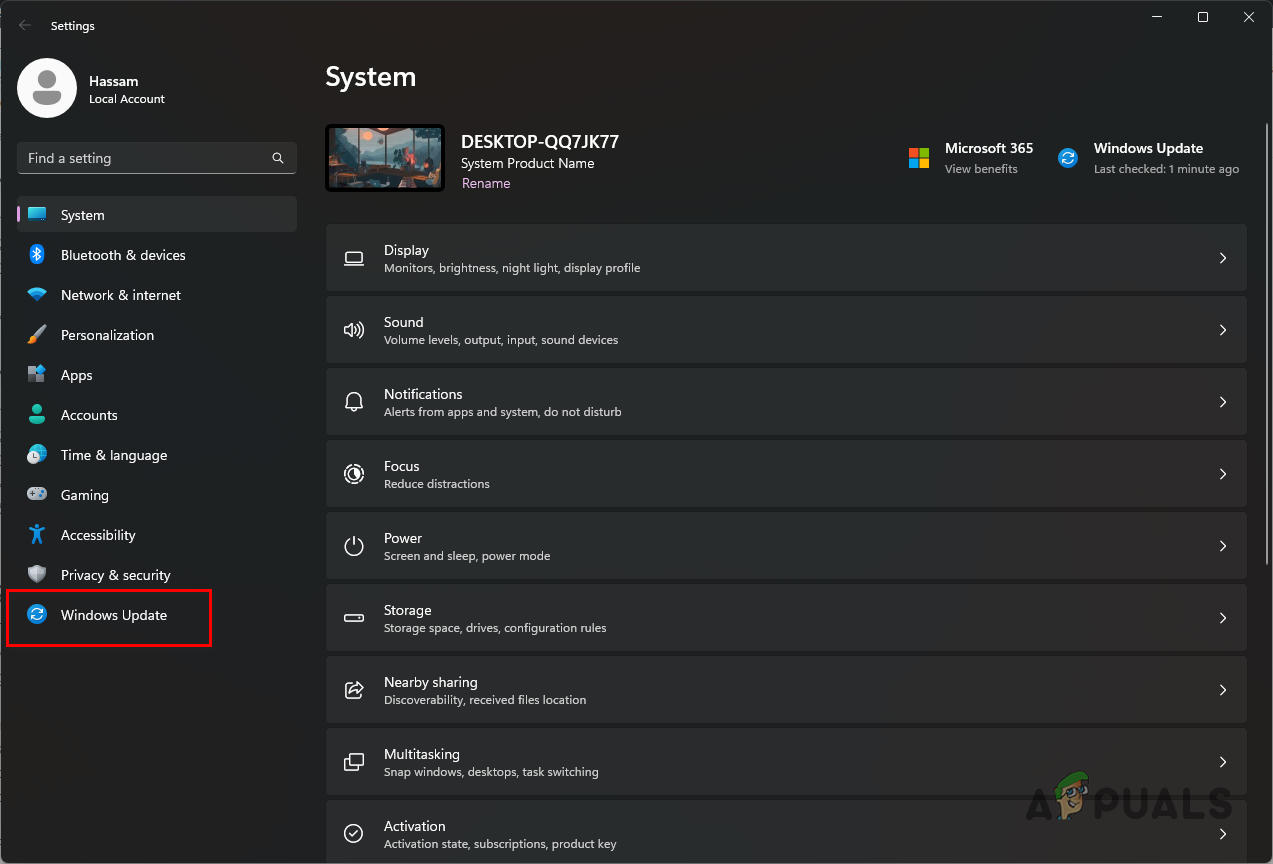
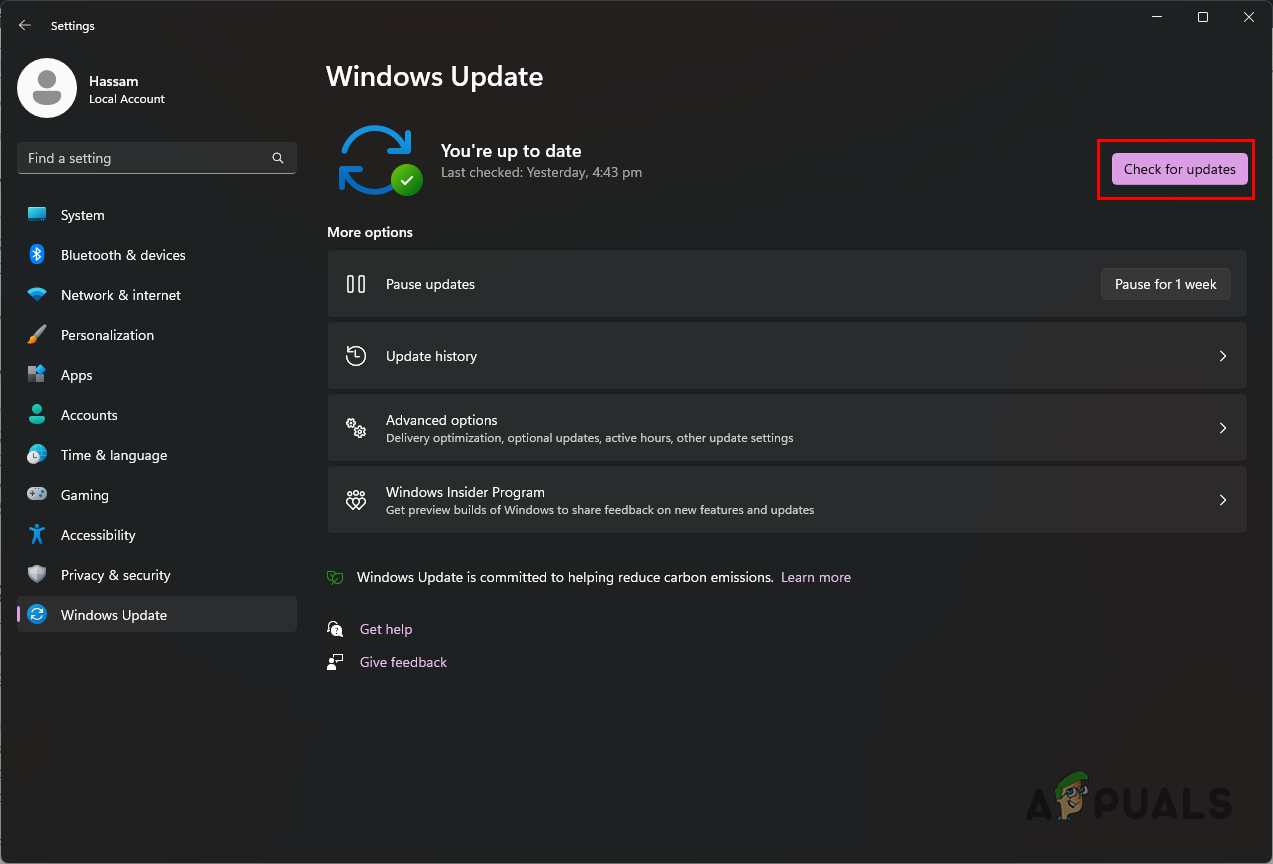
- First, open the Settings app with the Win key + I shortcut.
- In the Settings app, go to Windows Update on the left-hand side.
Navigating to Windows Update - Then, click the Check for updates option to download any updates available and install them.
Looking for Windows Update
3. Update Graphics Drivers
- Start by downloading the DDU utility on your computer from the official website.
- Then, extract it anywhere on your PC.
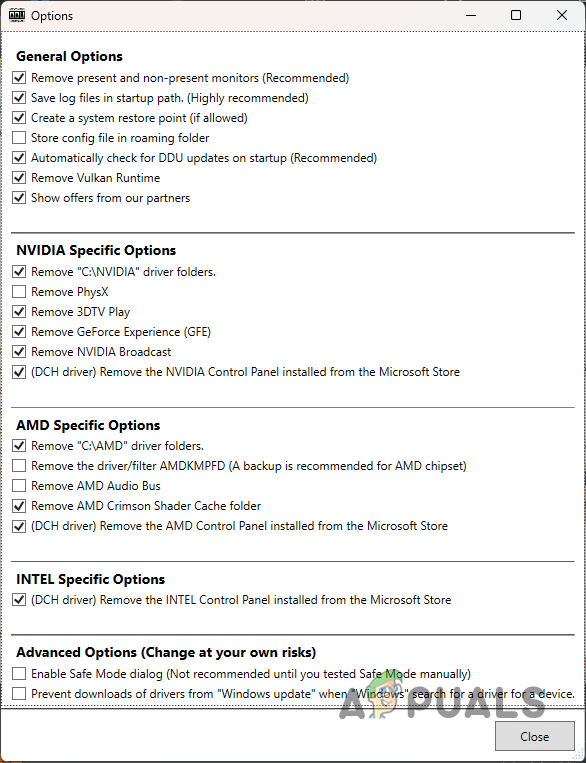
- After that, open the Display Driver Uninstaller.exe file.
- Once DDU is open, click Continue on the Options screen.
DDU General Options - After that, choose GPU from the Select device type menu.
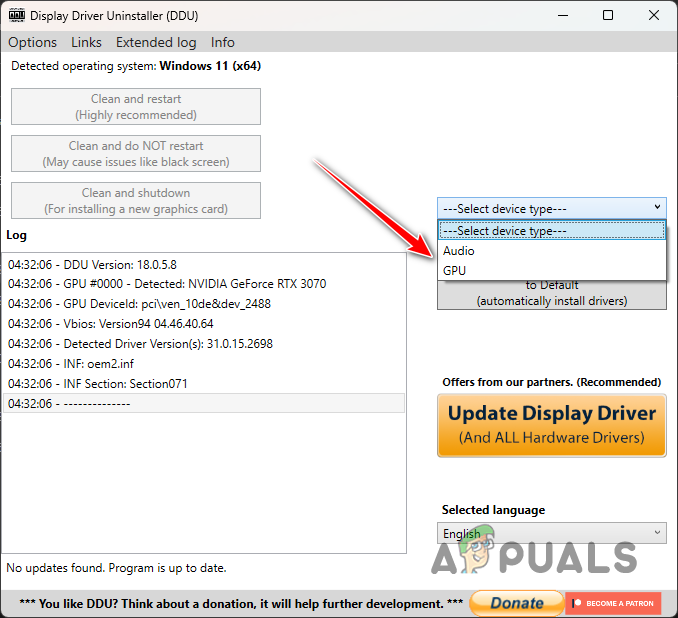
Selecting GPU Device Type - Then, select your video card brand from the Select device menu.
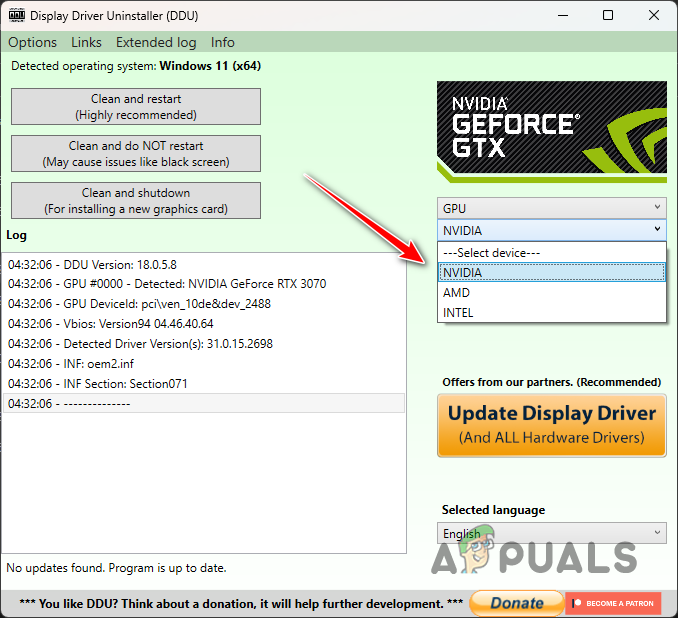
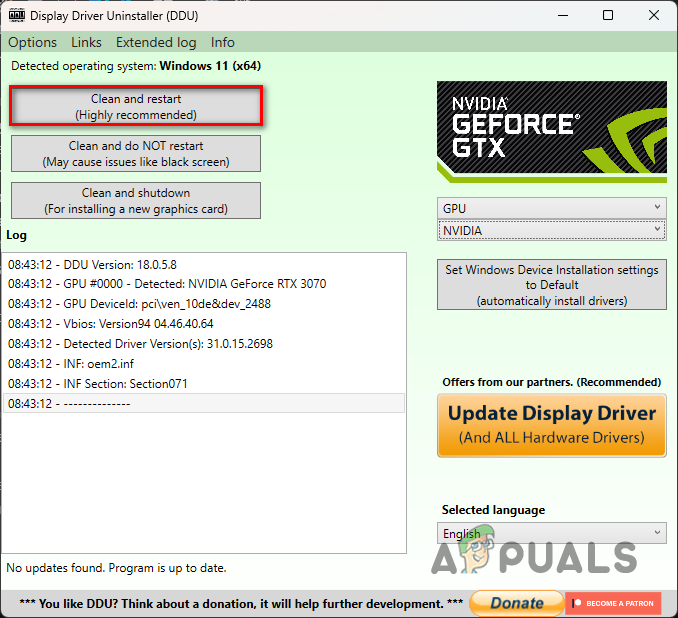
Selecting Video Card Brand - Once you do that, click Clean and restart.
Uninstalling Video Drivers - After your PC boots up, go to your GPU manufacturer’s website and download the latest video drivers.
- Install the new display drivers and see if the issue persists.
4. Perform SFC Scan
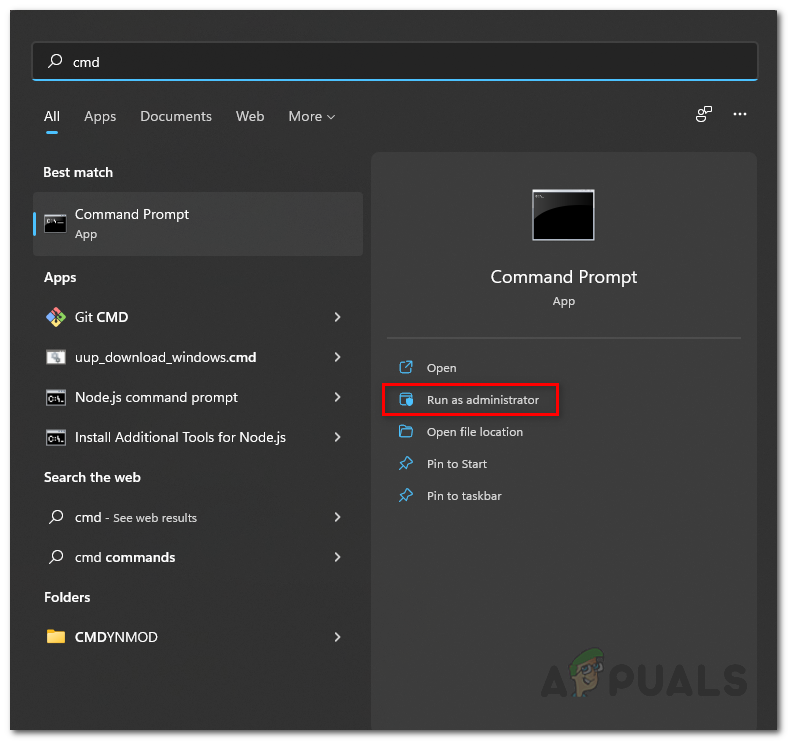
- Open the Start Menu and search for cmd. Click on the Run as administrator option to open an elevated command prompt window.
Open Command Prompt as Admin - After that, type in the following command and hit Enter:
sfc /scannow
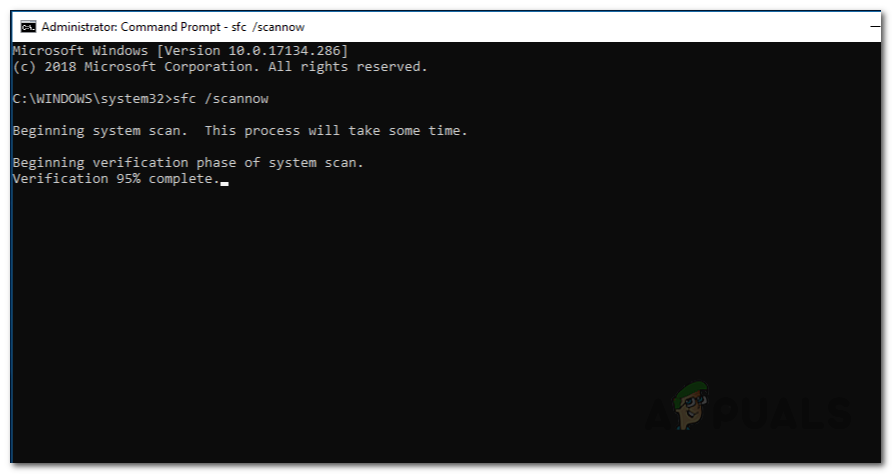
Running SFC Scan - Wait for the scan to complete.
- After that, copy and paste the following command and hit Enter:
Dism /Online /Cleanup-Image /RestoreHealth
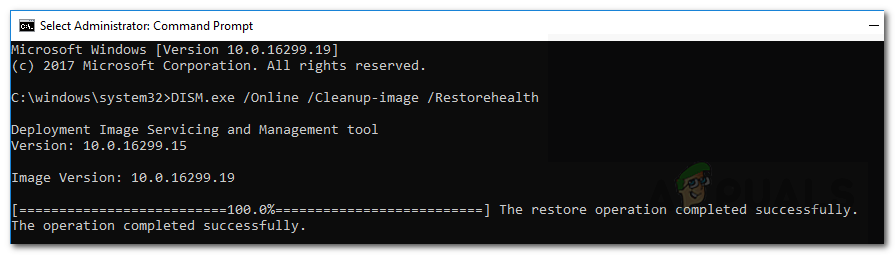
Restoring System Image Health - Once the scans are complete, see if the problem is still there.
5. Change Performance Options
- Open the Start Menu and search for Adjust the appearance and performance of Windows. Open it up.
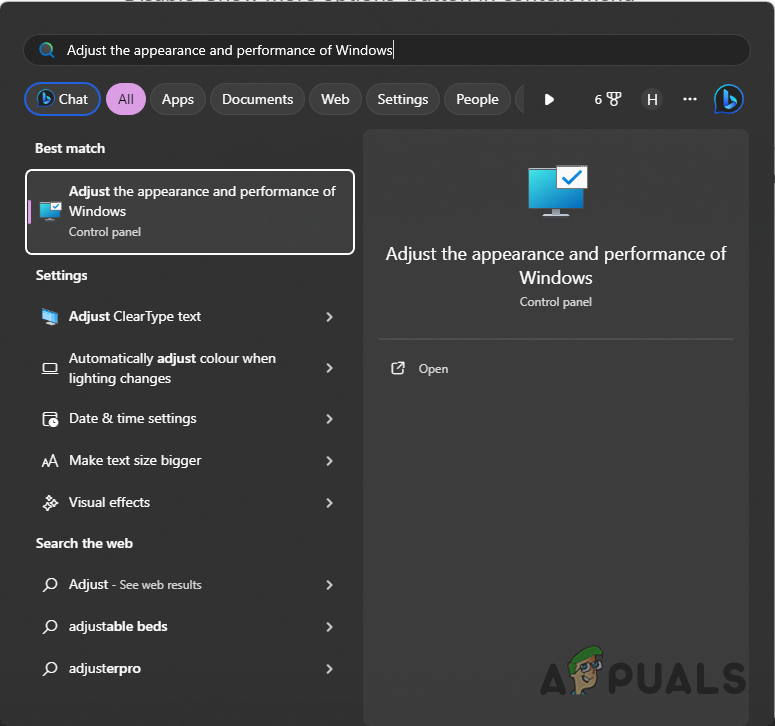
Opening Performance Options Menu - Then, on the Performance Options window, select the Adjust for best performance option.

Changing Performance Options - Click Apply and hit OK.
6. Remove Third-Party Context Menu Options
- First, open the Run dialog via the Win key + R shorthand on your keyboard.
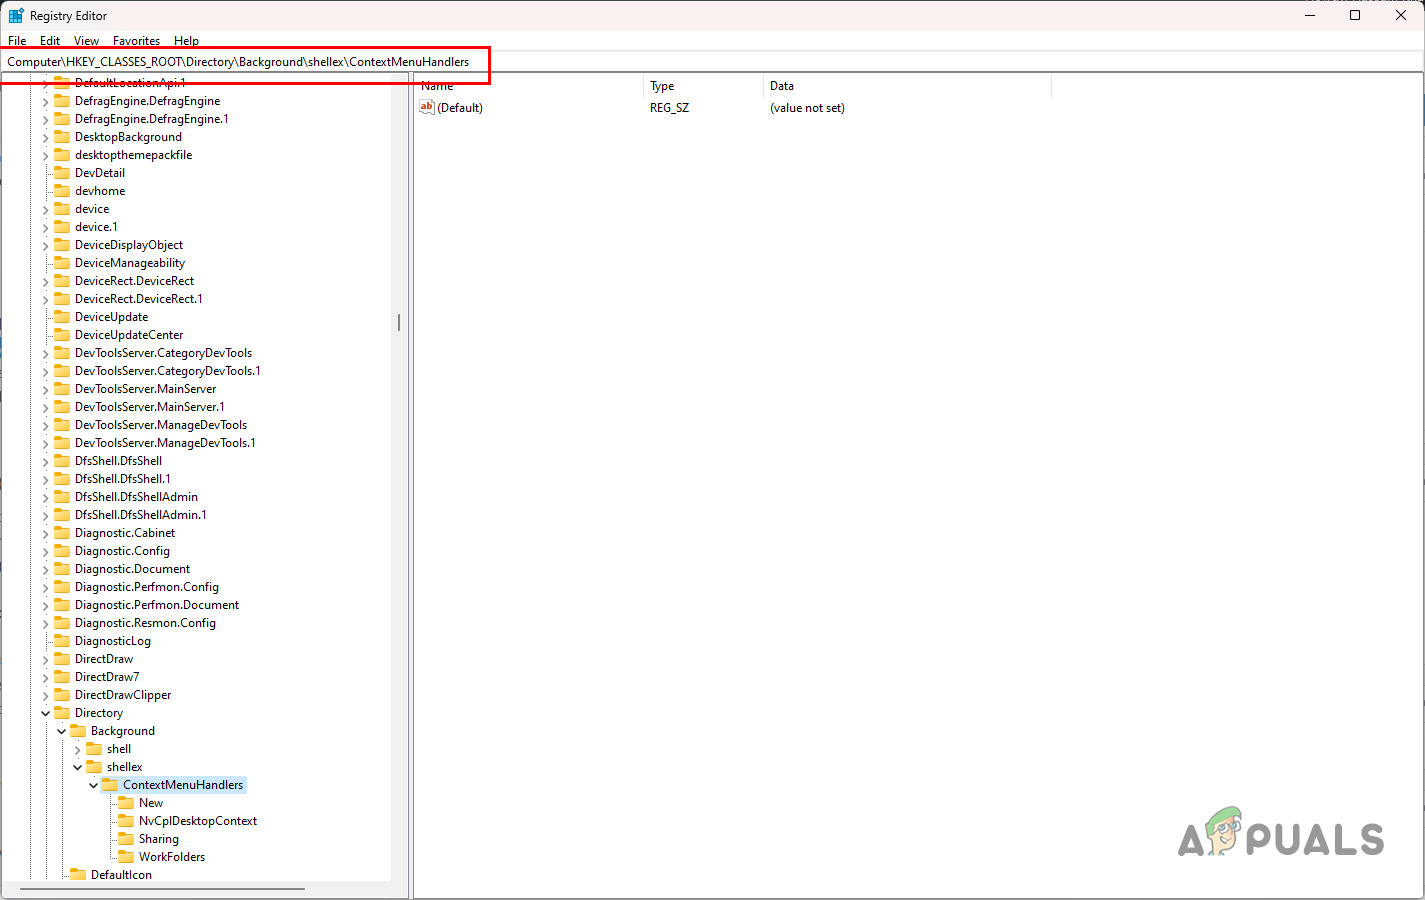
Opening Windows Registry - After that, copy and paste the following path in the Windows Registry address bar:
Computer\HKEY_CLASSES_ROOT\Directory\Background\shellex\ContextMenuHandlers
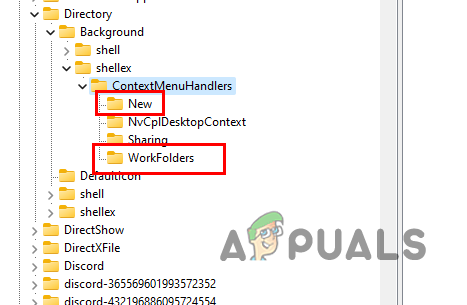
Navigating to Context Menu Path - On the left-hand side, expand the ContextMenuHandlers list.
- Then, delete all the keys except New and WorkFolders.
Keys Not to Delete - Restart your computer.
7. Perform a Clean Boot
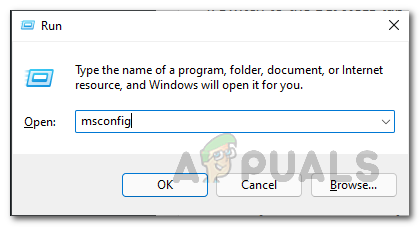
- Use the Win key + R shorthand to open the Run box.
- Then, type in msconfig and hit Enter.
Opening the System Configuration Window - This will open the System Configuration window.
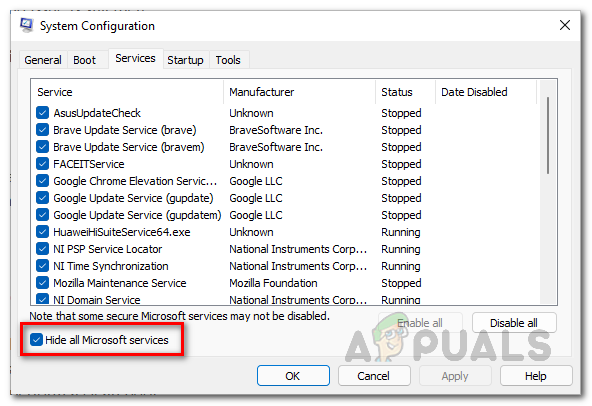
- Navigate to the Services tab.
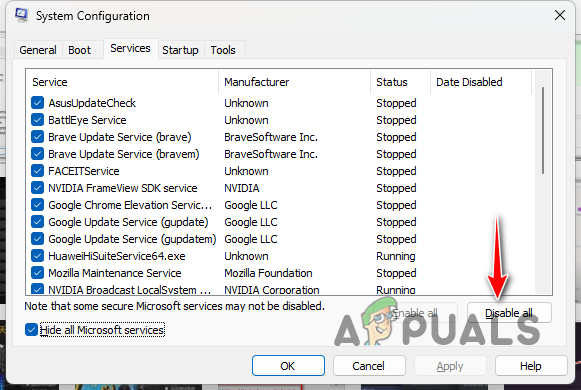
- After that, select the Hide all Microsoft services box.
Hiding Microsoft Services - Then, click the Disable all button and click Apply.
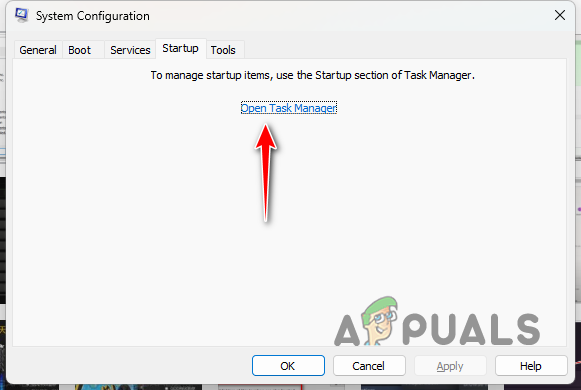
Disabling Third-Party Services - Once you do that, switch to the Startup tab and click Open Task Manager.
Opening Task Manager - In the Task Manager window, select the apps one by one and click the Disable option.

Stopping Third-Party Apps on Startup - Finally, restart your computer to perform a clean boot.
With these solutions, you should be able to alleviate the slow context menu problem in Windows 11. It is important to ensure that the third-party apps on your system do not clutter the context menu to avoid such issues in the future.
Still encountering a slow context menu in Windows 11?
If you are still facing a slow context menu in Windows 11, you will need to contact the official support team from Microsoft. You can do this by submitting a ticket to Microsoft support regarding your issue and they should be able to get back to you in as soon as feasible.
Reviewed by Muhammad Zubyan


