How to Build Lineage OS on Windows 10
LineageOS, the forked successor to CyanogenMod, is the most popular custom ROM for Android. Its been ported to over 200 phone models and has a huge range of features compared to the stock Android experience.
However, while there are many devices with LineageOS ports, there are even more without. In this quick and easy Appual’s guide, we’ll be showing you how to build LineageOS in a Windows 10 environment. Please note that this will not build a LineageOS ROM that is immediately compatible for your device, this guide is purely to get you setup and running on a Windows 10 environment for building LineageOS from the official Git repo.
Please note you should be familiar with using Linux command terminals and building Android ROMs – this isn’t a beginner’s guide. You should see Appual’s guides on building custom ROMs from AOSP if you’ve never attempted to build a ROM before (links below).
If you’re interested in custom ROM building and other DIY Android tutorials, you should check out these other Appual’s guides:
- How to DIY Port TWRP for Android
- How to Manually Theme Android System UI
- How to Build a Custom ROM from AOSP | Pt. 2
Requirements:
- Windows 10 (64-bit) (recommended to be installed on an SSD)
- At least 16GB of RAM (compiling takes a lot of resources!)
So what we’re basically going to do is set up a Windows Subsystem for Linux (WSL) for our build environment. This is incredibly easy though often overlooked, as most of what we need is available inside the Microsoft Store.

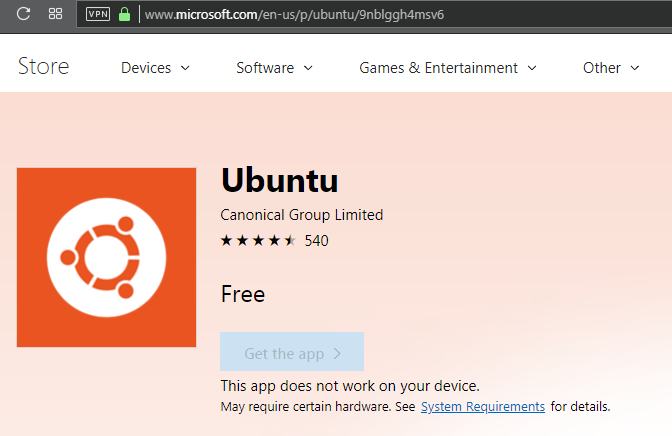
Your first step is to open the Microsoft Store, and search for Ubuntu 18.04 and install the app.
Next open the Ubuntu 18.04 app and go through the initial setup wizard.
Now open the Ubuntu terminal and install the following packages:
sudo apt install android-sdk-platform-tools bc build-essential ccache curl g++-multilib gcc-multilib git gnupg gperf imagemagick lib32ncurses5-dev lib32readline-dev lib32z1-dev liblz4-tool libncurses5-dev libsdl1.2-dev libssl-dev libwxgtk3.0-dev libxml2 libxml2-utils lzop m4 openjdk-8-jdk pngcrush repo rsync schedtool squashfs-tools xsltproc zip zlib1g-dev
Next you need to create a new directory for the source code and navigate to it:
mkdir -p ~/android/lineage && cd android/lineage
Now we will init the LineageOS source repo:
repo init -u https://github.com/LineageOS/android.git -b lineage-15.1
Add this bit of code to .repo/local_manifests/roomservice.xml (if this file doesn’t exist, you can simply create it)
<project name="TheMuppets/proprietary_vendor_your device brand" path="vendor/your device brand" remote="github" />
And we’ll download the source code:
repo sync
Now this is purely optional, but its recommended to turn on caching to speed up your build – we do this through “ccache”.
You basically want to add the following line to your ~/.bashrc file:
Export USE_CCACHE=1
And then specify the maximum amount of disk space you want ccache to take advantage of:
Ccache -M 50G
Replace the “50G” in that line with your preference – it corresponds to the amount of cache you’re allocating in gigabytes. If you’re building for just one device, you can use between 25G – 50G, but if you’re building for multiple devices that do not share the same kernel source you should bump it up to around 75 – 100G. In either case, utilizing the ccache will shave a significant amount of time off your builds.
Next, you should cherrypick the following commit:
source build/envsetup.sh && repopick -t wsl-compile
Then you will prepare the device-specific code:
breakfast your device codename
Make 64-bit bison and ijar:
make bison && make ijar
Set the BISON_EXEC to run the 64-bit version of bison and set IJAR_EXEC to run the adapted ijar:
export BISON_EXEC=~/android/lineage/out/host/linux-x86/bin/bison

export IJAR_EXEC=~/android/lineage/out/host/linux-x86/bin/ijar
(add the commands to ~/.bashrc if you don’t want to have to execute it every time you reopen a command line)
And now you can start the build!
brunch your device codename
For building in the future, you just need to repeat the steps of adding the .repo/local_manifests, enable the ccache, and set the BISON_EXEC and adapted IJAR.
You also need to make bison && make ijar every time you flush the directory.
Some final notes:
- Do not add/edit your Linux files from Windows, the files will most likely become corrupted in bash. Do it within the Linux subsystem.
- Do not use mnt to download the source code to other drives and then follow this guide. You should download the source code to folders only within the Linux subsystem!


