How To Add MFA Security Through Your Raspberry Pi Terminal
The Raspberry Pi is a popular single-board computer that has become all the craze in recent years. Due to its growing popularity and common usage across newbie coders and tech enthusiasts, it has become a target for cybercriminals to do what they like to do best: cyber theft. Just like with the regular PC devices that we protect with numerous firewalls and passwords, it’s become increasingly important to protect your Raspberry Pi device with similar multi-faceted protection as well.
Multi-factor authentication works by combine two or more of the following to grant you access to your account or device. The three broad categories to provide access granting information from are: something you know, something you have, and something you are. The first category could be a password or pin code that you have set up for your account or device. As an added layer of protection, you may be required to provide something from the second category such as a system-generated pin that is sent to your smartphone or generated on another device you own. As a third alternative, you may also incorporate something from the third category, comprising of physical keys such as biometric identification which includes facial recognition, thumbprint, and retinal scan depending upon the capability of your device to perform these scans.
For the purpose of this setup, we will use the two most common modes of authentication: your set password and a one time token generated through your smartphone. We will integrate both steps with google and receive your password through Google’s authenticator application (which replaces the need for receiving SMS codes on your cell phone).
Step 1: Get the Google Authenticator Application

Before we begin setting up your device, let’s download and install the google authenticator app on your smartphone. Head into the Apple App store, Google play store, or the respective store of whichever device you’re operating. Download the google authenticator application and wait for it to finish installing. Other authentication applications such as Microsoft’s authenticator can also be used, but for our tutorial, we will use the Google authenticator application.
Step 2: Setting Up Your SSH Connections
Raspberry Pi devices normally operate on SSH and we will work on configuring our multi-factor authentication over SSH as well. We will create two SSH connections to do this for the following reason: we don’t want you to get locked out of your device and in case you do get locked out of one stream, the second will allow you another chance to get back in. This is just a safety net we are putting in for the sake of you: the user owning the device. We will keep this safety net second stream going throughout the setup process until the entire setup is complete and we have ensured that your multi-factor authentication is working properly. If you carry out the following steps thoughtfully and carefully, there should’nt be any issue getting your authentication set up.
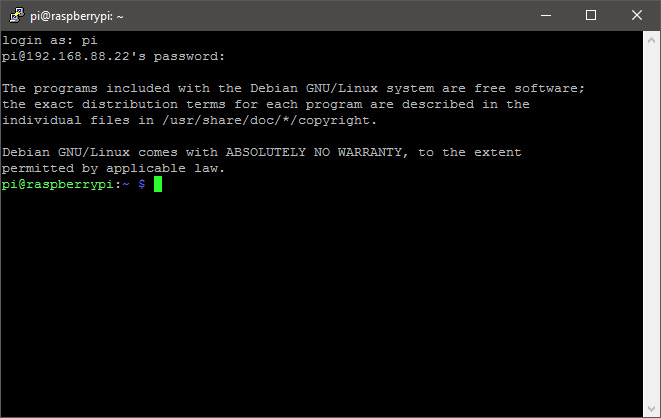
Launch two terminal windows and type in the following command in each. This is to set up the two streams in parallel.
ssh username@piname.local
Instead of username, type in your device’s username. Instead of pi name, type in your pi device’s name.
After hitting enter, you should get a welcome message in both terminal windows displaying your device’s name and your username as well.
Next, we will edit the sshd_config file. To do this, type in the following command in each window. Remember to do all of the steps in this section in both windows in parallel.
sudo nano /etc/ssh/sshd_config
Scroll down and find where it says: ChallengeResponseAuthentication no
Change the “no” to a “yes” by typing this in its place. Save your changes by pressing [Ctrl]+[O] and then exit the window by pressing [Ctrl]+[X]. Again, do this for both windows.
Relaunch the terminals and type in the following command in each to restart SSH daemon:
sudo systemctl restart ssh
Lastly. Install the Google Authenticator in your setup to integrate your system with it. To do this, type in the following command:
sudo apt-get install libpam-google-authenticator
Your streams have now been setup and you have configured your google authenticator with both your device and your smartphone up until this point.
Step 3: Integrating Your Multi-Factor Authentication With Google Authenticator
- Launch your account and type in the following command: google-authenticator
- Enter “Y” for time-based tokens
- Stretch out your window to see the entire QR code that has been generated and scan it on your smartphone device. This will allow you to pair your Raspberry Pi’s authenticator service with your smartphone application.
- There will be some back up codes displayed under the QR code. Note these down or take a photo of them to have them in reserve in case you’re unable to verify your multi-factor authentication through the Google Authenticator application and end up needing a backup code to get in. Keep these safe and don’t lose them.
- You will be prompted with four questions now and here’s how you’ll need to answer them by entering either “Y” for yes or “N” for no. (Note: The questions below are quoted directly from the Raspberry Pi digital terminal so that you know exactly which questions you will be faced with and how to respond to them.)
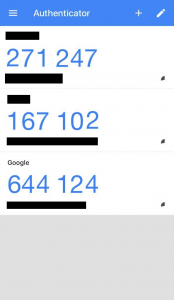
The Google Authenticator Smartphone Application on iOS. Accounts have been blacked out for security reasons and the security code digits have been shuffled around and changed as well. - “Do you want me to update your “/home/pi/.google_authenticator” file?” (y/n): Enter “Y”
- “Do you want to disallow multiple uses of the same authentication token? This restricts you to one login about every 30s but increases your chances to notice or even prevent man-in-the-middle attacks (y/n):” Enter “Y”
- “By default, a new token is generated every 30 seconds by the mobile app. In order to compensate for possible time-skew in between the client and the server, we allow an extra token before and after the current time. This allows for a time skew of up to 30 seconds between the authentication server and client. If you experience problems with poor time synchronization, you can increase the window from its default size of 3 permitted codes (one previous code, one current code, the next code) to 17 permitted codes (the 8 previous codes, one current code, the next 8 codes). This will permit for a time skew of up to 4 minutes between client and server. Do you want to do so? (y/n):” Enter “N”
- “If the computer that you are logging into isn’t hardened against brute-force login attempts, you can enable rate-limiting for the authentication module. By default, this limits attackers to no more than 3 login attempts every 30s. Do you want to enable rate-limiting? (y/n):” Enter “Y”
- Now, launch the Google Authenticator application on your smartphone and press the plus icon on the top of the screen. Scan the QR code being displayed on your Pi device to pair the two devices. You will now be displayed with authentication codes round the clock for whenever you need them to log in. You won’t need to generate a code. You can simply launch the application and type in the one being displayed at that moment.
Step 4: Configuring The PAM Authentication Module With Your SSH
Launch your terminal and type in the following command: sudo nano /etc/pam.d/sshd
Type the following command as shown:
#2FA auth required pam_google_authenticator.so
If you want to be asked for your pass key through the Google Authenticator application before entering your password, type in the following command before the command typed in previously:
@include common-auth
If you want to be asked for the pass key after your password has been entered, type this same command in, except put it in after the previous #2FA command set. Save your changes by pressing [Ctrl]+[O] and then exit the window by pressing [Ctrl]+[X].
Step 5: Close The Parallel SSH Stream
Now that you have finished setting up the multi factor authentication, you can close one of the parallel streams that we had going. To do this, type in the following command:
sudo systemctl restart ssh
Your second backup safety net stream is still running. You will keep this running until you have verified that your multi factor authentication is working properly. To do this, launch a new SSH connection by typing in:
ssh username@piname.local
Instead of username, type in your device’s username. Instead of pi name, type in your pi device’s name.
The login procedure will now carry out. Type in your password and then enter the code displayed on your Google Authenticator application at this time. Be careful to get both steps done in thirty seconds. If you are able to log in successfully, you can head back in and repeat the previous step to close the parallel safety net stream we had running in place. If you have followed all of the steps correctly, you should be able to resume with multi factor authentication on your Raspberry Pi device now.
Final Words
As with any authentication process you put into place on any device or account, these additional factors make it safer than before but don’t make it absolutely safe. Be careful when using your device. Be alert of potential scams, phishing attacks, and cyber theft that your device could become subject to. Protect your second device that you have set up the code retrieval process on and keep it safe as well. You will need this device every time to get back into your system. Keep your back up codes in a known and safe location in case you are ever in a position where you don’t have access to your back up smartphone device.