Hard Drive Not Showing up on Mac? Try these fixes
Hard drives are slowly fading away as SSDs become more popular and common. However, they are still widely used and serve a really good purpose. When you plug in a hard drive to your Mac, you would normally expect it to show up in the Finder app. As it turns out, in some cases, the expected may not happen and you may not see your hard drive show up on your Mac. This can be really frustrating as we heavily rely on storage devices as they store the data that holds a great value to us.
Your hard drive not showing up on your Mac can be due to a number of reasons. This includes the cable being used to connect the hard drive to your Mac as well as your Finder preferences. In this article, we will be showing you how to resolve any issues that may be causing your hard drive not to show up on your Mac whether they may be related to the cable, the hard drive itself, and more. Before we do that, however, it would be better to establish a better understanding of why the problem occurs in the first place. For this, let us have a look at the possible causes of the issue that include but are not limited to:
- Faulty Cable — The first reason that this issue may occur is due to a faulty cable. Problems like these are pretty commonly caused by a bad or faulty cable. If this is applicable, you will have to check the cable and if it turns out to be faulty, simply switch it for a different one.
- Finder Preferences — Another reason you might face the issue where your hard drive does not show up could be due to your Finder preferences. In this case, this is not really an issue because the hard drive is being detected by your Mac but you are just not able to see it because of your Finder preferences. Thus, to fix this, you will simply have to edit your Finder preferences so that it shows the external drives that you connect.
- Drive Format — As it turns out, in some cases, the issue can also be caused due to your hard drive’s format. This happens when the file system of the hard drive cannot be read by your Mac in which case you will simply have to format it again using the Disk Utility on your Mac to fix the problem.
- Faulty Hard Drive — Finally, if the hard drive that you are using is damaged itself, you won’t be able to see it on your Mac because the operating system won’t be able to recognize it. In such a case, it would be best to take it to a technician or if you have a warranty on the hard drive, simply claim that.
With that said and out of the way, let us jump right into the different workarounds that you can implement to get the issue resolved and be able to use your hard drive.
Check Finder Preferences
As it turns out, the first thing that you should do when you face the problem in question is to make sure that you have the right preferences for the Finder application. This is because, oftentimes, nothing is wrong with your hard drive and it is perfectly fine but you are not able to see it just because of your Finder preferences. If this case is applicable, you simply have to make sure that external hard drives are allowed to be shown in the Finder app from the preferences. To do this, follow the instructions given down below:
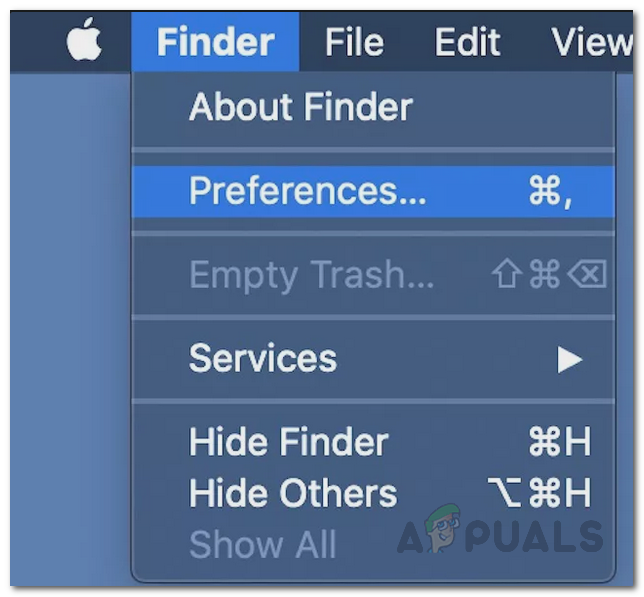
- First of all, open up the Finder app.
- Then, on the menu at the top, click on Finder.
- From the drop-down menu, choose Preferences.
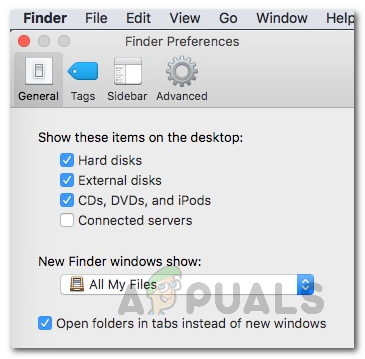
Opening Finder Preferences - This will bring up the Finder Preferences window. There, make sure the External disk is ticked.
Finder Preferences - Once done, you can close the Finder app. Now, go and check if you are able to see the hard disk.
In case the option was already ticked, then the issue isn’t from your Finder Preferences. In such a case, jump to the next method down below.
Check the Cable
At this point, we have scratched off the possibility of the problem being due to your Finder preferences, the second thing that you should check is the cable that you are using to connect the hard drive to your Mac. More often than not, the cables that we use to connect external drives to our computers can get damaged and cause connectivity issues. This usually happens when the hard drive isn’t receiving enough power.
In addition to that, make sure that the hard drive is plugged in correctly and it is not loose which can be usually the case as well. You can also try using a spare cable if you have one to see if that works. In case it does, then the issue is obvious and your cable was faulty.
Format Hard Drive
In some cases, the issue can also be caused by the file system of your hard drive. If you formatted your hard drive into a file system that isn’t recognized by your Mac, you won’t be able to see your hard drive show up in the Finder app. In such a scenario, you will have to format the hard drive into a more common file system so that your Mac has no issues reading it. To do this, you can either use a different PC that you have to format the hard drive. Alternatively, you can also use the Disk Utility on your Mac to format the drive. Before doing this, make sure you have a backup of the drive.
If you are running a macOS version prior to High Sierra, you can format the hard drive to HFS+ format. For subsequent versions, you can use the APFS format or simply format the hard drive to exFAT or FAT32 file systems that are readable by macOS. Follow the instructions given down below to format your hard drive:
- First of all, open up Spotlight by pressing the Cmd + Spacebar shortcut keys. Once opened, type Disk Utility and then hit the Enter key.

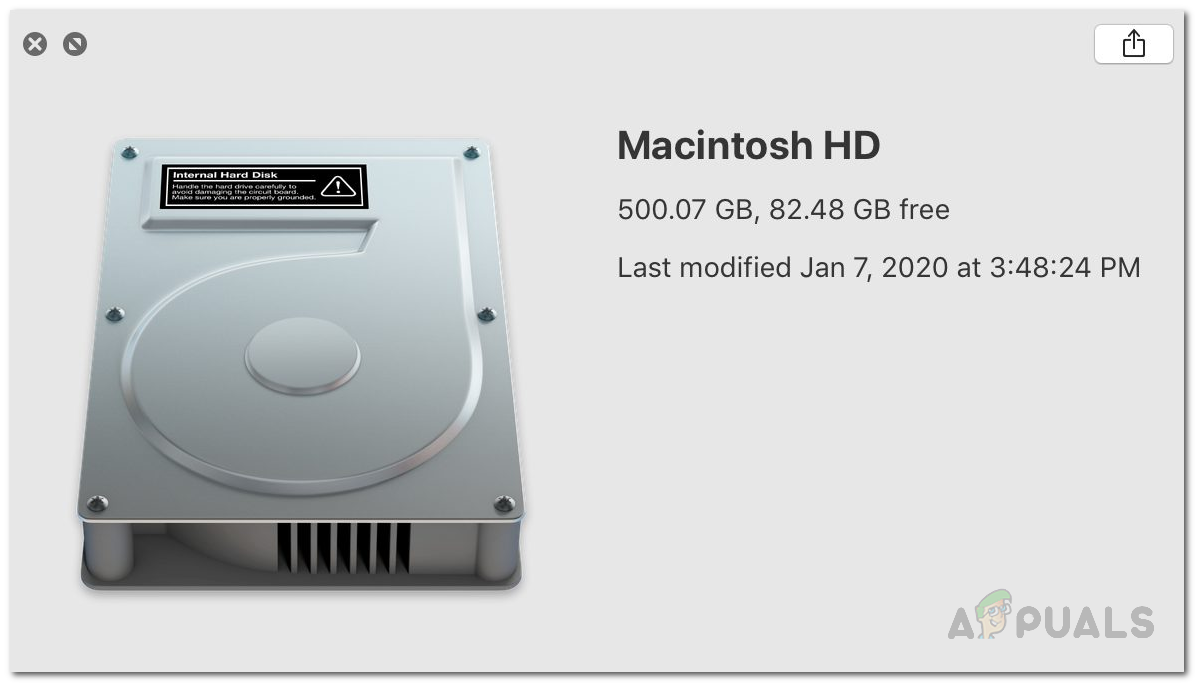
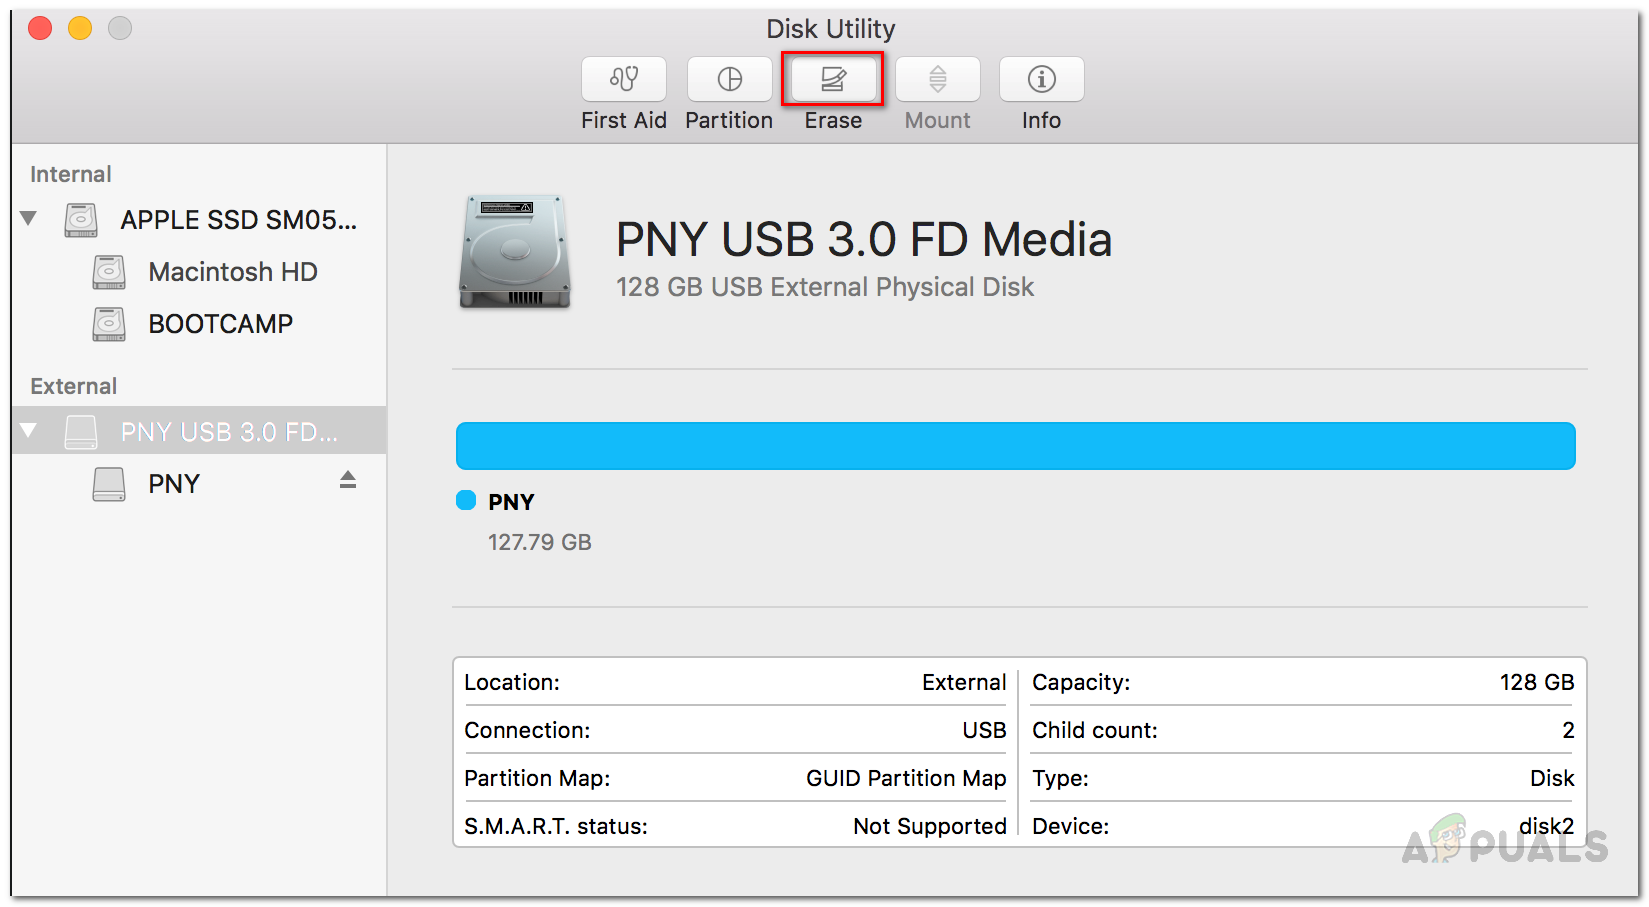
Opening Disk Utility - Once Disk Utility opens up, on the left-hand side, select your hard drive.
- At the top, click on the Erase button at the top.
Disk Utility - A new dialog box will open up. Here, you can rename the hard drive if you wish to do so.
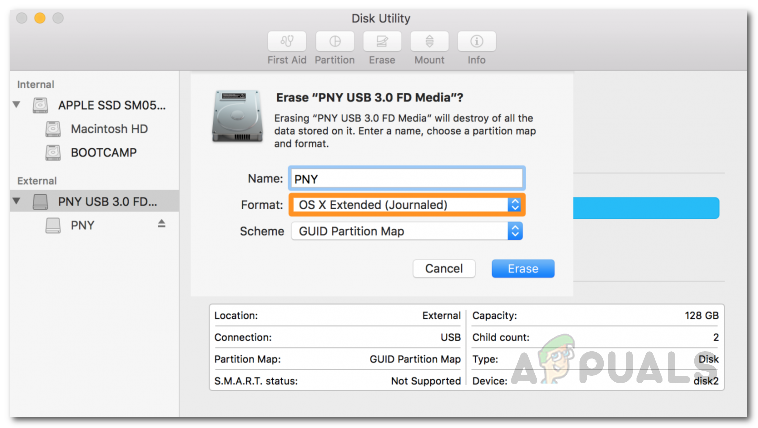
Erasing Hard Drive - Disk Utility will choose a format type for you. You can change this if you wish to. If you want to use the hard drive on both Windows and Mac, you should use the exFAT option from the drop-down menu. Otherwise, for Mac only, Mac OS Extended (Journaled) is the best option.
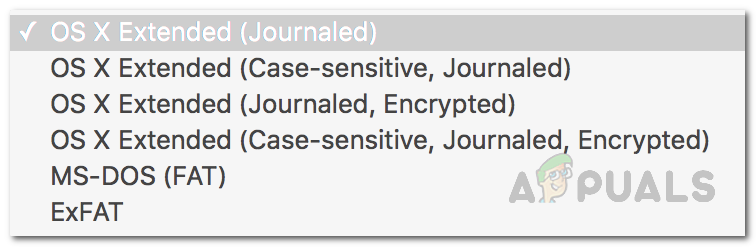
Format Menu - Once you have chosen a format type, click the Erase button to format it.
- Wait for it to complete and then check if it shows up now.
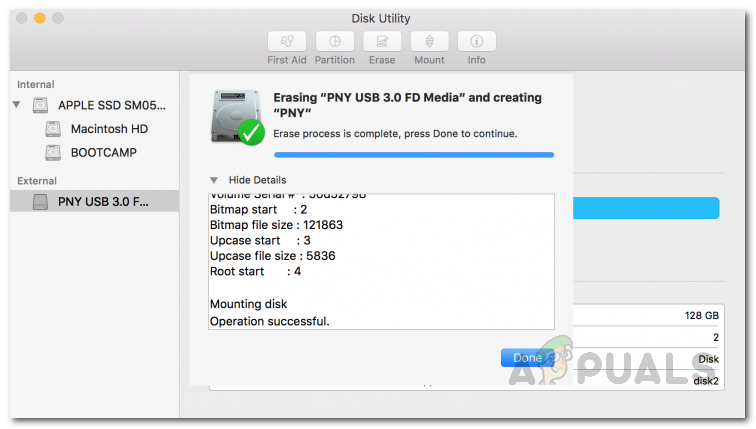
Disk Utility Finished Erasing
Repair Hard Drive using First Aid
As it turns out, the problem, in some cases, can be due to a damaged hard drive. In such a scenario, you can make use of the built-in Mac utilities that will help you fix such issues with your hard drive. The First Aid utility can be used to do this that can potentially fix whatever is causing this issue with the hard drive. To do this, follow the instructions given down below:
- First of all, open up the Disk Utility by searching for it in the Spotlight.
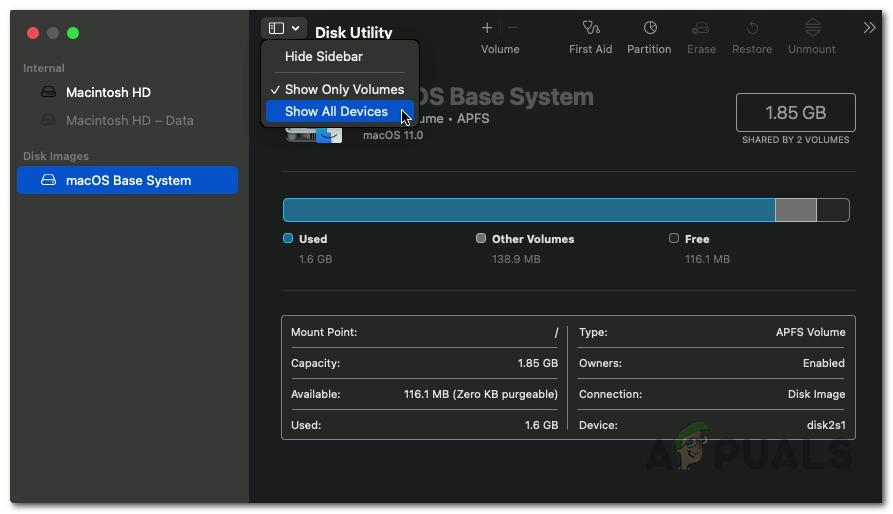
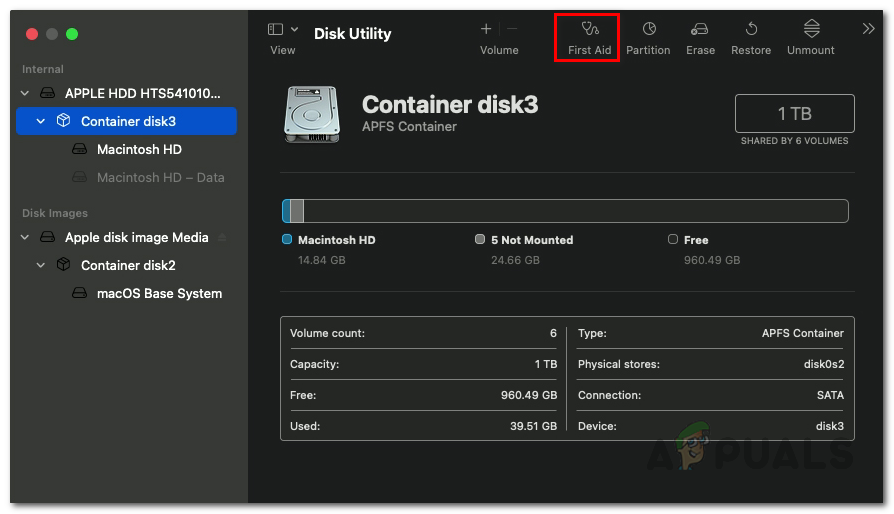
Opening Disk Utility - Once you have done that and Disk Utility is open, on the left-hand side, click on your hard drive. If you don’t see your hard drive, click on the drop-down menu icon next to Disk Utility and choose Show All Devices.
Showing All Devices on Disk Utility - Make sure that your hard drive is mounted. Then, click on the First Aid option at the top.
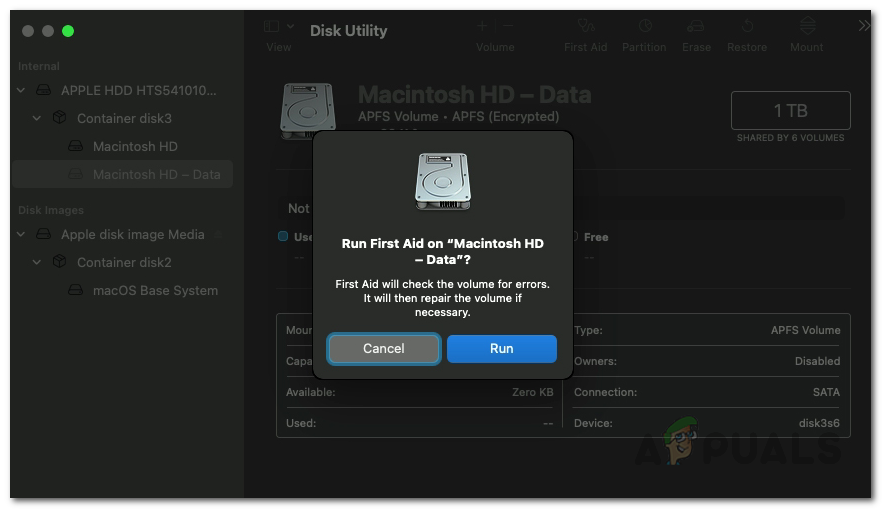
Opening First Aid - On the dialog box that appears, click the Run button.
Running First Aid - Once First Aid has finished scanning your hard drive and if it finds any errors, you will be shown a Repair Disk option. Go ahead and click on that to repair your disk.
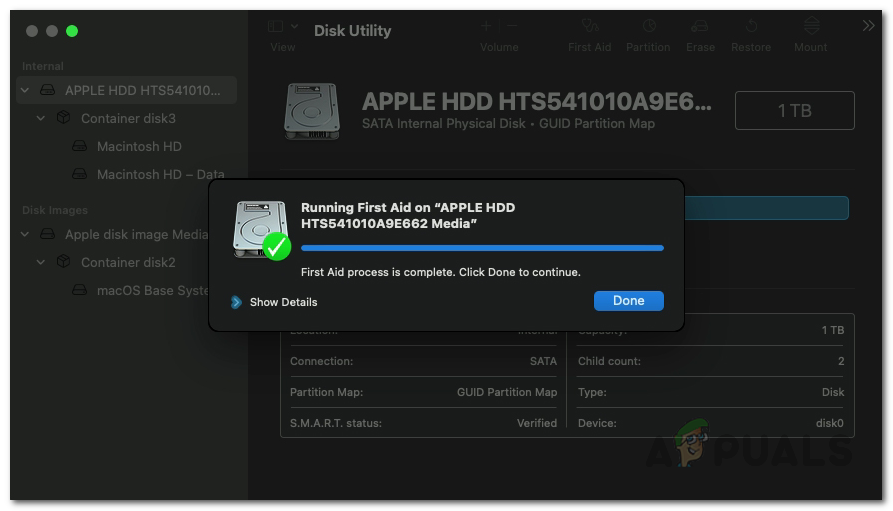
First Aid Finished - After that has finished, see if the issue is still there.


