Fix: Disk Utility Wont Load on MacOS
Some macOS users are reporting that they are suddenly unable to verify the status of their HDD or SSD drives via the Disk Utility. Whenever they try to open it, the Disk Utility ends up displaying the ‘Loading disks‘ message endlessly without actually displaying any of the disks.
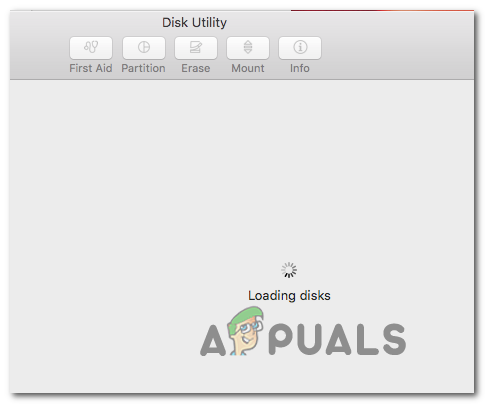
In some cases, this issue is facilitated by a fairly common inconsistency that can be resolved easily via a simple Mac restart. This will resolve the common glitch where the Disk Utility will hand with the “Loading disks” message after a new HDD or SDD drive is connected.
However, this issue can also be triggered by a stuck Disk Utility process. In this scenario, using the terminal to identify and kill the task managing the process will fix the issue entirely. Unless the problem is occurring due to a 3rd party conflict – in this case, run the Disk Utility in Safe mode and see if the problem is fixed.
In case the issue is still occurring, try moving the preference file (com.apple.diskutility.plist) away from the Library menu in order to force the OS to create a new healthy file.
Other potential fixes include resetting the NVRAM and PRAM, repairing the OS drive via the Recovery menu, power-cycling your machine and even reinstalling the macOS in exceptional situations where nothing else fixes the issue.
Restarting your Mac Computer
As it’s been reported by several affected users, this issue can occur due to a fairly common inconsistency that can be resolved by a simple system restart.
Although there’s no official explanation on why this problem occurs (even on the newest macOS versions like Catalina), some tech-savvy Mac users are saying that the utility tends to hang and fail to load disk information when a large external HDD or SSD is connected.
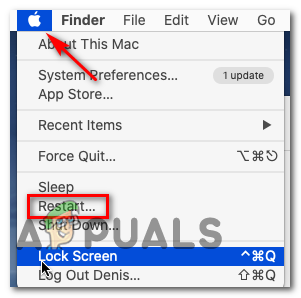
If this scenario is applicable, try restarting your macOS conventionally by clicking on the Apple icon (top-left corner) and selecting Restart from the newly appeared context menu.
Once the restart sequence is complete, attempt to launch the Disk Utility once again and see if the issue has been resolved.
In case the utility still hangs with the ‘Loading disks‘ message, move down to the next potential fix below.
Unsticking the Disk Utility
As it turns out, this issue is often reported to occur due to the main process behind Disk Utility getting stuck in a limbo state. If this scenario is applicable, you should be able to fix the issue by finding out the assigned process number of Disk Utility and using that to kill the task.
This operation will get the utility unstuck, allowing you to manipulate your disk drives without the endless ‘Loading disks‘ message.
Here’s a quick guide on getting the Disk Utility unstuck by using the Terminal:
- Open the Finder app from the action bar at the bottom of the screen.

Opening the Finding App - Once you’re inside the Finder app, click on the Go button (from the ribbon bar at the top) and click on Utilities from the newly appeared context menu.

Accessing the Utilities menu - Once you’re inside the Utilities screen, double-click on the Terminal app from the list of available options.
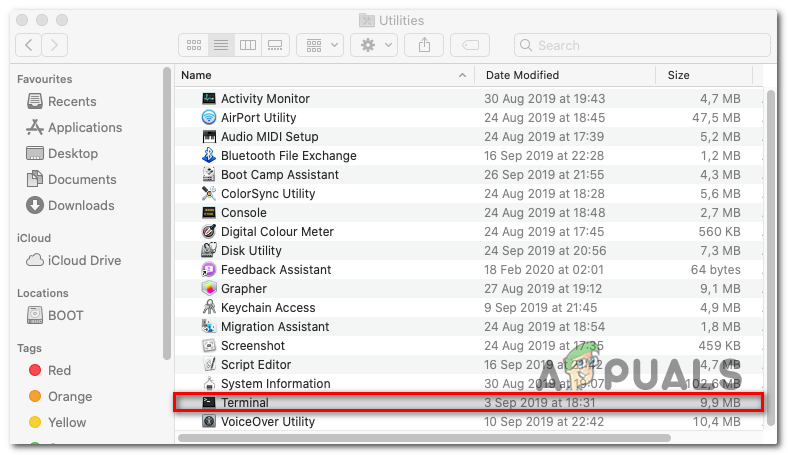
Accessing the Terminal utility Note: You might be prompted to provide your admin password at this point.
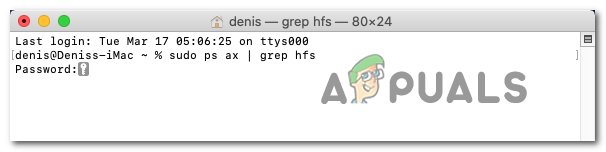
- After you’re finally inside the Terminal app, type the following command and press Return to get a list of all the task processes that are currently running:
sudo ps ax | grep hfs
- When prompted to insert the password associated with your administrator account, type it and press Return once again.
Inserting the administrative password - After the results are generated, you should see a line that looks like this:
**970** ?? U 2:08.88 /System/Library/Filesystems/hfs.fs/Contents/Resources/./fsck_hfs -y /dev/disk2s4
Note: The parameters and dates will be different, but the location will be the same.
- Take note of the first number (970 in the example above) and use it in the next command below:
sudo kill -9 970 #
Note: Keep in mind that 970 is just a placeholder – replace it with your own number that you generate at step 5. This command will clear the Disk Utility task and get the utility unstuck.
- Additionally, run this following command to kill the Fsck process also:
sudo kill $(ps -ef | awk '/fsck/ {print $2}') 2>/dev/null - Attempt to launch the Disk Utility once again and see if this operation has managed to resolve the issue in your case.
Running the Disk Utility in Safe mode
Since this ‘Loading disks‘ issue with Disk Utility could be the result of a conflict with some type of 3rd party entity, your first attempt at resolving the issue would be to boot your Mac in Safe Mode and retry the operation while every 3rd party service is not permitted from running.
Several affected Mac users have confirmed that this operation allowed them to finally use the Disk Utility and complete the operation that they were previously permitted to.
Here’s a quick step by step guide on booting your Macintosh in safe mode and running the Disk Utility without any 3rd party interference:
- Start (or restart) your Mac, then immediately press and hold on the Shift key. Keep the Shift key pressed until you see the Apple logo appearing on the screen.
Releasing the Shift key when you see the startup logo Note: If your startup disk is encrypted with FileVault, you will need to log in twice.
- Once the next startup is complete, use the action bar in the bottom to click on the Finder app.
Opening the Finding App - Once you’re inside the Finder app, click on the Go button (from the bar at the top), then click on Utilities (from the newly appeared context menu).
Accessing the Utilities menu - Inside the Utilities menu, double-click on the Disk Utility and see if it opens successfully (without the same ‘Loading disks‘ error message). In case the issue doesn’t repeat, complete the action that you were previously not able to.
Deleting the preference files for Disk Utilities
One fairly common cause that might end up triggering the endless ‘Loading disks’ error with Disk Utility is a corrupted preference file located in ~/Library/Preferences. This problem was reported on a lot of different macOS versions (including macOS Catalina).
Several affected users that were also struggling to resolve this problem have confirmed that they managed to fix the issue entirely after moving the file elsewhere (since you cannot delete it conventionally). This will end up forcing the operating system to create a new healthy file that will take its place.
Here are some instructions that will allow you to deal with the corrupted preference file of Disk Utility:
- From the default macOS screen, click on the Go option from the ribbon at the top and click on Go to Folder from the newly appeared context menu.
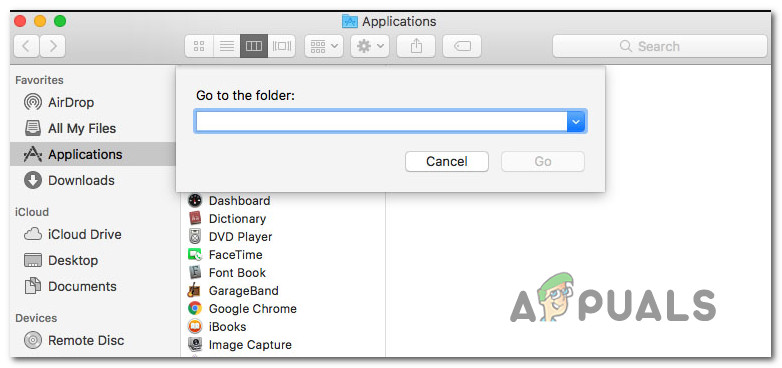
Go to the folder text box - Once you’re inside the Go to the folder box, type the following command and press Return to land directly into the Library folder:
~/library/
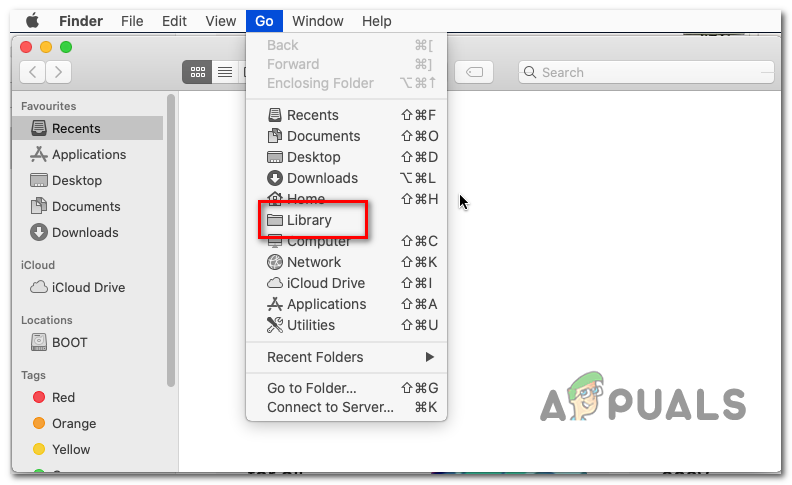
Accessing the Library Folder via the Finder app - Inside the main Library folder, scroll down through the list of folders and double-click on Preferences.
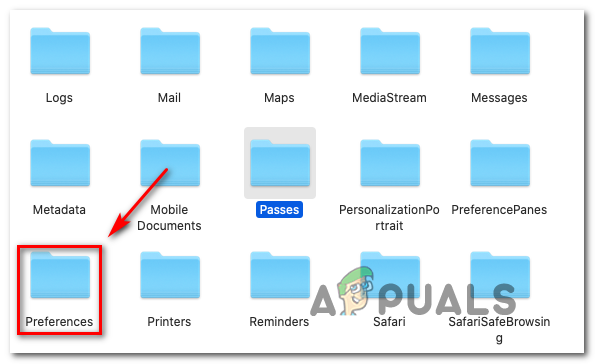
Accessing the Preferences tab - Inside the Preferences folder, scroll through the list and locate the Plist file named com.apple.diskutility.plist.
- Once you see it, simply drag & drop it on your desktop in order to move it. If you are asked to confirm by providing your admin password, do so to complete the process.
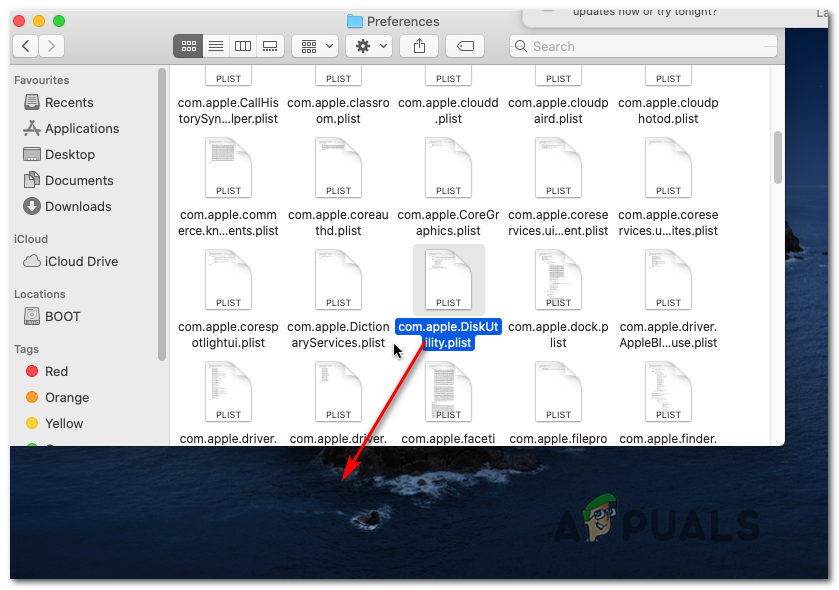
Moving the Plist file associated with Disk Utility - Next, relaunch the Disk Utility conventionally via the LaunchPad or by using the Finder app and see if the problem has been resolved.
Repairing the Drive via Recovery Menu
As it turns out, this particular error can also occur due to a collection of bad data accumulated in your OS drive. In some circumstances, this problem will ultimately cut user access to several critical utilities including Disk Utility.
If this scenario is applicable, you should be able to fix the issue by repairing the drive using the Disk Utility directly from the Recovery Menu. This operation will ensure that there’s no outside interference.
Here’s a quick guide on booting your Mac directly into the Recovery Menu and starting the Disk Utility directly from there:
- Restart your Mac and press Command + R and keep them both pressed until you see the Utility menu (Recovery Menu) appearing.
- Once you see that menu, click on Disk Utility to select it, then press the Continue button to open it.
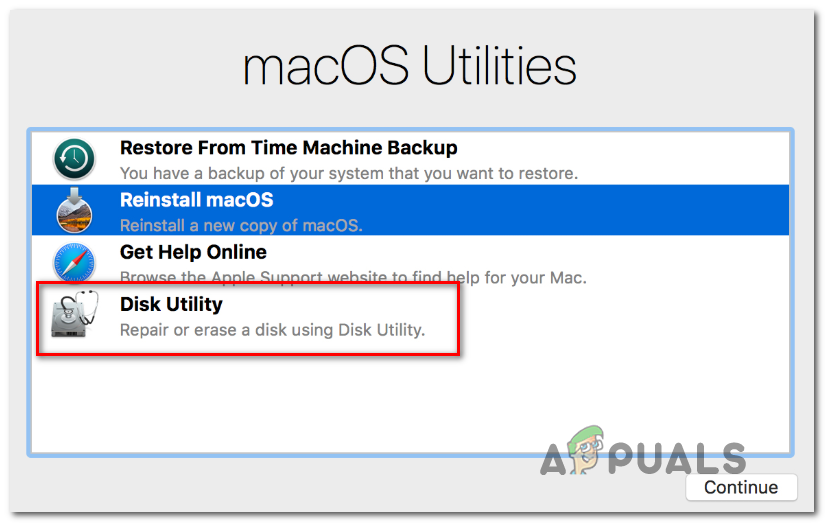
Accessing the Disk Utility via Recovery Menu - After the Disk Utility is fully loaded, select the volume entry that holds your OS files and click on the First Aid tab (from the toolbar) and wait for the Done button to activate. Once it’s active, click on it, then quit Disk Utility.
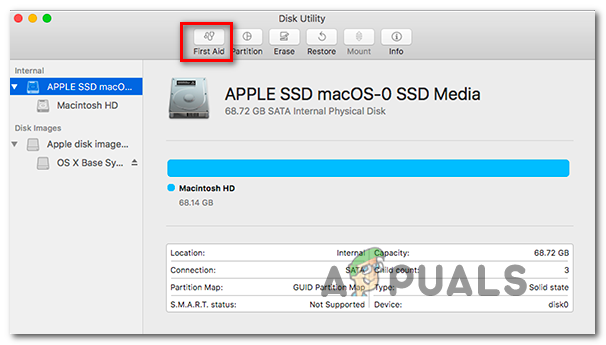
Running First Aid on the OS drive - Restart your Macintosh from the Apple menu and wait for the drive to be repaired at the next startup.
- After your macOS boots normally, attempt to open Disk Utility conventionally and see if the issue is now resolved.
Resetting NVRAM and PRAM
As it turns out, this particular issue can also be facilitated by data stored in NVRAM (nonvolatile random-access memory) or PRAM (Parameter RAM). NVRAM represents a small amount of memory that your MAC uses to store certain settings and access them quickly while PRAM stores similar information, but it’s mostly related to Kernel Information.
Among the information stored by PRAM and NVRAM is startup-disc selection and management, a series of data that might end up effectively breaking the Disk Utility.
Note: THe exact settings stored by NVRAM and PRAM depend on your particular Mac version.
If this scenario is applicable, you should be able to fix the issue by resetting both the PRAM and NVRAM. Here’s a quick guide on how to do this:
- First things first, start by shutting down your Mac completely.
- Turn it On and immediately press and hold on these four keys together: Option + Command + P + R.

Forcing a NVRAM and PRAM reset - Keep all four keys pressed for over 20 seconds – During this process, your Mac might appear like it’s restarting, but don’t let go of the keys yet.
- When you hear the SECOND startup sound, you can release all four keys at once.
Note: On Mac computers with Apple T2 Security Chip implementation, release the keys after the Apple logo appears and disappears for the second time. - Once the next startup sequence is complete, use the Action bar at the bottom to access the Finder App.
Opening the Finding App - Inside the Finder app use the ribbon bar at the top and click on Go > Utilities. Then, from the list of utilities, click on Disk Utility and see if the application is now opening normally (without the endless ‘Loading disks‘ error)
Performing a Power cycling on your Mac
In case you’ve cleared your NVRAM and PRAM with no success, it’s very likely that some type of temporary data ends up freezing the Disk utility. Since there are a lot of potential culprits that might end up doing this (most likely a conflicting process stuck in a limbo state), your best bet at fixing the issue right now is to clear any temp data by forcing a power-cycling procedure on your Mac computer.
If you are ready to go through with this procedure, follow the instructions below:
- First things first, remove any disk that’s currently inserted in your optical drive and disconnect any external HDD and flash drives that you might currently have connected to your Mac.
- Click on the Apple icon (top-left corner) and click on Shut down from the newly appeared context menu.
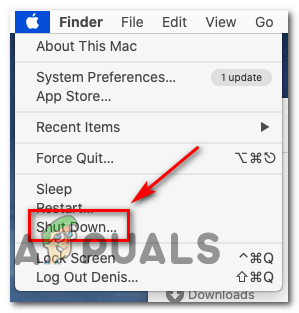
Shutting Down your Mac OS - Once the shutdown sequence is completed and you’re not seeing any life signs from your MAC, physically disconnect the power cable and wait for at least 30 seconds before plugging the cable into the power outlet again and starting your Mac again.
- After the next startup sequence is complete, attempt to launch the Disk Utility and see if the issue is now resolved.
If you’re still having the same problem, move to the final method below.
Reinstalling the OS X
If none of the other potential fixes above have allowed you to fix the issue, chances are you’re dealing with some kind of system file corruption that cannot be resolved conventionally. In case this scenario is applicable, you should be able to fix the issue by by forcing an OSX reinstall via the Recovery menu.
If you’re not exactly sure on how to do this, follow the step by step instructions below:
- Enter the Recovery menu by restarting your Mac and pressing & holding the Command + R keys as soon as you see the initial startup screen.
- When you see the recovery menu, you can let go of Command + R.
- Once you get to the recovery menu (macOS Utilities), select the entry named Reinstall macOS and click Continue.
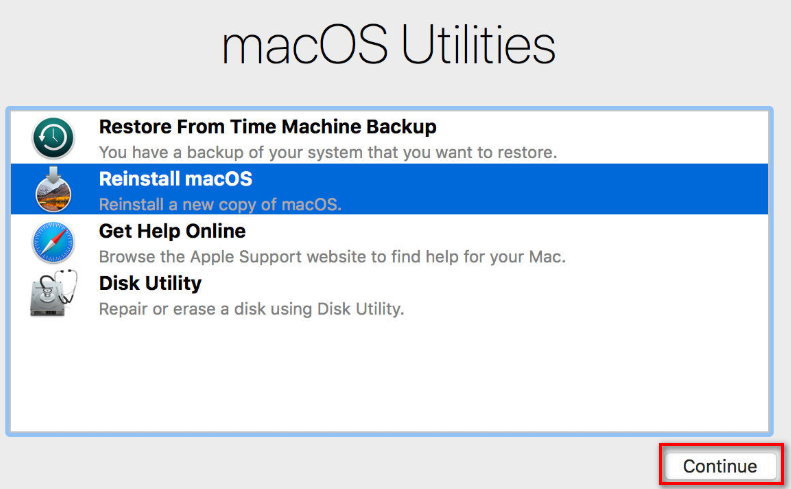
Reinstalling macOS - Follow the on-screen prompts to complete the reinstallation of your Mac Operating System.
Note: You will be prompted to insert your administrator password several times during this process.


