Fix: Warframe Update Failed
Warframe is a cooperative free-to-play third person online action game set in an evolving sci-fi world and it gathered quite a fan base around it. The game is fast-paced and it inclused things you have never seen before in a beautiful sci-fi setting.
However, you have run the latest build of the game in order to play it and downloading the latest update is sometimes not possible because of the “update failed” error. This problem is available both on Steam and on standalone game clients so we have gathered methods that are applicable in both of these scenarios for you to check out.
What Causes the Warframe Update to Fail?
There is a variety of different things which may cause Warframe updates to fail and we have focused on the most common ones which appear to users on a regular basis. It’s a shame that some things almost unrelated to the game can cause it to misbehave but everything can be sorted out easily. Here is a full list:
- Faulty Microsoft Visual C++ Redistributable installations
- Internet connection settings
- Warframe launcher settings
- A broken or missing DirectX installation
- Game’s cache
- Malware running on your computer
Solution 1: Repair Your Microsoft Visual C++ Redistributables
The Warframe update failed problem is often caused by a broken or faulty Windows update which somehow ruined the installations of Microsoft Visual C++ Redistributables. Other system files may have been affected as well and you should take care of them as well after repairing your Microsoft Visual C++ Redistributable installations.
- Click the Start menu button and open Control Panel by searching for it there. Also, you can click on the gear-looking icon in order to open the Settings app if your installed OS is Windows 10
- In Control Panel, switch the View as an option to Category at the top right corner and click on Uninstall a Program under the Programs section at the bottom of the Control panel window.
- If you are using the Settings app on Windows 10, simply clicking on Apps should immediately open a list of all installed programs on your PC.
- Locate Microsoft Visual C++ Redistributable Package in Control Panel or Settings and click on Modify after clicking it once. You might notice that there are several different versions of the utility. You will need to make note of them and repeat the reparation process for each one of them.
- You may need to confirm some dialog boxes and follow the instructions which will appear along with the wizard. Make sure you choose Repair for each version of the utility.
- Click Finish when the wizard finishes with the process and repeat the process for all versions of the Visual C++ Package. Check to see if Warframe is able to update now by launching it.
Now, if this doesn’t work. You can choose to Uninstall each Microsoft Visual C++ Redistributable and redownload them again. You will need to reinstall Visual C++ by locating it here. Select the version you want to download and choose the download according to your processor (32-bit or 64-bit).
Locate the file you just downloaded in the Windows folder, run it, and follow the instructions on-screen in order to install the Microsoft Visual C++ Redistributable Package you chose to download. Repeat the same process for all versions you previously uninstalled and check to see if the Warframe update fails again.
Also, try to run an SFC scan to verify that all the drivers and Windows’ important files are in place.
Solution 2: Reset LAN Settings
If you have tweaked certain settings regarding your Internet connection to suit another program or if you simply wanted to improve on something, you should know that plenty of programs depend on your Internet connection being set up normally. Make sure you undo these changes by following the steps below.
- Open Internet Explorer on your computer by searching for it on the Desktop or the Start menu. Click on the Gear icon located in the top right corner. From the menu which opens, click on Internet options in order to open a list on related connection settings.
- If you don’t have access to Internet Explorer, Open Control Panel by searching for it in the Start menu or by using the Windows Key + R key combination, typing “control.exe” in the Run bar, and click OK in order to run Control Panel.
- In Control Panel, select to “View as” Category at the top right corner and click on the Network and Internet button to open this section. Inside this window, click on Internet options in order to navigate to the same screen as you would if you opened Internet explorer.
- Navigate to the Connections tab and click on LAN Settings.
- Check the box next to Automatically Detect Settings and make sure the Proxy servers are blank unless you actively use one, which is not recommended if you don’t want further connection settings when playing Warframe.
- Make sure you apply the changes you made and restart your computer before you check to see if the Warframe update failed error still appears.
Solution 3: Tweak Some Launcher Settings
Not all settings in the launcher window can be used on each computer and sometimes there are settings that should be disabled in order to make the updating process work. Oddly enough, some of those settings even included disabling DirectX10, DirectX11, or even both! However, turning off Bulk download should also get the process going!
- Open Warframe’s launcher either by double-clicking the game’s shortcut or executable from Desktop or any other place on your computer such as Start menu, etc.
- If you downloaded and installed the game on Steam, open it, navigate to the Library tab, and double-click the Warframe entry in order to launch it.
- When the game’s launcher opens, locate the cog icon at the top right corner, next to the ‘x’ and the minimize button, and click on it in order to open launcher settings.
- Disable the Bulk Download option in the new window which will open and click OK. Try updating the game now. Also, users have reported that disabling the DirectX10 and DirectX11 0 options can also fix the problem so make sure you try this out as well.
Solution 4: Reinstall DirectX
If your DirectX installation has gone corrupt and if you are using DirectX 9 or older which doesn’t come pre-installed on older versions of Windows OS, you should definitely consider downloading the DirectX installer and running it to reinstall it and possibly solve the problem. This has worked for other users and we hope it will work for you!
- Pay a visit to the DirectX End-User Runtime Web Installer Download Page on Microsoft’s official website which is linked in this step.
- Scroll down, locate, and click the red Download button at the site and follow the instructions which will appear on screen in order to directly download the Web Installer for DirectX on your computer.
Note: Microsoft will probably offer a couple of their applications after you click the Download link, but you should uncheck those products if you’d rather not have them on your computer. If you choose not to download these utilities, the Next button will be renamed to No thanks and continue.
- Perform the DirectX installation process by opening the downloaded .exe file in your Downloads folder and following any instructions from the DirectX installation wizard. You will need to scroll through the Terms & Conditions page (while reading it, of course) and click on the Next button.
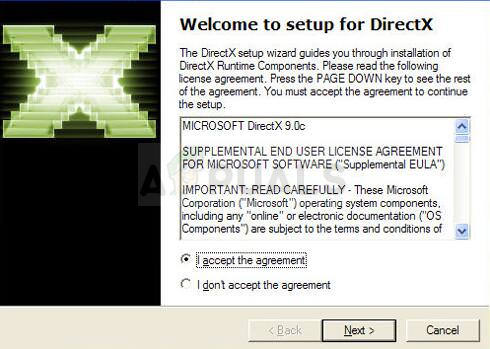
- Restart your computer and check to see if the Warframe update error still appears after launching the game.
Solution 5: Failing to Connect Due to Network Errors
If you suspect you have to blame your Internet connection for the fact Warframe won’t launch, you should definitely try this method out. It’s particularly useful if you find out that you can update the game using your mobile data connection by connecting to a hotspot created by your phone. Follow the steps below for these ultra-helpful commands!
- Search for “Command Prompt” by typing it either right in the Start menu or by pressing the search button right next to it. Right-click the first entry which will pop up as a search result and select the “Run as administrator” context menu entry.
- Additionally, you can also use the Windows Logo Key + R key combination in order to bring up the Run dialog box. Type in “cmd” in the dialog box which appears and use the Ctrl + Shift + Enter key combination in order to run Command Prompt using administrator privileges.
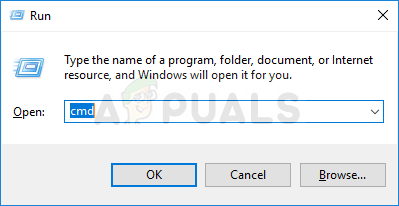
- Type in the following commands in the window and make sure you press Enter after typing each one. Wait for the “Operation completed successfully” message or something similar to know that the method has worked and you haven’t made any mistakes while typing. Make a short pause between these two commands.
ipconfig/flushdns
ipconfig/release
ipconfig/release6
ipconfig/renew
- Reopen Warframe either by double-clicking its shortcut on your computer or by launching it through Steam and check to see if the Warframe update failed problem has disappeared.
Solution 6: Run the Game’s Launcher as an Administrator
Running an app as an administrator gives it extra privileges and access to actions that may have been blocked by default on your operating system. This shouldn’t occur normally but users have reported that simply running the launcher with admin privileges enables it to download and install the update so make sure you try this out before giving up!
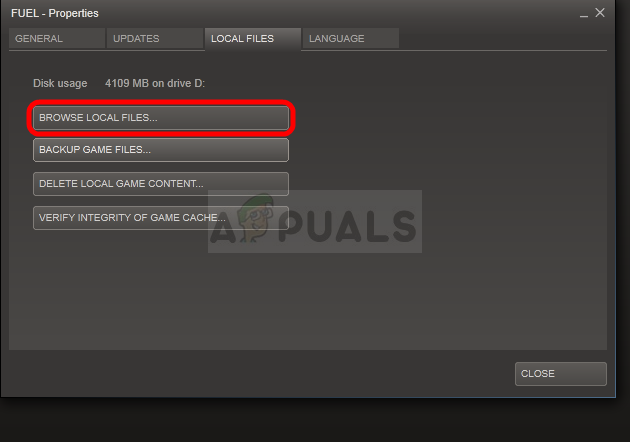
- Open up Steam by double-clicking its icon on the Desktop or by searching for it in the Start menu. Head over to the Library section in the Steam window by locating the Library tab at the top, and locate Warframe in the list of games you own in your library.
- Right-click on its entry and choose Properties. Navigate to the Local Files tab and choose Browse Local Files.
- If you have the standalone client version of Warframe, you can still locate the game’s installation folder manually. The easiest way would be to right-click the game’s shortcut on Desktop or anywhere else and choose Open file location from the menu.
- Anyway, once inside the installation folder, locate and open the Tools folder. Inside, you should be able to see a file named Launcher or launcher.exe. Right-click on this file and choose Properties. Navigate to the Compatibility tab in the Properties window and check the box next to the “Run this program as an administrator” option.
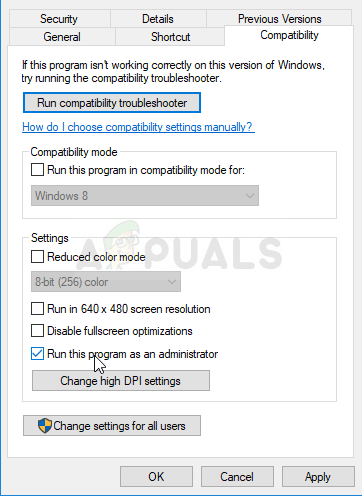
- Apply the changes you have made and try relaunching Warframe from where you installed in order to see if the problem still occurs.
Solution 7: Switch Languages from the Launcher
Switching the language to anything else than the one you had when the error occurred appears to have worked for plenty of Warframe players even though the method appears too basic. This is more of a workaround for the problem but you can simply switch everything back to English after the update is downloaded and installed successfully.
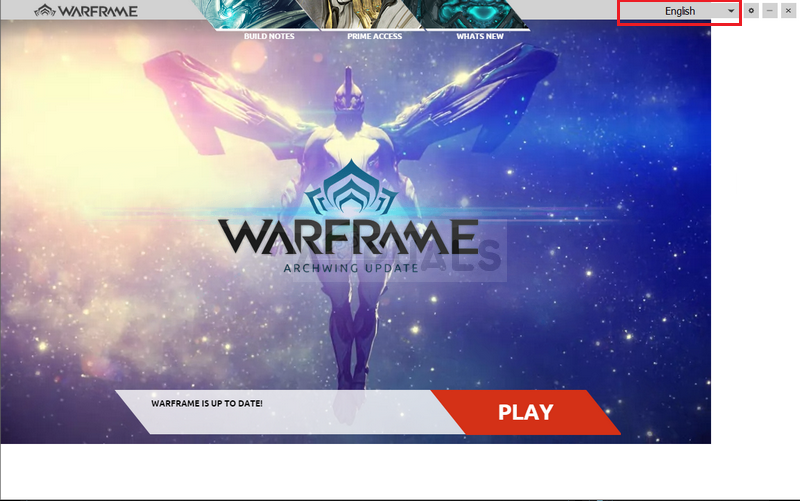
- Open Warframe’s launcher by double-clicking the game’s shortcut or executable from Desktop or any other place on your computer such as Start menu, etc as this will automatically open the launcher.
- If you downloaded the game via Steam, open it, navigate to the Library tab and double-click the Warframe entry in order to open it.
- When the game’s launcher opens, locate the language text at the top right corner, next to the ‘x’, minimize, and settings buttons. Change it to something else and wait for the launcher to reload. Repeat the same process for a couple of languages until it finally works!
Solution 8: Reset the Game’s Cache
The games keep its cache internally on your computer, inside its installation folder, and deleting or renaming it should reset its updating process and start certain things from scratch. This is a great fix as it allows you to skip any uninstallation and fix the problem simply by using File Explorer and/or Steam on your PC!
- Open up Steam by double-clicking its icon on the Desktop or by searching for it in the Start menu. Head over to the Library section in the Steam window by locating the Library tab at the top, and locate Warframe in the list of games you own in your library.
- Right-click on its entry and choose Properties. Navigate to the Local Files tab and choose Browse Local Files.
- If you have the standalone client version of Warframe, you can still locate the game’s installation folder manually. The easiest way would be to right-click the game’s shortcut on Desktop or anywhere else and choose Open file location from the menu.
- Anyway, once inside the installation folder, locate the Cache. Windows folder. Right-click on this folder and choose the Rename option. Change its name to Cache.Windows.old or something like that and click Enter. Reopen the launcher and check to see if the update will start properly. If other errors appear, revert the changes to the folder’s name.
Solution 9: Scan Your Computer for Malware
Users have reported that they have contacted the Warframe support team and they claimed that the error is sometimes caused by malware residing on users’ computers. When Warframe servers register the unusual behavior, they block the ISP and you need to get rid of malware before gaining access again.
Here, we will show you how to scan your PC with Malwarebytes as it often shows the best results considering the fact that it really has a vast database. Good luck!
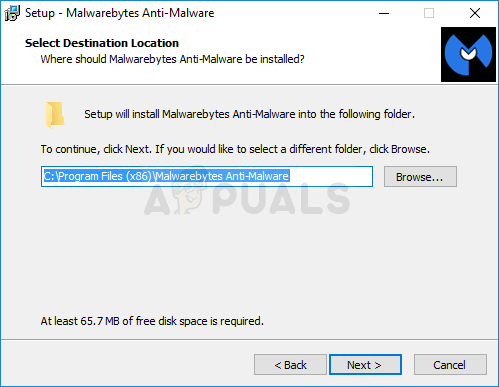
- Malwarebytes Anti-Malware is a great anti-malware tool with a free trial version you can download from the Internet. Hopefully, you won’t need the full program after you solve this issue (unless you want to buy it and have it ready for other problems) so make sure you download the free trial version by clicking here.

- Locate the executable file you just downloaded and double-click on it in order to open it on your computer.
- Select where you want to install Malwarebytes and follow the instructions which will appear on the screen in order to complete the installation process.
- Open Malwarebytes and select the Scan option available at the home screen of the application.
- The tool will probably launch its update service in order to update its virus database and then it will proceed with the scan. Please be patient until the process finishes which might definitely take a while. If malware is detected on your computer, confirm to have it deleted or quarantined.
- Restart your computer after the scanning process is over and check to see if you still experience issues with the Warframe update failed.
Note: You should also use other security tools if you can tell the type of malware you have on your computer (ransomware, junkware, etc.) as one tool probably won’t register all types of malicious apps.
Solution 10: Reconfigure Launcher Settings
If you are running the game in 64-bit mode from the launcher configurations and have recently changed this setting or if you have made any changes to the computer recently, you might be getting this issue. Therefore, in this step, we will be reconfiguring the launcher settings to stop the game from running in 64-bit mode. For that:
- Click on the war frame to open the launcher menu.
- Select the cog at the top right corner of the launcher menu and select the “Launcher Settings” option from the list.
- In the launcher settings, uncheck the “Enable 64-bit Mode” option and then save your changes.
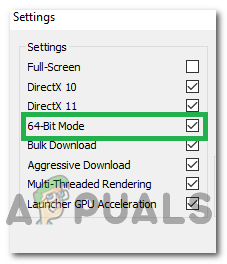
Disabling 64-bit Mode on the Launcher - Try to update the game and then check to see if the issue still persists.
Solution 11: Allow the game through Firewall
It is possible that the connection between the Warframe servers and your computer is getting derailed due to blockage from your Windows Firewall. Therefore, in this step, we will be making sure that the Windows Firewall isn’t blocking Warframe from making contact with its servers by adding a rule that allows the game to function without any restrictions by the Firewall. For that:
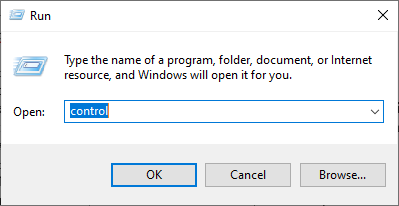
- Press “Windows” + “R” to launch the run prompt.
- Type in “Control Panel” and press “Enter” to launch the Classical Control Panel Interface.
Accessing the Classic Control Panel interface - Click on the “View By:” button on the top and then click on the “Large Icons” option.
- Click on the “Windows Defender Firewall” button and then click on the “Advanced Settings” option from the late side.

Opening Windows Defender Firewall from Control Panel - First of all, click on the “Inbound Rules” option from the left side and then click on the “New Rule” option on the right side of the window.
- Now select “Program” from the Rule Type window and click Next. (This includes SQLbrowser.exe).
- Hit browse below “This Program Path” to select the program executable file, then click Next.
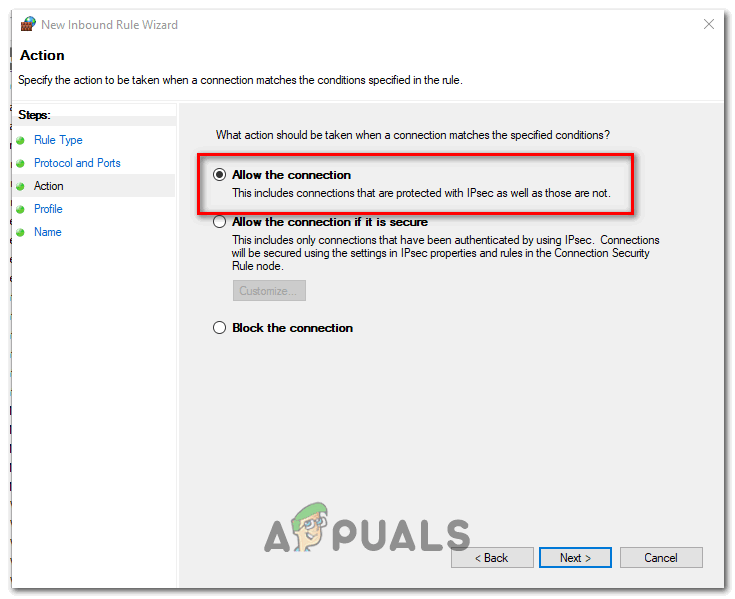
- Make sure that “Allow the Connection” box is selected, then click Next.
Allowing the connection - Select when to apply the rule (Domain, Private, Public), in this window, make sure to allow it for all connections and click on “Next”.
- Choose a name for the rule and enter a description if you want to.
- Click on Finish to add an Inbound rule that allows Warframe requests that are coming to the computer.
- In order to fully allow Warframe through the Firewall, we will also have to create a similar Outbound rule to ensure that the game is allowed to fully connect with its servers.
- Similarly, create an outbound rule by selecting “Outbound Rules” instead of “Inbound Rules” in the fifth step.
- Check to see if the issue persists after creating this exception.
Solution 12: Update Windows
Updating your Windows is necessary and an effective way for your system to run smoothly and in optimal conditions. It allows the latest features and various bug fixes to work on your PC. Installing the latest windows update could be really beneficial in resolving such errors and we will be performing exactly that by checking for any available updates on our computer. For that:
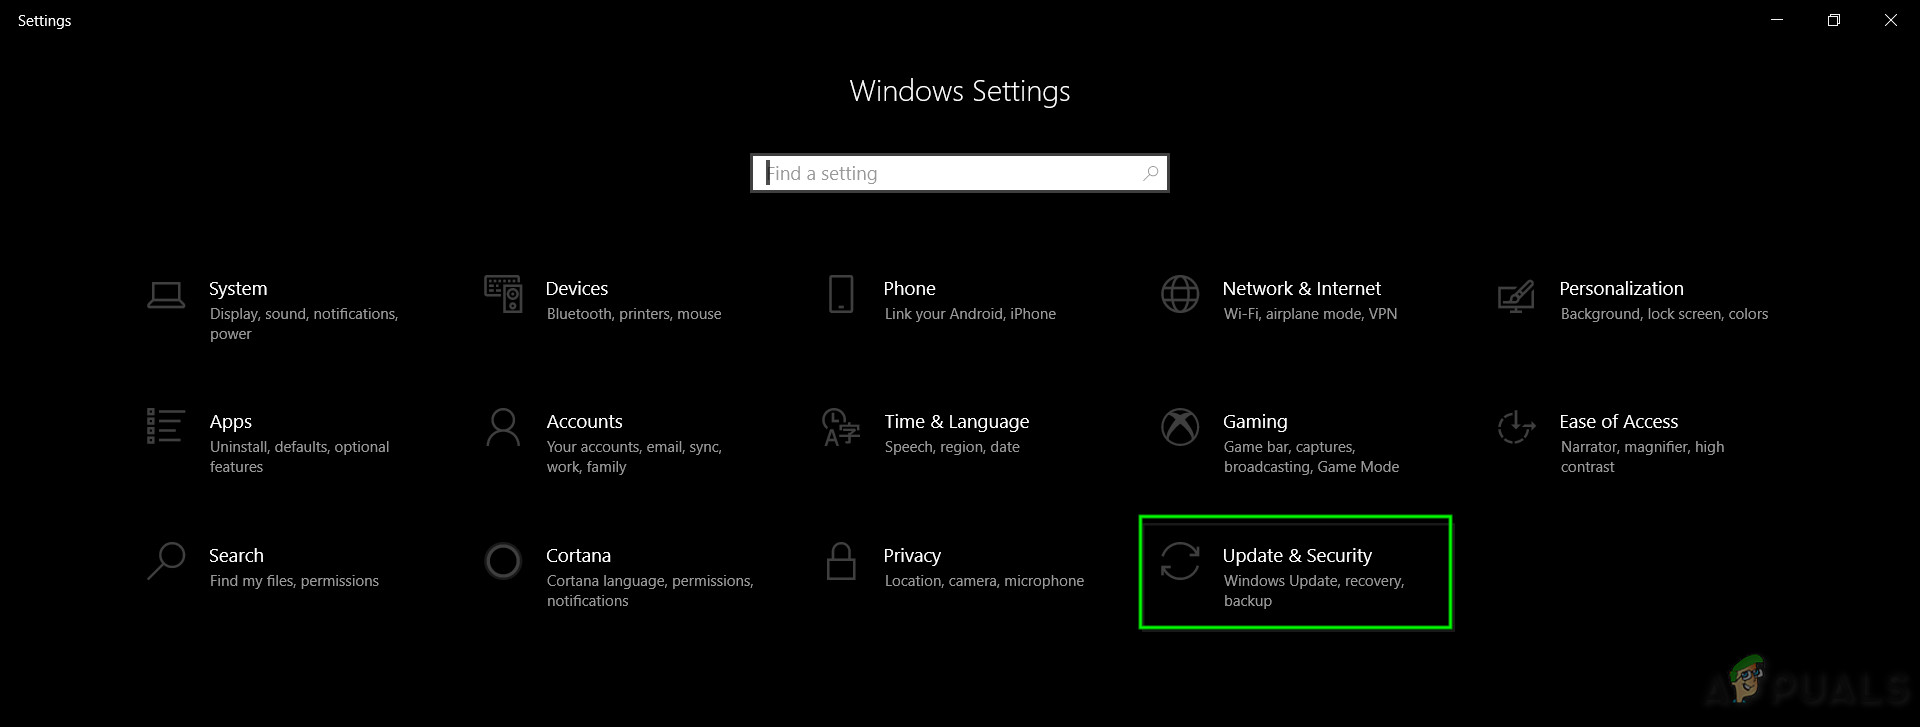
- Press “Windows’ + “I” buttons on your keyboard to open the settings.
- Click on the “Update & Security” option from this menu and then select “Windows Update” from the sidebar.
Update & Security.in Windows Settings - Click on the “Check for Updates” option to prompt an automatic update check on your computer.
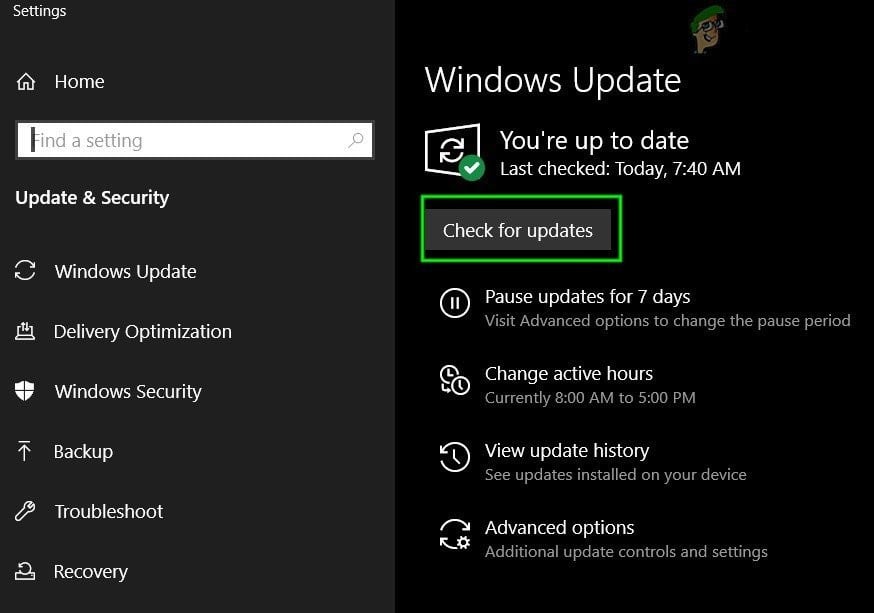
Check For Updates in Windows Update - Your computer will now automatically check and install any available Windows updates.
- After updating your computer, check to see if the issue persists.
Solution 13: Disable Avast
Avast Antivirus is generally known not to play well with games like Warframe and it can often block them from being able to communicate with their servers. Therefore, as a temporary check, you can try disabling Avast and see if the game works with the Antivirus disabled. In order to do that:
- Go to the Windows taskbar and search for the Avast icon. Right-click on it and select the “Avast Shields Control”. Choose among one of the following given options:
Disable for 10 minutes
Disable for 1 hour
Disable until computer is restarted
Disable permanently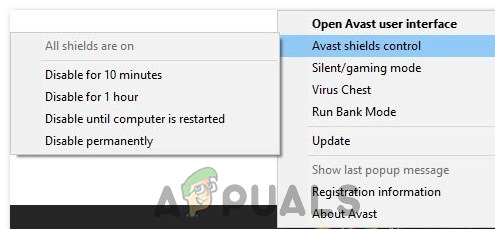
Disabling Avast Temporarily - Confirm your choice by tapping Yes when Avast asks you and its done. Avast antivirus and all the shields should be now paused for the period you have chosen.
- To check whether the antivirus is really disabled just open its main window. If it is red and says “All antivirus shields are off” then everything worked as it should. To return the function, click on the button “Resolve” and wait for a second to see the message “You’re protected”.
- While the Antivirus is disabled, confirm if the game works or not.
Solution 14: Disable VPN
If you are using a VPN or a proxy on your computer to mask your internet connection by bouncing it off of a couple of servers and are actively hiding your internet usage, you might get this error with the game. Therefore, it is advised that you temporarily disable all VPN connections on your computer if you have ever set one up and make sure you aren’t masking your location in any way.
Most servers get suspicious if the internet connection is being bounced from a couple of other servers before it reaches there and is trying to access resources. They might consider it a harmful connection and perceive the attempt as a threat and block it from being able to access the server resources. Therefore, it is always best to check if the issue goes away with the VPN disabled.
Solution 15: Reset the Internet Connection
Most of the time, a bad internet connection is always the main trigger behind all failed updates and downloads. Prior to seeking any other remedy, you should try to reset your internet connection. Whenever the internet stops working or you face a network connection problem always try to restart your equipment first. Proceed as follows:
- As a first step, you must unplug your router and modem from the power supply (You may have to remove the battery for some devices as well).

Unplugging power from the equipment - Now wait for around 30 seconds and then plug them back in: first the modem and then the router.
- Wait for a while for them to completely power back on.
- After all the hardware gets their full functionality back, check to see if this little maneuver has fixed the issue for us.
Solution 16: Try Using a VPN
If you haven’t ever set up a VPN connection on your computer and are using your main ISP without masking your location, you might get this error due to a regional problem. While sometimes the VPN can be the source of the problem, it can also come to save the day in some situations. If your area is facing a location ban from the server either temporarily or permanently, a VPN just might be able to fix the issue for you by masking your location and bouncing the request off of another server. Make sure to use a reputable VPN and check if doing so fixes the issue.
Solution 17: Check Computer’s Connection with Warframe Website
Sometimes the failed update error can also be caused when you are unable to access the Warframe.com website with the internet explorer. So, make sure to check whether your PC can connect to the war frame website or not. Try to browse the https://warframe.com website in the internet explorer. Some specific Windows components are used by the War frame launcher which are in turn used by the Internet Explorer. So, if you can’t access the war frame website in internet explorer, chances are, your connection has been blocked. To overcome this issue, you are required to send a ticket to War frame Support.
Solution 18: Reconfigure Internet Explorer
There exists an offline mode in Internet explorer which helps to download the websites automatically even when the internet is not available. This feature can sometimes prevent applications from being able to establish a secure connection between their servers. Therefore, in this step, we will be disabling this option. For that:
- Press “Windows” + “R” on the keyboard and type in “inetcpl.cpl”.
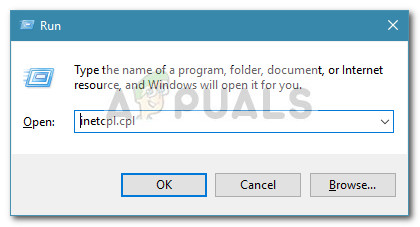
Run dialog: inetcpl.cpl - Press “Enter” to launch the internet explorer options window.
- Click on the “Connections” tab and ensure that the “Never Dial a Connection” option is selected.
- Also, click on the “Advanced” tab, and under the “Browsing” options, uncheck the “Enable Offline items to be synchronized on a Schedule” option.
- After making these changes, save them and exit out of the window.
- Check and see if doing so has fixed the issue with the game.
Solution 19: Remove Temporary Internet Files
In this step, try to delete all the temporary internet files from the Internet Explorer which might get saved whenever you access a website through your browser. After doing so, we will be checking if doing so has rectified the error with the game or not. In order to do that:
- Press “Windows’ + “R” on the keyboard, type in “Inetcpl.cpl” and then press “Enter” to launch the internet explorer options window.
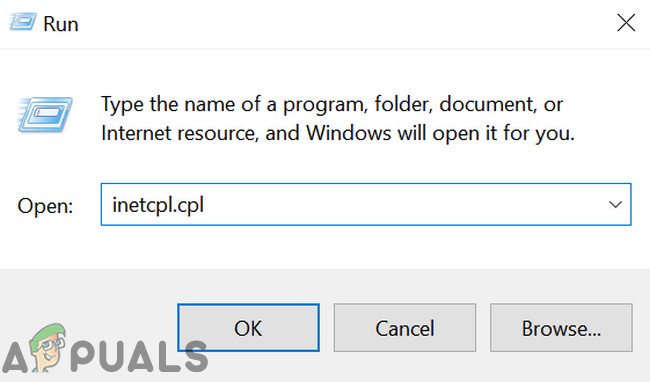
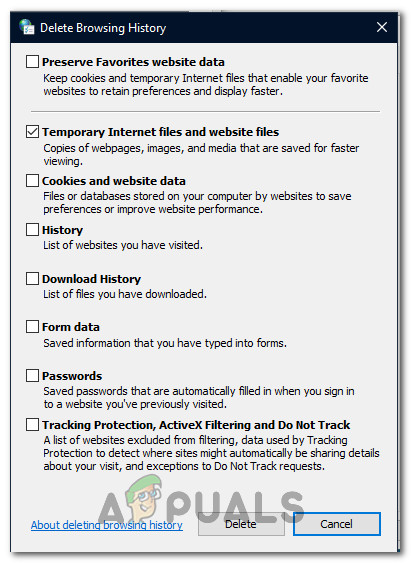
Run inetcpl.cpl - Under the “General” tab, click on the “Delete” option.
- After that, uncheck each box except “Temporary Internet files” and press the “Delete” button.
Checking the option - After doing this, check to see if the issue is fixed.
Solution 20: Set the Date and Time
Sometimes, the incorrect setting of the Date and Time might actually be triggering this issue on your computer. According to our research, the date and time settings are important because they are used by the computer to check the validity of a site or a server’s security certificate and if the date and time aren’t set properly, the certificate cannot be properly verified. Therefore, in this step, we will be correcting the computer’s date and time. For that:
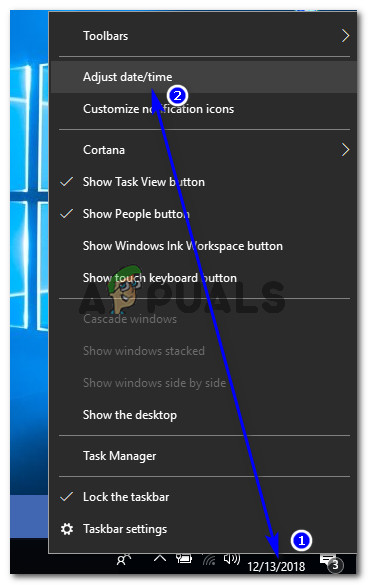
- Search and locate for the time icon in the lower right corner of your PC desktop.
- Right-Click on the Date and Time display tile and click on the “Adjust Date/Time” button.
- Toggle the “Automatic Date and Time” off and select the option “Change” under the “Set Date and Time Manually” heading.
- Reconfigure the date and time to match the current date and time in your region.
- Check to see if doing so has fixed the error message.
Solution 21: Give an interval between the download process
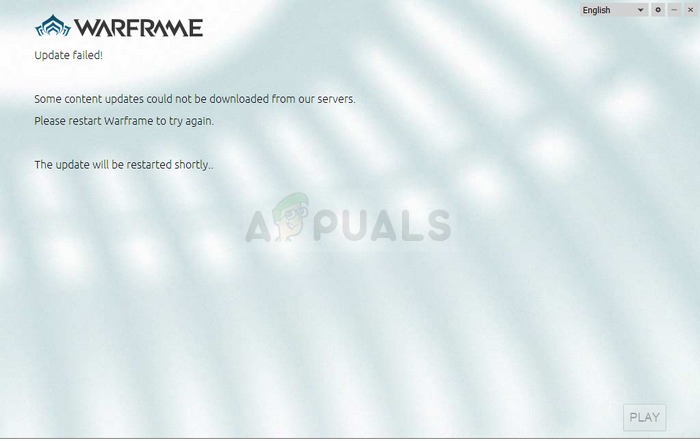
A major cause behind the occurrence of this error could be a War frame server issue. The server sometimes gets excessively overloaded when multiple people are trying to download the update at the same time. In this case, you just need to sit back and keep trying for a while until the download process gets completed. You may also receive a message namely “download will be restarted shortly”. In this scenario, you do not need to intervene and let the system start the download process automatically. This process may take some time and you need to be patient till the load is taken off of the server and your connection is able to start downloading the update.


desn’t working :/