Fix: VMware Failed to Lock the File
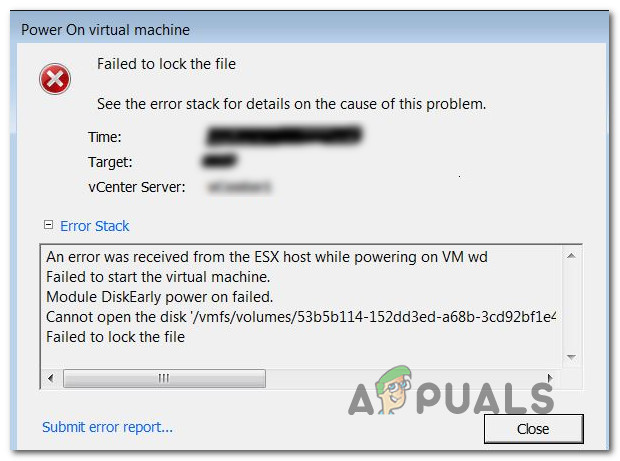
Some VMware users are reporting that they cannot start one or more virtual machines that they configured on their computer. Upon powering on the virtual machine, the window displays the following error: “An unexpected error was received from the ESX host while powering on VM VM_name. Failed to lock the file.”
What is causing the Failed to lock the file issue?
We investigated this particular issue by looking at various user reports and the repair strategies that are commonly used to fix this particular error message with WMware. Based on our investigations, there are several different culprits that are known to trigger this particular error message:
- A second virtual machine is already using the .vmx file – As it turns out, this particular issue can occur if you attempt to start a second virtual machine that is using the same virtual machine configuration (.vmx) file as another machine that was configured first. In this case, you can resolve the issue by deleting the .lck folders & logs.
- The virtual machine contains mounted disks – As several users have reported, this issue can also occur if you try to power on a virtual machine with mounted disks that we’re enforced via the VMware-mount utility. If this scenario is applicable, you can resolve the issue by deleting the .lck folders & logs.
- The virtual machine is started during snapshot operation – We actually tested this and it lead us right to the “Failed to lock the file” error. You’ll see this exact error if you try to turn on the virtual machine through the user interface facilitated during the snapshot operation. If this is what’s causing the issue, deleting the logs & the .lck folders from the virtual machine folder will resolve the issue.
- The virtual machine is already in use – You might also be encountering this issue if the virtual machine you are trying to start is already in use. This typically happens if you’re running a dual configuration. In this case, all you need to do is close the other instance that is running the same virtual machine and the error will stop occurring.
- VMware Workstation doesn’t have admin access – As it turns out, this particular issue can also occur if you VMware Workstation is not granted admin access. If this scenario is applicable, you can resolve the issue by forcing your OS to allow administrative privileges.
If you’re currently encountering this exact issue and you’re looking for a way to resolve it without losing any data, this article will provide you with some troubleshooting suggestions. Down below, you’ll find a collection of potential repair strategies that other users in a similar situation have commonly used to fix this particular error.
For the best results, we advise you to follow the methods below in the order that they are presented since they are ordered by difficulty and efficiency. If you go through with them in order without skipping any steps, one of them is bound to resolve the problem regardless of the culprit that is causing the issue.
Method 1: Running VMware as admin
In some cases, the fix is as simple as ensuring that the VMware application has administrative privileges. This should happen by default, but certain settings might prevent the application from getting admin access.
Some users that were encountering the “Failed to lock the file” error have reported that the issue stopped occurring after they launched VMware Workstation in admin mode.
Here’s a quick guide on how to do this:
- On your desktop, right-click on the VMware shortcut and choose Run as administrator.
Note: If you don’t have a desktop shortcut, navigate to the installation folder of WMware and right-click on vmplayer.exe. Unless you set up a custom location, you will be able to find it in: C:\Program Files (x86)\VMware\VMware Player - At the UAC (User Account Control), click Yes to grant administrative privileges.
- Launch the virtual machine that was previously triggering the issue to see if the issue has been resolved. If you no longer encounter the “Failed to lock the file” error, continue with the steps below to make the change permanent.
Note: In the current state, you will have to repeat Step 1 & Step 2 every time you launch VMware in order to circumvent the issue. - Right-click on the VMware Workstation executable or shortcut and choose Properties.
- Inside the Properties screen, go to the Compatibility tab, check the box associated with Run this program as an administrator (under Settings) and click Apply to save the current configuration.
- Open VMware normally and see if the issue has been resolved.
If the issue is still occurring, move down to the next method below.
Method 2: Deleting the LCK folders of the virtual machine
Several affected users have managed to resolve this issue by locating the physical location of the virtual machine that was failing with the “Failed to lock the file” and deleting the LCK folders. After doing this and restarting their computer, most affected users have reported that the issue has been resolved.
If you haven’t established a custom location for it, your virtual machine will typically be located inside the Documents folder under the Virtual Machines folder.
Here’s what you need to do:
- Make sure that VMware is completely closed and the virtual machine is powered off.
- Open File Explorer and navigate to Documents > Virtual Machines, then select the virtual machine that you’re encountering the issue with.
Note: If you saved your virtual machine in a custom location, use the File Explorer to navigate there. - If you have multiple virtual machines, double-click on the one that is creating the issue.
- Inside your virtual machine folder, you should be able to find one or two folders with the name ending in “lck“. Select both, then right-click and choose Delete to remove them. If you find any .log files outside the .lck folders, delete them also.
Note: Deleting these folders will not have any negative effect on your virtual machine. The next time you start the virtual machine, VMware will automatically recreate the two folders once again. - Restart your computer.
- At the next startup, launch the virtual machine and see if the issue has been resolved.


