Fix: Virtual Disk Service error the volume size is too big
Some users are getting the Virtual Disk Service error: The volume size is too big error when trying to format an internal or external HDD (or a partition) with the Diskpart utility. Some affected users reported that they’ve been waiting over 5 hours for the operation to complete before getting this error message.
What is causing the Virtual Disk Service error: The volume size is too big error?
This particular error is known to occur whenever the user tries to format a large partition or USB hard drive to FAT32. If you try to do it from the Windows interface, you will only get the option to format with the NTFS or exFAT file systems.
This happens because Windows cannot format or create a FAT32 volume that is greater than 32GB from Windows (at least not with the Diskpart utility). However, you can mount and use a bigger one without issues.
There are several reasons why you’d want to format a drive to the FAT32 file system. Most people do it because they either want to transfer files from a Mac computer or for a console (PS3, Xbox 360, etc.)
Fortunately, there are ways to circumvent this Windows shortcoming. If you’re struggling to resolve this particular issue, this article will provide you with several troubleshooting methods. Follow the steps below to bypass the Virtual Disk Service error: The volume size is too big error.
Method 1: Format with DiskPart using the NTFS file system
If you don’t necessarily need to format your drive with the FAT32 file system, you can use DiskPart to format using the NTFS file system. This will not trigger the same Virtual Disk Service error: The volume size is too big error since windows allow you to format partitions or drives larger than 32 GB using the NTFS file system.
Note: If you need to format using the FAT32 file system, move down to the next method below.
If you decide to use Diskpart to clean and format a drive using the NTFS file system, follow the steps below:
- Press Windows key + R to open up a Run dialog box. Then, type “cmd” and press Ctrl + Shift + Enter to open up an elevated Command Prompt. When you’re prompted by the UAC (User Account Control), click Yes at the prompt.
- Connect the drive that you want to format (if it’s not already connected) and wait a minute or so.
- Type the following command to open the DiskPart utility and press Enter:
diskpart
- Next, get a list of all available drives by typing the following command and pressing Enter:
list disk
Note: Take the time to identify the drive that you want to clean. Typically, Disk 0 is the HDD containing the OS. In our case, we want to format Disk 1 to the NTFS file system.
- Once you have identified the drive that you want to format, use the following command to select the drive in question:
select disk X
Note: Keep in mind that X is merely a placeholder. Replace it with the actual number associated with the drive that you want to format.
- With the disk selected, type the following command to clean the drive and press Enter to start the process:
clean
Note: Keep in mind that as soon as you press the Enter key, the disk will be wiped out of its contents.
- Once the process is complete, type the command below to ensure that the drive you’re targeting is still selected:
list disk
Note: If you notice an asterisk (*)next to the drive in question, it means that the drive is still selected and you are ready to proceed further. If not, follow Step 5 again to re-select it.
- Type the following command to create a fresh partition and press Enter:
create partition primary
- Once the partition has been created, type the following command and press Enter to select the partition that you’ve just created:
select partition 1
- With the partition selected, type the following command and press Enter to set the freshly created partition as active:
active
- Type the following command and press Enter to create a partition using the NTFS file system and assign it a label (name):
format FS=NTFS label=Appuals quick
Note: Keep in mind that Appuals is merely a placeholder for the name of your partition. Replace it with your own name.
- One the process is complete, type the following command and press Enter to assign a letter to the drive you’ve just created:
assign letter=A
Note: Replace the A placeholder with a letter of your choosing.
- Finally, type the following command to close the DiskPart utility and complete the process:
exit
You have now successfully reformated the drive with the NTFS file system without receiving the Virtual Disk Service error: The volume size is too big error.
If you need to format the drive with the FAT32 partition, follow Method 2.
Method 2: Using a 3rd party utility
If you absolutely need to format your partition to the FAT32 file system, you have little choice but to use a 3rd party utility program.
There are a lot of freeware tools that will allow you to bypass Windows 32 GB limitation. We decided to use Fat32 Format because it’s simple, entirely free and it doesn’t include any adware. But you can also use Rufus, SwissKnife and a bunch of other software to achieve the same end result.
If you decide to keep it simple, here’s a quick guide on formatting a drive that is larger than 32GB to the FAT32 file system using Fat32 Format:
- Visit this link (here) and click on the screenshot picture to download the utility.
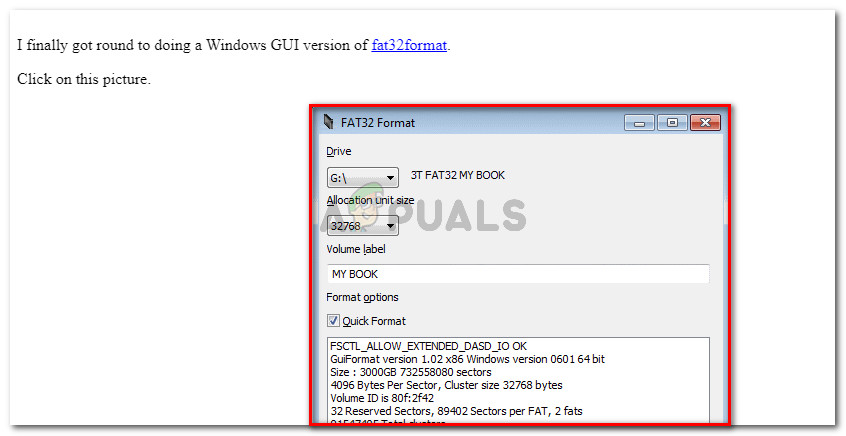
Download the Fat32 Format utility by clicking on the screenshot - Double-click the guiformat.exe executable that you’ve just downloaded and click Run if the SmartScreen prompt appears.
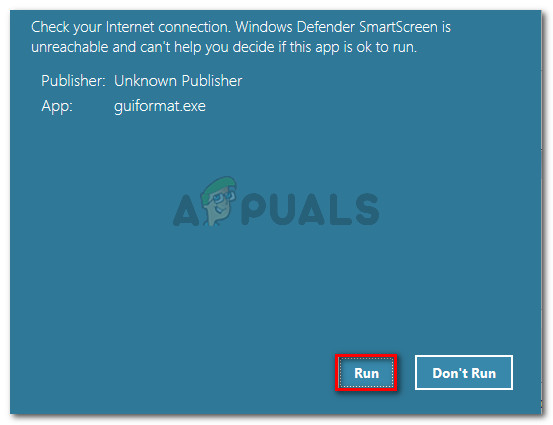
Open the executable and click Run at the SmartScreen prompt - Once the utility is opened, make sure that the appropriate drive is selected via the drop-down menu under Drive. Then, select an Allocation unit size according to your needs and click Start to begin the formatting procedure.
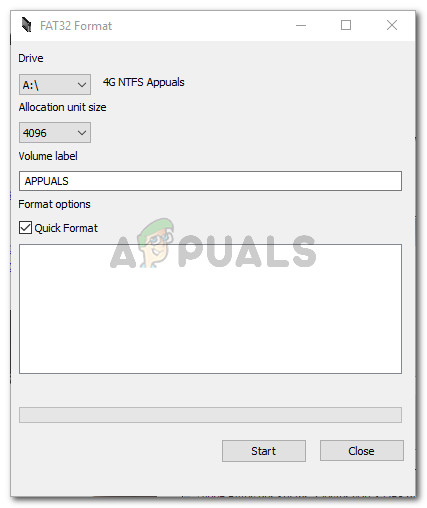
Select the drive and choose the appropriate Allocation unit size Note: If you want this procedure to be over quickly, check the box associated with Quick Format.
- Click Ok at the final prompt to confirm the formatting procedure of the selected drive.
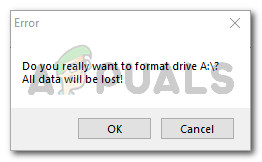
Confirm the formatting procedure - When the procedure is over, your drive will be automatically converted to the FAT32 Format file system (regardless of its size).


