[FIX] iTunes Store Error Code 0x80092013 on Windows
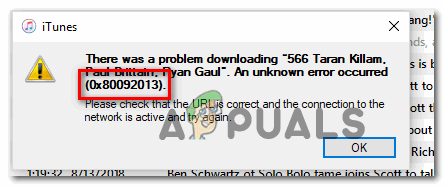
Some iTunes users are reporting that they regularly end up seeing the ‘An unknown error occurred (0x80092013)’ error when attempting to download or play content from the iTunes library on their Windows computer.
When troubleshooting this particular issue, start by ensuring that your system’s date & time is correct. This is important because iTunes will impose a server-level check and reject the connection if your end-user machine time is outdated.
But this problem can also occur due to a severely outdated iTunes version that is no longer allowed to connect to Apple’s servers. In this case, you’ll need to use the auto-update function or uninstall > reinstall manually in case the auto-update function is broken.
However, if you’re using an overprotective AV suite, it’s also possible that the 0x80092013 error code is caused by a connection interruption triggered by your firewall. In this case, you can resolve the issue by adding iTunes (and Safari if installed) to the exception list.
And finally, another fairly common instance that will trigger this error is a gateway service like a VPN client or a Proxy server. If you’re using one of those, disable them and see if the error code goes away.
Method 1: Setting the correct date and time (if applicable)
As it’s been confirmed by a lot of different affected users, the 0x80092013 error code can also occur after a failed date & time verification.
Keep in mind that iTunes has a mandatory verification that will cross-check the date & time of the connecting device (your computer) against the values on its server. If the values are off, it will regard it as a potential security vulnerability risk and refuse your connection with the iTunes library.
If you notice that your date & time is off and you think this is the root cause of the 0x80092013 error, you should be able to fix the issue swiftly by setting the correct time & date from the Date & Time window. To do this, follow the instructions below:
- Close iTunes along with any associated instances.
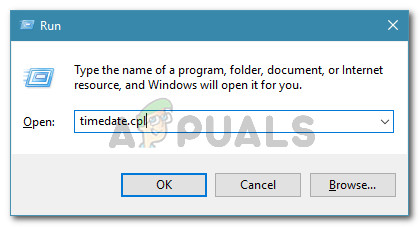
- Open up a Run dialog box by pressing Windows key + R. Next, type ‘timetable.cpl’ inside the text box and press Enter to open up the Date & time window.
Opening the Date and time window - Once you’re inside the Date & time window, use the horizontal menu at the top to click on Date & time, then click on the Change date & time button.
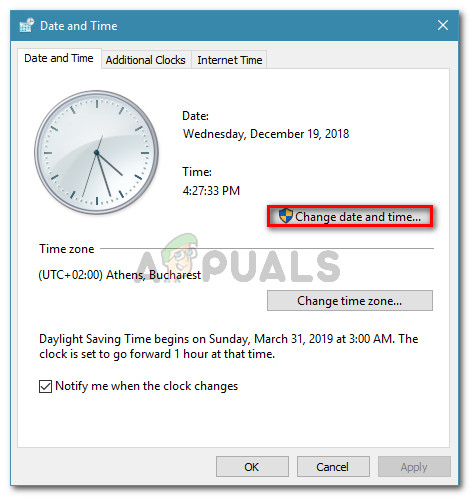
Setting the correct date and time Note: At the User Account Control prompt, click Yes to allow admin access.
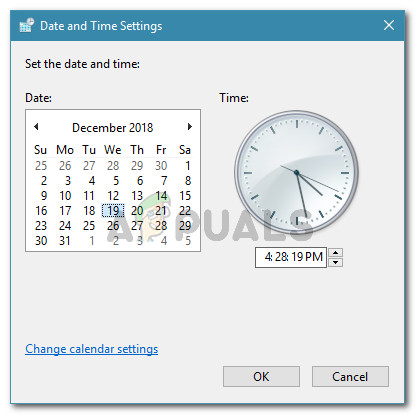
- Once you get to the next screen, make use of the calendar module to set the appropriate date, then modify the time values according to the timezone of your area. Once you’ve modified everything to the correct values, click Ok to save the changes.
Modifying Time & date - Once you have successfully adjusted the date to the correct values, launch iTunes once again and see if the problem is now resolved.
Note: If your date & time keeps changing after you do a system shut-down, you’re most likely dealing with a faulty CMOS battery. In this case, you will need to open your computer’s case and replace it.
If you adjusted the time & date values to the correct values with no success or the values were already correct, move down to the next potential fix below.
Method 2: Update or Install the latest version of iTunes
As it turns out, the 0x80092013 error code is quite common on iTunes versions older than 10.6.1.7 (especially on Windows 10). Although we haven’t managed to find an official response from Apple, a lot of affected users have confirmed that the error code simply went away after they updated their iTunes installation to the latest version.
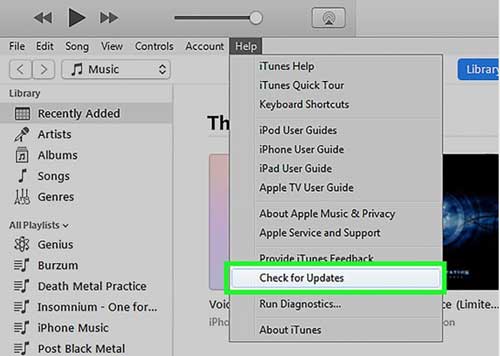
If you suspect that you are using an outdated version of iTunes, open the application and use the ribbon bar at the top to click the Help menu. Then, from the newly appeared context menu click on Check for Updates.
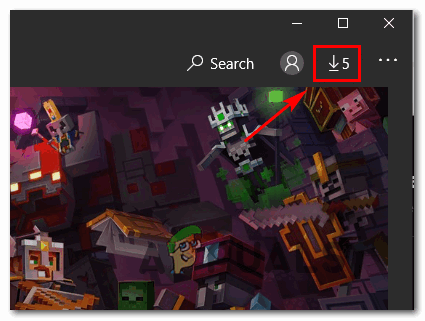
Note: If you’re using the UWP version of iTunes, open your Microsoft store, click on the Download button (top-right corner) and then click the download icon associated with Itunes (under Available Updates)
But given the fact that the auto-updating function is notoriously unreliable on Windows, you should double-check to see if you’re actually having the latest version and you’re not dealing with a software glitch.
If you discover that your iTunes version is indeed outdated and the auto-updating function refuses to upgrade you to the latest version, you will have to do this manually.
But keep in mind that the steps of doing so will be different depending on the iTunes version that you’re using – If you have the UWP (Universal Windows Platform) version, you need to do via the Settings app, and if you have the desktop version, you’ll need to do it via the Programs and Files menu.
Follow the instructions applicable to your particular scenario:
A. Reinstalling the latest version of iTunes for desktop
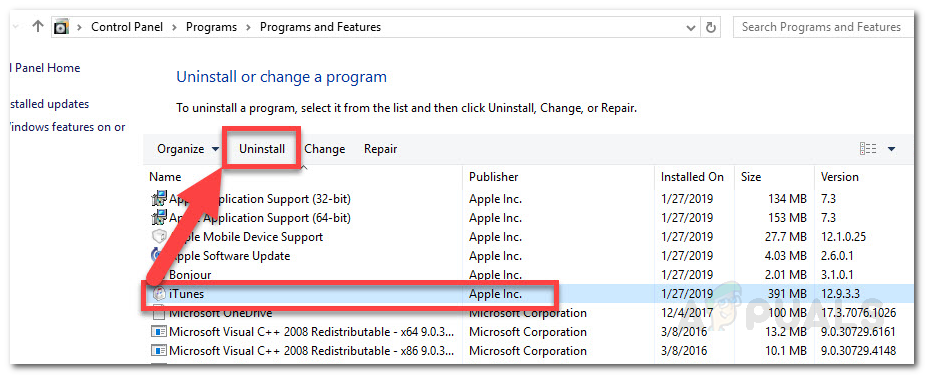
- Press Windows key + R to open up a Run dialog box. At the next screen, type ‘appwiz.cpl’ and press Enter to open up the Programs and Features menu.

Type appwiz.cpl and Press Enter to Open Installed Programs List - Inside the Programs and Features screen, scroll down through the list of applications, then right-click on the iTunes app and click on Uninstall from the newly appeared context menu.
Uninstalling problematic application - Inside the uninstallation screen, follow the instructions to complete the uninstallation.
- Once you complete the uninstallation, go ahead and uninstall the remaining dependencies – Keep in mind that you will also need to uninstall Apple’s supporting software to ensure that you remove any relevant item that’s breaking the auto-update function. So go ahead and click on the Publisher category and then systematically uninstall everything that’s related to Apple Inc.
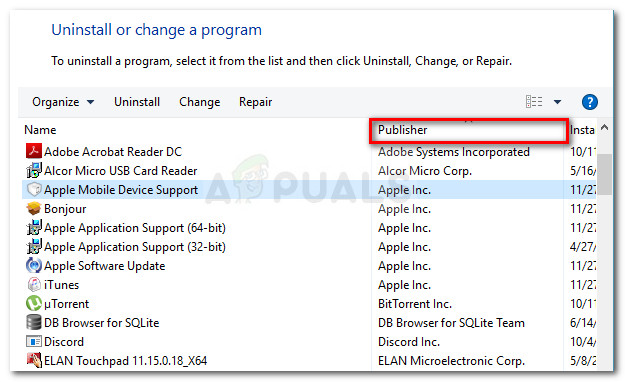
Click the Publisher column to order the app results - After you manage to uninstall everything that’s signed by Apple Inc, restart your computer and wait for the next startup to complete.
- Next, visit this iTunes download page, scroll down to the Looking for other versions section and click on the Windows button to download the latest desktop version.

Downloading the desktop version of iTunes - Once the installation is complete, open the installation executable and follow the on-screen prompts to complete the installation of the latest version of iTunes.
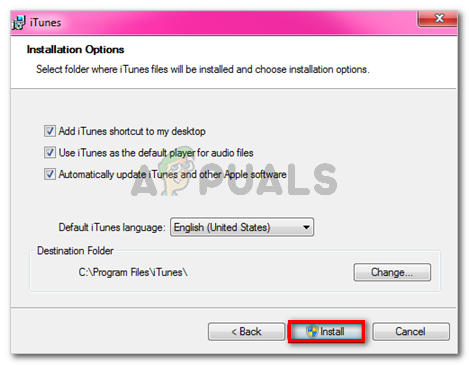
Installing iTunes on your computer - When you see the UAC (User Account Control) prompt, click Yes to grant administrative access.
- After the installation is complete, do one final restart then launch iTunes conventionally (once the next startup is complete) and see if the 0x80092013 error is complete.
B. Reinstalling the latest version of iTunes UWP
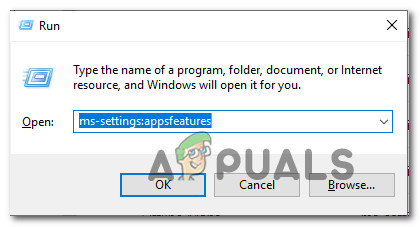
- Press Windows key + R to open up a Run dialog box. Inside the run box, type ‘ms-settings:appsfeatures’ and press Enter to open up the Apps & Features tab of the Settings app.
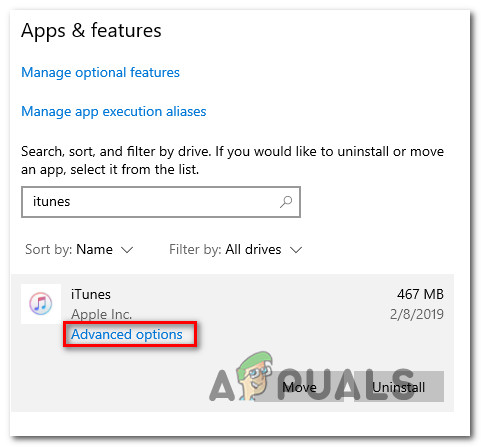
Accessing the Apps & Features Menu - Once you have successfully opened the Apps & Features menu, use the search function (top-right section of the screen) to search for ‘iTunes’. and click on iTunes from the list of results.
- Next, click on Advanced Options from the newly appeared context menu associated with iTunes UWP.
Accessing the Advanced Options menu of iTunes - Once you’re inside the Advanced Options menu, scroll all the way down to the Reset tab and click on the Reset button to initiate this process.
- At the final confirmation window, click Reset once again to start the operation.
- After the operation is complete, open iTunes once again and follow the on-screen prompts to update to the latest version.
- Repeat the action that was previously causing the 0x80092013 error and see if the issue is now resolved.
Method 3: Adding Safari and iTunes to the AV Exception list (if applicable)
As a lot of users have confirmed, you can also expect to see the 0x80092013 error occurring due to interference caused by the firewall solution that’s currently active.
This is fairly common with the free version of AVG, but it’s also confirmed to occur with the built-in Windows firewall (especially on Windows 7). If this is applicable to your current situation and you’re using Windows Firewall, you should be able to fix the issue by whitelisting both the main iTunes executable and the Safari supporting framework.
Note: If you’re using a different 3rd party suite, search online for specific steps on whitelisting Safari and iTunes in your firewall settings menu.
If you’re using Windows Firewall, follow the instructions below:
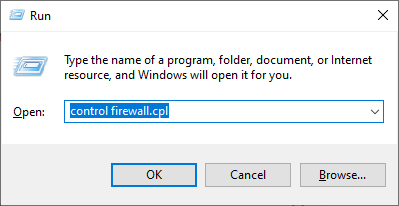
- Press Windows key + R to open up a Run dialog box. Inside the run box, type ”control firewall.cpl’ inside the text box and press Enter to open up the classic interface of the Windows Firewall.
Accessing the Windows Defender Firewall - Inside the Windows FIrewall menu, use the menu on the left to click on Allow an app or feature through Windows Defender Firewall.
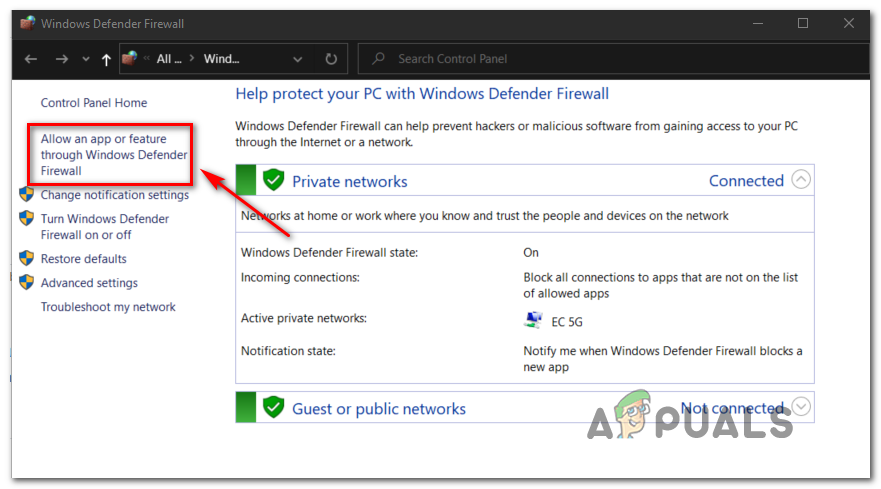
Allowing an app or feature through Windows Defender - Once you’re inside the allowed apps menu, start by clicking on the Change button and click Yes at the User Account Control prompt to grant admin access.
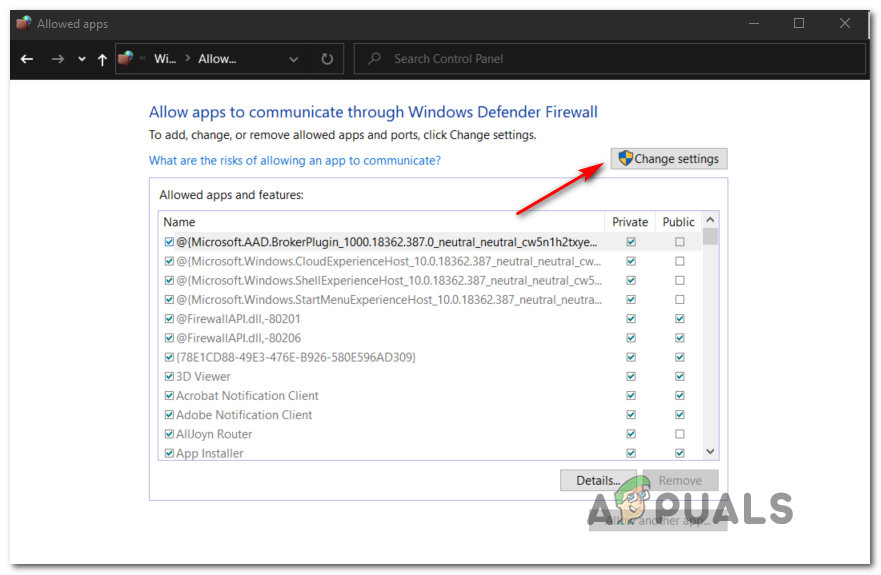
Changing the Settings of the Allowed Items in Windows Firewall - Next, scroll down through the list of items and identify iTunes and Safari (if you installed every supporting software). When you see it/them, check their associated boxes for both Private and Public before clicking Ok to save the changes.
Note: If you can’t see iTunes in this list, click on Allow another app and add the entry manually.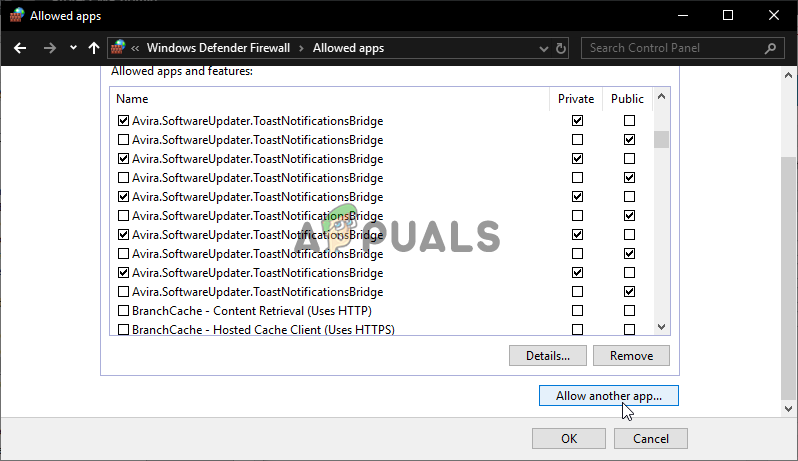
Allow another app in Windows Firewall - Once iTunes has been whitelist, launch the app again and see if the problem is now fixed.
If you’re still seeing the 0x80092013 error when attempting to play or download content, move down to the next fix below.
Method 4: Disabling Proxy or VPN
As it turns out, the iTunes utility doesn’t play nice with gateway services that facilitate anonymous web browsing and the circumvention of content restrictions. This is understandable since the iTunes library is different depending on the region where you access it from.
However, the ability to detect and reject VPN and proxy connections are superior on iTunes. As we’re writing this, there are only a handful of VPN clients that can go undetected in Itunes (and this list is getting smaller).
So one potential culprit that might actually be the underlying cause of the 0x80092013 error is an active proxy server or a VPN client that’s being deployed at a system or network level. If this scenario is applicable, you should be able to fix the issue by disabling the proxy server or uninstalling the VPN client that is currently acting as a gateway.
Depending on the gateway service type you’re using, follow guide A or guide B for instructions of disabling your VPN or Proxy server:
A. How to uninstall your VPN client
- Press Windows key + R to open up a Run dialog box. Next, type ‘appwiz.cpl’ and press Enter to open up the Programs and Features menu.
Type appwiz.cpl and Press Enter to Open Installed Programs List - Once you’re inside the Programs and Features screen, scroll down through the list of installed applications and locate the 3rd party VPN client that you’re currently using.
- When you manage to locate it, right-click on it and choose Uninstall from the newly appeared context menu to begin the uninstallation process.

Uninstalling a VPN tool - Inside the uninstallation screen, follow the on-screen instructions to complete the operation, then restart your computer.
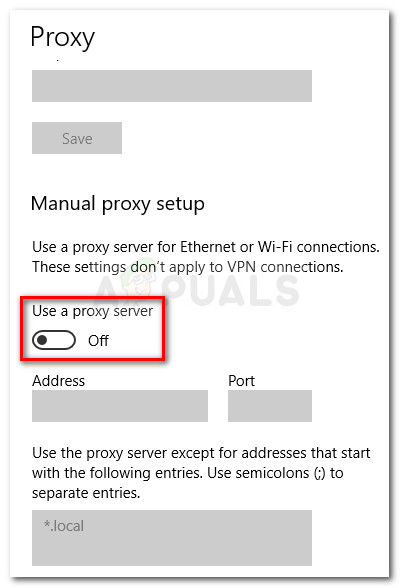
B. How to Disable your Proxy server
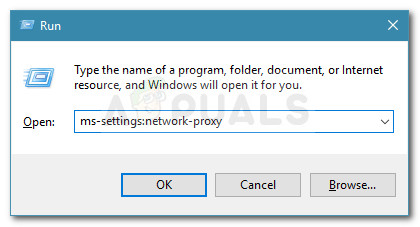
- Open up a Run dialog box by pressing Windows key + R. Next, type ‘ms-settings:network-proxy’ and press Enter to open up the Proxy tab of the native Settings app.
Run dialog: ms-settings:network-proxy - Once you’re inside the Proxy tab, scroll all the way down to the section named Manual proxy setup section, then uncheck the checkbox associated with Use a proxy server.
- Once the Proxy server has been disabled, restart your computer and see if the problem is fixed.
After you have successfully managed disable or uninstall your Proxy server / VPN client, open iTunes once again and repeat the action that was previously triggering the 0x80092013 error to see if the issue is resolved.