Fix: io.netty.channel.abstractchannel$annotatedconnectexception
The “io.netty.channel.abstractchannel$annotatedconnectexception: Connection refused: no further information” error is a common frustration experienced by Minecraft players. This error message typically appears when you’re trying to connect to a Minecraft server but encounter difficulties during the connection process.
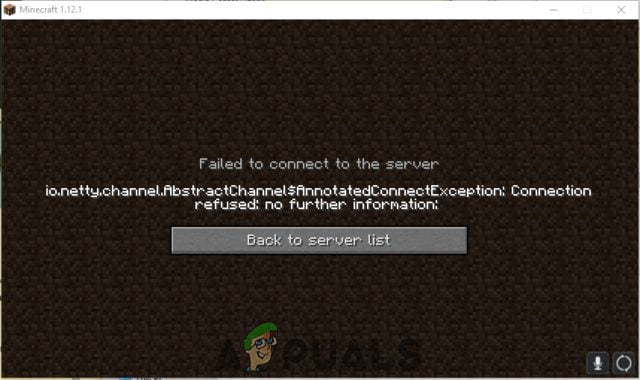
The error indicates a network connection issue between your Minecraft client and the server. It can result from problems with your network or the server. “AbstractChannel” refers to a class in the Netty framework that manages communication, while “AnnotatedConnectException” signals a connection failure.
It occurs due to several factors. Common causes include server unavailability during maintenance, incorrect IP or port configurations, Windows Firewall blocking the connection, outdated Java versions causing conflicts, or incompatible software installed on the device.
Lets discuss solutions to this problem.
1. Power-Cycle your Network
Power-cycling your network devices can help fix connection issues by clearing temporary network problems. Restarting your router and modem refreshes the network, removing conflicts with dynamic IP addresses, routing errors, or other inconsistencies that may block your connection to the Minecraft server.
- Disconnect the power from the internet router.

Disconnecting power cord - Wait for 5 minutes and reconnect the power.
- Once internet access is restored, try to connect to the server and check if the issue persists.
2. Reset your Network Configurations
Resetting your network configurations clears outdated or incorrect settings that may block the connection to the server. This process helps fix issues like incorrect IP addresses or DNS settings, which often cause connection errors in Minecraft.
- Search for Command Prompt in the Windows Search bar, then click “Run as Administrator”.
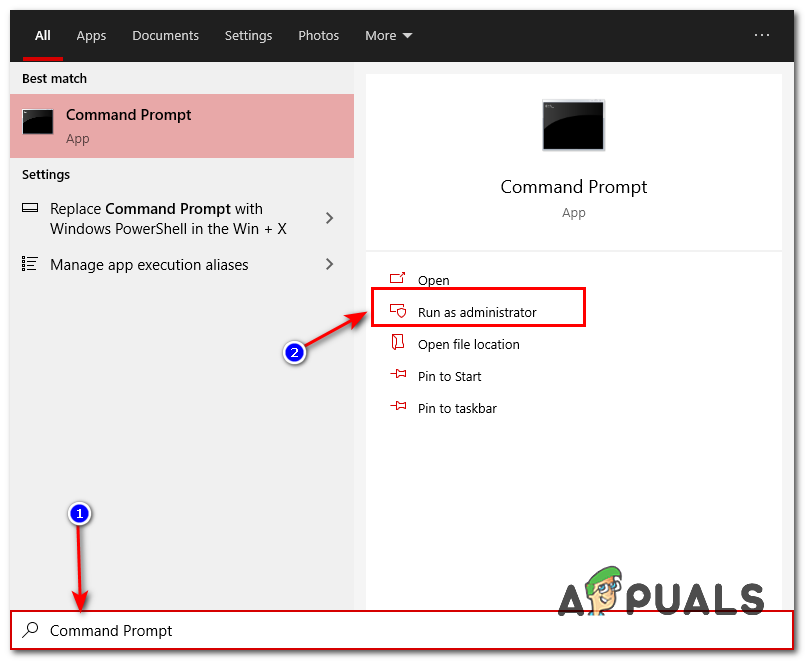
Running Command Prompt - Once the Command Prompt window is open, type the following commands one by one:
ipconfig /flushdns
ipconfig /release
ipconfig /renew
netsh winsock reset
netsh int ip reset
- Restart your computer and check if the issue persists.
3. Add Exception in Firewall
Ensuring your firewall isn’t blocking Minecraft is crucial for a successful server connection. By adding an exception for Minecraft’s Java files and game directory, you let the firewall trust the game’s network activity, preventing it from being mistakenly blocked. This step ensures the firewall doesn’t interfere with the communication between your client and the server.
- Click on the Start menu and select the Settings icon.
- In Settings, click on Updates & Security.
- Select Windows Security from the left pane, then select Firewall & Network Protection.
- Scroll down and select Allow an App through Firewall.
- Click Change Settings and select Yes on the warning prompt.
- Select Allow another app from the options and click Browse.
- Navigate to the game installation directory and select the game and the launcher executable.
- Repeat the process, and this time navigate to the directory where you have the Minecraft servers installed.
- Open the Maxwell folder and then the MinecraftServer folder.
- Allow both the Java executables located inside the folder in the same way.
- Repeat the process again, and instead of clicking Allow another app, scroll down the list of available apps, and allow all the Java Platform SE Binary options through both the Private and Public networks.
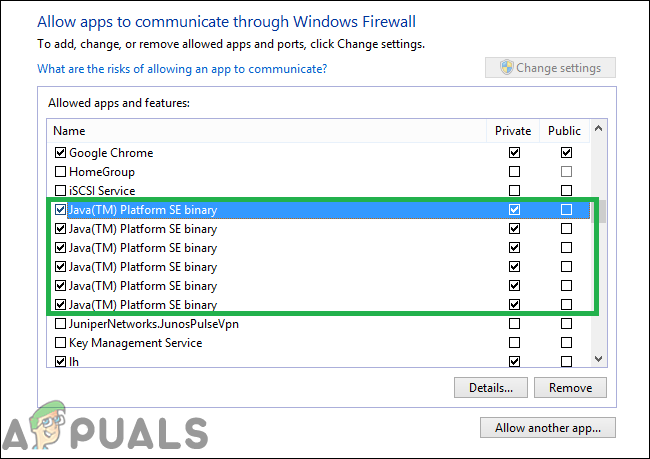
Applications that need to be allowed through the firewall - Open the Minecraft launcher, try to connect to the server, and check if the issue persists.
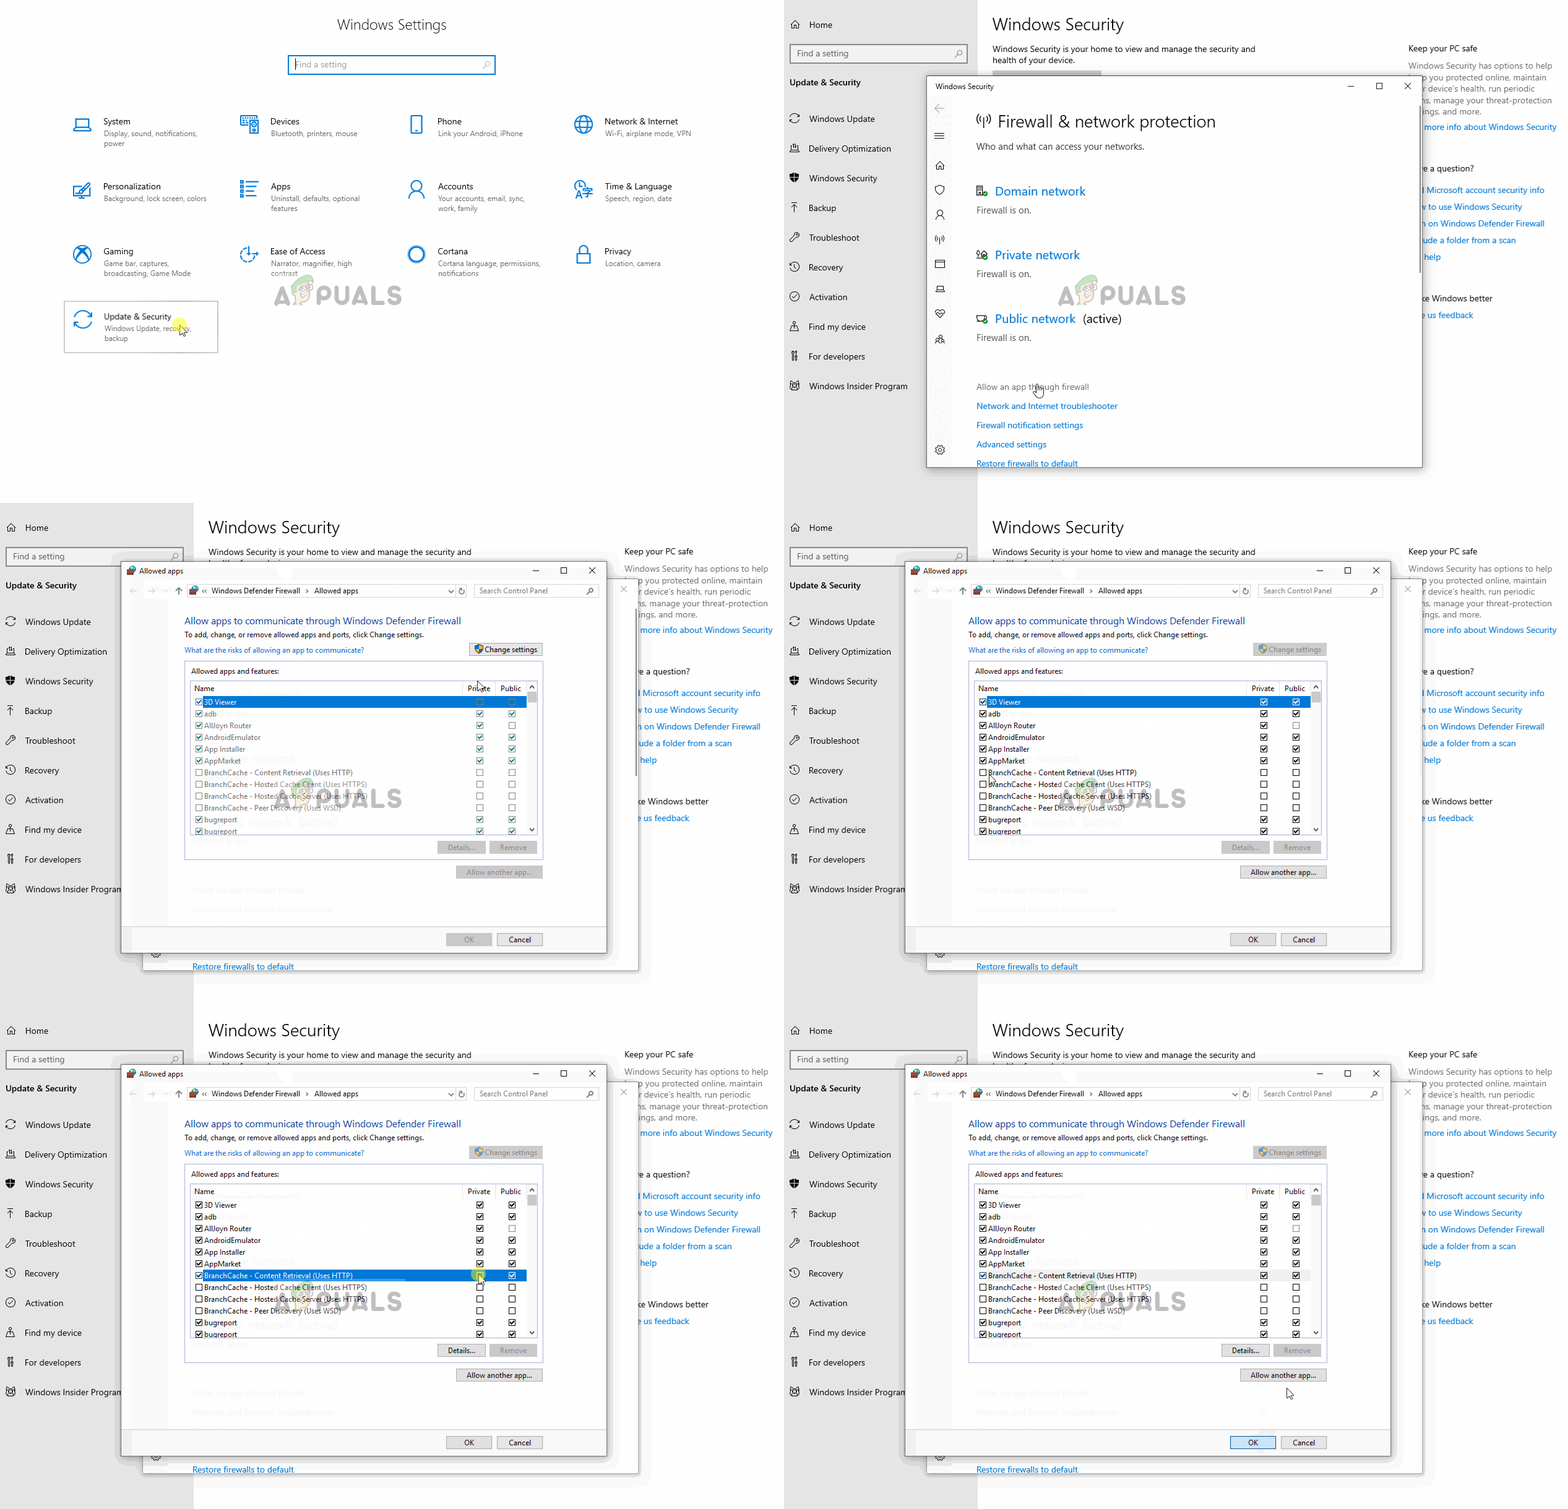
Allowing an application through the firewall
4. Add the IP address and Port Before Connecting
If your IP address isn’t static, it can change frequently, causing connection issues. In this step, check the IP address and correct port, then add them to the Minecraft Launcher to ensure a proper connection.
- Click on the search bar on the Windows toolbar and type “Command Prompt“.
- Right-click on the icon and select “Run as Administrator“.
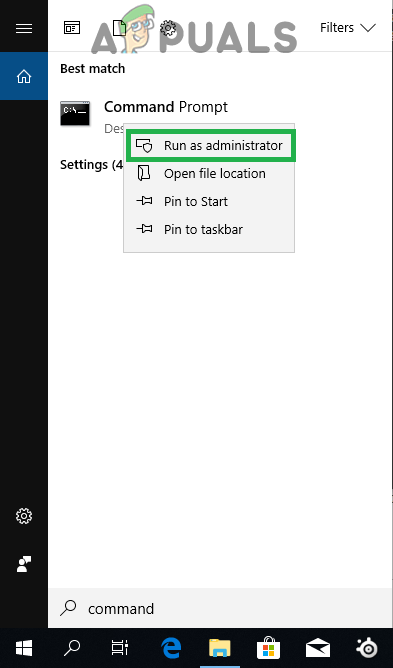
Right-clicking on the Command Prompt icon and selecting Run as Administrator - Type “ipconfig” and note the “IPv4 Address“.
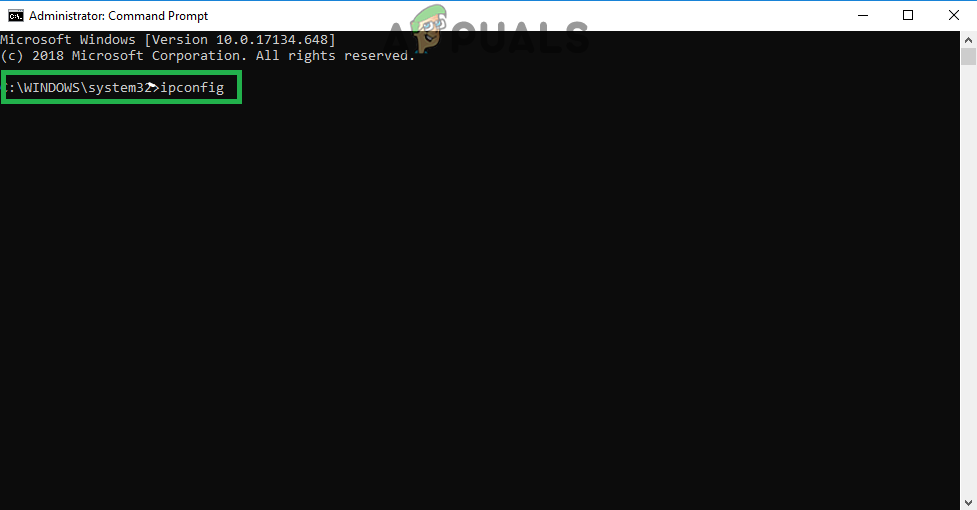
Typing “ipconfig” in the command prompt - Navigate to the “Minecraft Servers folder > Maxwell (some random numbers) > MinecraftServer” and open the “Server Properties” text document.

Opening the “Server Properties” text document and noting the server port - Note the “Server Port” listed there. In our case, it was “25565.” It should be similar in most cases, but in some it may vary.
- Open Minecraft and navigate to the “Play Multiplayer” option.
- Select the server you want to join by clicking on it, then select “Edit” from the options below.
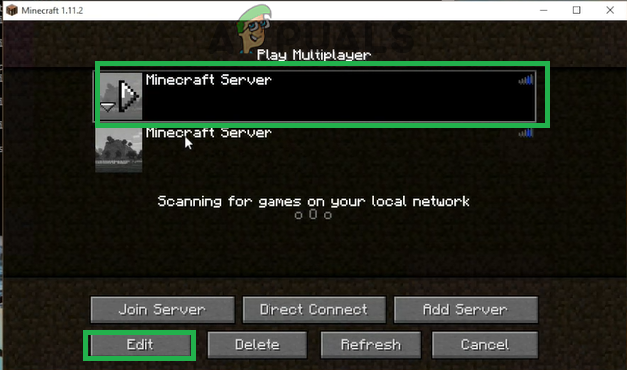
Clicking on the server and selecting “Edit” - The server name can be according to your preference, but the “Address” needs to be the IPv4 address we noted and the port number. For example, “XXX.XXX.X.X:25565” where “25565” is the port number and it may vary.
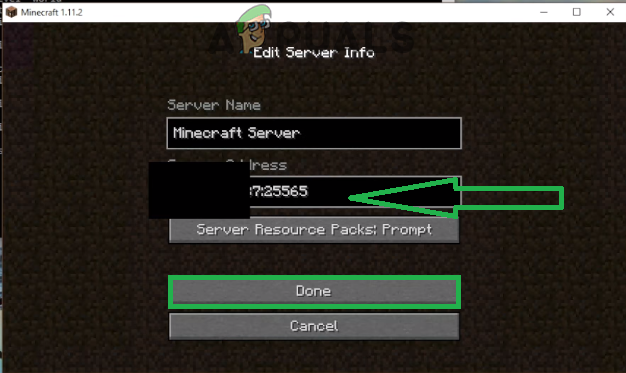
Editing the Server Address and clicking “Done” - Click “Done“, click “Refresh“, and check if the issue persists.
5. Check for Port Filtering
Port filtering occurs when your router or firewall restricts access to certain ports required by Minecraft servers. By checking and adjusting your port settings, you allow the necessary traffic through, which can help in resolving this error.
Here, what you can do is check your router’s and your local machine’s network configurations and make sure that port filtering isn’t turned on and if it is, the correct ports are being filtered.
Fix 6. Check ISP Network Access
If none of the above methods work, you should check your ISP’s network access. ISPs sometimes block network access to specific domains and don’t allow you to go through. Contact your ISP and verify that internet access isn’t indeed blocked.
Furthermore, you can also change your internet connection to your smartphone’s 3G and see how that works out for you. If it does, it probably means that your ISP is blocking you and you need to change your network.
If Minecraft is working with the Mobile Data it means that your ISP is blocking the connection. If that’s the case please contact your ISP to get your issue resolved.


