How to Fix Network Adapter Not Detected On Windows?
The network adapter not detected issue occurs when Windows is not able to detect the network adapter for multiple reasons, such as a disabled network adapter, disabled essential network services, problems with the Sockets API and corrupted network drivers. These might be some of the leading contributors preventing you from accessing the internet.
After understanding the causes, let’s look at the solutions that have worked for most affected users.
1. Re-enable Network Adapter
Sometimes, the device manager stops detecting the device due to several reasons. This can happen when the device gets disabled automatically or the driver for the particular device has been uninstalled. In both situations, you need to ensure what can cause this issue. To do this, you will need to enable the network adapter and If it does not fix this issue, try installing the driver by following the methods mentioned below.
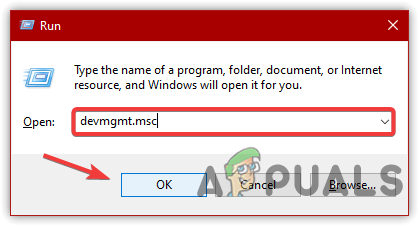
- Press the Win + R to open the Run Window
- Type devmgmt.msc and click OK
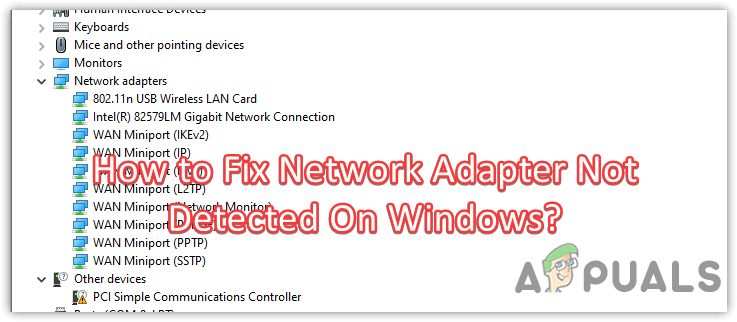
Opening Device Manager - Select the Network Adapter and click Actions from the top, then click Scan For Hardware Changes. This will re-enable the network adapter if it is disabled.

Enabling Network Adapters
2. Reset Network Settings
Windows allows us to reinstall all the network adapters and reset all the settings that the VPN client software or the users applied. So if this issue occurs due to the corrupted network adapter or misconfiguration in the network settings, resetting the network will aid in fixing this issue. The following steps will help to reset the network settings
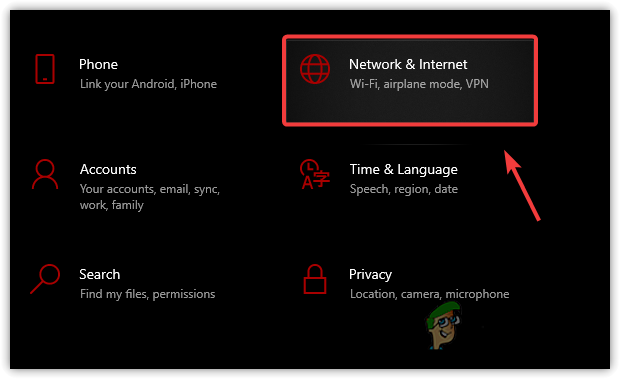
- Open Settings by pressing Win + I on the keyboard
- Navigate to the Network & Internet
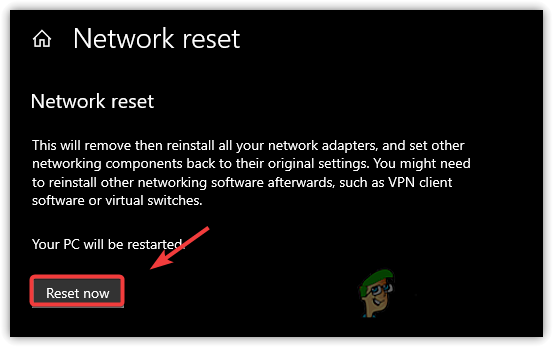
Navigating to Network And Internet - Scroll down to the bottom and click Network Reset
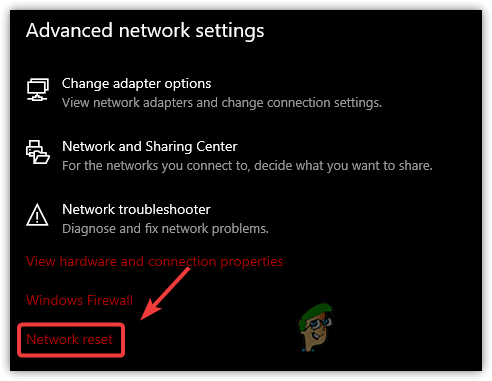
Clicking Network Reset - Then, click Reset Now. This will restart your computer will the fresh Network Adapter
Resetting Network Settings - Once done, the issue should be fixed.
3. Use Commands to Reinstall Network Adapters & Reset Settings
If resetting the network settings does not fix your issue, it might be due to the problem with Sockets API, which you can fix by just executing the command to reset winsock. However, if that does not work, then you can use netcfg -d command, which will remove all the WAN Miniports, network adapters, IP address and among others.
Therefore, if you are using a custom WIFI card, make sure to download a driver using another device and transfer it to the causing device so that you will be able to install it on your computer. Once you execute both commands, you need to restart to reinstall network adapters and everything will return to its default. To do so, follow the steps:
- Click Start Menu and search for Command Prompt

Searching Command Prompt - Right-click on the command prompt and then click Run As Administrator
- Once the command prompt is opened, paste the following command to reset the winsock
netsh winsock reset
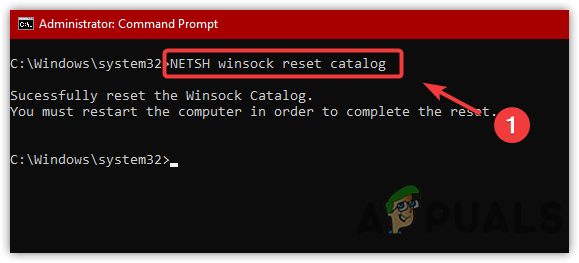
Resetting Sockets API - After that, if the issue persists, type the following command
netcfg -d
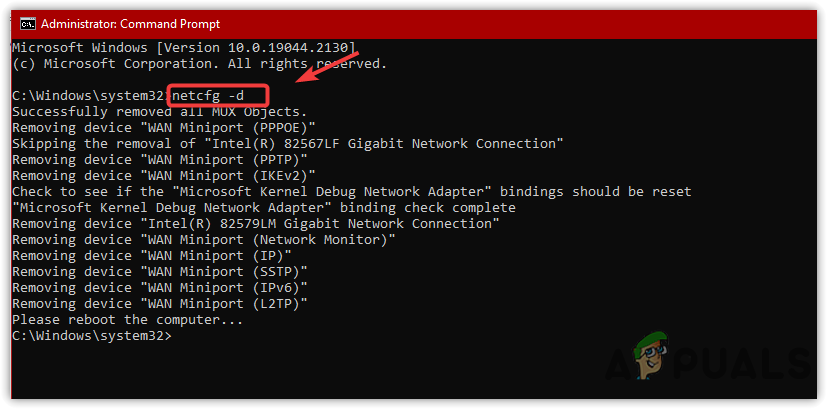
Resetting All Network Configurations - Once done, you need to restart your computer to get things back to normal
- Once you have restarted, the issue should be solved.
4. Install the Network Adapter Manually
You can also install the network driver through the device manager even if Windows is not detecting it. But you need to know the specific hardware model of your network adapter to install the driver. To do so:
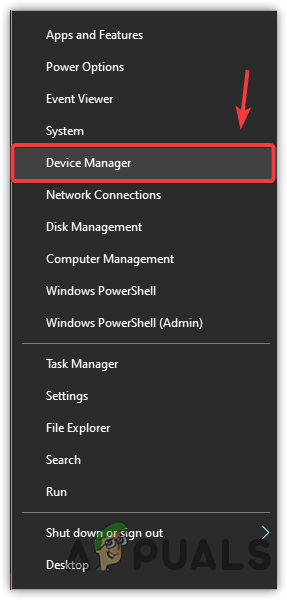
- Right-click on the Start Menu icon and then click Device Manager
Launching Device Manager - Once the device manager is launched, select the Device Name
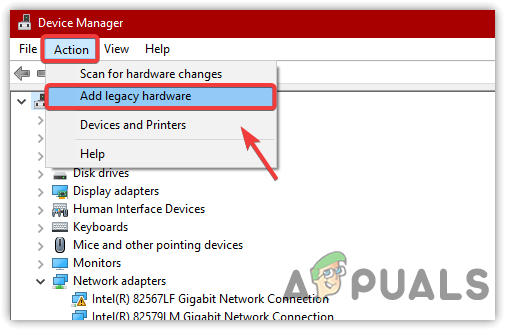
- Click on Actions from the top and then click Add Legacy Hardware
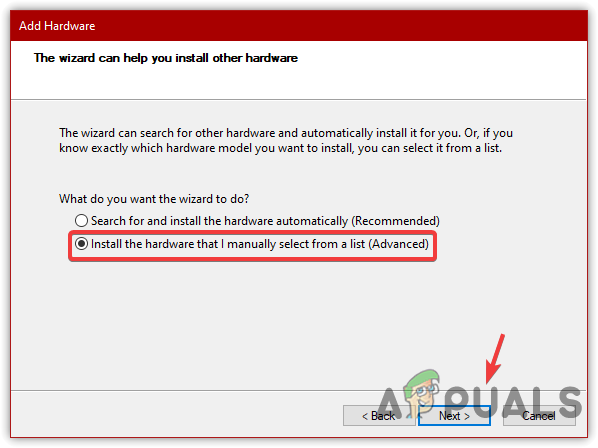
Adding Legacy Hardware - Click Next to proceed the select Install The Hardware That I Manually Select From A List
Proceeding to Install A New Hardware Device - Then, click Next
- Select the Network Adapters under Common Hardware Types and click Next

Selecting Network Adapters - Select the Manufacturer from the left pane and then select the model of your network adapter
You can check the model number from the manufacturer’s website if you are a laptop user and don’t know the model number.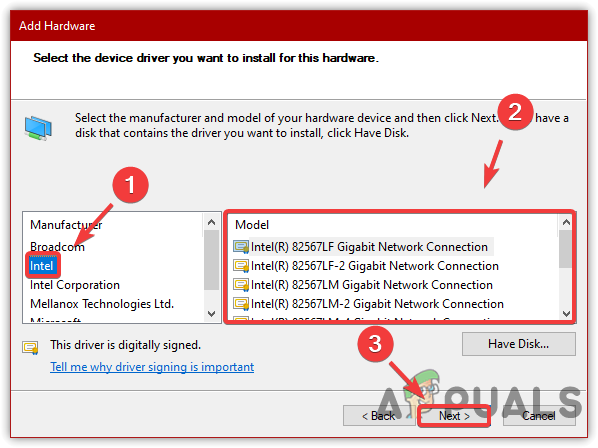
Choosing Network Adapter As Per The Model Number - Once you select the driver, click Next
- Again, click Next to start the installation process
- Once done, click Finish and check if your internet is working. If it is, then your problem is resolved.
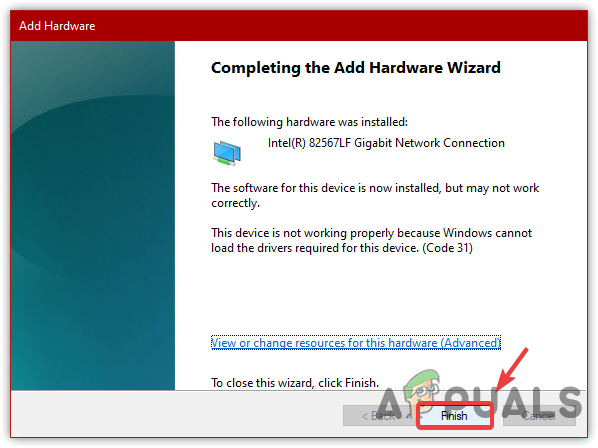
Clicking Finish
5. Restart Network Services
Windows provide services that work in the background to operate the tasks. There are some important services that keep the internet connection stable and connected to the computer. You might face several issues like this if they are not running properly. Therefore, ensure that the services are running properly.
6. Restart WLAN AutoConfig Service (WIFI Users)
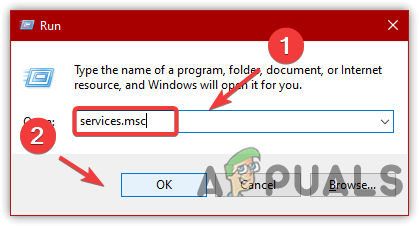
- To restart network services, press Win + R to open the Run Window
- Type services.msc and click OK
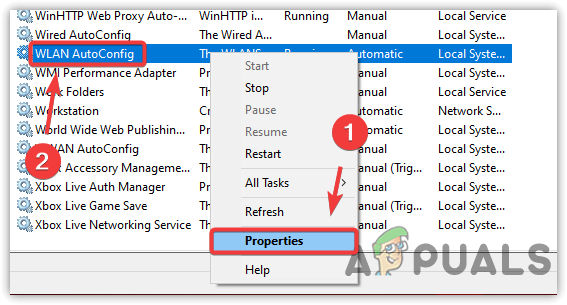
Opening Services Window - Once you are in the services Window, find and right-click WLAN AutoConfig
- Go to Properties
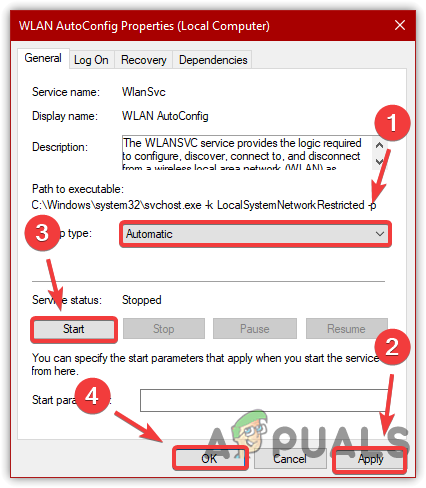
Opening WLANAutoConfig Service Properties - Change its Startup Type from Manual to Automatic
- Then, click Apply and click on the Start button if the service is stopped
- Click OK to save the changes
Restarting Service
This WLAN AutoConfig service provides the logic required to connect, disconnect, configure and discover from a wireless local area network WLAN. It also helps communicate with other devices to connect wirelessly. Basically, it plays a strong role in providing a good internet experience to laptop or WIFI card users. If you have a laptop or WIFI card, you cannot connect to the internet if this service is disabled.
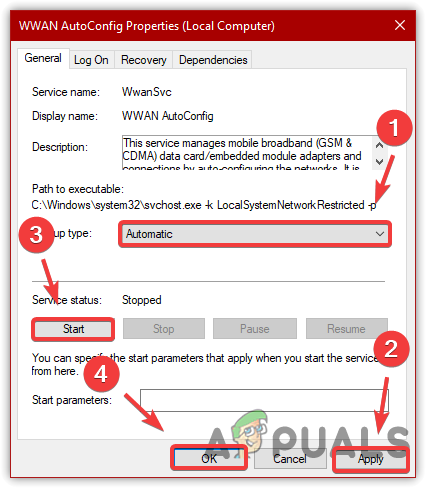
7. Restart WWAN AutoConfig Service ( Broadband Users)
- if you are using the broadband device for the internet connection, then right-click the WWAN AutoConfig
- Then, click on Properties
- Change the startup type to Automatic
- Then, click Apply and if the service is stopped, click Start and OK to save the changes.
Restarting WWAN AutoConfig Service
8. Run Network Troubleshooter
Troubleshooters are designed to fix problems automatically. Windows includes a network troubleshooter, which diagnoses the problem in the network and if it finds the issue, it will provide you an option to apply the fix. To do that:
- Right-click on the Ethernet or WIFI icon from the bottom right and then click Troubleshoot Problems
- Once the troubleshoot open, select All Network Adapters
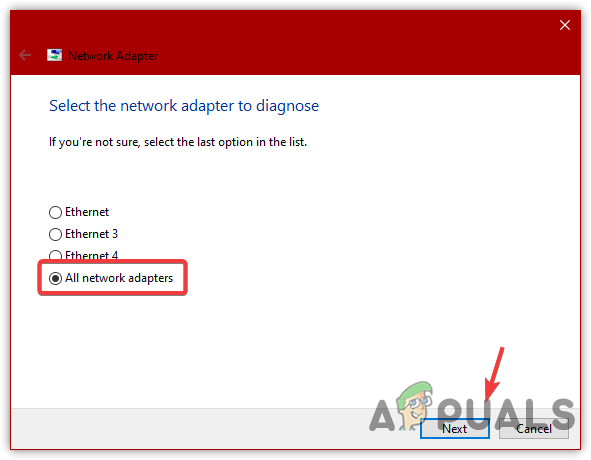
Finding Problems In All Network Adapters - The troubleshooter will give you options, and you need to select the option as per the issue you are encountering.
- In my case, the network adapter is disabled, so it gives me the option to enable the Network Adapter
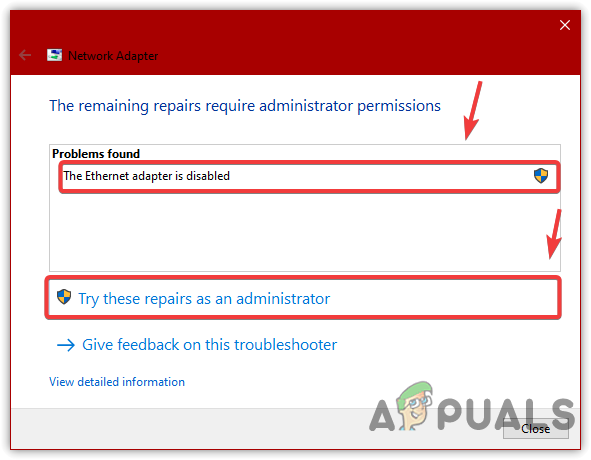
Enabling Network Adapter - So when I clicked on Try These Repairs As An Administrator, my issue was gone.
9. Download the Network Driver With The Help Of Another Device
If the issue is not fixed yet, you might have a corrupted network driver installed, causing this issue. and for that reason, the device manager might not be able to detect the network adapter.
You will need to download the network driver using another computer or a mobile device. If you have a laptop, download the driver provided by your manufacturer, as the driver will be more reliable and compatible with your device. You can follow the steps to download the compatible driver for your laptop but if you have a desktop, go to your manufactures website to download a network driver. In both cases, you can follow the steps below:
9.1 Laptop Users
- First, press the Win + R to open the Run program
- Type dxdiag and click OK
- Note down the value of the System model, then go to your manufacturer’s website using another device
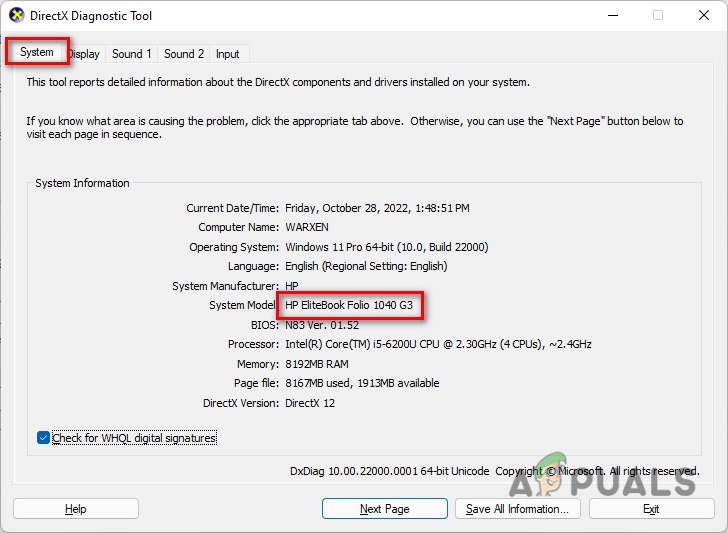
Checking Laptop’s Model Number - Search your laptop with the model number, then download the Network driver
Downloading Network Driver According to the OS - Once you have downloaded it, transfer the driver to the laptop, install it and check if it fixes the issue.
9.2 Desktop Users
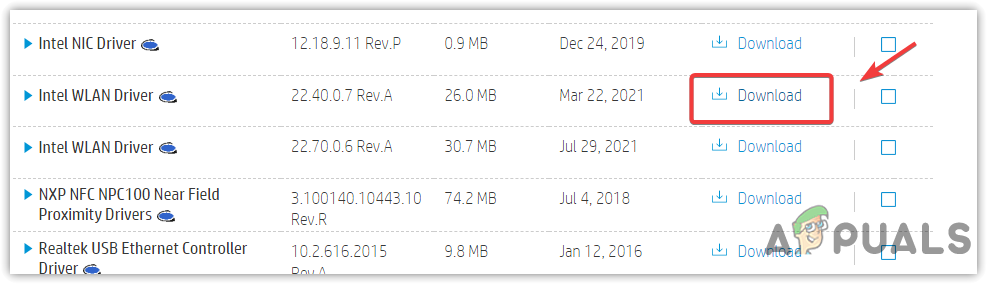
- Go to your manufacturer’s website and download the driver from there.
- Just google the manufacturer’s name and the network adapter. For Example Intel Network Driver

Navigating to Official Manufacturer’s Website - Download the Network Driver
Downloading Network Driver - Once the driver is downloaded, transfer it to your desktop using a USB or a Mobile phone
- After that, install it on your computer and check if this resolves your issue.
10. Use System Restore
The final solution for this issue is to restore your computer to a state where Windows was working fine. Remember that this method requires a restore point created when you have not encountered the issue. In case you have not created a restore point, you can still check because some third-party driver installation applications create a restore point for safety, as the driver failure problem can arise during the installation process. Below are the steps:
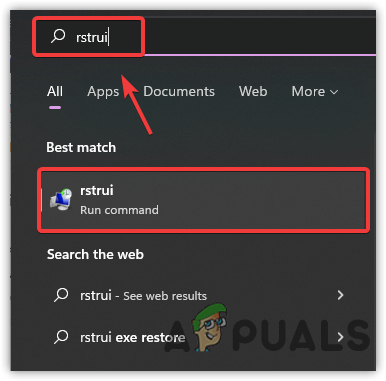
- Click Start Menu and type rstrui and hit Enter
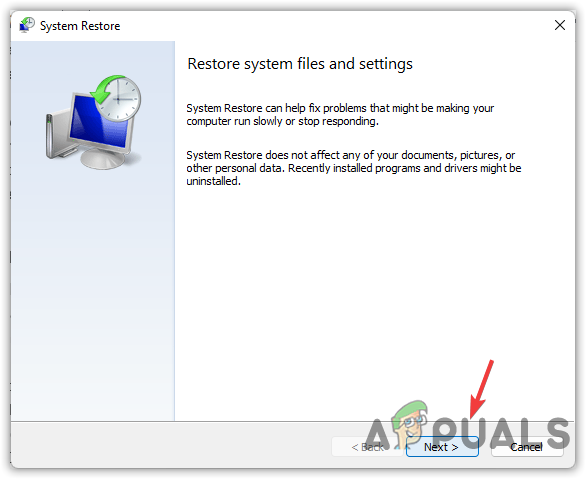
Opening System Restore - Click Next to proceed
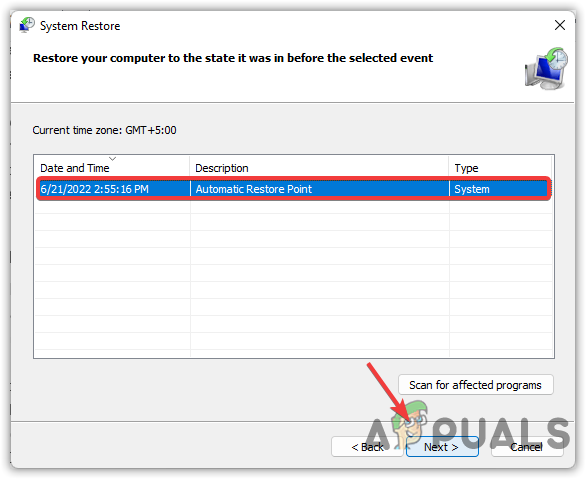
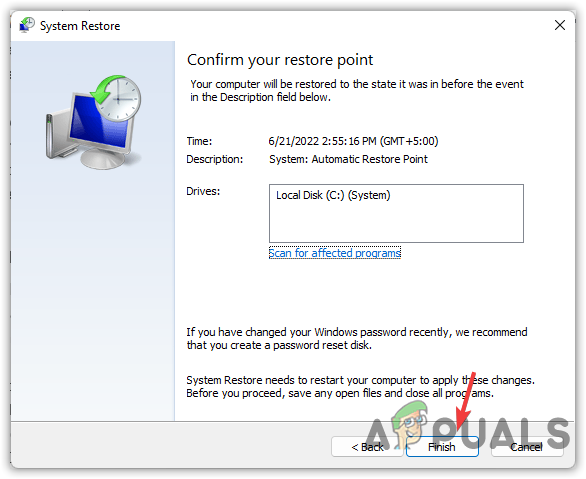
Clicking Next To Start - Select a restore point and click Next
Select A Restore Point - Click Finish to start the process
Clicking Finish To Start The Restore Procedure - After the restart, check if the device manager detects the network adapter.
If none of the methods have worked, it is most probably a hardware issue. You can take your computer to a repair shop, but before that, try another solution which is resetting the Windows. If the issue persists after resetting the Windows, it is highly recommended to take a laptop or a desktop to a repair shop.
Hi,
We are using a third party network service and working fine in
windows 7. now we are planning to migrate our machine OS to Windows 10
and when i try to add that service inf file in Network adapter it looks
like its not adding to “Local Area Connection Properties”
Please help us in achieving this.
Thanks & Regards,
Srikanth
Please refer below link for more details on this issue:
http://answers.microsoft.com/en-us/insider/forum/insider_wintp-insider_devices/not-able-to-add-a-network-service-inf-file-in/d63b6a5f-61e5-4fce-b749-d753f9af80e3