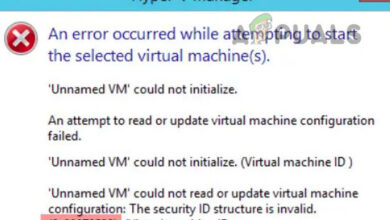
Fix: Hypervisor is not Running Error on Windows
There have been users reports that state that users are not able to launch VirtualBox as they are presented with a message box saying hypervisor is not running. This error is often due to your Hyper-V services not running automatically or disabled Hyper-V feature. Basically, Hypervisor is a software that is used to run or create virtual machines. When users try to open VirtualBox, instead of the user interface, they are prompted with the ‘Virtual Machine could not be started because the hypervisor is not running’ error.
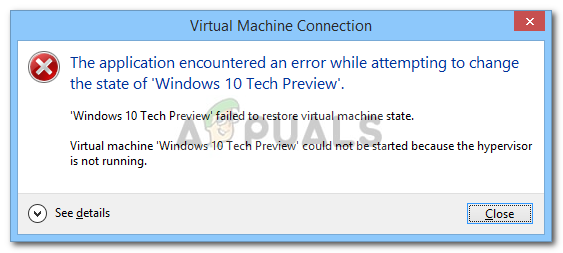
We all know about virtual machines and many of us have used it at least once throughout the years, albeit most of us aren’t aware of the responsible tech at play. Nonetheless, the error can be easily resolved by applying a few simple solutions that we have mentioned down below.
What causes the ‘Virtual Machine could not be started because the Hypervisor is not running’ Error on Windows 10?
Well, after looking at the user reports, the error is due to the following factors —
- Hyper-V services: In some cases, the error is popping up because the Hyper-V services on your Windows 10 aren’t starting automatically after abootupp.
- Hyper-V feature: Another thing that can cause the error to appear is the Hyper-V feature. If this feature, located in your Windows features list, is disabled, it will cause the error message to emerge.
To fix your issue, you can follow the few solutions down below. If you want a quick workaround, we recommend following the solutions in the same order as provided.
Solution 1: Using the Command Prompt
You can fix your issue by setting the hypervisor to start automatically in your boot configuration data file. This will require an elevated command prompt so make sure you are using an administrator account. Here’s how to do it:
- Press Windows Key + X and select Command Prompt (Admin) from the list to open an elevated command prompt.
- Once the command prompt loads, type in the following command and press enter:
- bcdedit /set HypervisorLaunchType auto
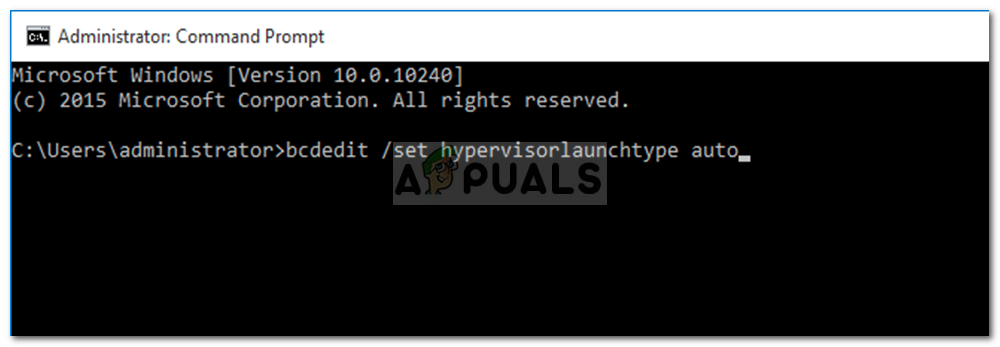
Setting Hypervisor to Start Automatically in BCD - Restart your system and check if it fixes your issue.
Solution 2: Starting the Hyper-V Service
Another fix that you can implement to circumvent the issue would be changing the properties of a Hyper-V service. Sometimes, the service doesn’t start automatically due to which the error is popping up. Therefore, to fix it, you will have to set the service to start automatically. Here’s how to do it:
- Press Windows Key + R to open Run.
- Type in ‘services.msc‘ and press Enter.
- In the Windows Services list, locate the Hyper-V Virtual Machine Management service.
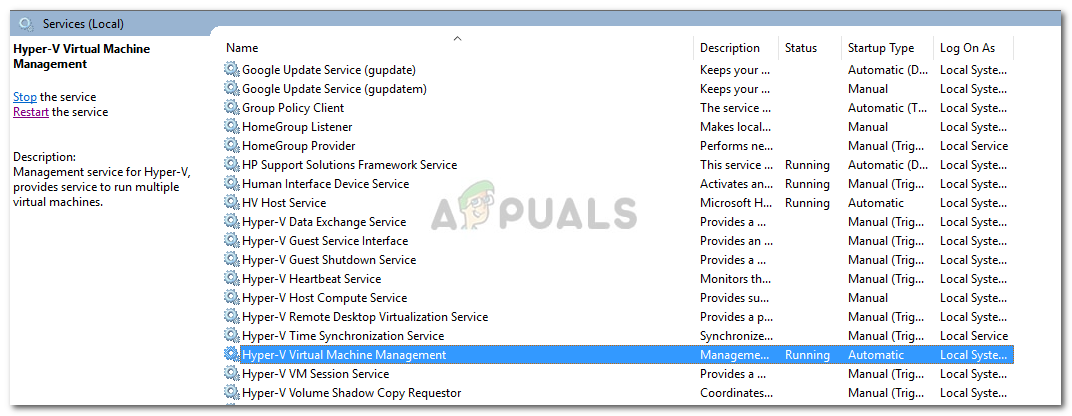
Hyper-V Virtual Machine Management Service - Double-click it to open Properties.
- Set the Startup type to Automatic and make sure the service is running.
- Restart your system.
Solution 3: Enabling Hyper-V Feature
Finally, the last thing that can potentially fix your issue would be enabling the disabled Hyper-V feature. This feature is located in the Windows features list which can be found in the Control Panel. To do this, you will have to do the following:
- Go to the Start Menu and open up the Control Panel.
- Go to Programs and Features.
- On the left-hand side, click ‘Turn Windows Features on or off’.
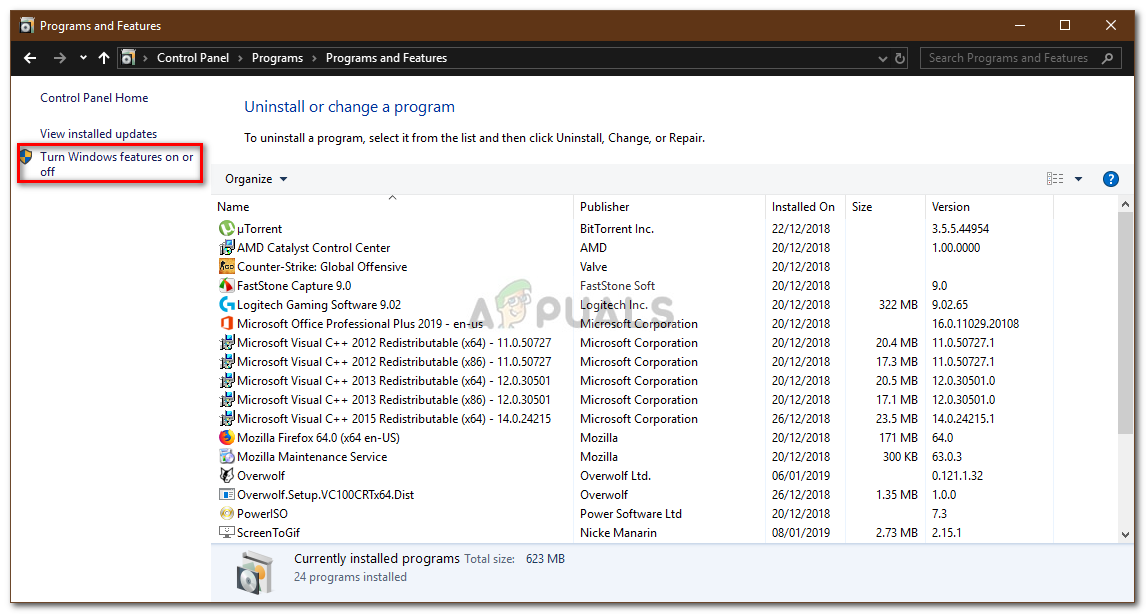
Programs and Features – Control Panel - Scroll down and expand the Hyper-V entry.
- Afterward, expand the Hyper-V Platform list.
- Tick the ‘Hyper-V Hypervisor’ box and then click OK.
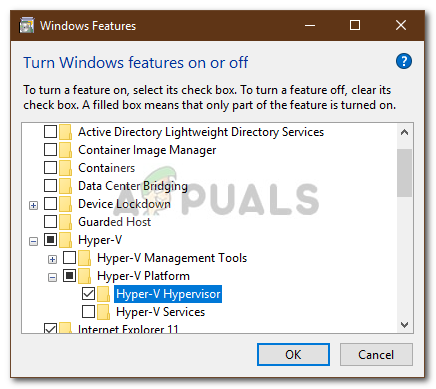
Enabling Hyper-V Hypervisor Feature - If it is greyed out, you will have to tweak your BIOS settings a teensy bit. In your BIOS settings, make sure Virtualization setting is enabled.


