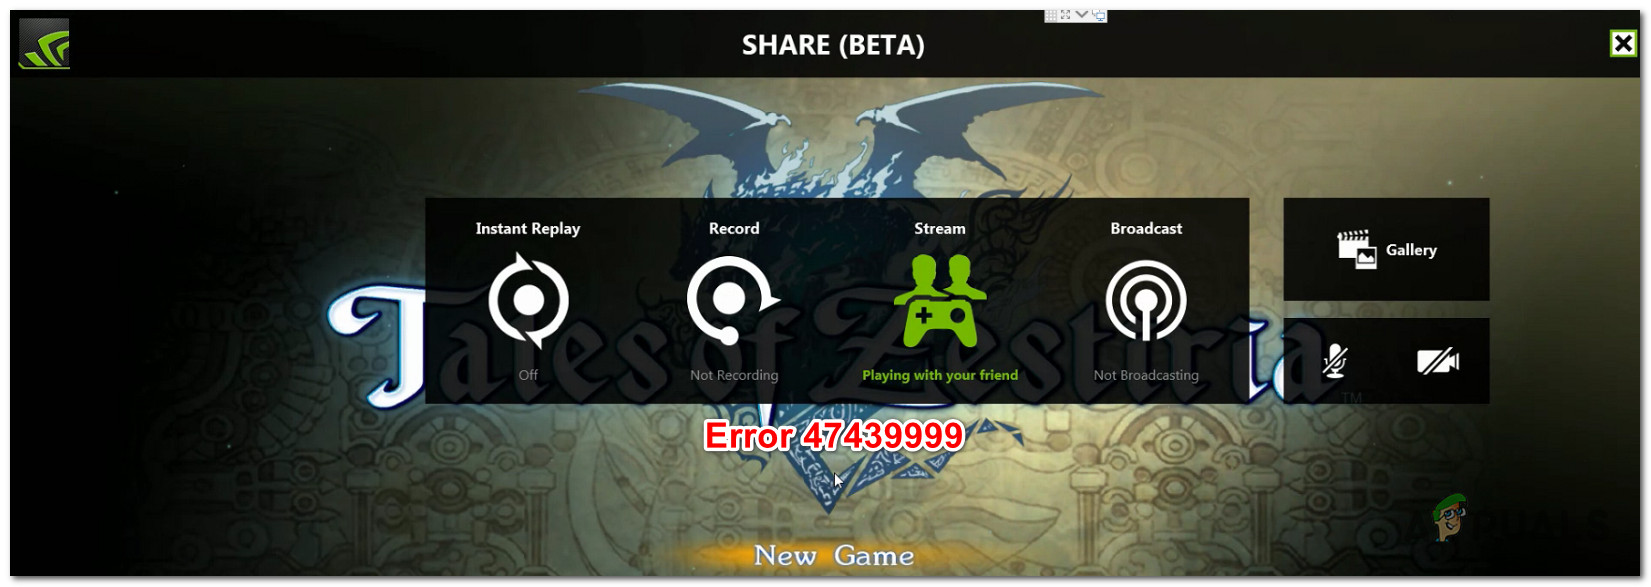
How to Fix Error Code 47439999 with GameStream
Some users are reportedly getting the 47439999 error code with every game they attempt to play using Nvidia’s Gamestream technology. The error is shown in an Nvidia Experience window and closing it will simply close off the game ending the co-up session.
After investigating this particular issue, it turns out that there are several different causes that might contribute to the apparition of this error code. Here’s a shortlist of culprits that were confirmed to cause the 47439999 error code:
- Badly cached data in Chrome – Since Nvidia GameStream uses the infrastructure behind Chrome for co-op interactions, this problem can be caused by badly cached data stored by your browser. To fix this particular problem, you’ll need to clear any cached data from your Chrome settings menu.
- GameStream ports are NOT forwarded – Another reason why you might expect to encounter this error is a problem with one or more ports than the GameStream feature is attempting to use. If this scenario is applicable, you can fix the issue either by enabling UPnP (if your router supports it) or by forwarding the required ports manually from your router settings.
- Nvidia Service conflict – According to some affected users, this problem can also appear in scenarios where an Nvidia Experience Service is actually conflicting with the game streaming feature. In this case, the solution is to stop every service prior to launching the streaming attempt using GameStream.
- ISP uses a shared IPv4 address – As it turns out, you can see this error code in situations where your ISP uses a shared IPv4 that the game-streaming feature doesn’t like. In this case, you can use a gaming VPN or set up a Hamachi network and invites your gaming buddies before starting the process.
Method 1: Clearing the Temporary Internet Filles and Cache in Chrome
Since the Gamestream technology is built around Chrome, you are stuck with using this browser if you want to use GameStream to jump on co-op games with your friends. But this also means that if you have an issue with your browser, you should expect it to reflect on the streaming attempt.
Fortunately, in most cases, the 47439999 Gamestream error code is most likely caused by a bad cookie saved in association with Nvidia Experience. In this case, you should be able to fix this problem by clearing the cache and cookies on your Google Chrome installation.
If you haven’t tried this already, follow the instructions below to clear the cache and cookies on your Google Chrome installation:
- Close off Nvidia Experience and every window that’s currently attempting to use the GameStream technology.
- Open Google Chrome conventionally and ensure that every unnecessary tab is closed (aside from the one that you’re currently using).
- Next, click on the action button (three-dot icon in the top-right section).
- Once you’re inside the newly appeared context menu, click on Settings.
- From the Settings menu, scroll all the way down to the bottom of the screen and click on the advanced button to bring up the options that are hidden by default.
- After the hidden menu becomes visible, scroll down to the Privacy and Security tab. Once inside the correct tab, click on Clear browsing data and select the Basic tab, then ensure that the boxes associated with Cached images and files and Cookies and other side data are enabled.
- Next, go ahead and set the time range to All time using the drop-down menu, then start the operation by clicking on Clear data.
- Wait patiently until the operation is complete, then restart your browser and initiate another co-op attempt using GameStream to see if the problem is now fixed.
If the issue is still not fixed, move down to the next potential fix.
Method 2: Forwarding the Ports used by GameStream
According to some affected users, this problem can also occur due to the fact that some of the ports that GameStream actively uses are blocked (either by your router or by some kind of firewall).
In case the first option is true (ports are blocked by your router), you will be able to fix this problem by ensuring that the ports used by GameStream are forwarded and readably accessible.
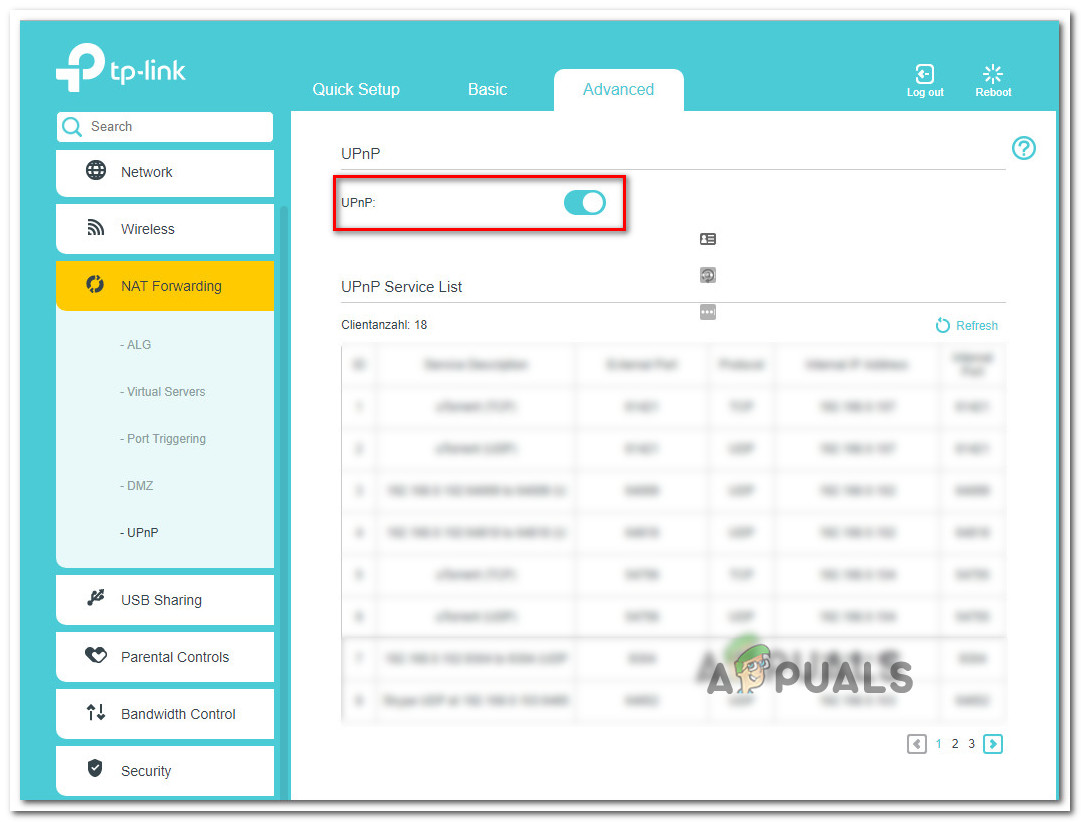
And when it comes to doing this, the easiest way is to simply enable UPnP (Universal Plug and Play) in order to ensure that the required ports are forwarded automatically. The steps of enabling UPnP from your router settings will be different from manufacturer to manufacturer – But typically, you will be able to do so by accessing your router settings and enabling UPnP from the Advanced tab.
However, if you’re using an older router model, chances are it might not support Universal Plug and Play – If this scenario is applicable, the only way to fix the 47439999 (if the issue is caused by a blocked port) is to forward the required ports manually.
If you don’t know how to do it yourself, follow the instructions below:
Note: These steps are only approximate as your screens will be different depending on your router manufacturer, but the ports that need to be forwarded remain the same.
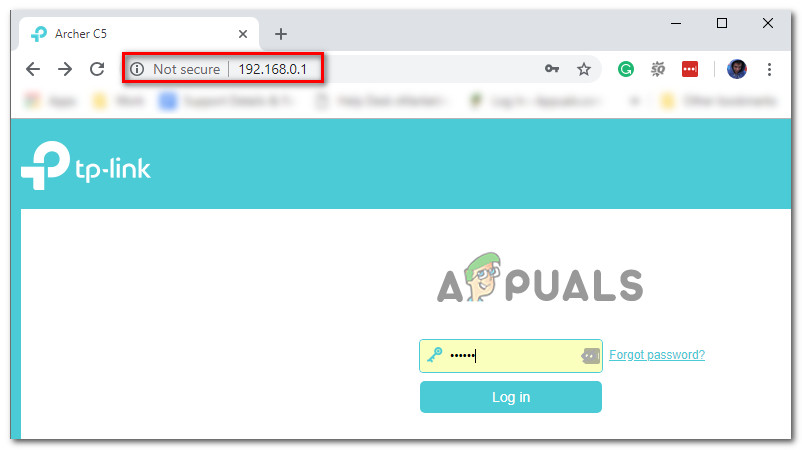
- Open your default browser and type the following address inside the navigation bar:
192.168.0.1 or 192.168.1.1
Note: These are the default addresses that your router most likely has (unless you modified it manually). If none of these addresses work, follow these instructions on finding your router’s IP address from any device.
- Once you finally manage to arrive at the login screen of your router, enter your credentials to gain access to your router settings.
Accessing your router settings Note: In most cases, the default credentials for admin and password are 1234 or admin (for both). If those didn’t work or you previously changed the default to custom credentials and you forgot them, you can search online for specific steps on how to revert back to the default credentials.
- Once you’re inside your router settings, go ahead and expand the Advanced menu and look for an option named NAT Forwarding (Port Forwarding) section or similar.
- After you manage to find the correct menu, look for the option that will allow you to add ports to the list of forwarded items.
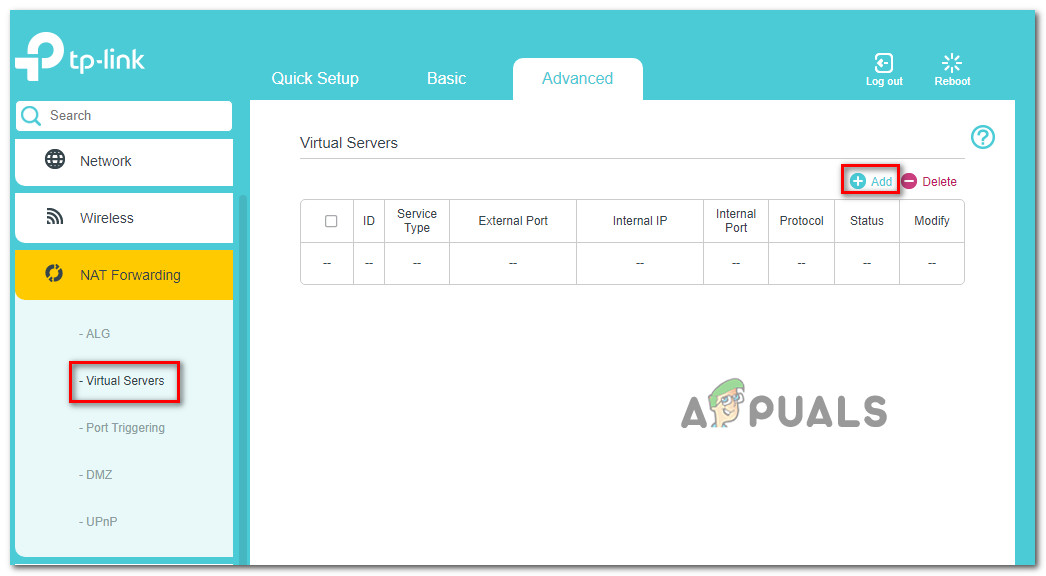
Adding ports to the Forwarding list - Next, go ahead and forward every port featured below and save the changes to ensure that every port UDP used by GameStream and Nvidia Experience is successfully forwarded:
47998 UDP
47999 UDP
48000 UDP
48010 UDP
- Once every port is successfully forwarded, save the changes, and reboot both your computer and router before retrying the operation and seeing if the problem is resolved.
In case the same 47439999 error code is still occurring, move down to the next potential fix below.
Method 3: Disabling every Nvidia Service
This might seem like a weird fix, but some affected users have managed to fix the problem by using the Task Manager to disable every Nvidia service prior to opening Nvidia Experience and launching the GameStream feature.
We have no official explanation on why this is effective, but some affected users are saying that it’s probably a rogue Nvidia Experience service that’s causing the 47439999.
If you want to try out this fix, follow the instructions below to use Task Manager to stop every Nvidia-related service before launching the GameStream feature:
- Press Ctrl + Shift + Esc to open up a Task Manager window. If you see the simple version opening, click on the more details button.
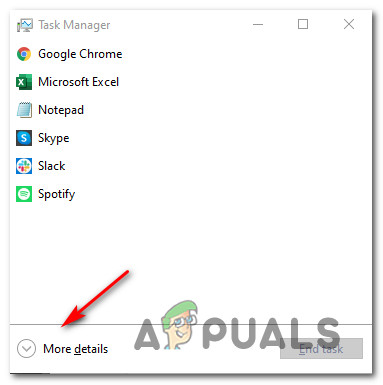
Opening the Detailed version of Task manager - Click on the Services tab from the vertical menu at the top, then click on the Description column so you’ll be able to locate every relevant service more easily.
- Next, locate every Nvidia service (by inspecting the Description) and right-click every instance, and click on Stop. Do so with every Nvidia service that is currently Running.

Stopping every relevant Nvidia service - Once every Nvidia service is stopped, launch the Nvidia GameStream feature again and see if the problem is now fixed.
In case you still end up seeing the same 47439999 error code even after stopping every involved Nvidia service in advance, move down to the final potential fix below.
Method 4: Using a Hamachi VPN
As it turns out, you might also encounter the 47439999 error due to the fact that your iSP provides a shared IPv4 by default, which ends up conflicting with GameStream / Nvidia share function.
If this scenario is applicable, you should be able to fix the problem by using a VPN to make it seem that you’re not using a shared IPv4. When it comes to doing this, the easiest way to do it is to simply install a conventional gaming VPN.
However, if you want to maximize your chances of success (especially if both you and the friend you’re trying to play with are seeing the same error), the proper way to do it is to use Hamachi (or a similar app) to create a dedicated VPN network that you’re both connected to when using GameStream.
Note: This might make your ping higher, but it’s still better than not being able to play the game at all.
Follow the instructions below to install hamachi and set up a VPN network to use with your friends when utilizing the GameStream:
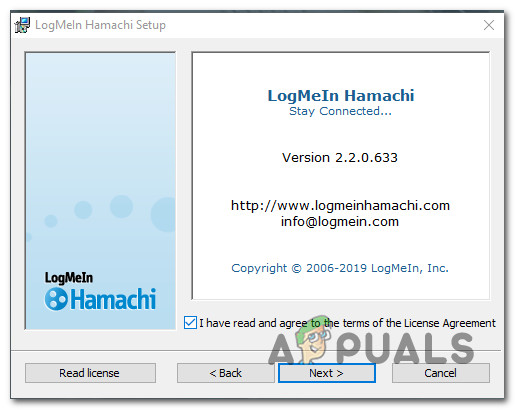
- Open your default browser and visit the official download page of Hamachi. Once inside, click on Download now to download the latest version of Hamachi VPN.
- Once the download is complete, double-click on hamachi.msi and follow the on-screen instructions to complete the installation of the Hamachi application. When prompted by the UAC (User Account Control) prompt, click Yes to grant admin access.
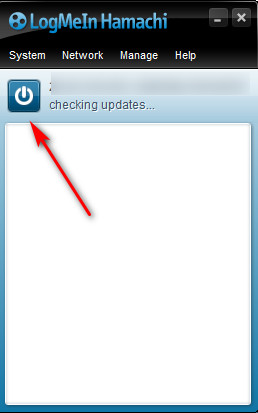
Installing Hamachi VPN - Once the installation is complete, reboot your computer and wait for the next startup to complete before opening Hamachi once again.
- Inside the main Hamachi screen, click on the power button and wait for the connection to succeed.
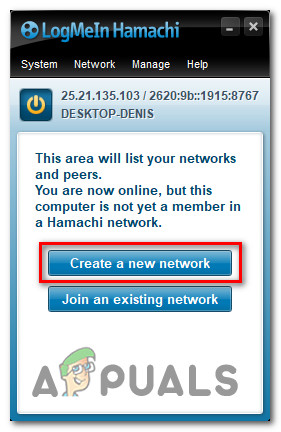
Creating a network with Hamachi - Once the connection is established, log in (or sign in if you don’t already have an account) with Hamachi.
- After you successfully connect with Hamachi, click on Create a New network from the LogMeIn Hamachi menu.
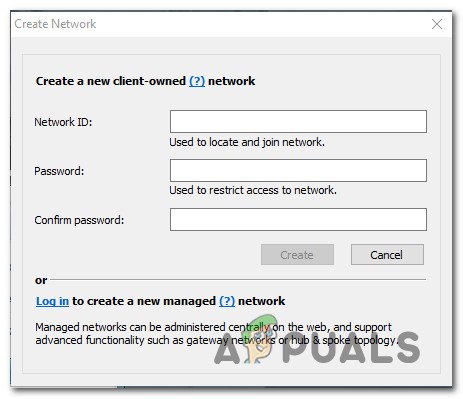
Creating a new Hamachi Network - Next, set a network ID and password for your Hamachi VPN network and remember it or note it down.
Establishing custom credentials for your Hamachi network - Once the network is successfully created, send the credentials you just established to the friend you’re trying to use GameStream with and ask him to install Hamachi as well and click on Join an existing network before inserting your credentials.
- Once both you and your friend/s are connected to the same Hamachi network, attempt opening another GameStream session and see if the issue is now resolved.


