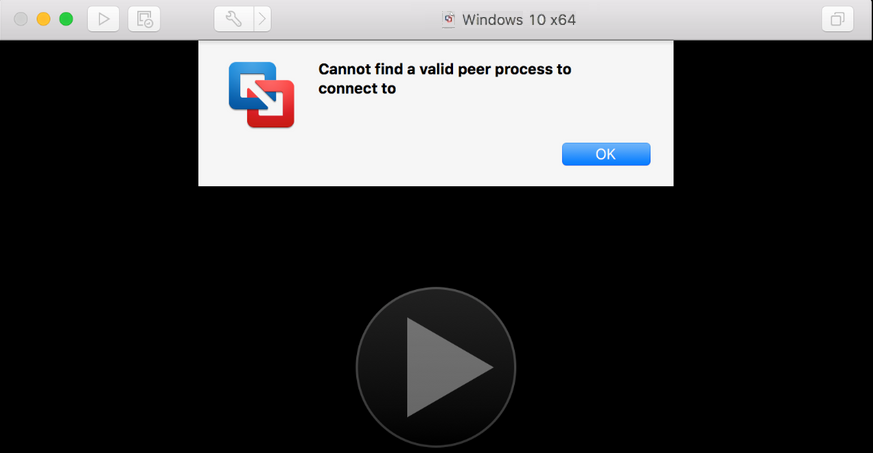
Fix: “Cannot find a Valid Peer Process to Connect To” VMWare
The VMWare app will fail to find a valid peer process to connect to if the installation of the application is no more valid or the operating system is missing essential modules. Try reinstalling the VMWare app or updating your device as it will fresh new files and replace incorrect ones.
Before diving into the troubleshooting process, make sure the version of the VMWare is supported by the OS of your host machine.
1. Relaunch the VMWare App after Force Closing it
The problematic VM app (like Workstation Pro, Fusion, Workstation Player, etc.) will fail to connect to a required process if the app’s modules are in an error state and not in the required condition to communicate with another OS module. Here, relaunching the VMWare App after force closing it will solve the problem.
- Launch the Task Manager (Windows), Activity Monitor (Mac), System Monitor (Linux), or something similar on your system.
- Right-click on a VM process and send End Task.
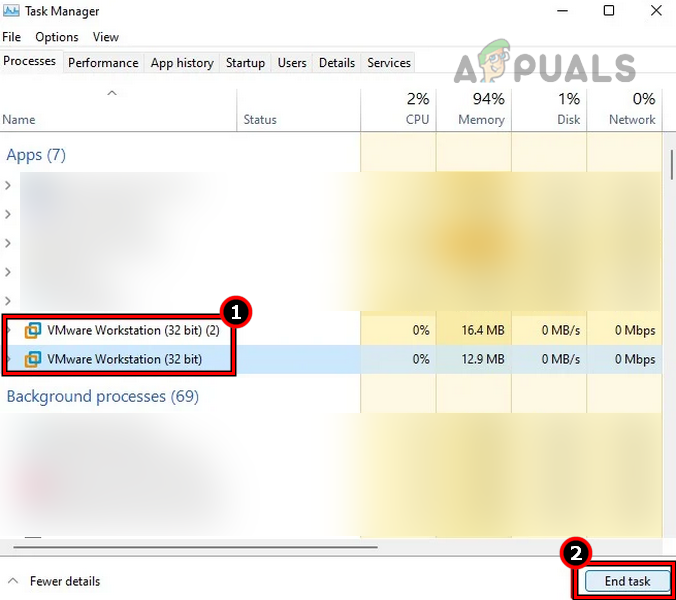
End VMware Processes in the System’s Task Manager - Repeat the same with all the processes related to the VMware app and then launch the app. Check if it is solves the peer process issue.
2. Reboot the Host Machine
VMWare app will fail to connect to a valid peer process if the required OS modules of the host machine are not in the ready state as required by the app or if they are busy with another application on your machine.
The error means that the app is failing to communicate with the required VMX processes or kernel extensions. Here, rebooting the host machine will solve the problem as the modules are reverted to the default state.
- Power off your host machine and wait for a minute.
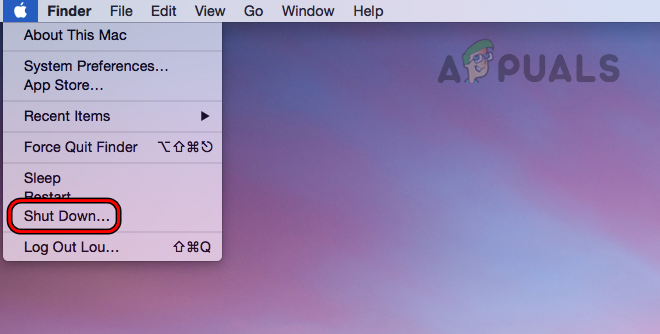
Shut Down Your Mac - Power on the host machine and launch the VMware app. Check if it is operating fine.
3. Update the VMware App to the Latest Build
You will face this issue if the installation of the application is outdated. This will make the app incompatible with the OS and the OS will not let the app access essential modules. In such a case, updating VMware to the latest build will solve the problem.
If you are facing an issue when installing a VMware app, then you may skip this method.
Update through the Help Menu
- Launch the VMware app and open its Help menu.
- Select Software Updates and check for updates.

Check for Software Updates on the VMware Workstation - If an update is shown, install the update, and once done, restart your system.
- Launch the VMware app and check if it is operating properly.
Perform a Repair Install of the VMware App
If you cannot launch the VMware app, then you may try the repair install as discussed below:
- Navigate to the VMware website and download the latest installer of the VMware app.
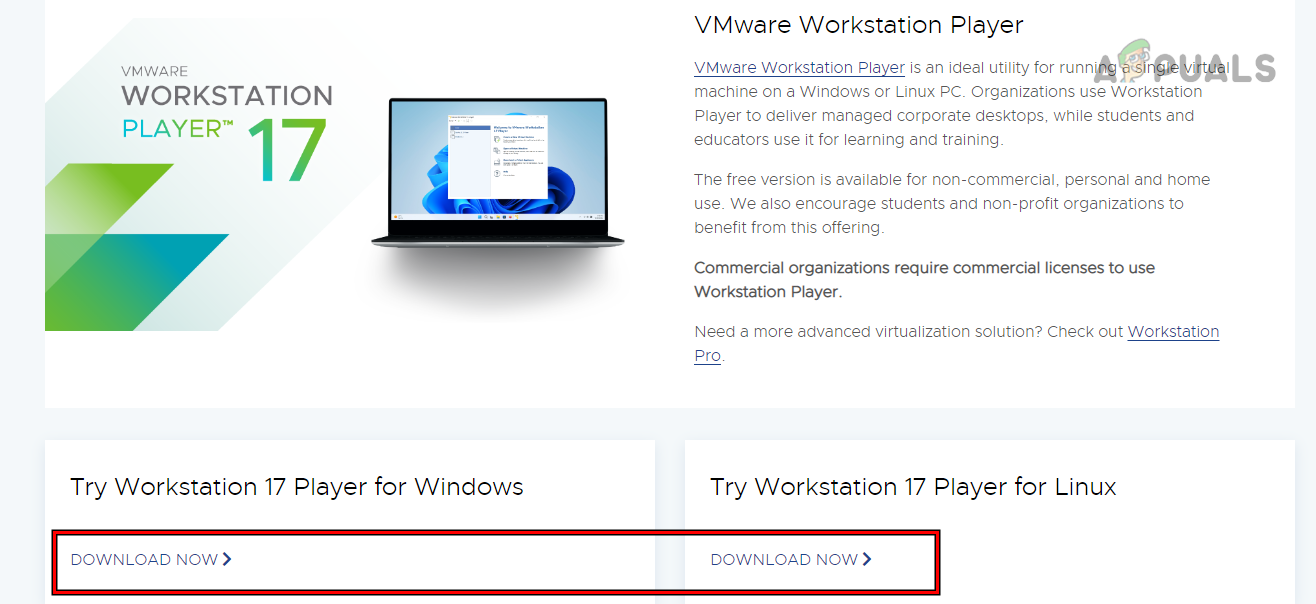
Download the Latest Version of the VMware App - Launch it as administrator and without uninstalling the current version, follow the prompts to complete the repair install.
- Once done, restart your system and check if the VMware app is working correctly.
4. Update the System’s OS to the Latest Build
A system with an outdated OS will not be compatible with the latest standards used by the updated version of the VMware app. This will make certain OS modules inaccessible to the service. To fix this, update your system to the latest build.
To update a Windows PC:
- Right-click Windows and open Settings.
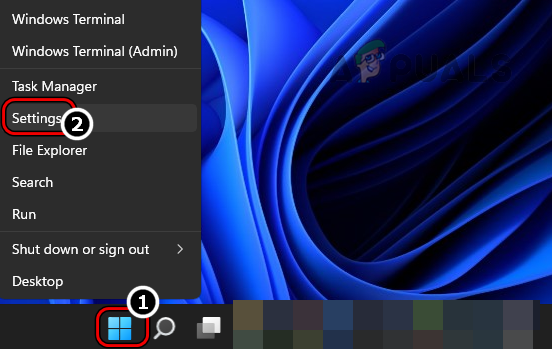
Open Windows Settings Through the Quick Access Menu - Navigate to the Windows Update tab > check for Windows Updates.
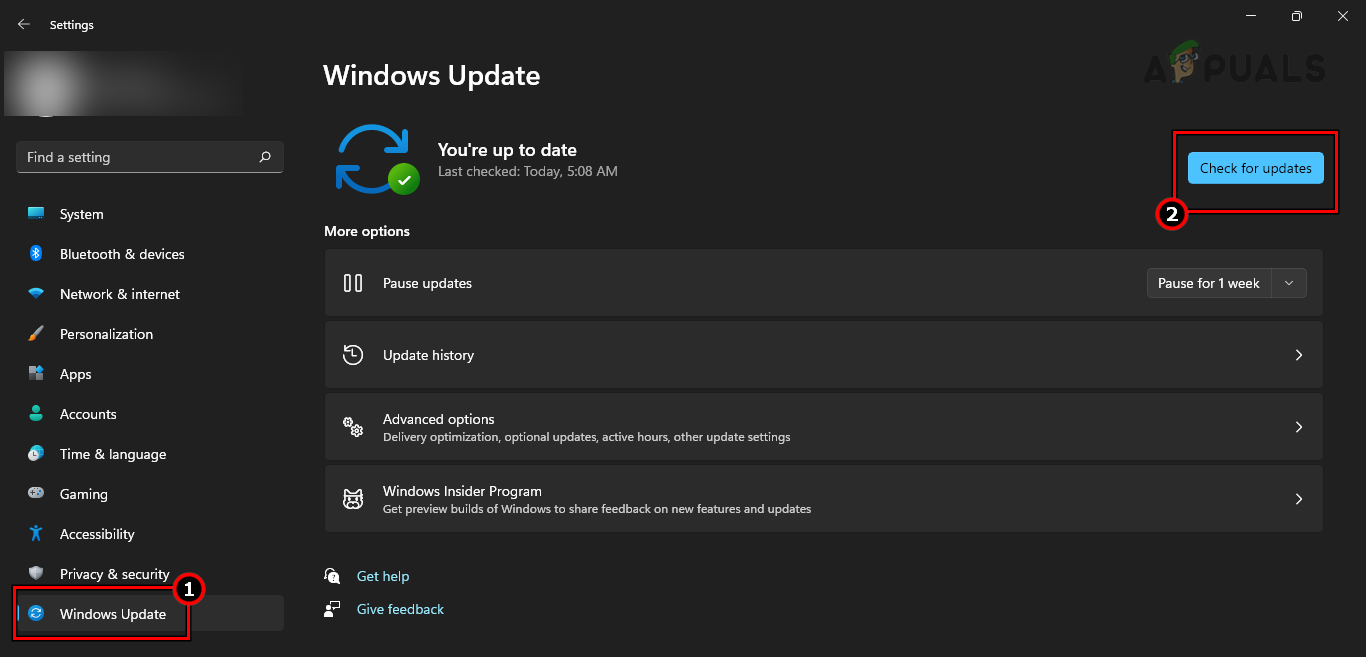
Check for Windows Updates - If updates are available, download and install these updates.
- Once updated, restart your PC and launch VMware. Check if it is clear of the peer process issue.
5. Enable the VMWare Service (Windows and Linux Only)
The VMWare service is a critical component for the VMWare app to communicate with other OS modules. If this service is disabled or not running, the VMWare app will not be able to communicate. Here, enabling the VMWare service will solve the problem.
Enable the VMWare Authorization Service on Windows
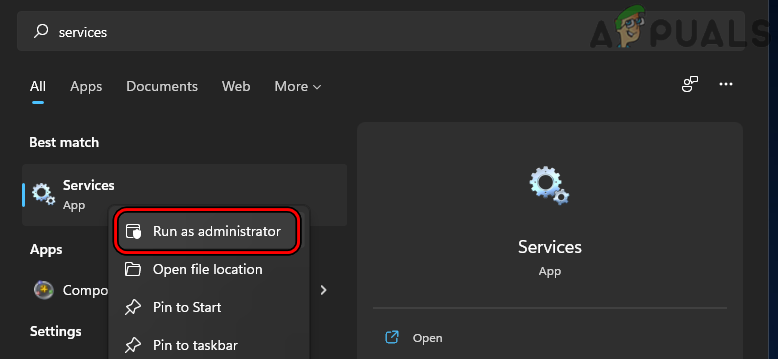
- Click Windows, type Services, right-click on Services, and select Run as Administrator.
Launch Services as Administrator - Open the VMWare Authorization service and set the Startup Type to Automatic.
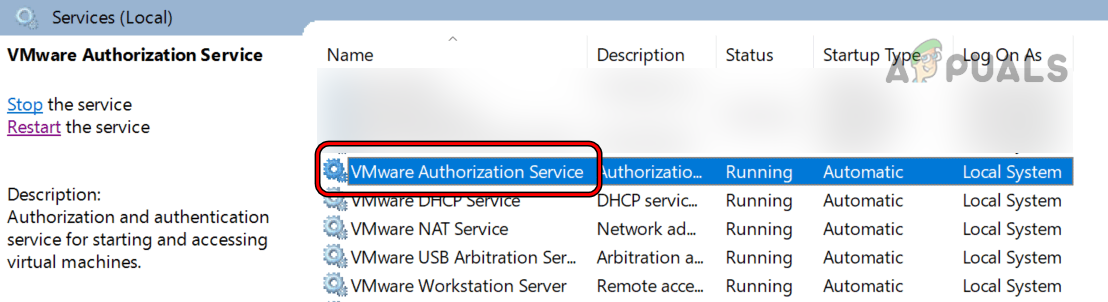
Open VMAuthorization Service in Windows Services - Apply the changes and restart your PC.

Set the Startup Type of VMware Authorization Service to Automatic - Upon restart, launch the VMWare app and check if it is working properly.
- If not, set the Startup Type of the VMWare Authorization service to Automatic (Delayed Start) and restart the PC.
- If this also does not work, launch Services > right-click on VMWare Authorization service > Select Start > Launch VMWare app.
Enable the VMWare Service on Ubuntu
- Launch the Terminal on Ubuntu and execute the following:
sudo service vmware start
- Open the VMWare app and check if it is working fine. If so but the issue reappears after a restart, you may need to repeat the above steps till the issue is resolved permanently.
6. Delete Old Snapshots from the VMWare App
If there are too many old snapshots added to your VMWare app and the app’s quota of the snapshot is reached, the app will fail to connect the VM to the required process.
32 snapshots are supported by VMware in a chain but it is recommended that only 3 snapshots in a chain should be used to avoid the issue. In this case, deleting old snapshots from the VMWare app will solve the problem.
- Launch the VMWare app > select the Virtual Machine > select an old snapshot > click Delete.
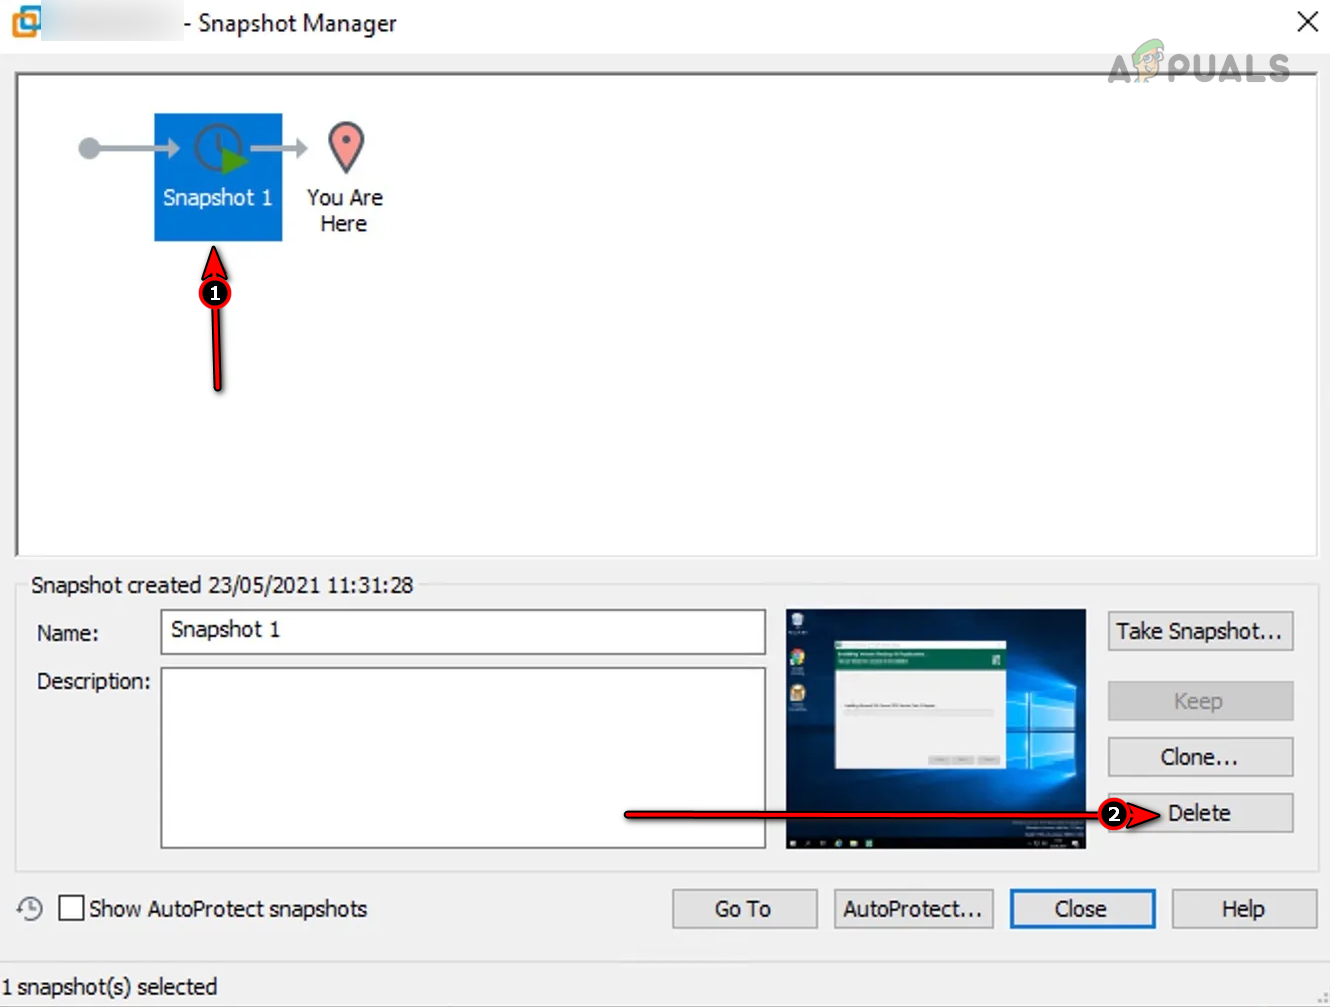
Delete Old Snapshots of a VM on the VMWare Workstation - Confirm to delete the snapshot and repeat the same to delete other snapshots that are not required.
- Once done, restart the system and launch the VMWare app. Check if it is clear of the process connection problem.
7. Disable 3D Acceleration of the Guest Machine
If your host machine is not compatible with the 3D acceleration of the guest machine, then the host machine will not be able to establish a successful connection. Here, disabling the 3D acceleration in the guest’s configuration will solve the problem.
- Launch the VMWare app and select the problematic virtual machine.
- Navigate to VM > Settings > Hardware > Display.
- Uncheck Accelerate 3D Graphics and click OK.
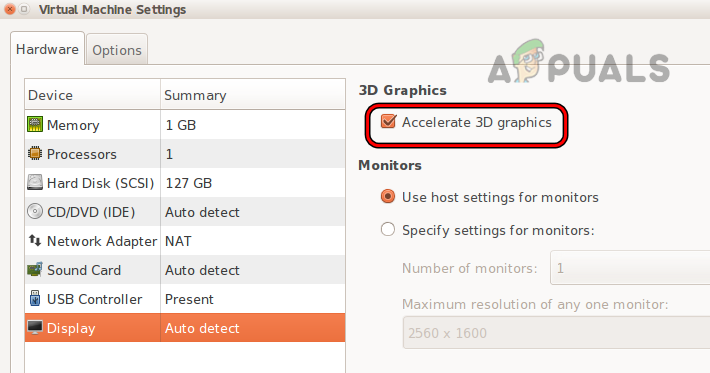
Disable Accelerate 3D Graphics in the VMWare Workstation - Restart the host machine and check if the VMWare issue is resolved.
8. Launch the VM Alternatively
If the physical path to the VM is no more valid or the VMWare app has permission issues to access the library where the VM is located, the app will display the access issue under discussion.
Here, launching the VM alternatively (through Library or Terminal) will solve the problem. Let us discuss the process with respect to a Mac.
- Exit the VMWare app and force close its processes in the Activity Monitor.
- Launch the Finder and navigate to the directory where VMs are located. The default location is:
~/Documents/Virtual Machines
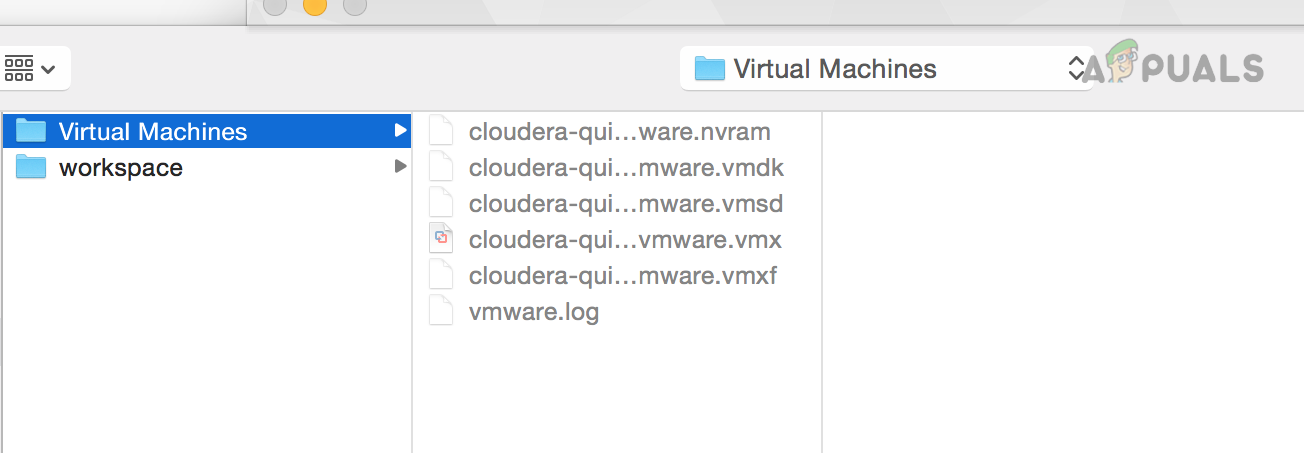
Launch the VMware VM Through the Virtual Machine Directory - Open the problematic VM and check if it works fine.
- If not, repeat step 1 and launch Terminal.
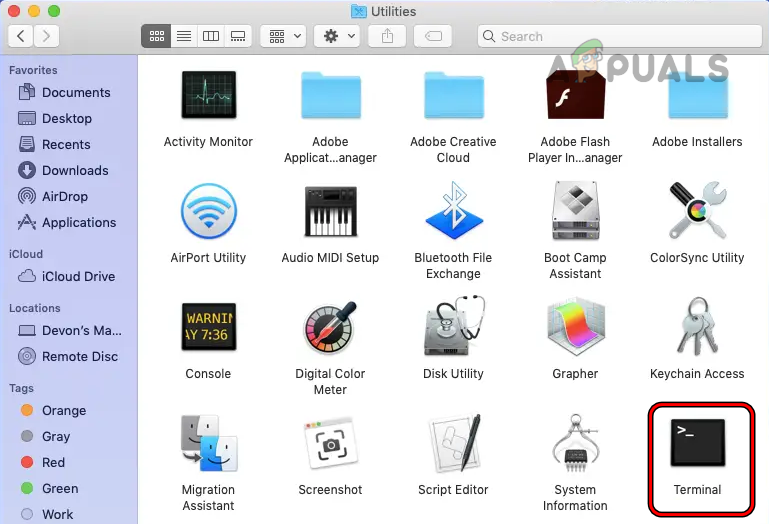
Open the Mac’s Terminal - Execute the following and check if the issue is resolved:
$ cd /Applications/VMware\ Fusion.app/Contents/MacOS/

$ ./VMware\ Fusion
- If the issue persists and is occurring with a particular VM, open the .VMX file of the VM.
- Check if the following or similar lines are shown:
rotatesize = 10000

log.keepold = 2
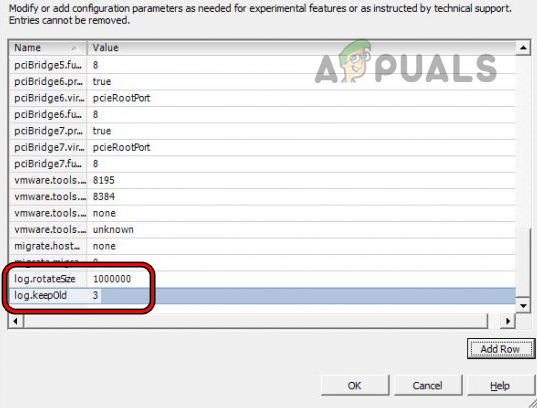
Delete Rotatesize and Keep Old Log Configuration from the VMX File of the VM - If so, delete these lines and close the file after saving the changes.
- Open the problematic VM and check if the peer process issue is resolved. Keep in mind this will increase the size of the log files of the VMware Fusion.
9. Recreate the VM by Dragging and Dropping the ISO of the OS
If the issue is occurring while creating a particular VM, then dragging and dropping the ISO instead of selecting the file might solve the problem. This overcomes permission problems of the application.
- Start creating a new VM by using the wizard of the VMWare app and when it asks for the installation medium, drag/drop the ISO of the OS.
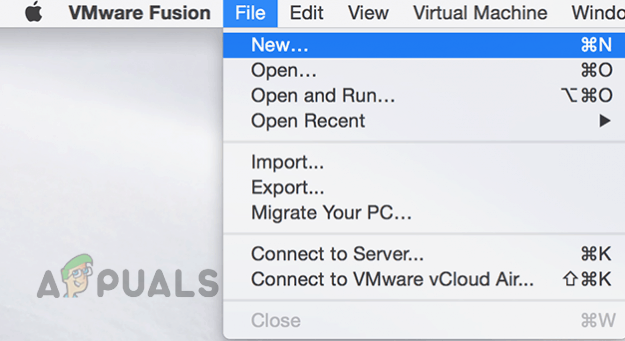
Create a New VM in the VMware Fusion - Follow the prompts on the screen to complete the process and once done, check if the problem is solved. You may need to input your admin password and license info of the guest OS (if applicable).
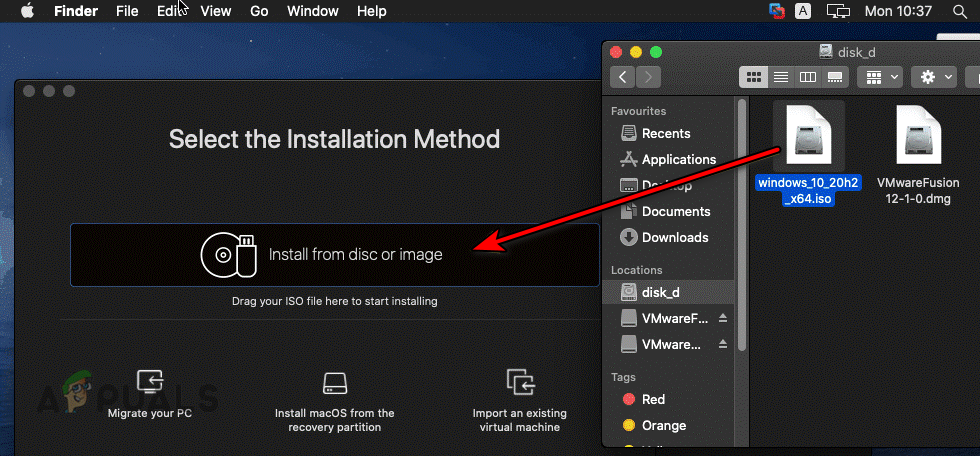
Drag and Drop the ISO of the OS to the Installation Prompt of the VMware Fusion
10. Uninstall Incompatible Applications
It might be the case that another application is using a system module that is needed by VMware to run. These are usually virtualization software. You should remove all of these applications from your system to be sure this isn’t the case.
Here is a list of applications reported by people to cause issues for them:
- Virtual Box
- Jungle Disk
- Second Copy
- Google File Stream
- SNS Network Solutions iSCSI Initiator
- Intel Hardware Accelerator Execution Manager (HAXM)
- OpenVPN
- Android SDK
- Avira Antivirus
If you have any of these applications or similar applications, uninstalling these will solve the problem. For illustration, let us discuss the process of uninstalling the Virtual Box on a Windows PC.
- Right-click Windows and select Apps & Features.
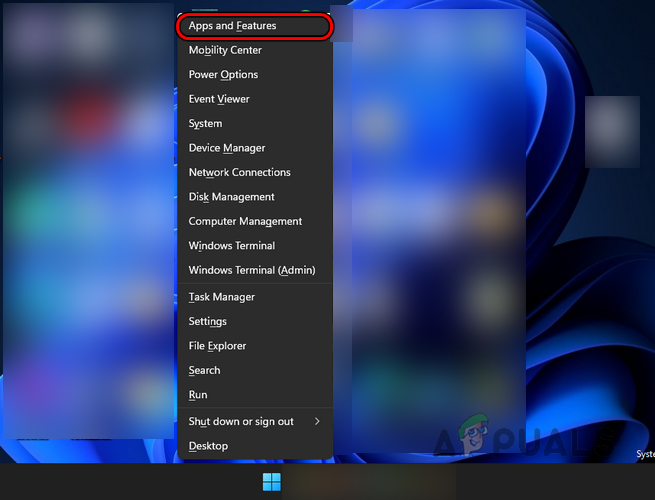
Open Apps & Features - Locate Oracle VM Virtual Box and open its Options.
- Select Uninstall and follow the prompts on the screen to complete the process.
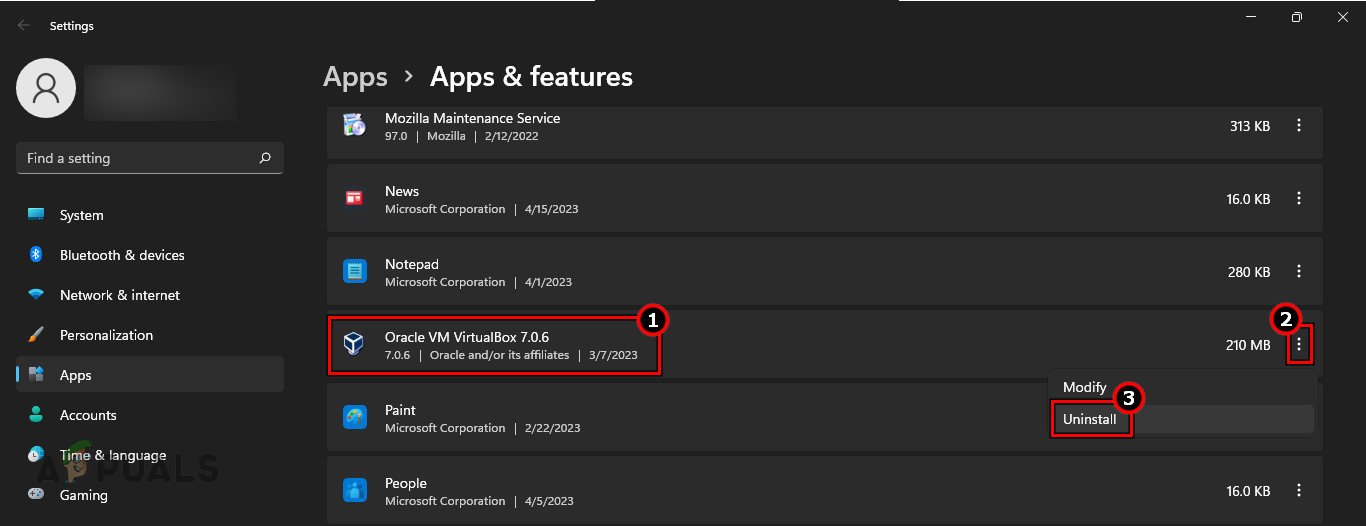
Uninstall Oracle VM Virtual Box - Once done, restart your system and press Windows + R keys to open the Run command box.
- Navigate to the following path:
%userprofile%/
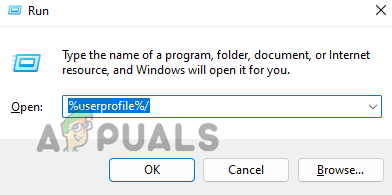
Open the UserProfile Directory Through the Run Command Box - Delete the following folders:
.VirtualBox

VirtualBox VMs
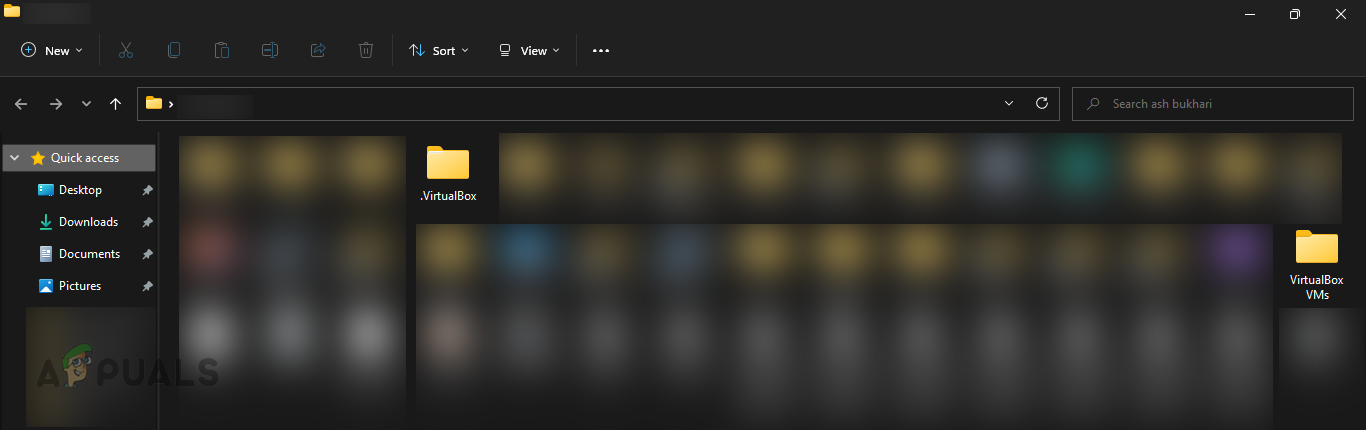
Delete VirtualBox and VirtualBox VMs Folder in the User Profile Directory - Again, open the Run command box and navigate to the following folder:
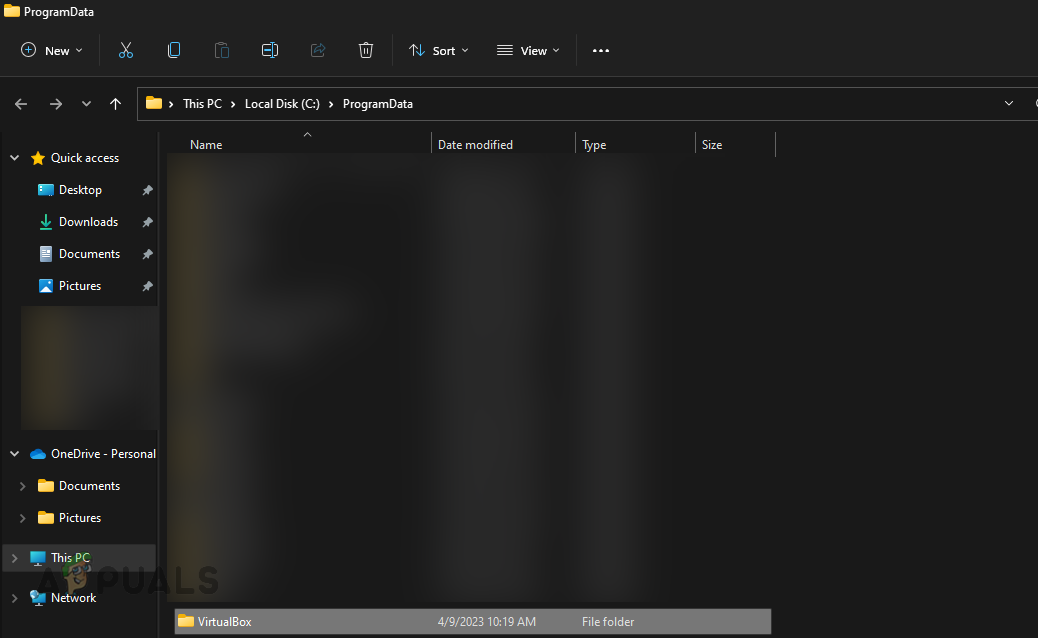
%programdata%
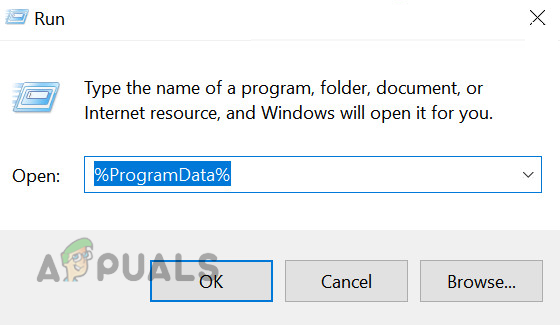
Open the ProgramData Folder Through the Run Command Box - Delete the Virtual Box folder and navigate to the following folder in the Run command box:
%programfiles%\Oracle
Delete the VirtualBox Folder in the ProgramData Directory - Delete the Virtual Box folder and restart your system.
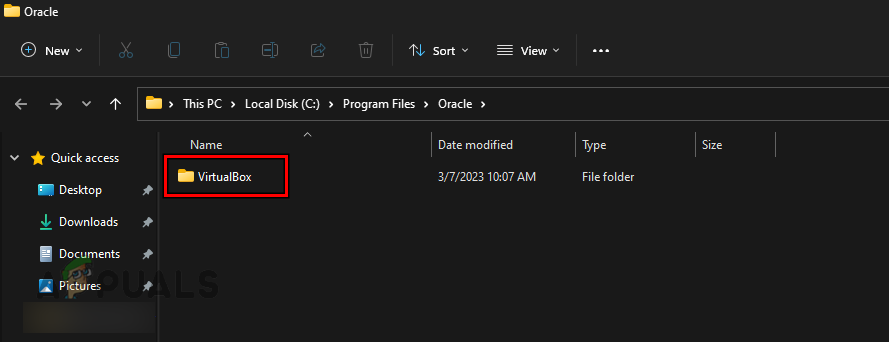
Delete the VirtualBox Folder in the Oracle Directory of the ProgramFiles - Upon restart, launch the VMware application and check if it is operating properly.
11. Set the VMWare’s Process Priority (Windows Only)
The VMWare app will fail to connect to a valid process if the priority of its process is not set to default. If you haven’t changed its priority, it’s likely that another application did so. Examples include Prnwatch Prio.
- Launch the VMWare app and right-click Windows.
- Select Task Manager and right-click on the VMWare process.
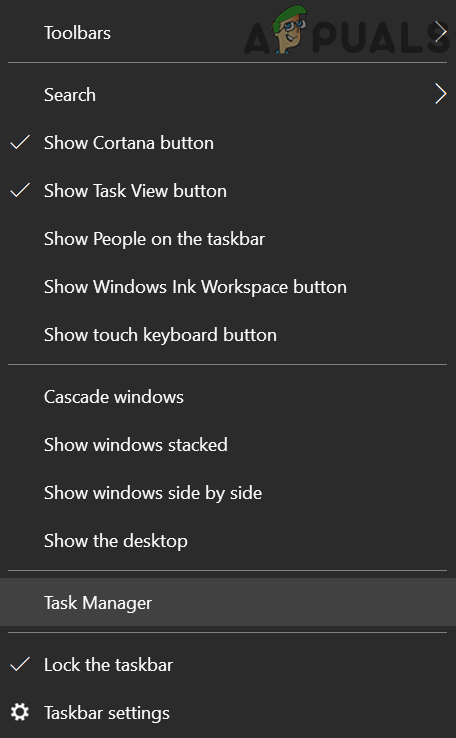
Open the Task Manager of Your System - Select Go to Details and in the Details tab, right-click on the VMWare process.
- Hover over Set Priority and select Normal. Repeat the same for all the processes related to the VMware app.
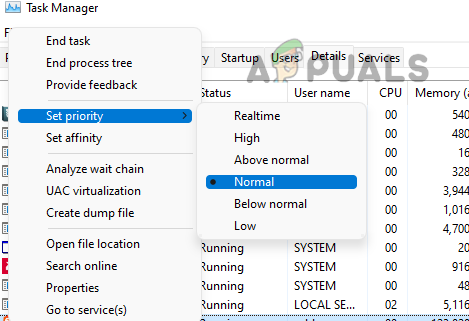
Set the Priority of the VMware Process to Normal - Launch VMWare and check if it is working properly. If it is working but the issue returns after a restart, check if another installed application is changing the priorities.
Setting Affinity directly through PowerShell
This is a quicker way to set affinities of all processes through the PowerShell to defaults.
- Launch the Windows PowerShell as administrator and execute the following command to check the Affinity of processes:
Get-Process | Format-Table -Property Name,ProcessorAffinity,PriorityClass

Enable All Processors for the VMware Process - Check the ProcessorAffinity column. Each core enabled is shown with 1 bit per core.
For example, if a process on the system with 4 cores is allowed to use all the cores, it should be 15 (which is equivalent to binary 1111), otherwise, the process affinity is being modified and you need to make sure that process is allowed to use all the CPU cores.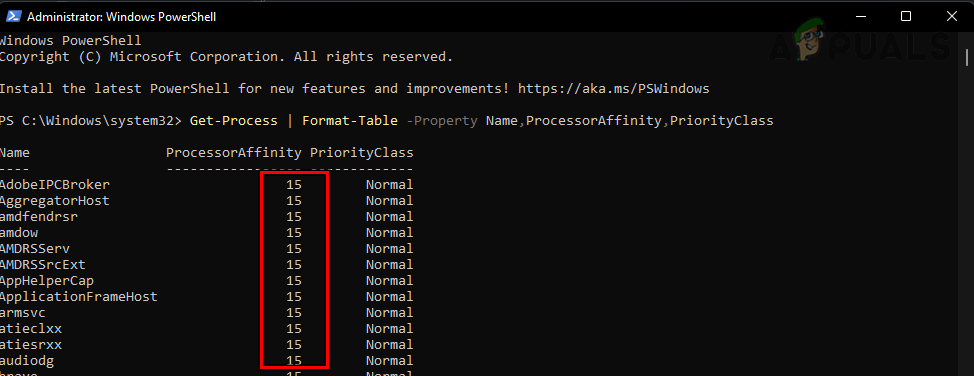
Check the Infinity of the Processes Through PowerShell - Once done, restart your PC and check if the VMWare issue is cleared.
12. Enable Execution of the VMware Fusion (Mac Only)
On a Mac, the VMware Fusion app will not find a valid peer process to connect to if the execution of the app is blocked by the security of the system. Enabling the execution of the VMware Fusion in Security settings can do the trick.
- Launch the System Preferences of your Mac and open Security & Privacy.
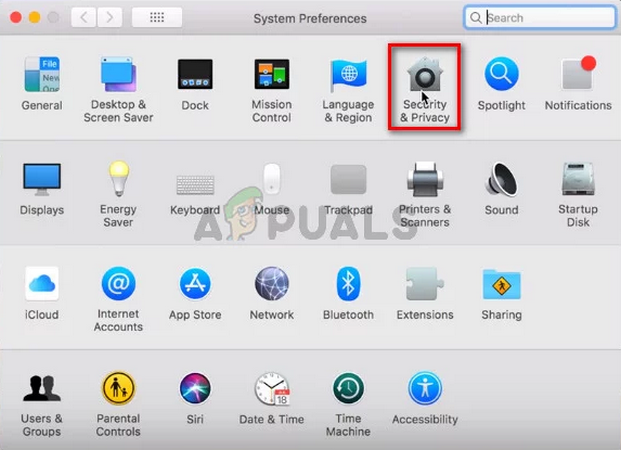
Open Security & Privacy in the Mac’s System Preferences - In the General tab, click on Allow for the notification of System software from developer “VMWare, Inc.” was blocked from loading.
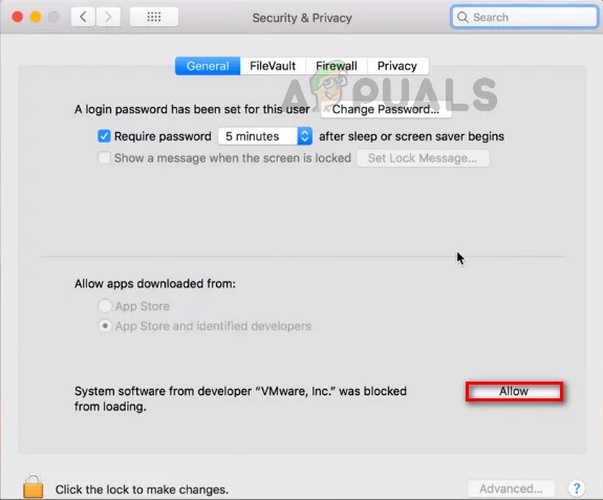
Allow System software from Developer “VMWare, Inc.” Was Blocked from Loading - Once done, launch VMware Fusion and check if it is working properly.
Variation 1: Allow Button not Responding
If the Allow button does not respond to a click, you can try the steps below:
- Check if by using your Mac’s touchpad you can click on the Allow button.
- If you have any 3rd party apps that modify the keyboard or mouse inputs such as MagicPrefs, QuicKeys, Karabiner-Elements, etc., check if disabling or uninstalling these apps lets you click on the Allow button.
Variation 2: Allow Button Not Visible
If there is no allow button shown or greyed out, then try the steps below:
- Launch the Terminal and execute the following command to Allow Apps to be downloaded from anywhere:
sudo spctl --master-disable
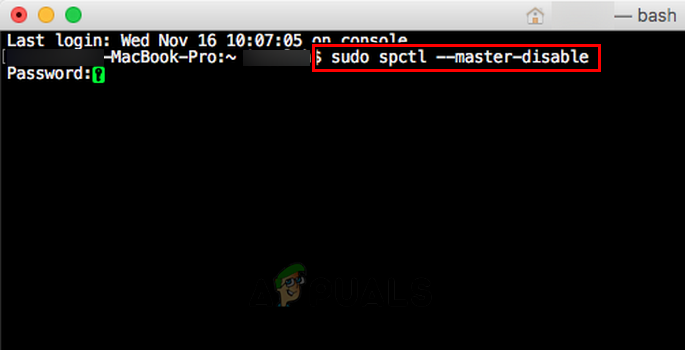
Enable Allow Apps Downloaded from Anywhere on the Mac - Close the Terminal and navigate to System Preferences > Security & Privacy > General.
- Ensure to Allow apps to be downloaded from is set to Anywhere and restart your system.
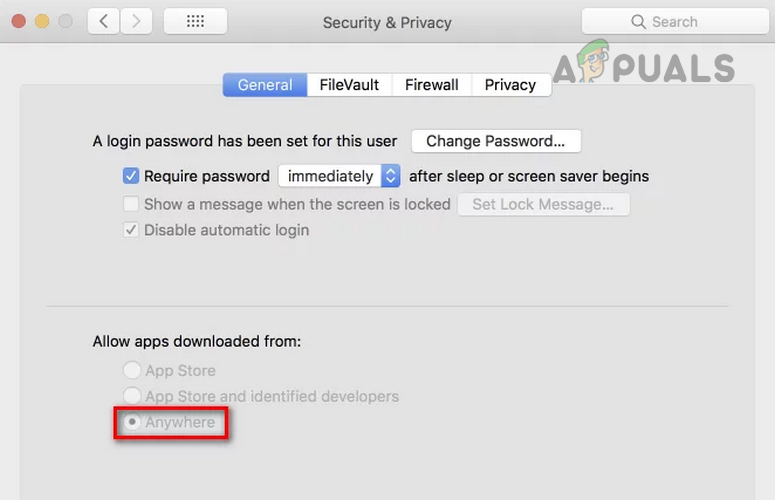
Set the Allow Apps Downloaded from to Anywhere in the Mac’s Security & Privacy Preferences - Again, head to the General tab and click on Allow for System software from developer “VMWare, Inc.”.
- Launch the VMWare Fusion and check the problem is solved.
Variation 3: Security notification isn’t shown
If the security prompt to allow the execution of the VMWare Fusion is not shown, then adding the VMWare’s developer ID to the Mac’s Kext will solve the problem.
- Launch the Terminal and execute the following command:
$ sqlite3 /private/var/db/SystemPolicyConfiguration/KextPolicy '.dump kext_policy'
- The following type of response will be shown:
PRAGMA foreign_keys=OFF; BEGIN TRANSACTION; CREATE TABLE kext_policy ( team_id TEXT, bundle_id TEXT, allowed BOOLEAN, developer_name TEXT, flags INTEGER, PRIMARY KEY (team_id, bundle_id) ); INSERT INTO kext_policy VALUES('EG7KH642X6','com.vmware.kext.vmci',1,'VMware, Inc.',1); INSERT INTO kext_policy VALUES('EG7KH642X6','com.vmware.kext.vmnet',1,'VMware, Inc.',1); INSERT INTO kext_policy VALUES('EG7KH642X6','com.vmware.kext.vmx86',1,'VMware, Inc.',1); INSERT INTO kext_policy VALUES('EG7KH642X6','com.vmware.kext.vmioplug.17.1.3',1,'VMware, Inc.',1); COMMIT; - Here, EG7KH642X6 is the VMWare’s Developer ID. Note it and switch off the Mac.
- Boot the Mac in the Recovery Mode by using Command + R keys.
- Launch the Terminal and execute the following command. Make sure to replace the developer ID with your ID:
$ spctl kext-consent add EG7KH642X6
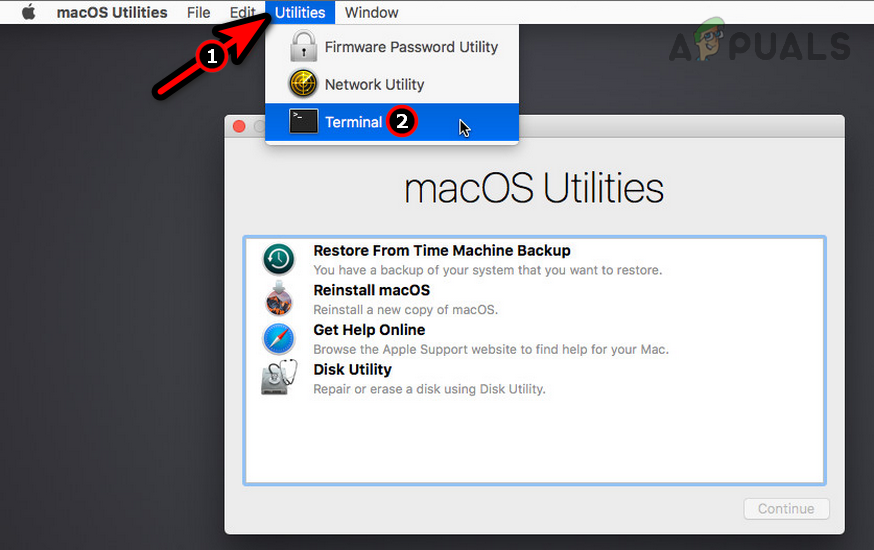
Launch Mac Terminal in the Recovery Mode - Exit the Recover Mode and boot the Mac in the normal mode.
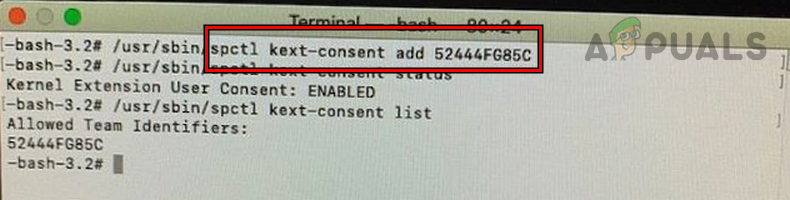
Add the VMware’s Developer ID to the Mac’s KEXT - Launch the VMWare Fusion and check if it is operating normally.
Reinstalling the Software
If none of the above methods work, you can try reinstalling:
- VMWare application. This will ensure that all old modules are replaced by newer ones. Don’t forget to erase the temporary files before reinstalling them.
- OS of the Host machine. If none of the above methods worked, its possible that the operating system of your host machine isn’t working as expected. It might be missing modules or its virtualization system needs a reinstall.


Hello,
Awesome instructions, but I still am getting the dreaded “Cannot find a valid peer process to connect to” despite having followed the instructions.
Thank you for sharing! 🙂