Fix: Amazon Kindle and Paperwhite won’t connect to WiFi
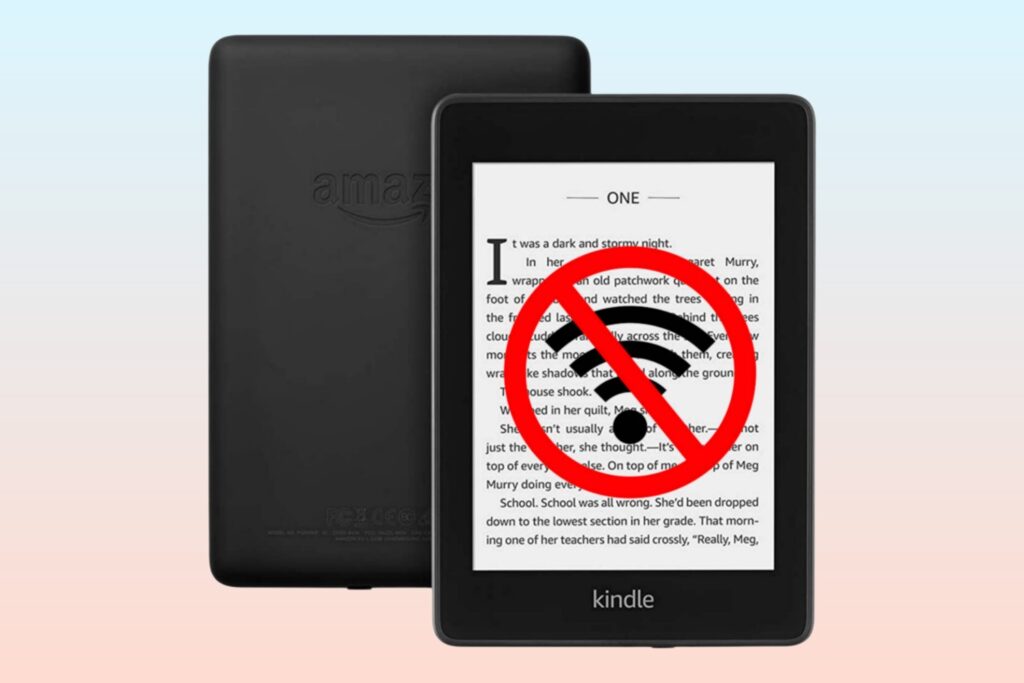
Amazon Kindle and Paperwhite users often encounter an issue when these e-readers simply won’t connect to Wi-Fi. As a result, users cannot download, purchase, or synchronize any Kindle content.
The most common reason for this occurrence is that the Kindle’s airplane mode is turned on. As we know, Wi-Fi does not connect when this happens. Therefore, simply turn off airplane mode and connect to Wi-Fi again.
Secondly, the main problem can also be outdated software. If your Kindle is failing to establish a Wi-Fi connection, check whether it is fully updated or not. If not, update it to the latest version.
Anyway, it’s not a serious issue and can be solved without any technical expertise. Simply follow the methods below, and you’ll be good to go.
1. Use Kindle close to your Wi-Fi Router
If your Wi-Fi router is too far away from where you are using your Kindle, the connection will fail. Therefore, make sure to use your Kindle within the range of Wi-Fi signals.
Secondly, do not use the Kindle close to interfering devices that consume high Wi-Fi bandwidth. For instance, keep away from microwaves, refrigerators, ovens, baby monitors, walkie-talkies, and so on.
If you have been avoiding both of these things, but your Kindle still fails to establish a Wi-Fi connection, follow the subsequent methods.
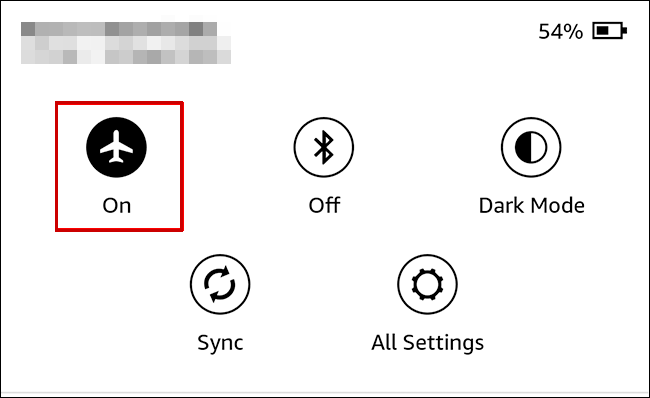
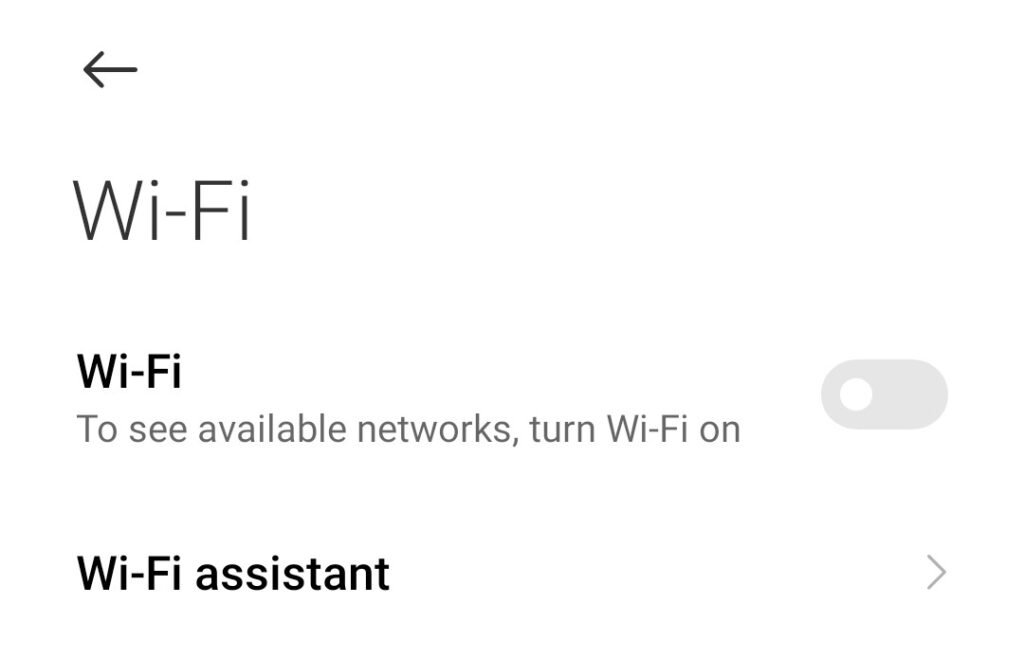
2. Turn off Airplane Mode
Many people turn on airplane mode to increase their Kindle’s battery life but forget to turn it off. Similarly, one can do the same when reading books offline. However, turning on airplane mode means that the Kindle won’t connect to WiFi until the mode is deactivated.
So, the easiest way to solve this issue is to turn off airplane mode. Here’s how you can do it:
- Swipe down on the home screen to access the Quick Actions menu.
- Locate the Airplane mode icon and tap on it to turn it off.
3. Restart Kindle and your Router
Restarting the Kindle will remove minor issues and software bugs that are preventing the Wi-Fi connection. It is always a good idea to restart your Kindle when facing problems. There could be non-responsive software, which is the reason for many issues. Secondly, restart your router at the same time.
Here’s how you can restart your Kindle e-reader:
- Start by pressing and holding the power button for a few seconds.
- The Power dialog box should appear now.
- Click on Restart.
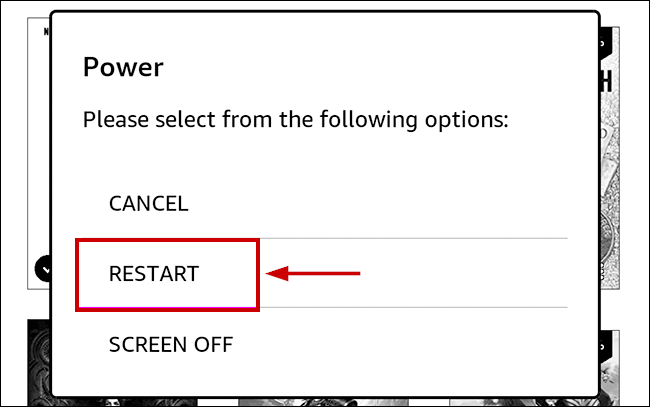
- Wait until the device reboots.
In case the Power menu does not appear and the screen goes black, perform the following steps:
- Press and hold the Kindle’s power button for 40 seconds.
- Kindle will restart automatically now.
- If it doesn’t, then hold the power button again for a few seconds until the Kindle screen appears.
4. Temporarily Turn Off the Wi-Fi on Other Devices.
Some Wi-Fi networks only have the capacity to connect a handful of devices. If there is a limit of, let’s say, five devices, then the sixth one will not connect to the network.
Similarly, WiFi networks that allow unlimited connections also get overloaded if you connect too many devices.
If either of these cases applies to you, turn off the Wi-Fi on your smartphones, laptops, and other devices for some time. Then, try connecting the Kindle to Wi-Fi.
If it works, then it means your WiFi can’t establish a connection on more than a limited number of devices.
5. Manually Connect your Wi-Fi
If your Kindle previously connected to the Wi-Fi network but won’t connect now, it could be due to a glitch in the network.
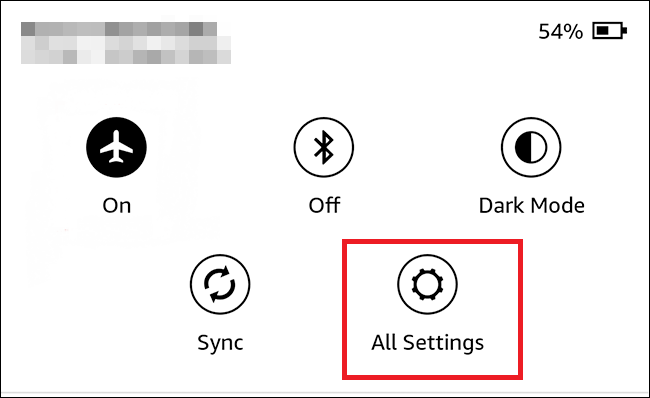
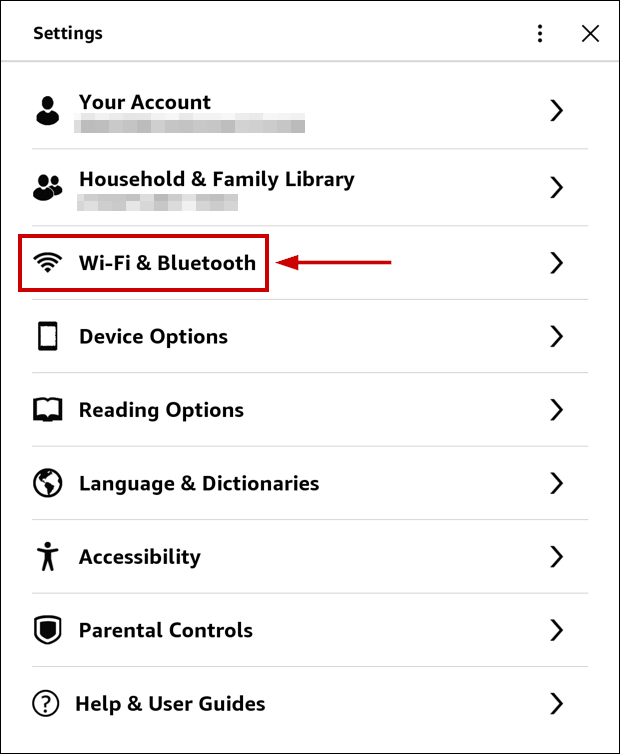
At this point, you should forget your Wi-Fi connection in the settings and reconnect to it again, as follows:
- Swipe down the top of the home screen and select the Settings or All Settings option.
- Navigate to Wi-Fi & Bluetooth.
- Tap on Wi-Fi Networks.
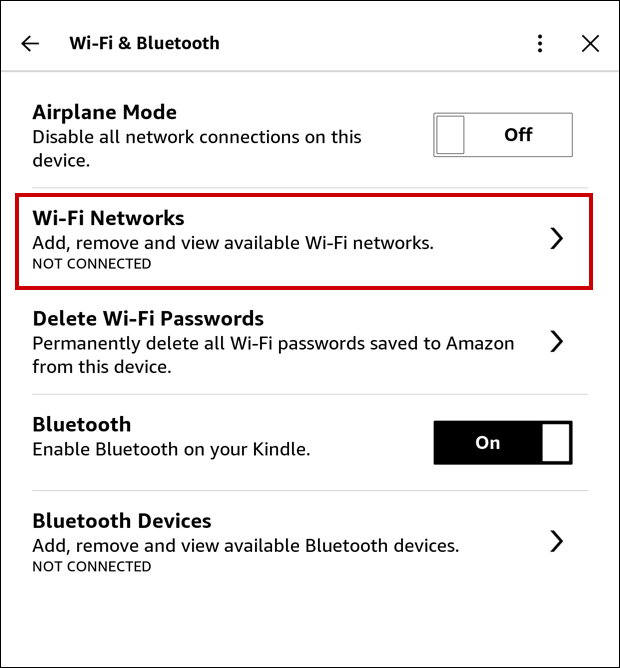
- Select your network and tap Forget.
- Now select your network again and enter the password.
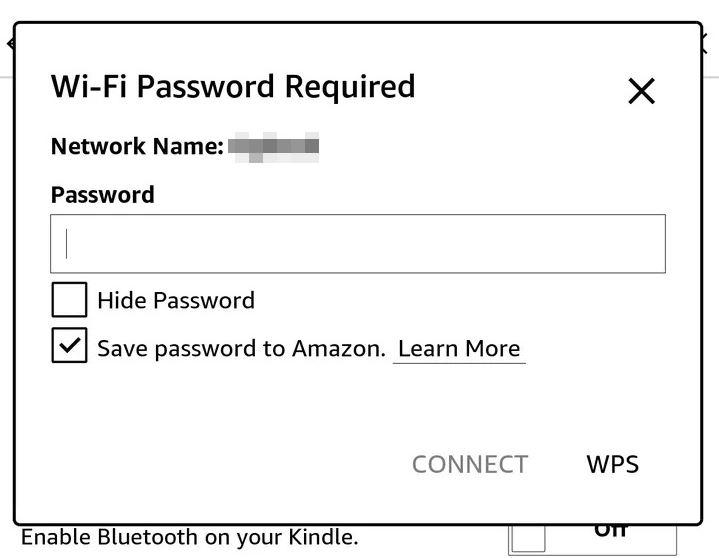
- Tap connect.
- Wait for the connection to be established.
6. Change the 5 GHz Band to 2.4 GHz
The Kindle does not work with 6 GHz WiFi bands, and pre-2021 models do not even support 5 GHz bands.
So, it will be impossible for the Kindle to connect to Wi-Fi in these instances. What you can do, however, is change your 5 GHz band to 2.4 GHz.
Follow the steps below to do this:
- Access your router’s admin dashboard.
- Go to the Wireless settings > Advanced.
- Locate the Wireless band option and select 2.4 GHz.
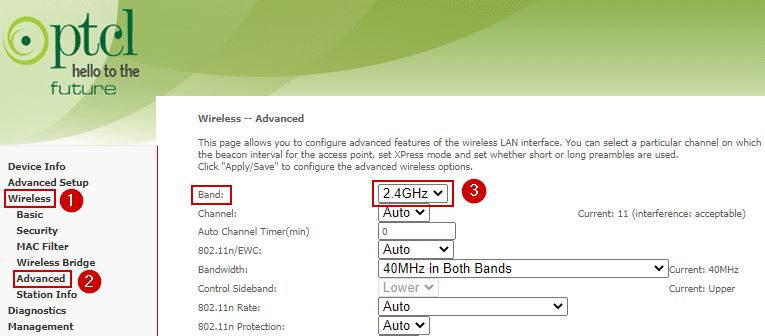
Note: The admin dashboard and settings will be different for every company.
- Save the settings.
- Reboot your router from the same admin panel.
- Wait for the reboot to take place and exit the dashboard.
- Try connecting the Kindle to Wi-Fi now.
- If it connects, then change the Wireless band to 5 GHz again, but don’t reboot the router this time.
7. Update Kindle to the Latest Software Version
If your e-reader is running on older software, there will always be various issues. Newer software comes with many updates and bug fixes that help the Kindle run smoothly.
Follow the steps below to update your Amazon Kindle:
- Start your computer and open a browser.
- Now go to the Kindle E-Reader Software Updates page.

- Download the latest update.
- Use the charging cable to connect your Kindle to your PC or laptop.
- Now, drag and drop the update file you just downloaded onto the Kindle drive from your computer.
- Carefully disconnect the Kindle from the computer afterward.
- Now, tap the three-dotted vertical menu icon on the Kindle’s home screen.
- Tap on Settings.
- Tap on Menu once more and select Update Your Kindle.
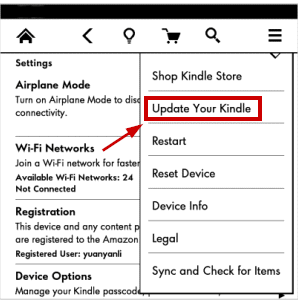
- Tap OK.
- Now you’ll see a message that reads “Your Kindle Is Updating”.
- Wait for the update to finish and connect to your Wi-Fi network again.
8. Use your Smartphone’s Hotspot for the Connection
If your Kindle still won’t connect to your Wi-Fi router, try using your mobile’s Wi-Fi hotspot for the connection.
Here’s how you can connect the hotspot to your Kindle:
- On your mobile device, go to Settings.
- Tap on the Hotspot menu.
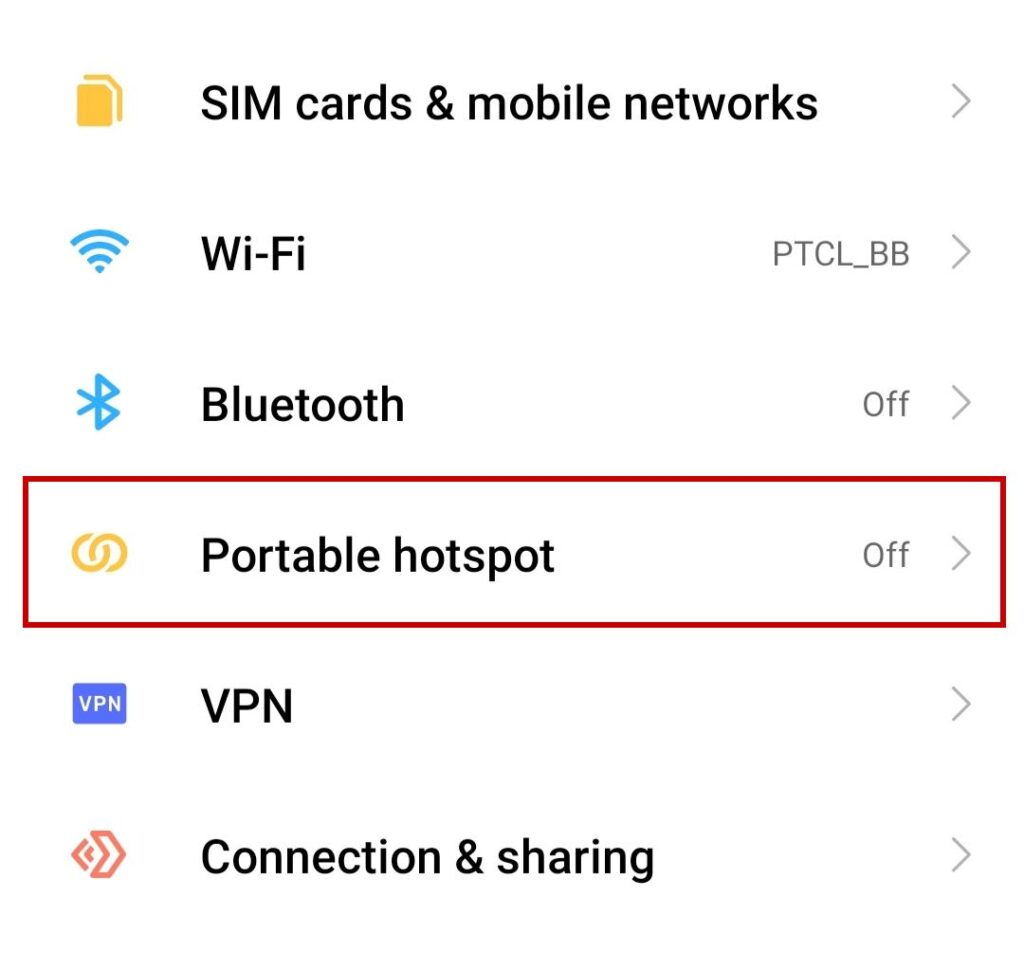
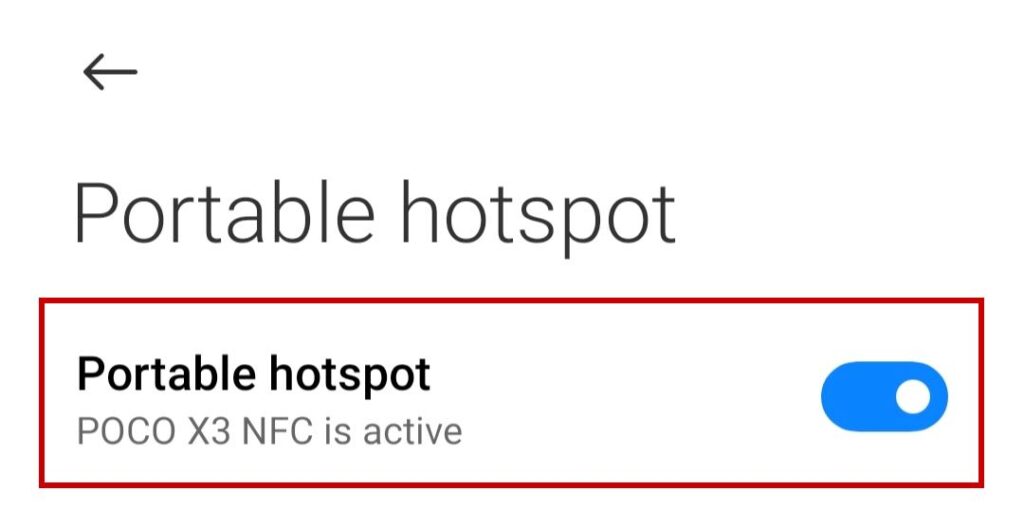
- Turn on the hotspot.
- Now go to Settings on your Kindle and tap on Wi-Fi & Bluetooth.
- Next, tap on WiFi Networks and scan for new networks.
- Tap on your personal hotspot network.
- Enter the password and tap Connect.
9. Factory Reset Kindle
Performing a factory reset on your Kindle should be your last resort if none of the other methods work. Ensure that all your data is synced with your Amazon account; otherwise, you will lose all of your files.
That being said, follow the steps below to factory reset your Kindle:
- Go to Settings > Device Options.
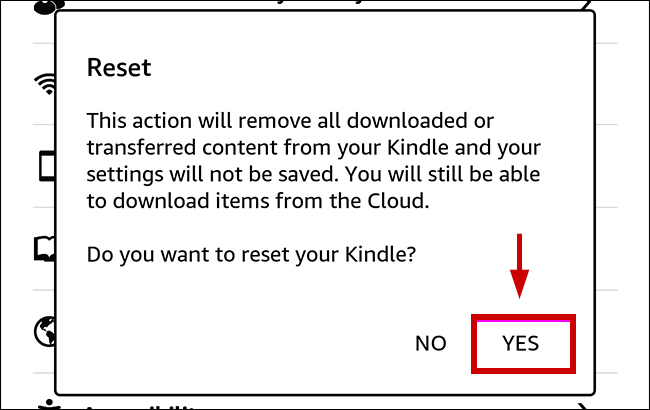
- Tap on Reset or Reset Device.
- Tap Yes on the next prompt.
- Wait for the Kindle to reboot after resetting.
- Connect to your WiFi network now.
Even if a factory reset doesn’t work, contact Amazon support.