Export and Import VMs on Oracle VM VirtualBox
In this article, we will show you how to export the virtual machine from one Oracle VM VirtualBox and then import it to another Oracle VM VirtualBox. You can do it between two Windows machines or you can import it to the same machine for the purpose of testing and learning more. This article consists of two parts, the first one is about exporting the virtual machine and the second one about the importing of the virtual machine. So, let’s start with the first part.
Export the Virtual Machine to the Oracle VM VirtualBox
- Log on the Windows 10
- Open Oracle VM VirtualBox
- Shutdown the virtual machine that you want to export. Right click on the virtual machine, click Close and then Power Off. The virtual machine will be powered off in a few seconds.
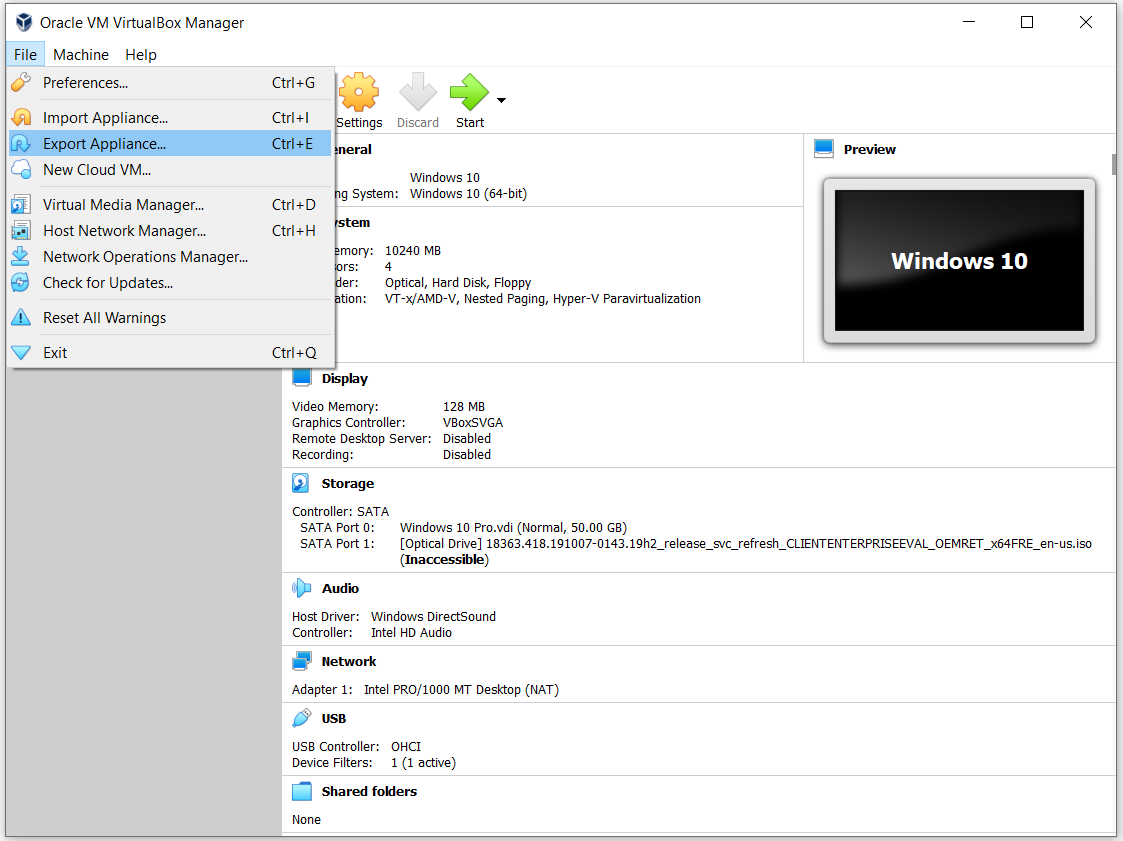
- Click on the File in the main menu and then click Export Appliance. You can also export the virtual machine by pressing CTRL + E on the keyboard.
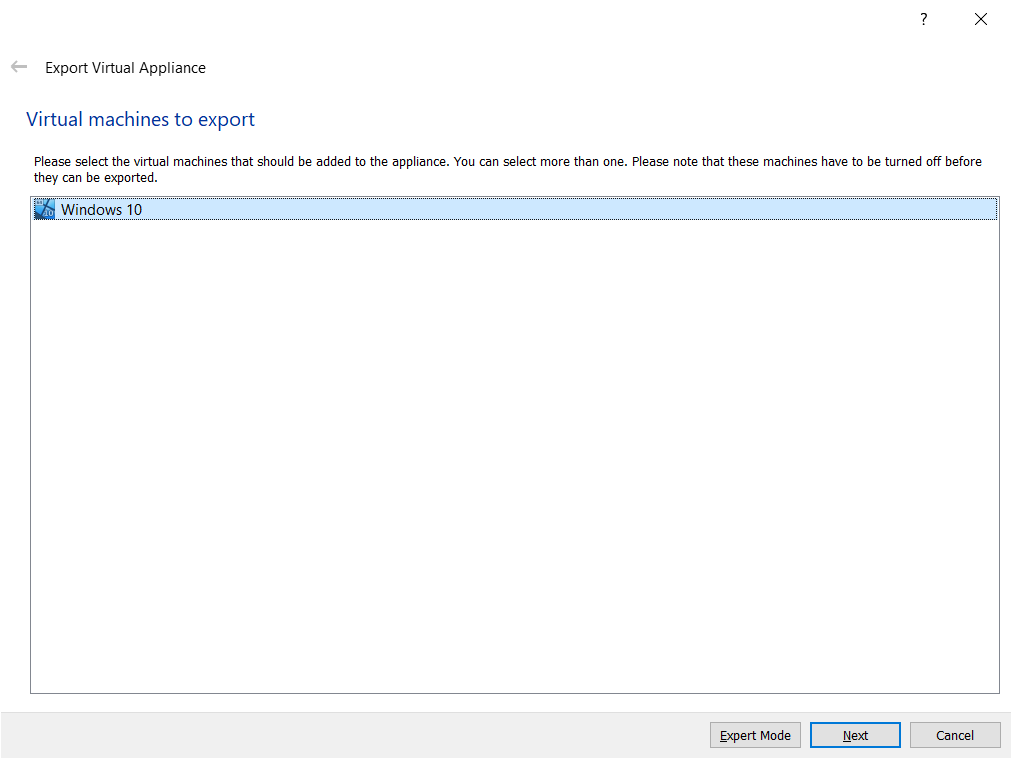
- Under Virtual Machines to export select the virtual machine that you want to export and then click Next. At the bottom of the window, you can choose Expert Mode which will provide you with more information to export the virtual machine. We will use Guide Mode.
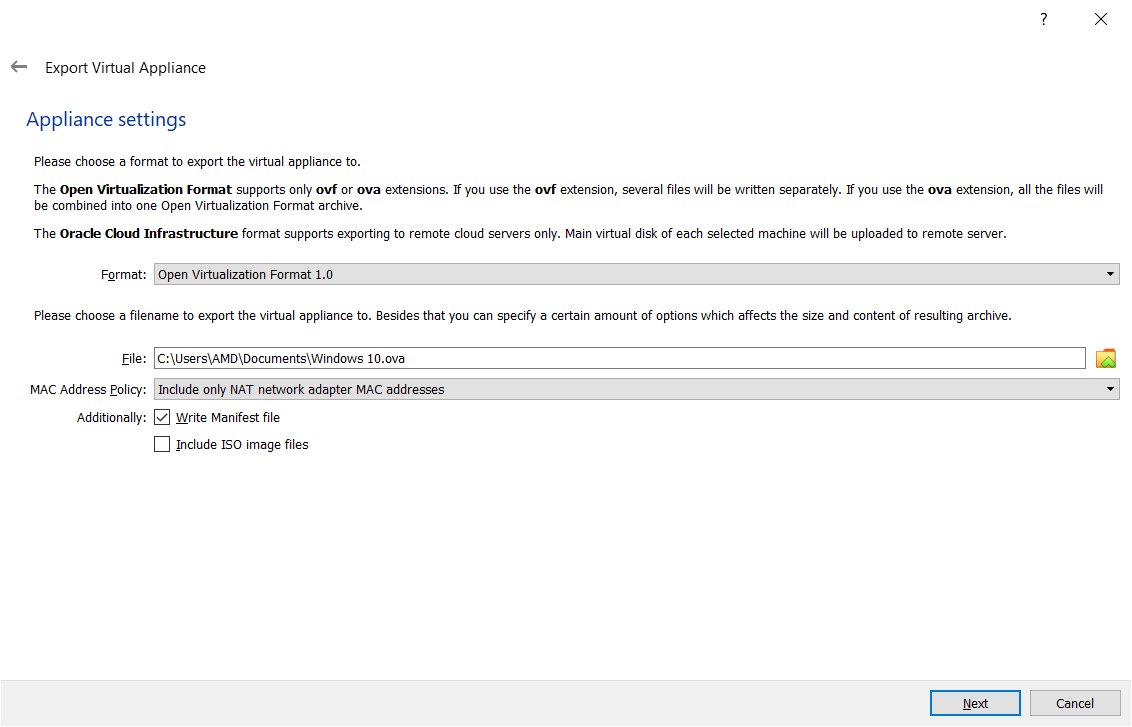
- Under Appliance settings choose the format of the virtual machine, create file name and location. Under Format, there are three different options including Open Virtualization Format 0.9, 1.0 and 2.0. The Open Virtualization Format supports only ovf or ova extensions. If you use the ovf extension, several files will be written separately. If you use the ova extension, all the files will be combined into one Open Virtualization Format archive. We will keep the default format: Open Virtualization Format 1.0.
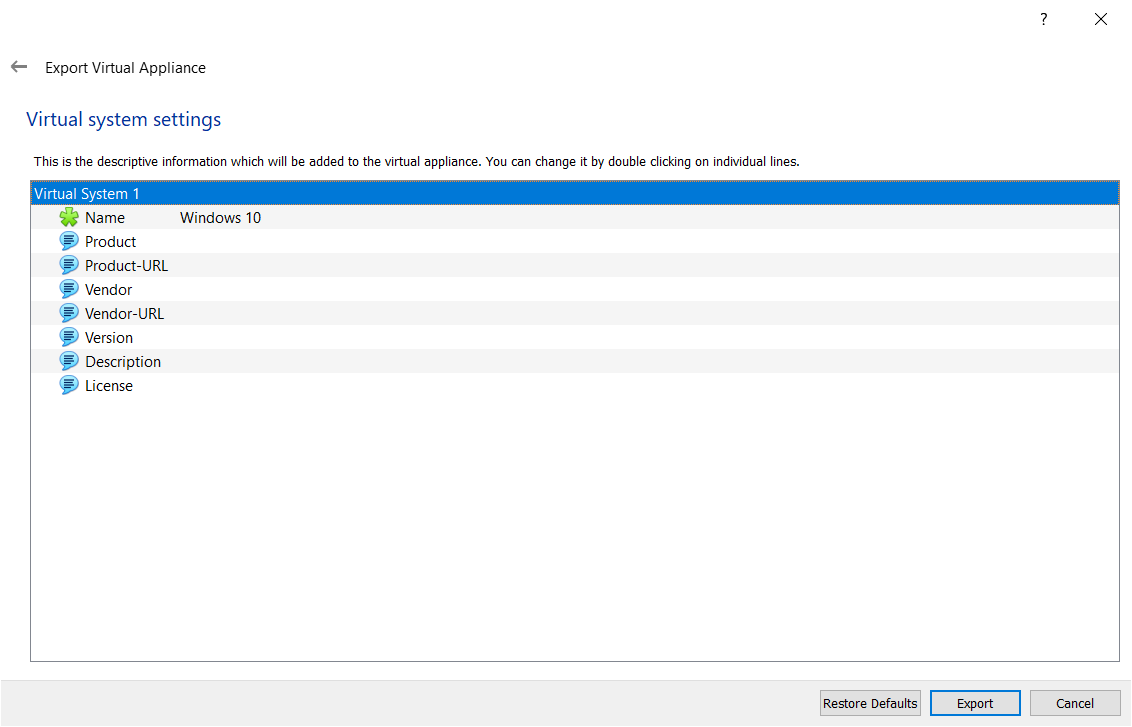
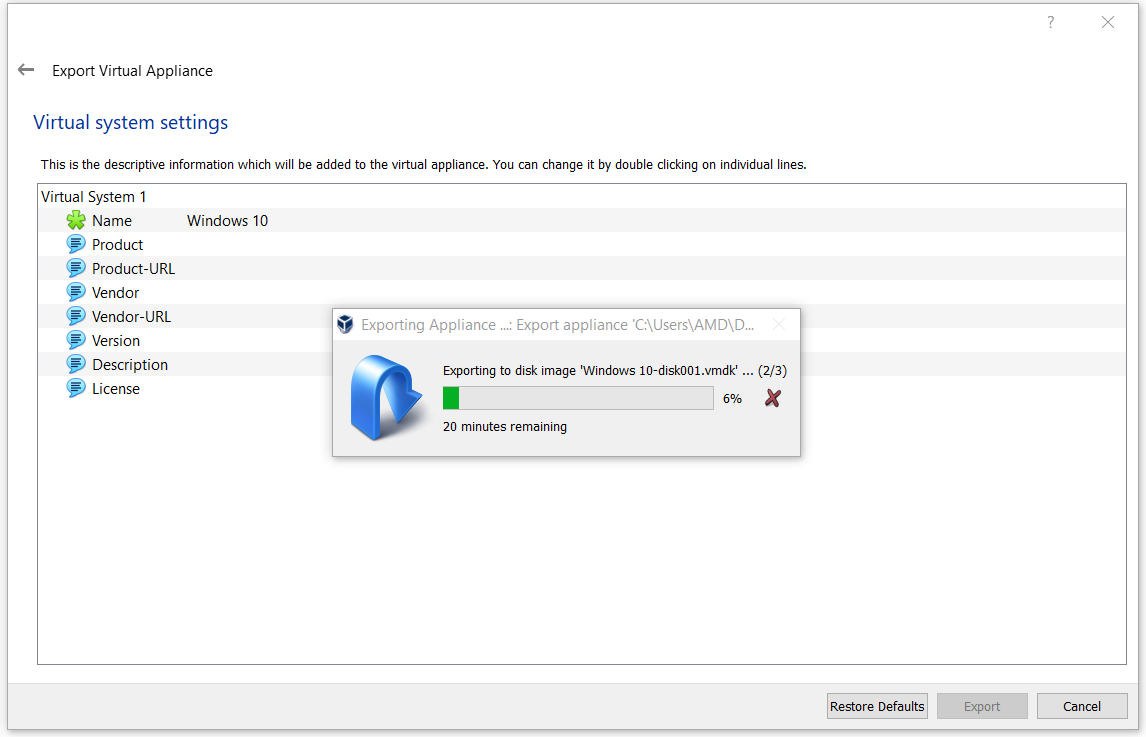
- Under Virtual system settings write the descriptive information which will be added to the virtual machine and then click Export. You can change it by double clicking on individual lines. If you don’t want to add descriptive information just click on Export. In our case, we will not add any descriptive information
- Wait until Oracle VM VirtualBox finishes exporting of the virtual machine
- Congratulations. You have successfully exported your virtual machine.
Import the virtual machine to the Oracle VM VirtualBox
In the second part, we will import the virtual machine that we exported in the previous step. As already mentioned, you can import the virtual machine into Oracle VM VirtualBox on another Windows machine or on the same machine as in the purpose of the testing.
- If you have closed the Oracle VM VirtualBox, please open it again
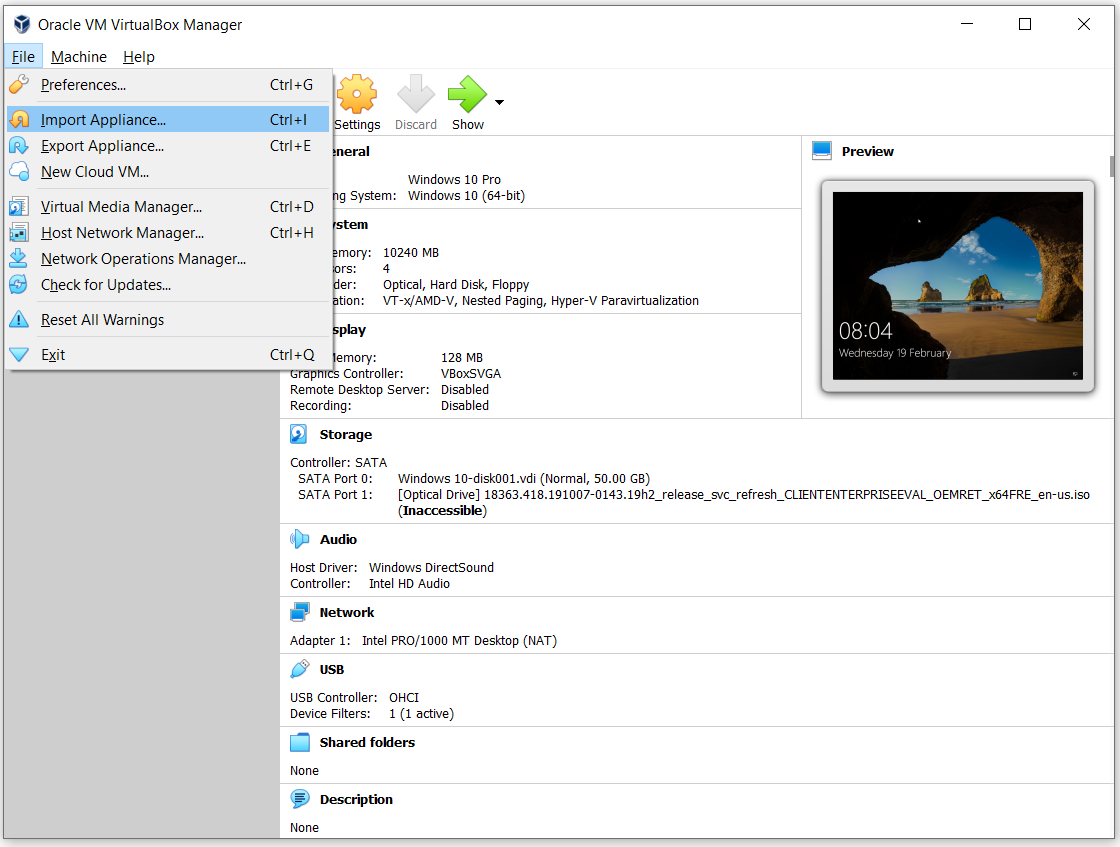
- Click on the File and then click on Import Appliance. You can also import the virtual machine by pressing CTRL + I on the keyboard.
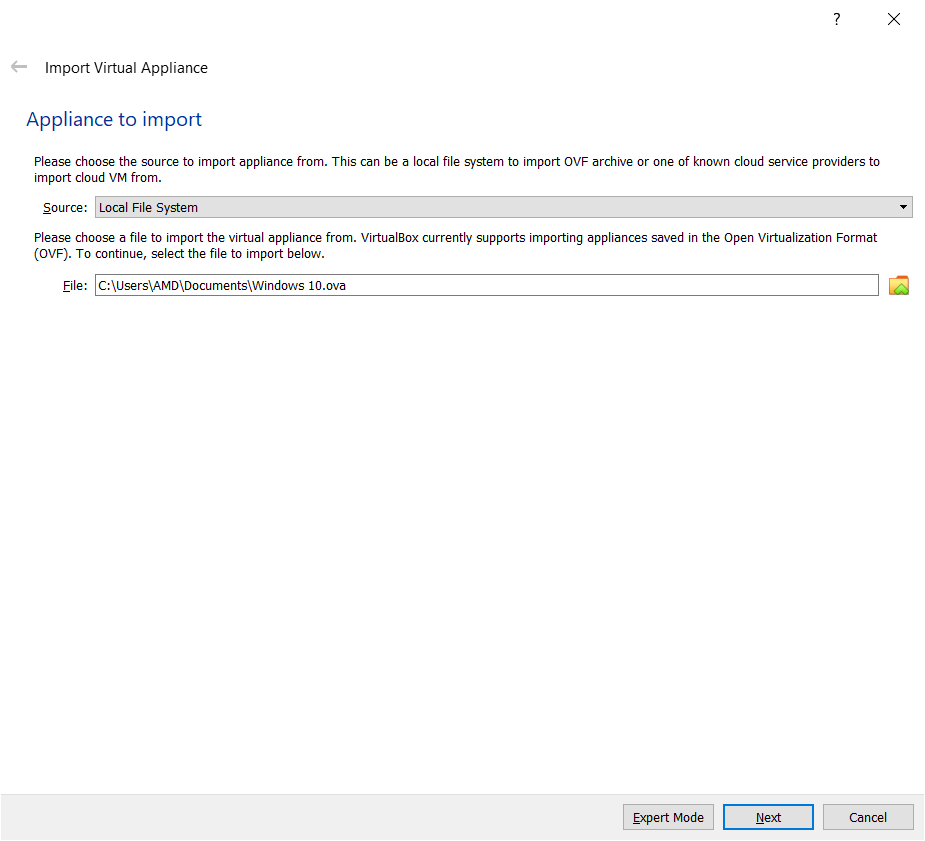
- Under Appliance to import choose the source to import the virtual machine from. This can be a local system to import the OVF archive or one of the known cloud service providers to import cloud VM from. Under File choose the file that you have exported in the previous part
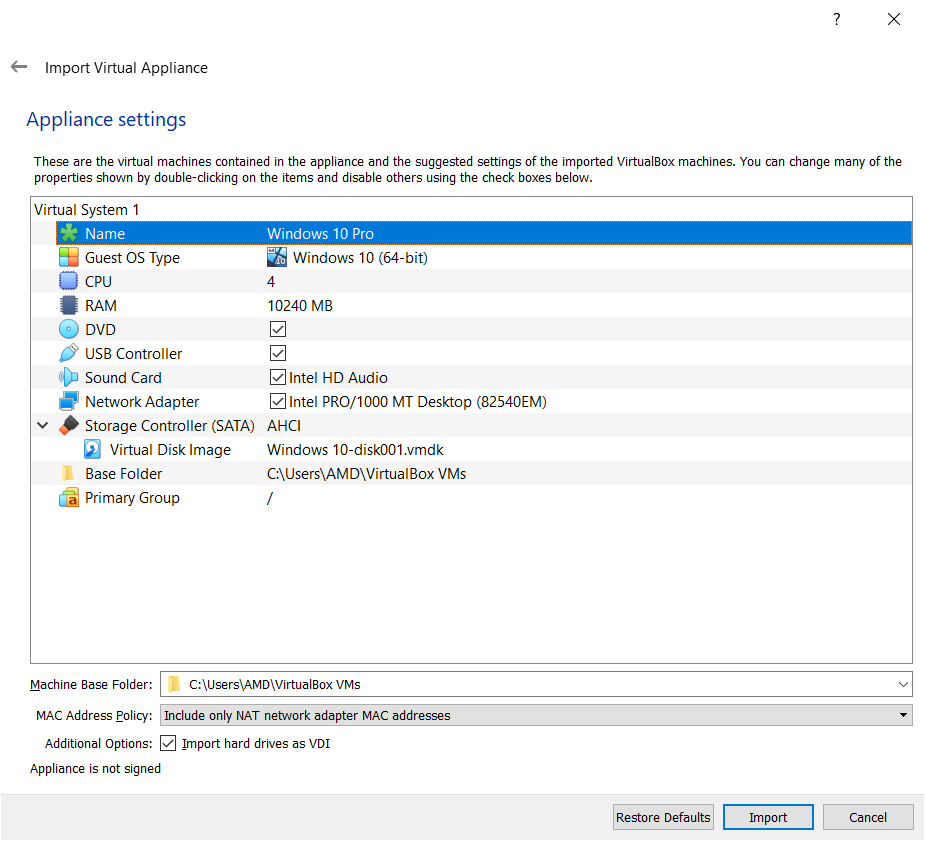
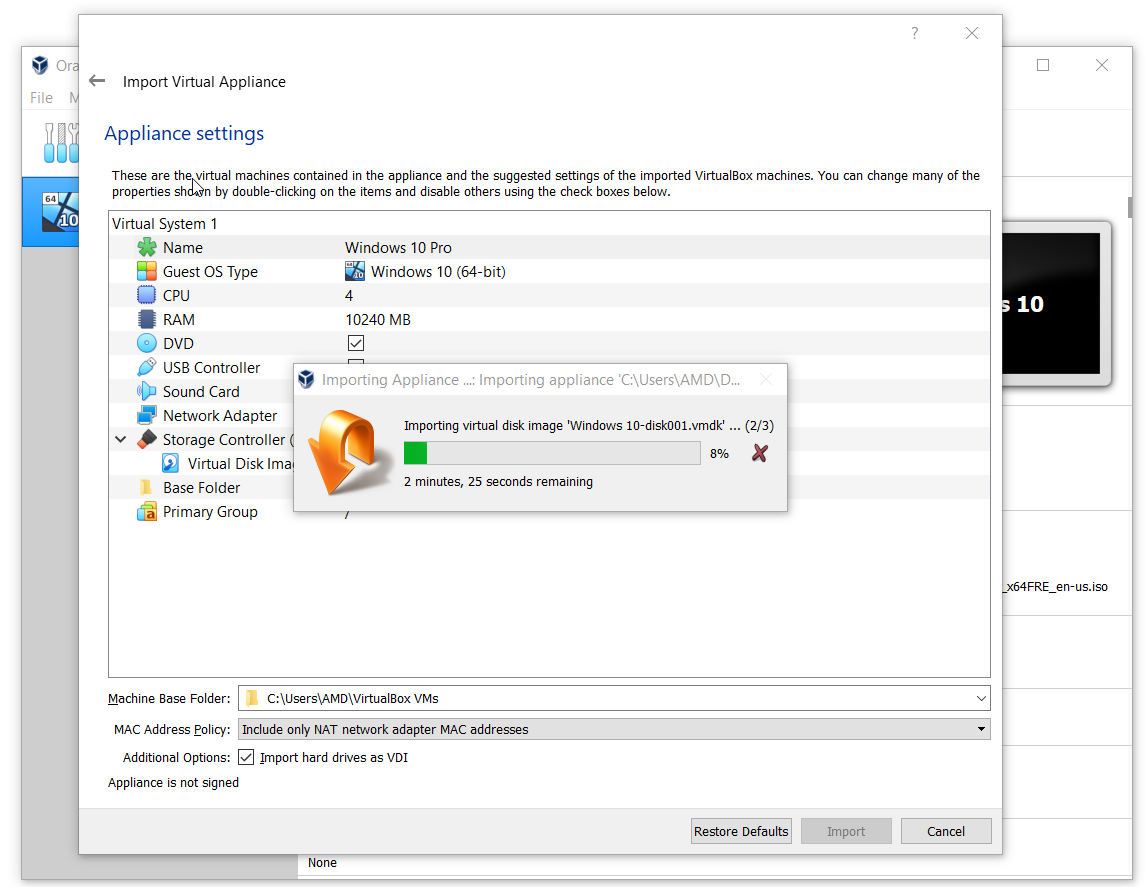
- Under Appliance settings perform the initial configuration such as the name of the virtual machine, guest operating system and resources (CPU, RAM, DVD, USB, Sound Card, Network Adapter, Storage Controller) and then click Import.
- Wait until Oracle VM VirtualBox finishes the procedure of importing the virtual machine
- Congratulations. You have successfully imported your virtual machine.
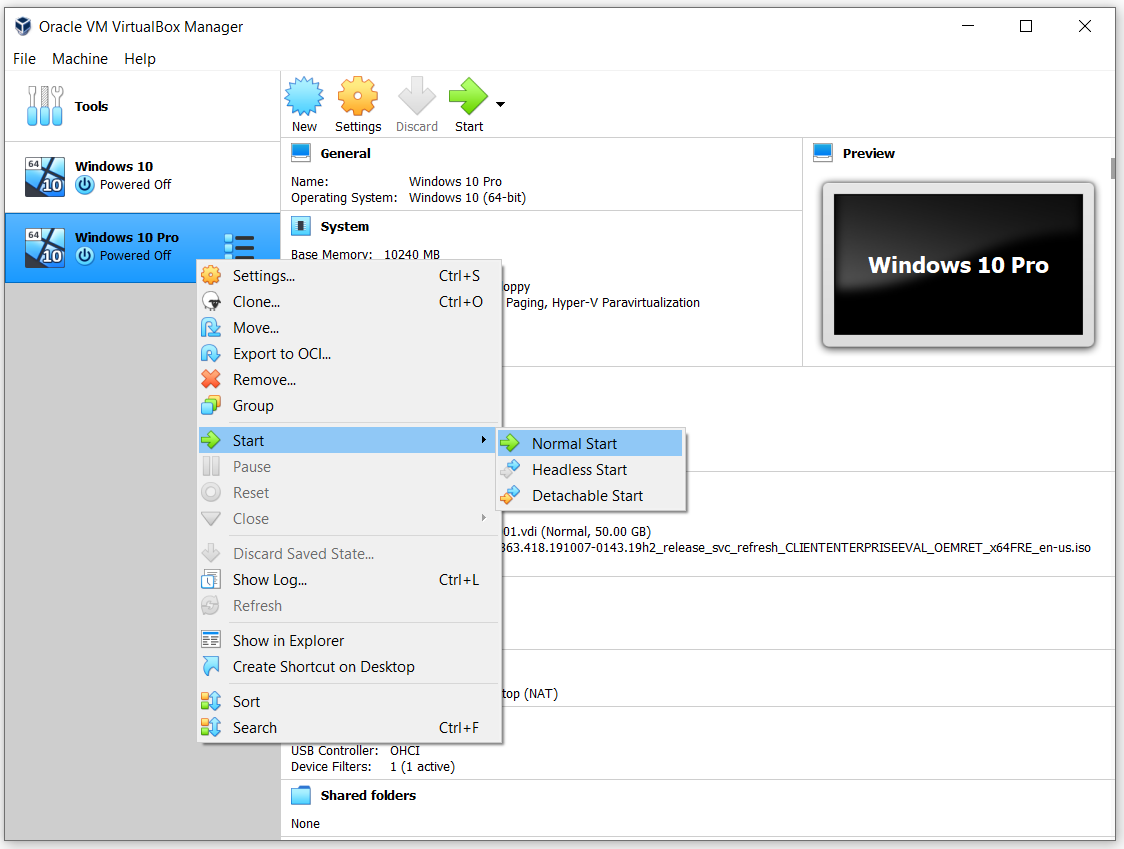
- Right click on the virtual machine, click Start and then click Normal Start


internet is not working after importing VM. What to do?