How to Fix ‘Event ID Error 24687’ on Windows 10 / 11?
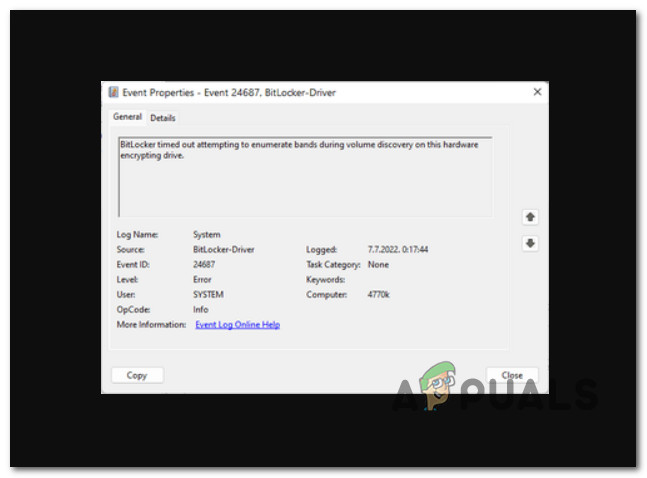
Some Windows 10 and Windows 11 users are constantly seeing new instances of the Event ID Error 24687 when opening Event Viewer. The error message explaining the issue is ‘BitLocker timed out attempting to enumerate bands during volume discovery on this hardware encrypting drive‘.
After investigating this particular issue, it turns out that there are actually several different underlying causes that might directly or indirectly cause this problem. Here’s a list of culprits you should be aware of:
- BitLocker is enabled – Bitlocker is the number #1 reason why you will see this type of event error appearing inside Event Viewer along with every startup. Several affected users that we’re dealing with the same kind of behavior have confirmed that the problem was resolved after they effectively disabled this feature from their system.
- Recent system change – As it turns out, there are several different drivers and apps that are known to cause this type of Event Viewer report. Most likely, an SSD firmware update or the installation of a drive management app might cause this behavior. Since there are a lot of underlying culprits that might cause this problem, the quickest way to fix this particular scenario is to use System Restore to revert your PC back to a state in which this problem was not occurring.
- Failing drive – According to several affected users, this problem can also appear in instances where the HDD or SSD that is currently hosting your OS installation is beginning to fail. You can confirm this scenario and prologue the life of your storage hardware (for a few more months) by deploying a CHKDSK scan to replace corrupted storage sectors with unused equivalents.
- System file corruption – Under certain circumstances, you can expect to deal with this issue if your Windows 10 or Windows 11 installation is currently plagued by some type of system file corruption that is affecting the BitLocker integration. In this case, you can try going for an SFC and DISM scan at first and move on to a clean install or repair install if the issue persists.
Now that we have gone over every potential reason why you might deal with this particular issue, let’s go over a series of fixes that other affected users have successfully used to get to the bottom of this issue.
1. Disable BitLocker
The most common cause of this kind of event fault occurring in Event Viewer at each startup is Bitlocker. A number of the impacted users who have reported the same type of behavior have confirmed that the issue was fixed when they really turned off this feature on their machine.
The BitLocker Drive Encryption menu’s encryption can be turned off by going to the System and Security tab using the traditional Control Panel interface. This method is relatively simple to do, but depending on your OEM, you might find that if you disable and enable the secure boot option in your BIOS or UEFI settings, the encryption feature will re-enable.
The automatic BitLocker Encryption can be turned off using the Control Panel by following the steps listed below:
Note: The instructions below will work for both Windows 10 and Windows 11:
- To bring up the Run dialog box, press the Windows key + R. The traditional Control Panel interface will then appear after you put “control” in the text field and hit Enter.

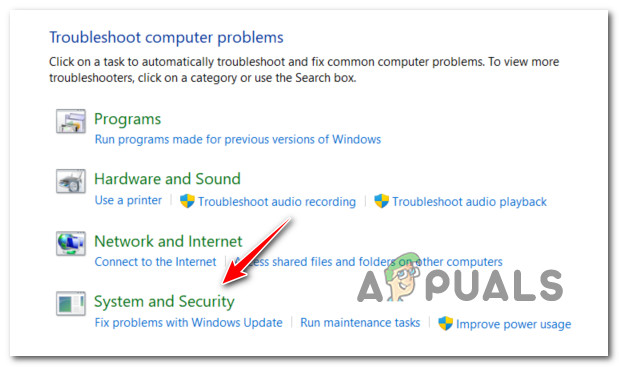
Open the classic Control Panel interface - From the list of available options once you’ve entered the Classic Control Panel interface, select System and Security.
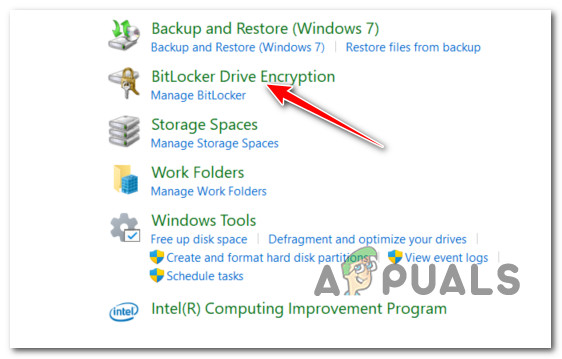
Open up the System and Security tab - Next, select BitLocker Drive Encryption from the System and Security menu.
Accessing the Bitlocker drive encryption - Inside the BitLocker Drive Encryption settings, click on the Turn off Bitlocker.
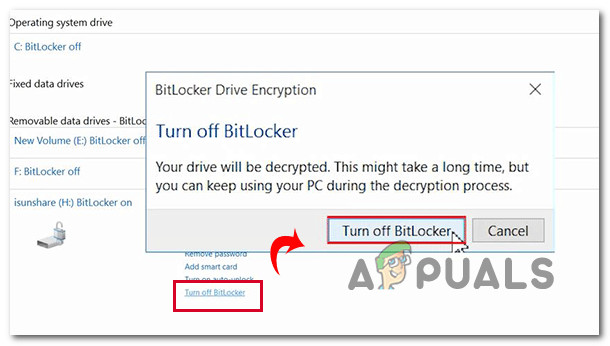
Turning off the Bitlocker - Click Yes to provide administrative rights when prompted by the User Account Control box, then click the Turn off Bitlocker button at the confirmation prompt.
- Be patient and wait for the drive to be decrypted. By launching File Explorer and examining your OS drive to see if the encryption icon has vanished, you can verify that the procedure was successful.
- Once you confirm that the encryption has been removed, restart your PC and check to see if you still have the same type of Event Viewer error.
If the issue is still not fixed, move down to the next method below.
2. Use System Restore
It turns out that this kind of Event Viewer report can be caused by a number of different drivers and programs. Most likely, this behavior could be brought on by installing a drive management app or updating the SSD firmware.
The simplest approach to resolve this particular situation is to use System Restore to return your PC to a condition in which this problem was not occurring because there are numerous underlying factors that could cause it.
To correct serious issues, you can use this utility to restore your complete Windows installation to a stable state where the issue never happened. However, in order to utilize this fix, your operating system must have previously taken a snapshot that may be used to restore the Windows installation to an earlier time.
To preserve System Restore Snapshots frequently, Windows should be configured to do so if you haven’t modified the default setting (after every installed Windows update).
Important: Before performing this method, be aware that it will essentially undo any changes done after the snapshot was first created. Any user preferences, game downloads, or program installations will have been erased after the snapshot was taken.
If you decide to restore your system, use the steps below to see how to do it:
- The first step is to open the Recovery Menu. Reboot your PC and press F11 or the key specified by the manufacturer of your motherboard when your computer starts up.
- After the Recovery Menu appears on your screen, you must select the System Restore section by clicking with the mouse or using the keyboard arrows.
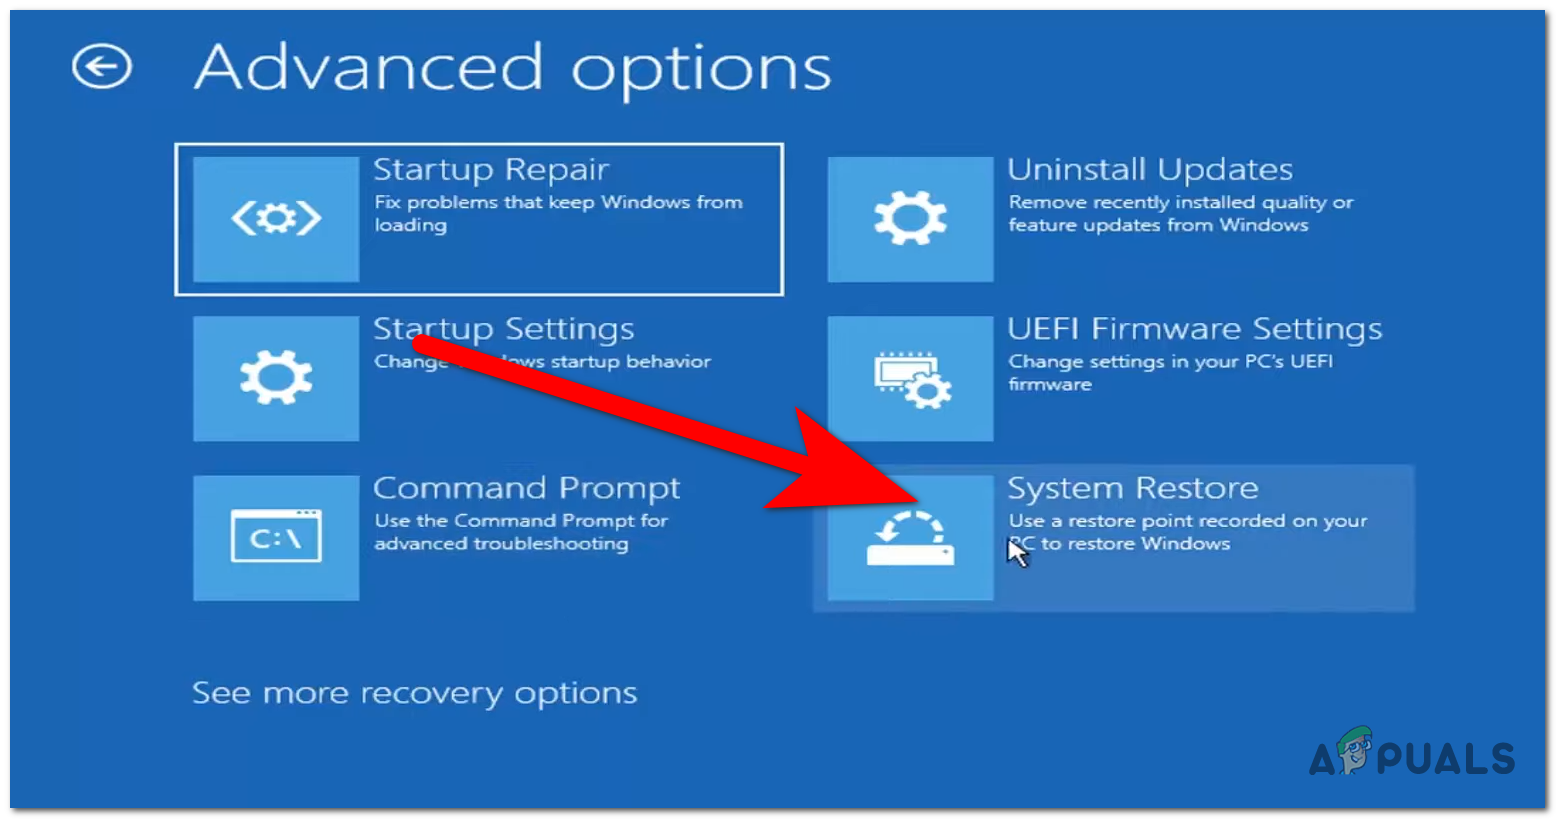
Open the System Restore menu - This will let you access the System Restore panel. To continue, select Next. When the most recent restoration point appears on your computer, click it.
- After completing this step, choose Finish to start the System Restore process. You must confirm your selection in order to move further.
- The procedure will take a few minutes to finish, depending on your PC.
- Test the computer to determine whether Windows 11 still throws new instances of the Event ID Error 24687.
If your machine continues to produce fresh instances of Event ID Error 24687, proceed to the next technique below.
3. Deploy SFC and DISM scans
If you’ve come this far without finding a fix, it’s likely that you’re dealing with some sort of system file corruption that keeps causing fresh occurrences of the Event ID Error 24687 at system startup.
The next step should be to launch SFC (System File Checker) and DISM (Deployment Image Servicing and Management), two built-in programs that can address the most common causes of system file corruption.
Despite the fact that SFC and DISM are roughly comparable, I suggest running both of them fast following one another to improve your chances of resolving the corruption issue.
It should be noted that while SFC collects healthy system files from a local location, DISM retrieves files from Windows Update in order to replace faulty counterparts.
Running an SFC scan from an elevated CMD prompt can be used to check for system file corruption.
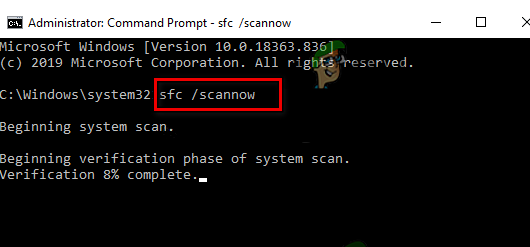
Even if the tool appears to have frozen, it is advisable not to interrupt this process midway (or prematurely quit the CMD window). You’ll eventually get the success notification after the operation is finished.
Once the SFC scan is complete, restart your computer.
Once the subsequent startup has been completed, run a DISM scan.

Note: Before starting this process, make sure your Internet connection is strong.
Restart your computer after properly executing the DISM command to see if the problem has been fixed.
If the Event ID Error 24687 is still visible in Event Viewer after running both of these scans, go to the next potential repair below if the issue is still not resolved.
4. Deploy a CHKDSK scan
Many people who have experienced this issue claim that it can also occur if the HDD or SSD that is now housing your OS installation starts to fail. By running a CHKDSK scan to swap out faulty storage sectors with unused ones, you can confirm this scenario and extend the lifespan of your storage hardware (for a few more months).
If you’re still using a standard HDD, the scenario in which portions of the storage sectors used to keep system files are beginning to degrade is what would result in these persistent Event Viewer errors.
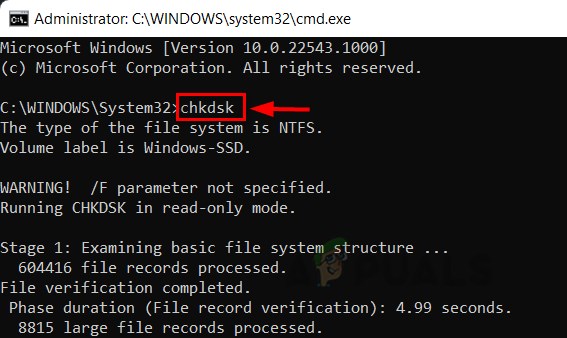
In this case, running a Check Disk Scan to replace defective sectors with healthy ones will help you extend the life of your HDD. Try launching a CHKDSK scan from an elevated CMD prompt to rule out this possibility.
Note: Thankfully, Windows’ integrated CHKDSK program can check for faults and corruptions as well as fix any logical errors and damaged data that may have been left behind by a forceful deletion attempt.
Open CHKDSK in an elevated CMD window to give it the rights it needs to fix damaged files. No matter which version of Windows you’re running, the instructions should work.
Restart your computer when the CHKDSK scan is finished to check if the Event ID Error 24687 has been resolved.
Try the following technique if the problem persists.
5. Perform a clean install or repair install
If none of the aforementioned techniques have helped you, your only remaining option is to entirely replace all of the impacted system file dependencies with healthy replacements.
At this point, your only choices are to perform a clean install or a repair install (in-place upgrade). If you encounter issues, we strongly advise selecting an in-place update (repair installation) if you have a choice:
• Repair install (in-place upgrade) – Only the system files will be changed during a repair install (while keeping your personal files, user preferences apps & games).
• Clean install – This choice might be the best if only a small number of kernel processes are impacted, but it has the disadvantage of wiping out all user data from the OS disk. Nevertheless, you should be aware that if you do this, all of your personal data will be erased.


