Fix: Ethernet Connection Not Working But Wi-Fi Works on Windows
Even though WiFi now predominates virtually all of our network connections, there are still situations where a wired or Ethernet connection is preferable to a wireless one. Ethernet becomes useful when you require a dependable and continuous connection for streaming, gaming, or downloading some files or applications.
Signals go through ethernet in a smooth and uninterrupted manner. Wi-Fi signals, on the other hand, are frequently stopped or slowed down by devices or physical objects that may be in between. And then there’s the manner of working around a limited bandwidth.
However, a typical issue that some Windows users run into when utilizing an Ethernet cable is that WiFi works, but Ethernet doesn’t. If this scenario is applicable to you, this article is exactly what you need.
We will explore the various causes of why this happens and we’ll provide several confirmed-to-work solutions.
Here’s a list of scenarios that might contribute to a scenario where the ethernet connection doesn’t work while the Wi-Fi connections work on a Windows computer:
- Common internet inconsistency – The Internet Connection Troubleshooter offers a number of automatic repair methods that are effective in most circumstances when the problem is actually a network malfunction. If a credible instance is found, this application has the capability to automatically implement the fix.
- Bad cables – You’d be shocked at how frequently a defective cable causes this issue to arise. Even though the cable appears to be in fine condition, it’s always conceivable that the plastic wrap conceals incongruent parts of the cable that are really impeding data transfer. Before concluding that this issue is not the result of a broken connection, make sure you double-check all the associated Ethernet connections.
- Cached network data maintained by router – Some Windows users claim that this issue can also be brought on by a situation in which the cached data on your network limits the usage of an ethernet connection. After restarting or resetting the router, the majority of affected Windows customers who have dealt with this issue report that it has been resolved and they are now able to use an Ethernet connection.
- Faulty Ethernet port – Another situation is that the port you are currently using to attach the Ethernet wire to your route may be broken. To determine if the issue has been resolved, try disconnecting the cable from the allegedly defective port and inserting it into another port.
- The network adapter is stuck in ‘limbo’ state – According to several affected users, this problem can also occur in situations where the active network adapter is stuck in a limbo state and can’t accept ethernet connections. In this case, you should launch a system-wide network reset from the Network & Internet tab.
- Corrupted DNS Cache – It turns out that another probable cause of why you might not be able to connect with an ethernet connection is a DNS (Domain Name System) difference made possible by the currently in use. This problem should often be resolved by flushing your current DNS from an elevated CMD prompt.
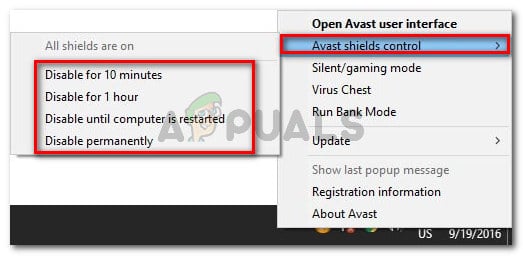
- AV interference – This error may also appear on occasion if your antivirus program chooses to stop an ethernet cable data transmission because it doesn’t believe the data to be reliable. You should be able to fix the problem by removing real-time protection before restarting your PC once again.
- Pending Windows Update – If you haven’t updated your Windows build in some time, Windows update may be the root of this problem. To fix this issue, open the Windows Update component and install each pending Windows update until your system is current.
- Virus infection – If Ethernet stops working, your computer may have been attacked with a virus or other malware. Many varieties of malware have the capacity to shift the router or stop the network, inhibiting proper operation. You should do a thorough scan using a dependable anti-malware program to ensure that this is not the case.
- Problem is caused by IPv6 – Disabling the IPv6 protocol will force the RDP connection to use IPv6 if you are trying to connect to a target PC with an outdated operating system. This will prevent the unpleasantness of having the remote desktop connection service remain disabled due to a network inconsistency.
- MAC Address not configured for network card – If you’re using a dedicated network card, it’s likely that you’ll need to take the bother of setting up a specific MAC address in order to prevent network issues like the “Ethernet Doesn’t Have a Valid IP Configuration” error.
- Ethernet connections are disabled – Remember that the ethernet protocol being truly deactivated on the PC that is rejecting the ethernet connection is another quite typical circumstance that might end up creating this issue. If this scenario is applicable, access Device Manager and make sure ethernet connections are allowed.
- Ethernet Connection Unidentified – If your IP settings are not configured correctly for your Ethernet, then your Ethernet connection will be unidentified by Windows Settings therefore it might stop working.
Now that you are aware of every potential reason why you might experience this problem on your Windows computer, move down to the next section where we explore a series of verified fixes that other users have successfully used to get to the bottom of this problem.
1. Run the Internet connections troubleshooter
The likelihood is that running the Internet Connection Troubleshooter and implementing the suggested remedy will automatically resolve the issue you’re currently having with Ethernet connections (if it is a network issue).
Note: In situations when the issue is genuinely a network fault, the Internet Connection Troubleshooter offers a number of automatic repair techniques that work well in most cases. This program has the ability to automatically apply the repair if a plausible case is identified.
We were able to track down a number of Windows 11 users who claimed that the issue was quickly fixed when they used the Internet Connection Troubleshooter and implemented the suggested patch.
For detailed instructions on how to launch the Internet Connection Troubleshooter and implement the suggested remedy, go to the list below:
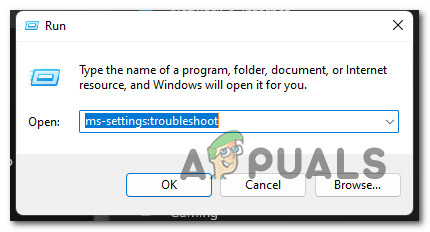
- To bring up the Run dialog box, press Windows key + R. The Troubleshooting tab will then appear once you enter the word “ms-settings:troubleshoot” into the text field and hit Enter.
Open up the Troubleshoot tab - Click Yes to allow admin access if the User Account Control (UAC) popup asks you to do so.
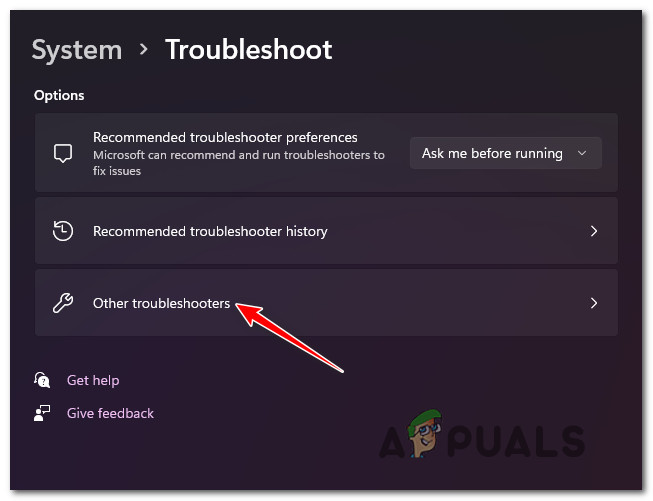
- After selecting the Troubleshooting tab from the Settings menu, click on Other Troubleshooters on the right side of the screen to expand the menu.
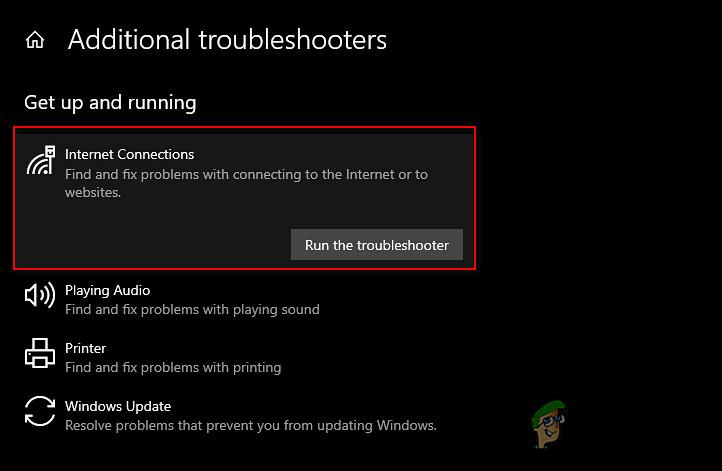
Access the Other troubleshooters tab - Select the Run option under the Internet Connections troubleshooter from the following menu.
Run the Internet connection troubleshooter - After the initial scan is finished, check to see if the software identifies a workable fix for your specific problem.
- If a workable fix is found, choose to Apply this fix on the following screen to apply the repair plan automatically.
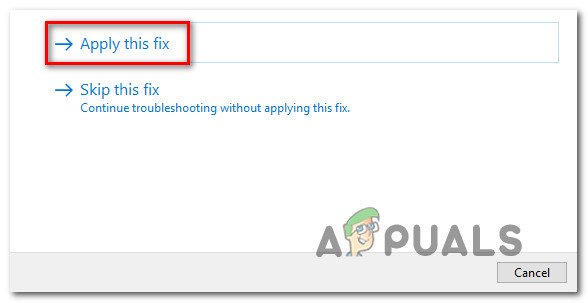
Apply the recommended fix - After the repair has been deployed and you have received a success message, restart your computer and check to see whether the Wi-Fi problem has been fixed.
If the same problem is still present, proceed to the next possible solution below.
2. Check all involved connections
You’d be surprised how often this problem actually occurs due to a bad cable.
Even if the cable looks in perfect shape, it’s always possible that the plastic wrap actually hides non-congruent sections that are actually inhibiting the data exchange. This typically happens with old ethernet cables.
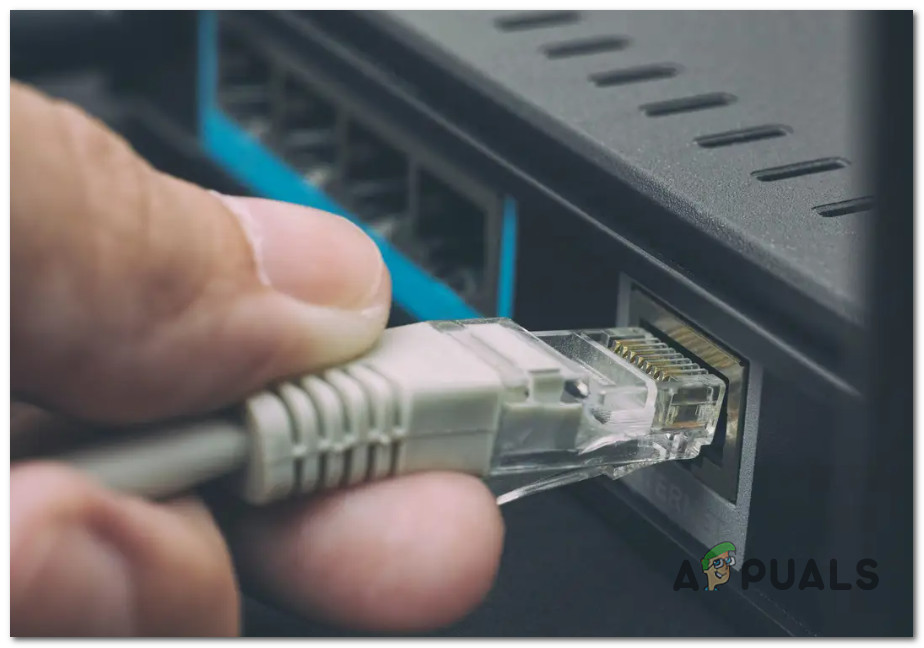
Before we move to more advanced fixes, you should ensure that the cable that runs from your ISP to your router is proper and congruent. Then, check the Ethernet cable that connects your router to your Windows PC.
Make sure that both cables are properly slotted inside the ports – you should hear the click button when this happens.
If you have spare ethernet cables, our recommendation is to swap both cables with new equivalents before trying to connect your Windows computer to the Internet via an ethernet cable.
If you took the time to investigate and ensure that this problem doesn’t occur due to a damaged cable or port, move down to the next method below.
3. Restart or Reset the router
According to some Windows users, this problem can also be caused by a scenario in which your router’s faulty cached data prevents the use of an ethernet connection.
Most afflicted Windows users who have dealt with this problem have said that it was fixed and they are now allowed to use an Ethernet connection after restarting or resetting the router.
Rebooting the router simply is a simple way to get started. This operation will update the IP and DNS that the PC is now utilizing in addition to removing any other cached information that is being held by your router, without changing any previously generated custom settings.
Simply turn off your router, disconnect it from the outlet, and wait at least 30 seconds before attempting a reset to ensure that the power capacitors are completely depleted.
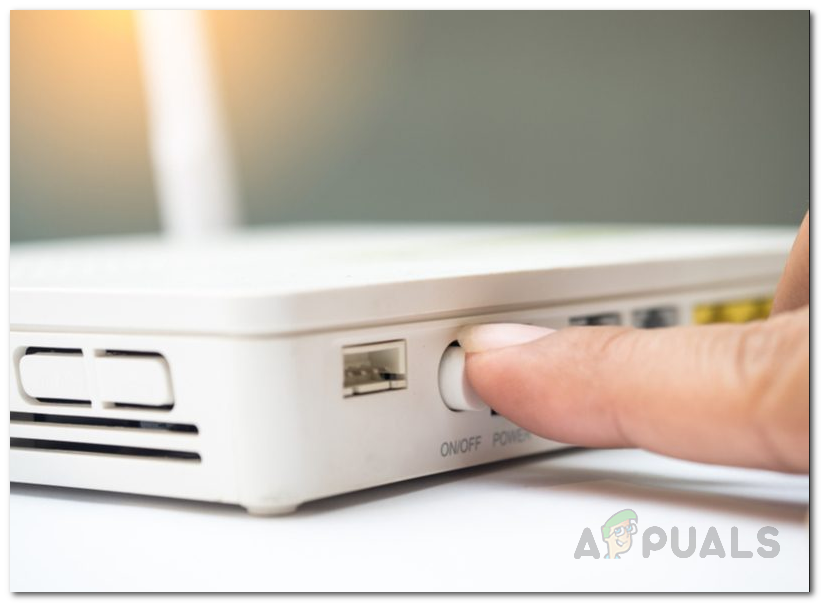
After reconnecting your router, wait until Internet connectivity has been restored, and then check to see whether the issue is still present.
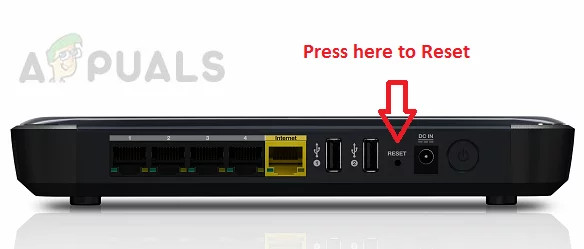
If the issue is still present, the next step should be to go for a router reset.
IMPORTANT: This operation will effectively reset all your router settings to the default values. Before going forward, understand that this procedure will also affect any forwarded ports, custom bandwidth frequencies, and any other custom settings that you previously established for your router.
To perform a router reset, press and hold the designated reset rear button for at least 10 seconds, or until you see the front LEDs blinking at the same time.
If you’ve tried restarting and resetting your router but are still unable to utilize an Ethernet connection even if you can connect to the Internet via Wi-Fi without any problems, continue to the next potential option below.
4. Use a different router port
There’s also the possible scenario where the port you’re actively using to connect the ethernet cable to your route is actually faulty. Try unplugging the cable from the suspected faulty port and plug it into another port to see if the problem is now fixed.
Note: If you’re on PC and you have more than 1 ethernet port at your disposal, connect your ethernet cable to the currently unused one.
If using a different port didn’t fix the issue in your case, move down to the next method below.
5. Reset the network adapter
The next thing you need to do is basically reset the network adapter that is now managing the internet connection if the approach described above didn’t help you to resolve the problem.
Going this way eventually allowed other users affected by this problem to connect to the Internet through an ethernet connection.
The only option to solve it is to launch a system-wide network reset operation from the Settings menu’s Network & Internet tab.
Note: Before reinstalling your network adapters and restoring any other network components to their normal settings, this procedure will first start by uninstalling all of your network adapters. Remember that you will probably need to reinstall any virtual switches or VPN client software you are currently using after the reset procedure is finished.
For detailed information on how to reset a network adapter on Windows 11 or Windows 10, refer to the guide below:
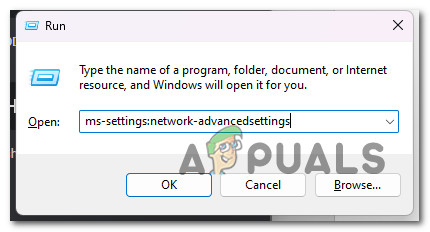
- To bring up the Run dialog box, press the Windows key + R. Then, to access the Network & Internet tab of the Settings menu, type “ms-settings:network-advancedsettings” into the text box and hit Enter.
Open the advanced network settings Note: If the User Account Control prompts you, select Yes to give admin access.
- After selecting the Network & Internet settings option, navigate to the right side of the screen, scroll to the very bottom of the page, and then select Advanced network settings.
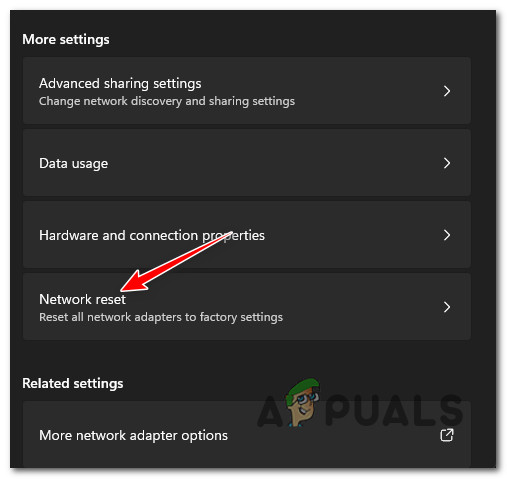
- Scroll down to More options under the Advanced Network Settings page and select Network reset.
Access the Network reset tab - To begin the process of resetting the network adapters on Windows 11, select Reset now at the next popup.
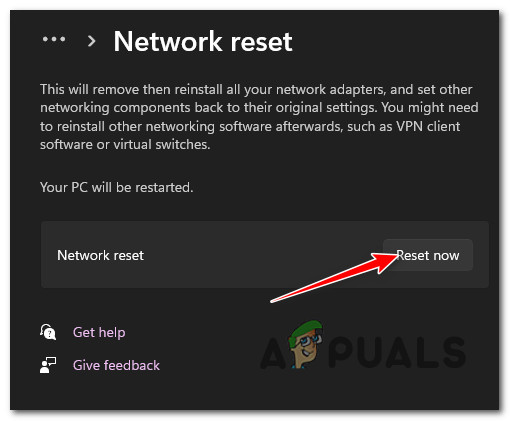
Resetting your network adapters Note: As the temporary files associated with your active network are being deleted at the conclusion of your operation, your PC will restart.
- After your Windows 11 computer has restarted, ensure that you connect to the same network that was the source of the issue and check to see if the issue has been resolved.
If you’re still having the same sort of problem, scroll down to the next possible solution below.
6. Reinstall the network card driver
If you’ve reached this point without discovering a workable solution, you might want to consider removing your existing network adapter driver.
In this situation, you’ll need to restart your computer after using Device Manager to completely delete the active network adapter driver. By doing this, you’ll compel Windows 11 to recognize that a crucial driver is absent and install a generic alternative (one that is fully compatible) the following time your machine boots up.
Follow the steps below for step-by-step instructions on how to achieve this:
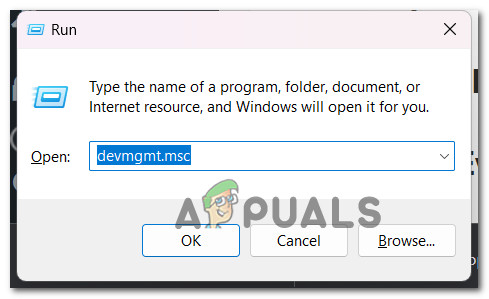
- To bring up the Run dialog box, press Windows key + R. Then, to launch Device Manager, type “devmgmt.msc” into the text box and click Ctrl + Shift + Enter.
Open Device Manager - Click Yes to provide admin access when the User Account Control prompts you to do so.
- After entering Device Manager, extend the Network Adapters drop-down menu by browsing through the list of devices at the bottom of the page.
- Right-click on the Wireless adapter in the Network Adapters drop-down menu and select Properties from the context menu.
Accessing the Properties menu - After entering the Network adapter Properties screen, select the Driver tab from the top menu.
- To start the process of uninstalling the active network adapter driver, click Uninstall again after clicking the Uninstall Device button at the bottom of the screen.
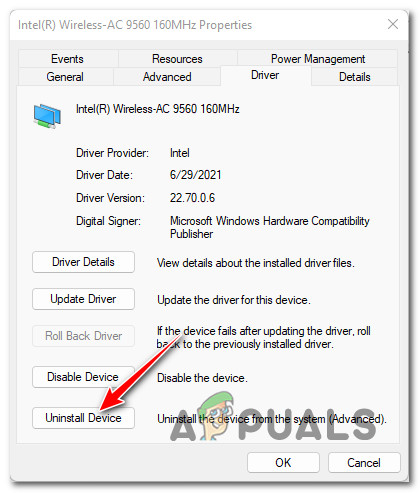
Uninstall the network adapter Note: Be careful to check the box next to “Attempt to delete the driver for this device” before clicking “Uninstall” to confirm the action.
- You’ll notice that you no longer have network connectivity when the process is finished; this is quite normal. Simply restart your computer if this occurs.
- Your OS will recognize that the network adapter driver is missing on the subsequent system restart and will install a compatible replacement to reestablish Wi-Fi access.
If you’re still having sporadic disconnections while connected to a Wi-Fi network after reinstalling the network adapter, scroll down to the next possible solution below.
7. Deploy an AV scan
A virus or other malware may have infected your computer if Ethernet stops working. Many types of malware have the ability to disable the network or move the router, preventing it from functioning correctly. The machine should have a reliable antivirus installed to prevent network failure.
To be sure that this is not the case, you should do a comprehensive scan using a reliable anti-malware application.
To get rid of the virus infection, if you don’t already have malware installed, take the time to run a malware scan.
There are other ways to go about doing this, but because Malwarebytes is one of the most potent security scanners and works equally well on malware and adware, we recommend utilizing it.
Use this article to deploy a Malwarebytes deep scan.
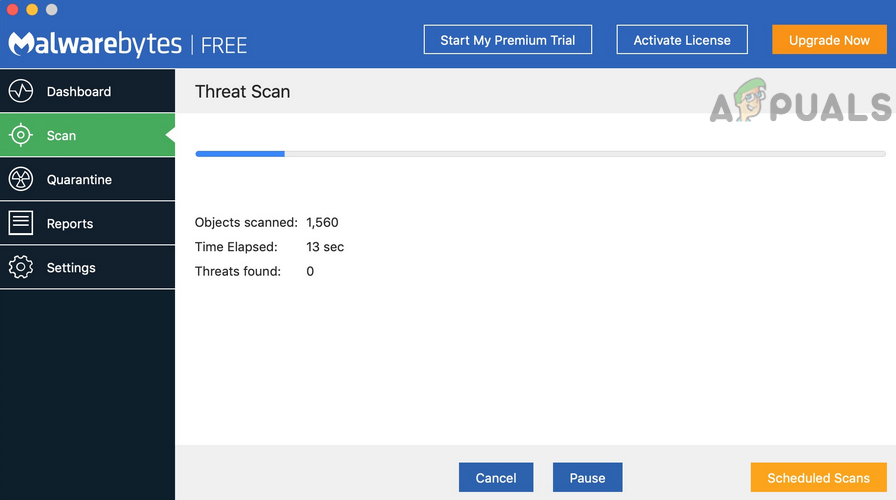
After the scan is complete, remove any infection instances as instructed, restart your computer, and then try connecting your PC to the Internet via an Ethernet connection once more to see whether the issue has been resolved.
If the same sort of issue continues, proceed to the next method stated below.
8. Disable IPV6
Your PC will be forced to utilize the more dependable IPv4 protocol for both ethernet and Wi-Fi connections if the IPv6 protocol is disabled.
Numerous impacted customers attest that by making this minor adjustment from the Network Connction menu, they were finally able to connect to the ethernet with an ethernet connection.
Note: The OS will favor utilizing IPv6 over IPv4 on more recent versions of Windows (Windows 10 and Windows 11).
Disable the IPv6 protocol momentarily to test if the issue has been resolved, if you haven’t already:
- Press Windows key + R to open the Run dialog box.
- The Network Connections menu will then be displayed once you type “ncpa.cpl” into the text box.

Open the Network Adapter menu - In the Network Connections menu, right-click the network adapter you’re currently using, and then choose Properties from the context menu that appears.

Access the Properties screen of your active network Important: When User Account Control (UAC) prompts you to provide admin access, choose Yes.
- On the Properties page for your network adapter, click the Networking tab.
- After that, go to the bottom of the list of items and uncheck the box next to Internet Protocol Version 6 (TCP / IPv6).
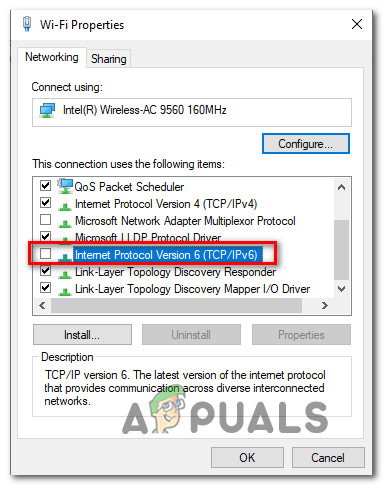
Disable the Ipv6 protocol - Click Ok after saving your changes. Try restarting your computer to check if the issue persists.
If you’re still experiencing the same kind of issue, move down to the next method below.
9. Configure a MAC address
Before you can connect through an ethernet connection if you’re using a dedicated network card, you might need to update the MAC address. Although this is meant to happen automatically, your unique configuration may require you to manually do this.
The network card has to have the MAC Address allocated to it in order to connect to the internet router. The device may not be able to connect over Ethernet if the MAC Address is provided incorrectly or is not there at all. As a result, this step entails manually giving the network card a MAC Address.
If you think this approach could work for you, read on for instructions on how to find out your physical address and then access it to change the network connection so that your router uses it as the primary MAC address.
What you must do is as follows:
- To enter the Run dialog box, press the Windows key and R key simultaneously.
- To launch an elevated Command Prompt, put “cmd” in the Run text box and hit Ctrl + Shift + Enter.

Open a CMD window - To provide admin access at the User Account Control (UAC), click Yes.
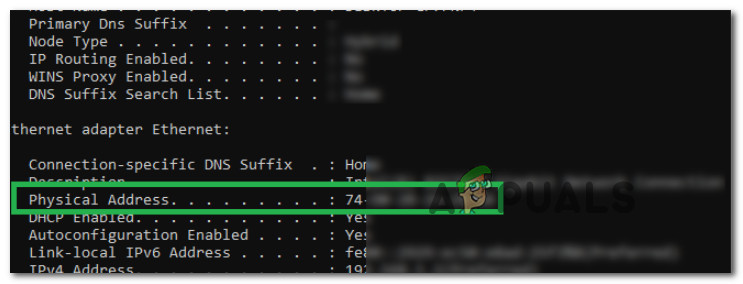
- After entering the elevated Command Prompt, use the command below to get a summary of your current network configuration:
ipconfig/all
- Note the Physical Address of the Ethernet Adapter that is now active from the list of results.
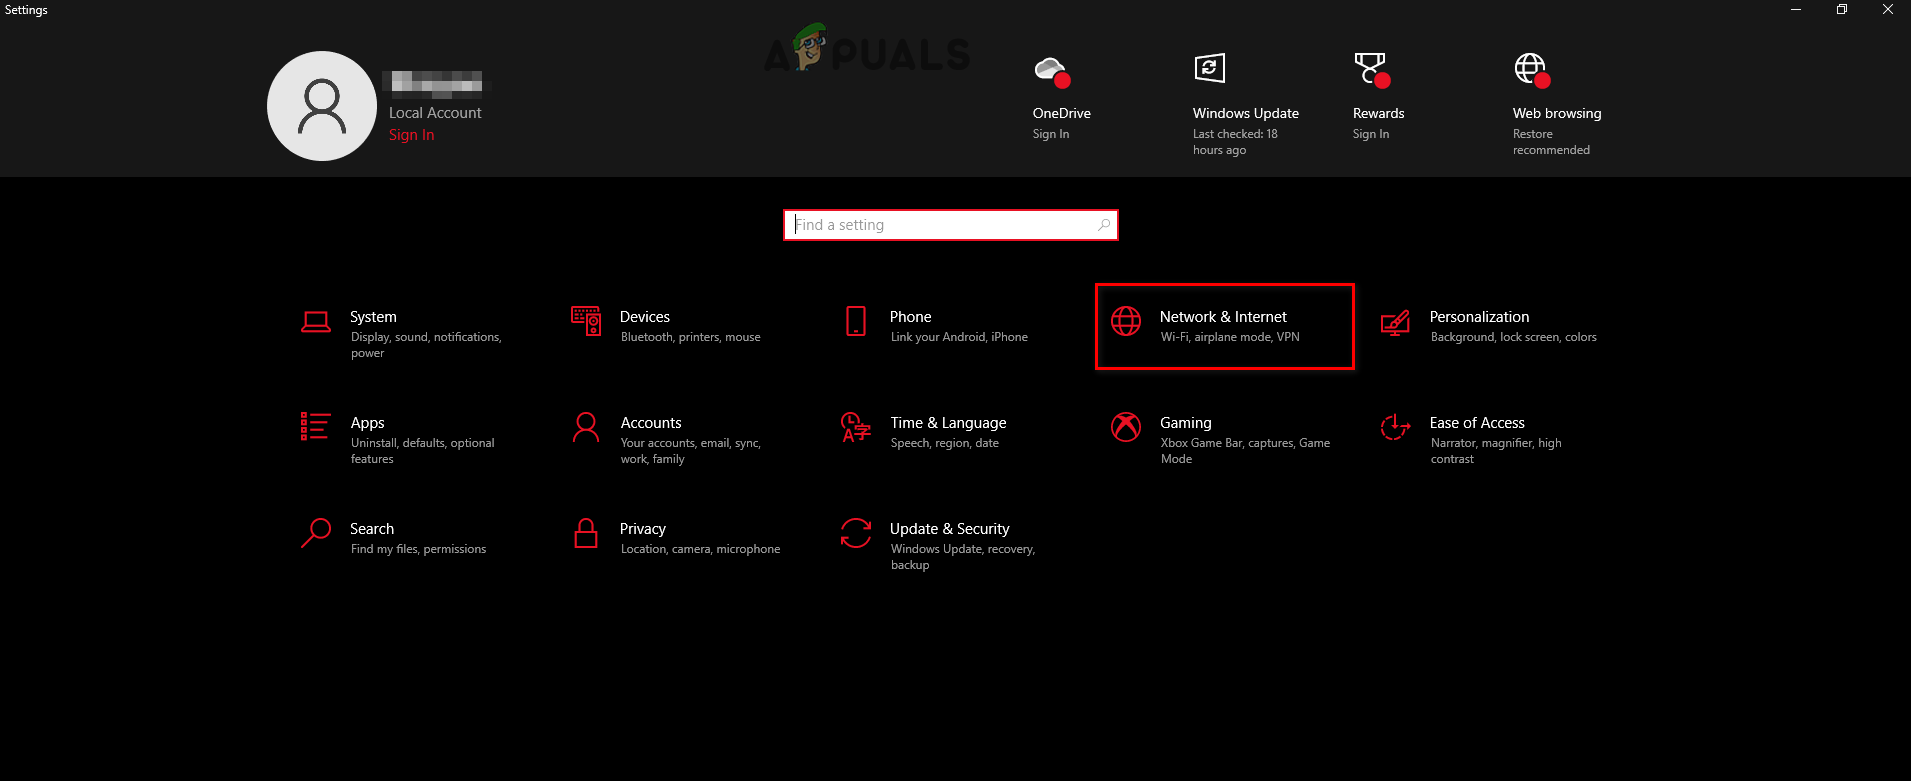
Take note of physicals address - As soon as you are able to write down the physical address of your network adapter, right-click on the network icon in the system tray and select Open Network and Internet from the context menu that just appeared.
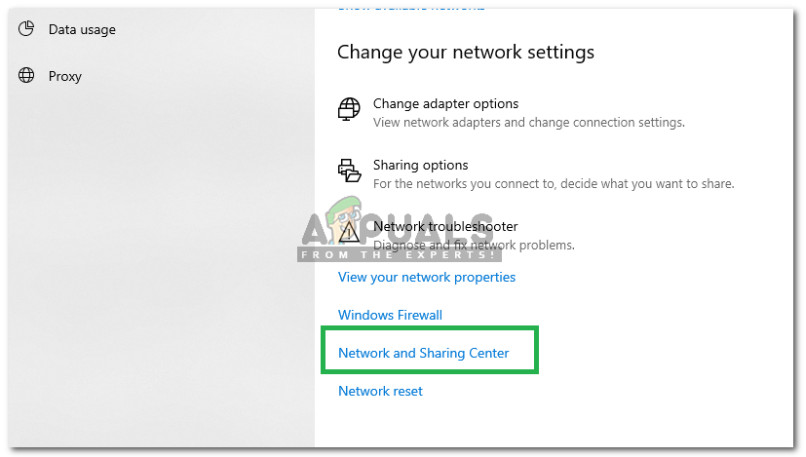
Open the network and internet settings - Select the “Change Adapter Settings” option from the “Network and Sharing Centre” menu after you’ve reached the following menu.
Open the network and sharing center - Next, choose “Properties” from the context menu when you right-click the network connection you’re now using.
- Select the Networking tab and then click the Configure button once you’re in the Properties page (under the name of your network adapter).
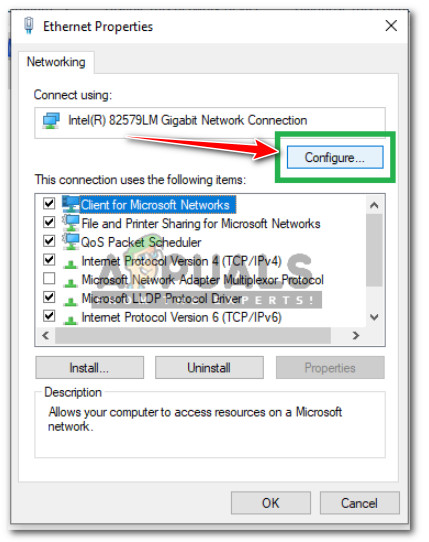
Configure the network connection - On the following page, choose “Network Address” from the list, then check the “Value” box.
- To save the changes, enter the physical address that you wrote down in step 5 here and click Ok.
- Restart your PC and router and check to see whether the issue has been resolved.
If the problem is still not fixed, move down to the next method below.
10. Disable Antivirus or Firewall (temporarily)
You could also occasionally notice this error if your antivirus software decides to block an ethernet cable data transfer because it doesn’t deem the data to be trustworthy.
By disabling real-time protection before restarting your PC once again, you should be able to resolve the issue. Since you already performed a security scan and ensured that this issue is not caused by some kind of malware, checking for AV interference is the next logical step.
Important: Although the specific steps will differ depending on the third-party suite you’re using, most antivirus programs allow you to off real-time protection from the taskbar menu.
Restart your computer, then try to reconnect the ethernet wire once again.
If the problem persists, move on to the next proposed fix below.
11. Make sure Ethernet connections are enabled
Keep in mind that another fairly common scenario that might end up causing this problem is when the ethernet protocol is actually disabled on the PC that is refusing the ethernet connection.
Before you disrecard this possible scenario, open Device Manager and expand the Network adapters menu to see if the ethernet controller is actually disabled or not. This method has been confirmed to be succesfull on both Windows 10 and Windows 11.
Follow the instructions below to make sure that ethernet connections are allowed on your PC:
- Press Windows key + R to open up a Run dialog box.
- Next, type ‘devmgmt.msc’ inside the text box, then press Ctrl + Shift + Enter to open up the Device Manager with admin access.
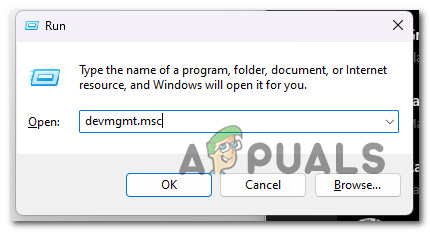
Open Device Manager - When you’re prompted by the User Account Control (UAC), click Yes to grant admin access.
- Once you’re inside Device Manager, scroll down through the list of categories and expand Network Adapters.
- Next, right-click on the network card that handles the ethernet connection and click on Enable Device.
- Confirm at the confirmation prompt, then reboot your PC and see if the problem is fixed once the next startup is complete.
If the same kind of issue is still occurring, move down to the next method below.
12. Reset the TCP/IP stack
It turns out that this specific problem may also be caused by a TCPIP or DHCP option that is causing the ethernet adapter to abruptly cut off the connection. Fortunately, this specific problem may be quickly fixed by using the command “netsh int IP reset” from an elevated Command Prompt.
Note: The following registry keys’ contents will be automatically reset by this CMD command:
SYSTEM\CurrentControlSet\Services\Tcpip\Parameters\
SYSTEM\CurrentControlSet\Services\DHCP\Parameters\
Other users who have used this approach successfully report that when the CMD command was executed and the connection was reset, the ethernet connection, at last, became steady.
To reset the TCPIP and DHCP settings on Windows 11 or Windows 11 using an elevated Command Prompt, follow the steps below:
- To bring up the Run dialog box, press Windows key + R. To open an elevated Command Prompt, put “cmd” into the text box and hit Ctrl + Shift + Enter.
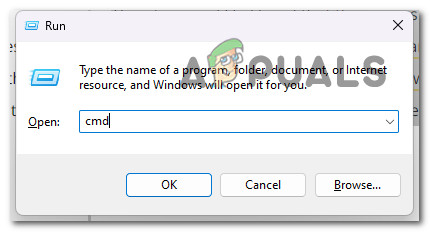
Open a CMD command - To allow admin access, select Yes when prompted by User Account Control (UAC).
- To successfully reset the TCPIP and DHCP settings connected to your current network connection, enter the following command into the elevated Command Prompt and press Enter.
netsh int ip reset c:\resetlog.txt
Important: Note that the aforementioned command assumes that your Windows partition is located on the C: disk. Change the partition letter if your arrangement is different.
- Once the command has been properly executed, restart your computer and check to see if the Wi-Fi connection is now steady.
If the problem is still not fixed, move down to the next method below.
13. Install pending Windows updates
Windows update may be the cause of this issue if you haven’t updated your Windows build in a while.
Open the Windows Update component and install each pending Windows update until your system is up to date to resolve this problem.
Before attempting any of the other possible options below, install all pending updates first and see if the problem goes away on its own.
The actions mentioned below should resolve the problem if it results from a known fault that Microsoft has previously corrected because the company has already offered a fix for each version of Windows 11 in question. (as well as the N version).
Follow these procedures to install every single forthcoming Windows update:
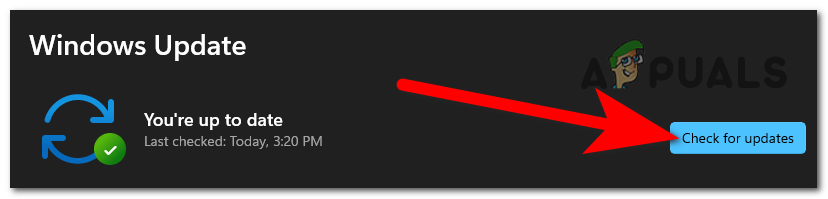
- Windows Update can be started more quickly by using the Run dialog box. Press Windows + R on your keyboard at the same time to do this. After you do this, the Run dialog box will show up.
- Next, enter the text “ms-settings:windowsupdate” in the box. The Windows Update area of the Settings app will then be displayed.
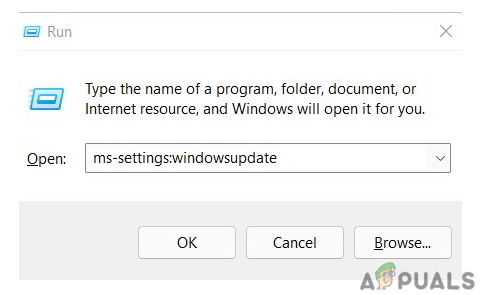
Access the Windows Update menu Note: If you haven’t changed the UAC settings, you can receive a prompt asking for your permission to continue. Clicking Yes will indicate your agreement with this.
- Select Check for Updates from the option on the right after launching the Windows Update pane.
Check for updates - Select Install Now to start a local installation after the update has finished downloading.
- Check to see if the problem has been fixed by restarting your computer.


