Fix: Error Code 0x00001338 in COD: Modern Warfare 2
There are several factors that can lead to the 0x00001338 Error in Modern Warfare 2, such as missing/corrupted game files, in-game character skin issues, corrupted Battle.net Cache, outdated GPU drivers, etc. This error can be pretty easy to fix, as it has many confirmed fixes.

This error usually occurs when Modern Warfare 2 starts up, preventing the game from launching. But this error can also occur while the game is open and suddenly crash the game. To fix this error, the first step is to determine what exactly its root cause is.
Below, we’ve written all possible reasons why you could be experiencing the 0x00001338 error in Modern Warfare 2:
- In-Game Skins: The character skins in Modern Warfare 2 are bugged at the moment, as they are causing the players’ game to crash with the error code 0x0001338 when they equip them.
- Modern Warfare 2 Documents Folder: The Modern Warfare 2 folder, which is stored in your Windows Documents, may have become corrupted, which could explain why you’re facing the error.
- Battle.net Cache: The Cache folder of the Battle.net program installed on your PC can be one of the main causes of this error code, as this Cache folder tends to get corrupted over time.
- Missing/Corrupted Game Files: Modern Warfare 2’s game files may have become corrupted, or some files may not have been installed during the download process. These missing or corrupted files can lead to many unique errors in MW2.
- Lack of Administrative Privileges: If Modern Warfare 2 is not running as an administrator, it will lack the privileges required to execute necessary commands and use DLL files. These missing privileges can cause many types of errors.
- Windows Fullscreen Optimizations: The Windows Fullscreen Optimizations feature is infamous for causing crashing issues in various games. If Modern Warfare 2 is running with this feature enabled, it could be the root cause of the crashing error.
- Outdated Windows: Modern Warfare 2 is only compatible with the latest version of Windows. If you’re using an outdated version of Windows, it is likely that the game keeps giving you the error code.
- DirectX 12: Modern Warfare 2 seems to encounter some performance issues when it’s run on the DirectX 12 API. These performance issues include lag, stutters, and crashes.
- Too Many Background Processes: If you have too many unnecessary processes active in the background while playing Modern Warfare 2, the game will not have enough system resources to run properly.
- Overlay Interference: The overlays of apps like NVIDIA GeForce Experience, Steam, and Xbox Game Bar can conflict with Modern Warfare 2 and lead to many errors.
- Windows Firewall or Antivirus Conflict: The Antivirus program installed on your PC and/or Windows Firewall could be blocking Modern Warfare 2’s files and stopping the game from launching.
- Outdated GPU Drivers: To run Modern Warfare 2 without any issues, you’ll need to upgrade your GPU drivers to the latest version available.
- Outdated Microsoft Visual C++ Redistributable: If you have a very old version of the Microsoft Visual C++ Redistributable compiler installed on your PC, it could be why this error keeps occurring.
1. Unequip Operator Skins
Players who pre-ordered the Vault Edition of Modern Warfare 2 will have the Red Team 141 Operator skins in their inventory. If you were one of these players and have these skins equipped for your Operators in the game, they could be the leading cause of the 0x00001338 error code.
There’s an issue with the in-game skins in Modern Warfare 2, so you should unequip all Operator skins before you try any other troubleshooting methods. This has a high chance of fixing this error code.
To unequip a skin, head to the home screen of Modern Warfare 2 and navigate to the Operators tab. In the Operators tab, select the Operators with a skin equipped on them, then press the Customize button. In the Customization menu, there will be an option to revert the Operators back to their default skins.
After each Operator has been reverted back to their default skin, relaunch Modern Warfare 2 and check if the error still occurs. If it does, move on to the next solution we’ve listed below.
2. Delete Modern Warfare 2 Players Folder
When you install Modern Warfare 2 on your system, it creates a folder in your system that stores certain information about the game, such as player data. It could be because the Modern Warfare 2 Documents folder has become corrupted and is conflicting with the game.
To fix this issue, delete the player’s folder from your Documents. This may sound risky, but it is entirely safe as the game will simply create another folder when you relaunch it, and the player data information will be restored automatically.
To delete the Modern Warfare 2 Documents folder, follow the steps we’ve written below:
- Press the Windows Key to open the Start menu.
- Type Documents, and press enter.
- In the Documents menu, look for a folder named “Modern Warfare 2“.
- Right-click the Modern Warfare 2 folder.
- Select the Delete option.
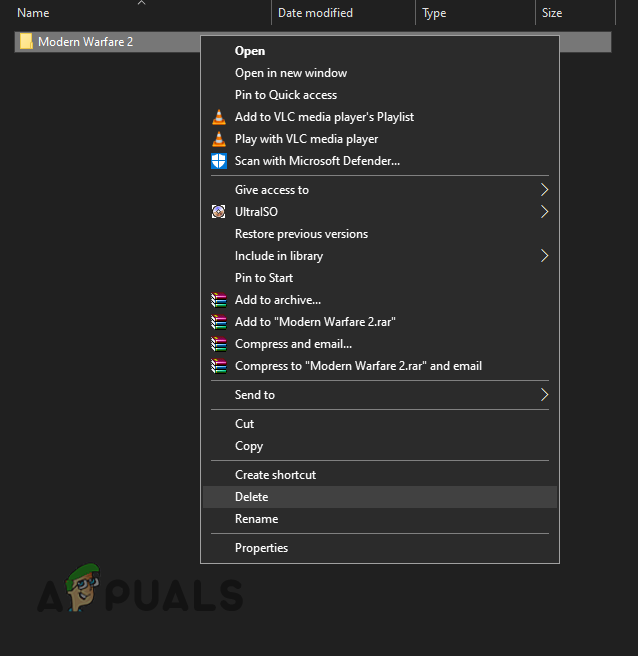
Deleting the Modern Warfare 2 Documents folder
After deleting the Modern Warfare 2 folder, restart your PC. After your PC boots up, launch Modern Warfare 2. The game should now launch without any errors. But if you’re still experiencing the error, continue with the next solution listed below.
3. Empty the Battle.net Cache
If you’re playing Modern Warfare 2 using the Battle.net launcher, the next best solution for the 0x00001338 error issue is to delete the Battle.net Cache.
The Battle.net Cache folder stores helpful information that the Battle.net launcher needs regularly. This folder allows the launcher to access this information quickly, allowing for much faster load times.
However, as you keep using the Battle.net Launcher, the Cache folder stores more and more data. And over time, this data can become outdated or even corrupted. This outdated/corrupted data leads to several issues with the launcher, resulting in performance errors and game crashes.
Therefore, a popular fix for performance errors and game crashes in Call of Duty is to empty the Cache folder in the drive. This will have no negative effects on the Battle.net launcher or the associated games, as the data stored in the Cache folder will be recovered automatically.
To empty the Battle.net Cache folder, follow these steps:
- Close the Battle.net launcher and all games associated with it.
- Press Windows Key + X simultaneously, and click on Task Manager.
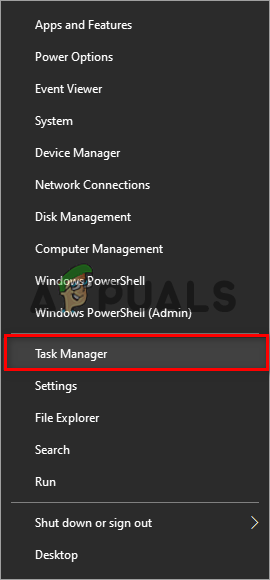
Opening Task Manager - In the Processes tab of Task Manager, look for processes named “agent.exe” and “Blizzard Update Agent.”
- If you can find these processes, left-click on them and then select the End Task option at the window’s bottom-right corner.
- Close Task Manager.
- Open the Run dialogue box by pressing Windows Key + R simultaneously.
- Type %appdata% and press enter.

Opening the AppData folder - Open the Blizzard Entertainment Folder
- Open the Battle.net subfolder.
- Open the Cache folder, right-click all files/folders inside it, and click on the Delete option.
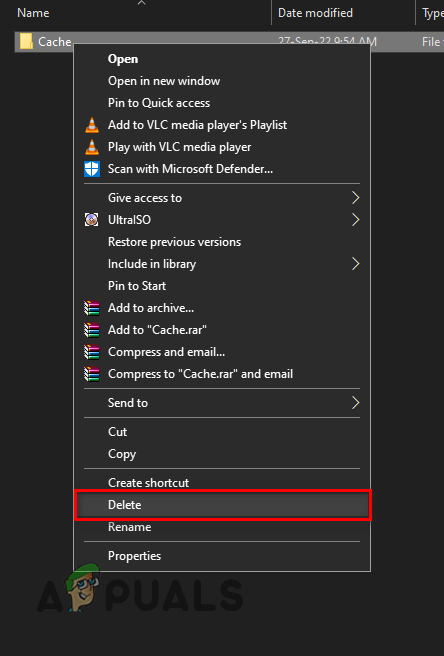
Deleting the Battle.net Cache folder
After emptying the Cache folder, open the Battle.net launcher again and relaunch Modern Warfare 2.
4. Repair Game Files
While Modern Warfare 2 was being downloaded onto your system, your internet connection may have suffered from some issues, such as an unstable download speed or packet loss, or the connection may have temporarily disconnected during the download process.
Due to these internet connection problems, some of Modern Warfare 2’s game files may have been downloaded onto your system improperly (corrupted game files), or not completely failed to download.
These missing/corrupted game files lead to all types of issues with the game, so they can be why you’re experiencing the error. Fortunately, the game files can be easily repaired through the game launcher.
If you’re playing Modern Warfare 2 using the Battle.net launcher, follow the below steps to repair its game files:
- Open the Battle.net launcher.
- Navigate to the Games section.
- Click on Modern Warfare 2 (Warzone).
- Click on the gear icon beside the Play button.
- Select the “Scan and Repair” option.
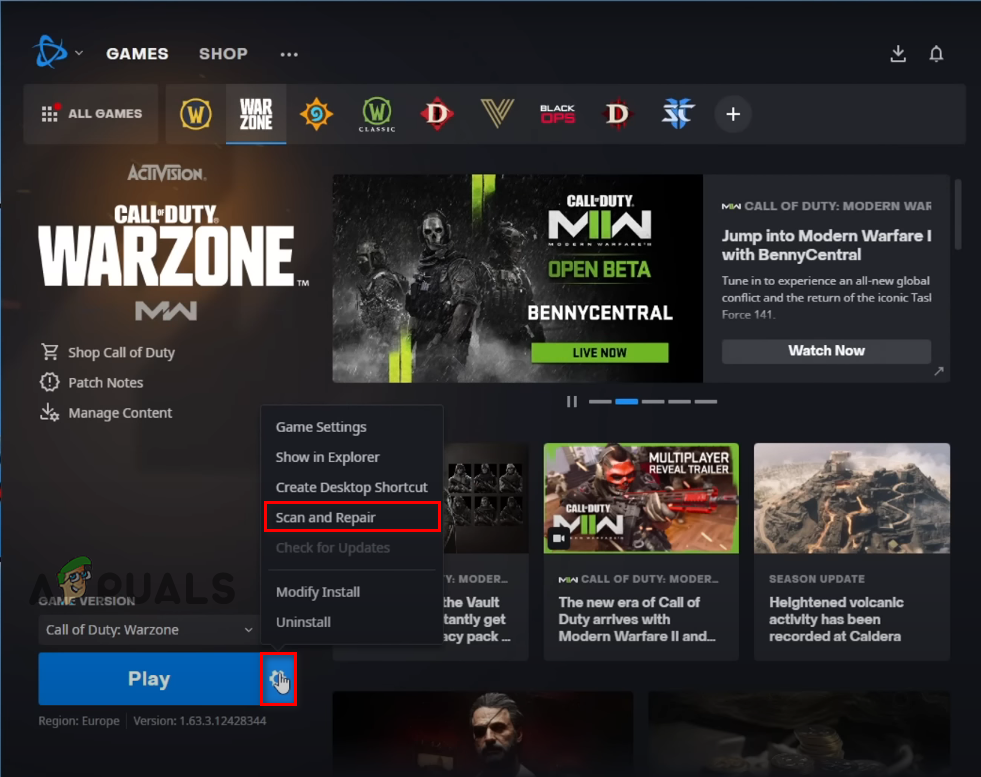
Repairing Modern Warfare 2 game files through the Battle.net launcher
If you’re playing Modern Warfare 2 using Steam, follow the below steps to repair its game files:
- Open Steam.
- Navigate to your Steam Library.
- Right-click Modern Warfare 2 in the list of games.
- Select Properties.
- Navigate to the Local Files tab.
- Click on “Verify integrity of game files…”
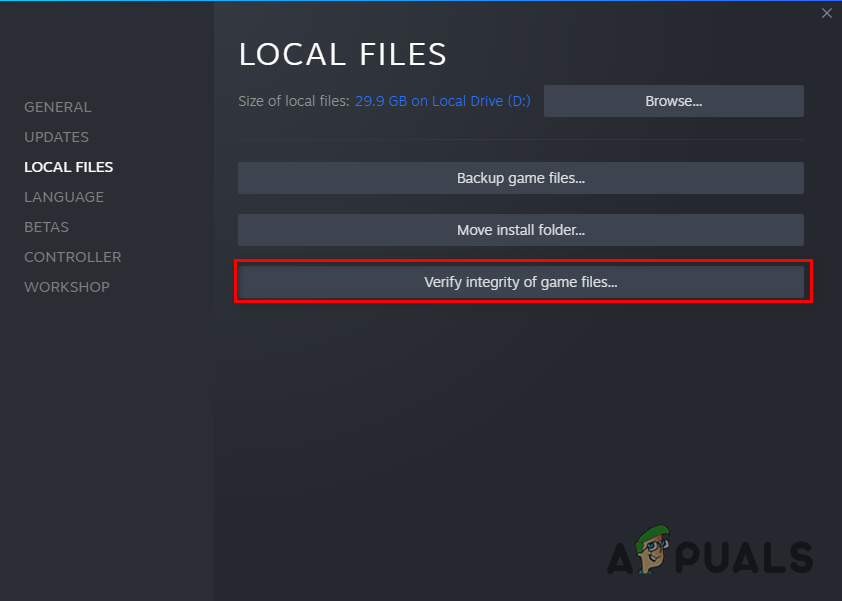
Repairing the Modern Warfare 2 game files through Steam
The game file repair process will be finished within a few minutes. And after it finishes, the launcher will inform you if it located (and repaired) any missing/corrupted files. If the launcher did not find anything wrong with MW2’s game files, it’ll show a message saying, “All files successfully validated.”
If this message appears, MW2’s game files are fine, meaning the cause of the issue is something else. So you should try our next solution to solve the error.
5. Run Modern Warfare 2 as Administrator
Games like Modern Warfare 2 require administrative privileges to run properly, as they need to perform specific commands and access important DLL files. If the game is not given administrative rights, it will not be able to do so, leading to many errors. If Modern Warfare 2 keeps crashing at startup, a lack of administrative privileges is likely why that issue is happening.
To grant Modern Warfare 2 administrator rights, you must run the game as an administrator. For this, you must first find the executable game file.
If you know where the game is installed, simply open the folder, and you will find the game’s .exe file in there. But if you’re unsure where the game’s install folder is, you can use the game’s launcher to open its exact install location.
If you’re playing Modern Warfare 2 using the Battle.net launcher, follow the below steps to find out where it’s installed:
- Open the Battle.net launcher.
- Click on the Battle.net icon in the top-left corner of the window.
- Click on Settings.
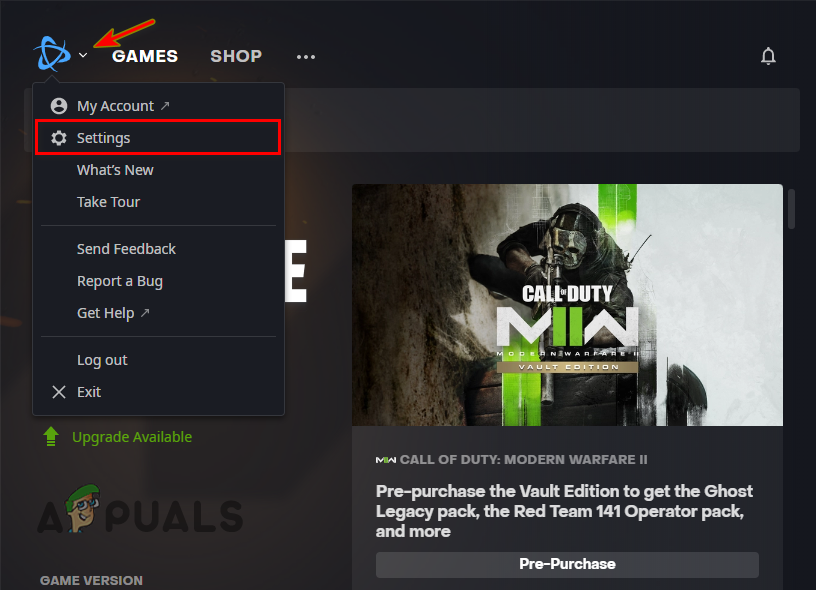
Opening Battle.net Settings - Navigate to the Downloads section.
- Click on the Scan for Games option.
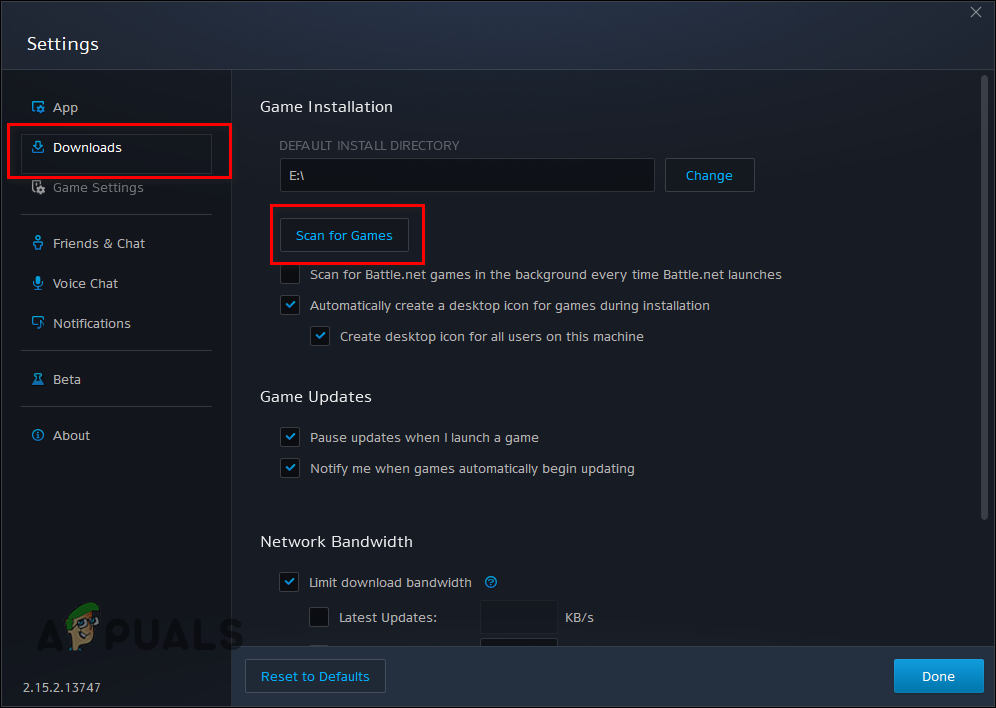
Opening Modern Warfare 2’s install location through Battle.net
When you click on the Scan for Games option, the launcher will show you the exact install location of all associated games you have installed on your PC.
If you’re playing Modern Warfare 2 using Steam, follow the below steps to find out where it’s installed:
- Open Steam.
- Head to your Steam Library.
- Right-click Modern Warfare 2 in the list of games.
- Click on the Manage option.
- Click on “Browse local files.”
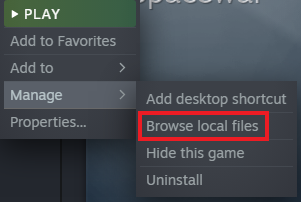
Opening Modern Warfare 2’s install location through Steam
This option will open up Modern Warfare 2’s install folder in File Explorer. Now that you know where Modern Warfare 2 is installed look for the .exe file. Once you’ve found this file, right-click it and select Properties.
In the Properties window, navigate to the Compatibility section and drop a checkmark beside “Run as Administrator.” This option will ensure that Modern Warfare 2 always launches with administrator rights.
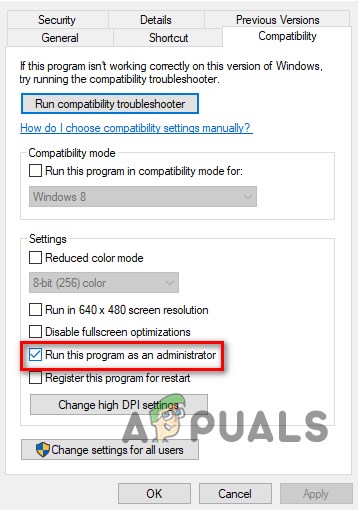
After checking off the Run as Administrator option, you should also drop a checkmark beside “Windows Fullscreen Optimizations.” This Windows feature is known to cause crashes and other performance issues in many games, so it should never be enabled.
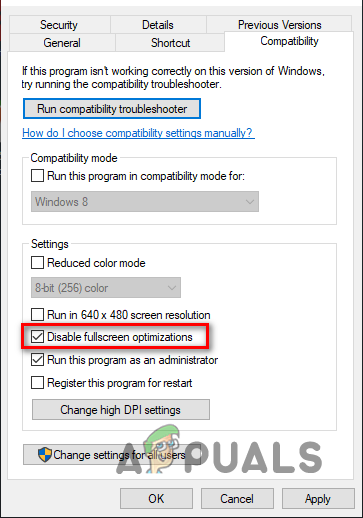
This feature aims to increase the performance of a game running in fullscreen mode by running it in a mixture of fullscreen mode and windowed mode instead. However, it negatively affects the performance of most games, so it should be disabled.
After selecting the “Disable Windows Fullscreen Optimizations” and “Run as Administrator” options, click Apply, then OK. Relaunch Modern Warfare 2 now, and the game should successfully launch without any issues.
6. Update Windows
According to the official system requirements of Modern Warfare 2, the game is only compatible with the latest versions of Windows 10 and 11. Many users who were unaware of this system requirements have successfully resolved the issue by simply updating their Windows to the latest version
Therefore, if you’re using an outdated version of Windows, it is likely the root cause of the 0x00001338 error code issue.
You should always keep your Windows updated to the latest version, as it eliminates any compatibility issues with new applications, updates Network Drivers to fix network problems, and improves the security of your system.
The constant updates can get very annoying, but it’s not necessary to update Windows immediately each time an update is released. You can delay the update if it pops up inconveniently, but ensure that you don’t delay it too long.
To update your Windows to the latest version, follow the steps we’ve written below:
- Press Windows Key to open the Start menu.
- Type Settings and press enter.
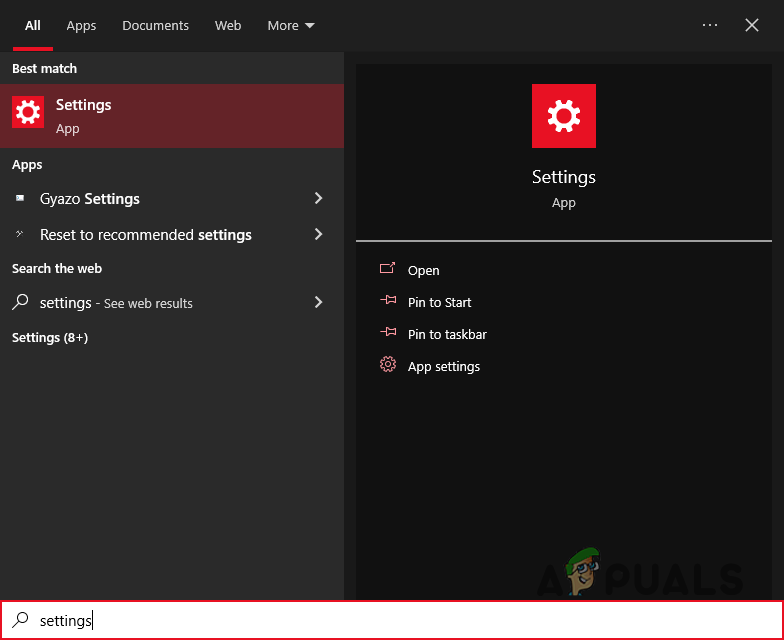
Opening Settings - Click on the Updates & Security option.
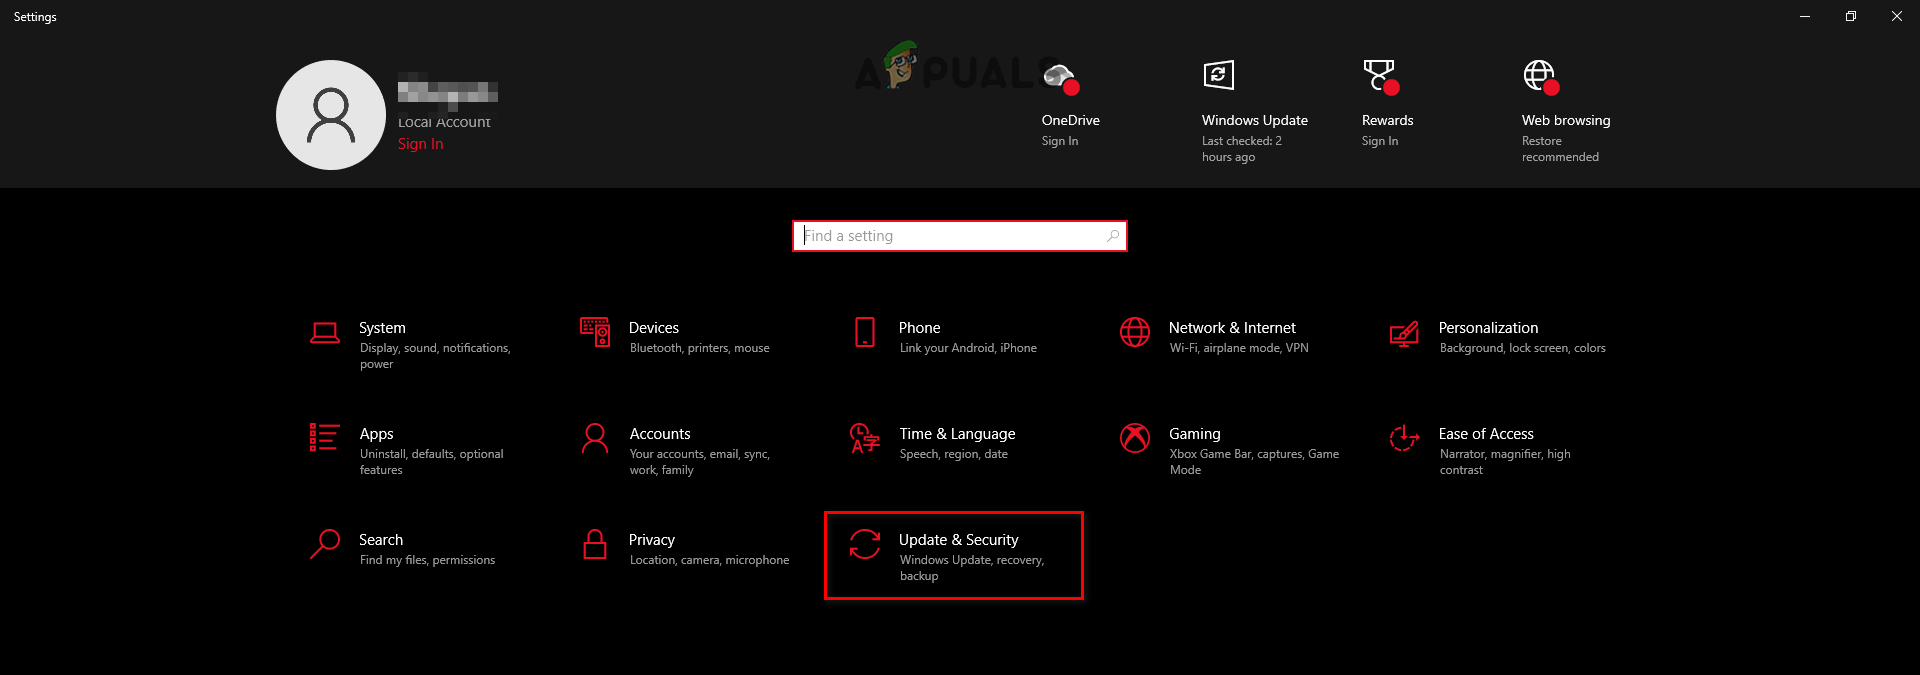
Opening the Updates and Security Menu - Click on the Check for Updates button.
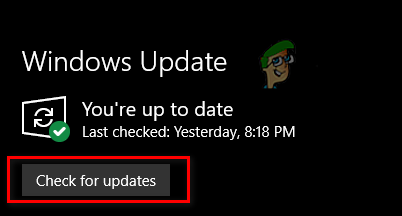
Updating Windows
The Check for Updates option will check if your Windows is updated to the latest version. If it isn’t, it will give you to option to do so. Once the update has finished installing, your PC will restart.
After your system boots up, launch Modern Warfare 2 and check if the game is still crashing. If it is, continue with the next solution listed below.
If you’re encountering any errors when trying to update Windows, check out our guide to solve your issue.
7. Install DirectX 12
Another possible solution to the 0x00001338 error in Modern Warfare 2 is to install DirectX 12. DirectX is an API that is used by games to be able to utilize your hardware to its fullest potential.
Modern Warfare 2’s official system requirements state that the game requires DirectX 12 to run properly. So if you only have DirectX 11 installed on your PC, it could explain why you keep encountering the error.
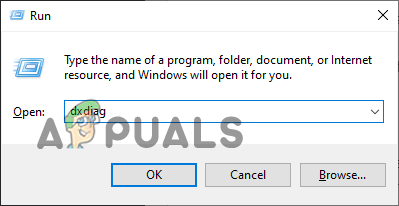
To check what DirectX you have installed on your PC, open the Run dialogue box by pressing Windows + X simultaneously, type dxdiag, and press enter.
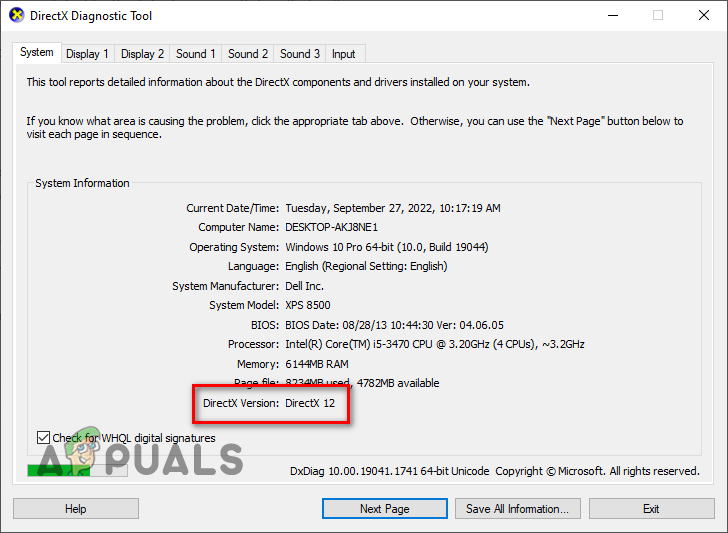
In the dxdiag window, the System tab will show you all the information regarding your PC. At the bottom of the specifications list, you’ll see what version of DirectX is installed in your system. If it says DirectX 12, skip to the next solution.
But if your DirectX version is 11, you must upgrade to DirectX 12. To do this, follow the steps written below:
- Open your browser and head to this website.
- Click on the Download button.
- After it finishes downloading, right-click the file and select the Run as administrator option.
- Click on “I accept the agreement.”
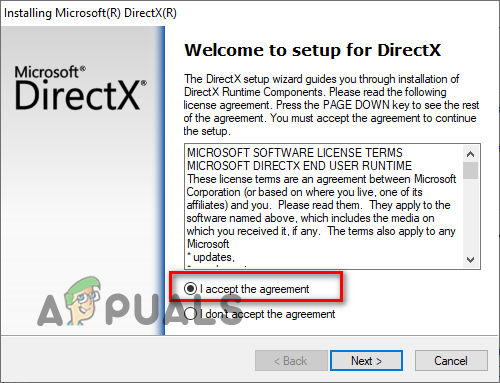
Accepting the DirectX Agreement - Click on Next.
- Remove the checkmark beside “Install the Bing Bar.”
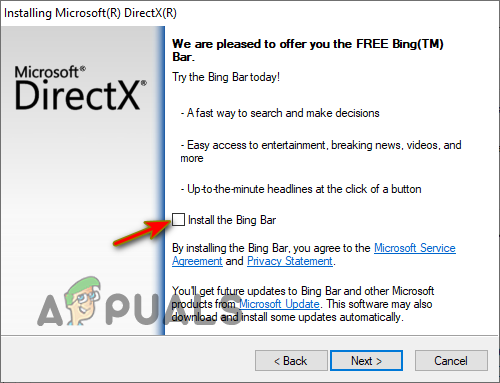
Do not install the Bing Bar - Click Next.
- Wait for the installation to finish.
- Click on Finish.
- Restart your PC.
After your PC restarts, the DirectX version of your system will be upgraded to DirectX 12. You should now be able to play Modern Warfare 2 without encountering any errors.
8. Close Non-Essential Processes Running in the Background
Modern Warfare 2 requires a lot of system power to run properly. While running the game, you must ensure that no non-essential program consumes your system’s resources.
If you leave too many unnecessary processes running in the background while playing Modern Warfare 2, the game will likely not have enough CPU, GPU, and/or RAM power to work as intended. If this happens, the game will encounter performance problems and other problems, such as the this error.
Note that the amount of background processes you can have running while playing Modern Warfare 2 entirely depends on your system’s hardware. If you have a high-end system, you can run a few programs in the background, such as Discord and Spotify. But if your PC is mid to low-end, you should ensure that no non-essential processes are active.
To close non-essential background processes, follow the steps we’ve written below:
- Press Windows Key + X at the same time.
- Select the Task Manager option from the list.
Opening Task Manager - In the list of processes, find those programs which are non-essential.
- Left-click on such programs and click on the “End Task” button at the bottom-right corner.

Closing Non-Essential Background Processes
Closing these non-essential processes will free up more RAM, CPU, and GPU power for Modern Warfare 2. This can help fix the error code and other performance issues.
9. Disable Overlays
Another common reason for errors like the Modern Warfare 2 0x00001338 error is app overlays. Many programs nowadays come with an overlay feature, which people can use to access app functions without maximising the actual app.
The overlays of apps like Steam, Discord, and NVIDIA Afterburner can be incredibly useful, but unfortunately, they tend to lead to game performance errors.
The overlays of these apps are not optimized for every program. Therefore, when you have these overlays active while using specific programs, they will conflict with the program and cause problems.
And also, if you’re using the overlay feature of several apps simultaneously, they will likely clash with each other and cause further issues. And on top of all this, overlays can use a noticeable amount of system resources. So if you have a mid to low-end PC, they will make your system lag a lot.
To ensure that no overlays on your system are causing any issues with Modern Warfare 2, you should simply disable them. The three most important overlays to disable are the NVIDIA GeForce Experience, Steam, and Xbox Game Bar overlays.
To turn off the NVIDIA GeForce Experience Overlay, follow the steps written below:
- Press Windows Key to open the Start menu.
- Type GeForce Experience, and press enter.
- Left-click on the gear icon beside your username (in the top-left corner).
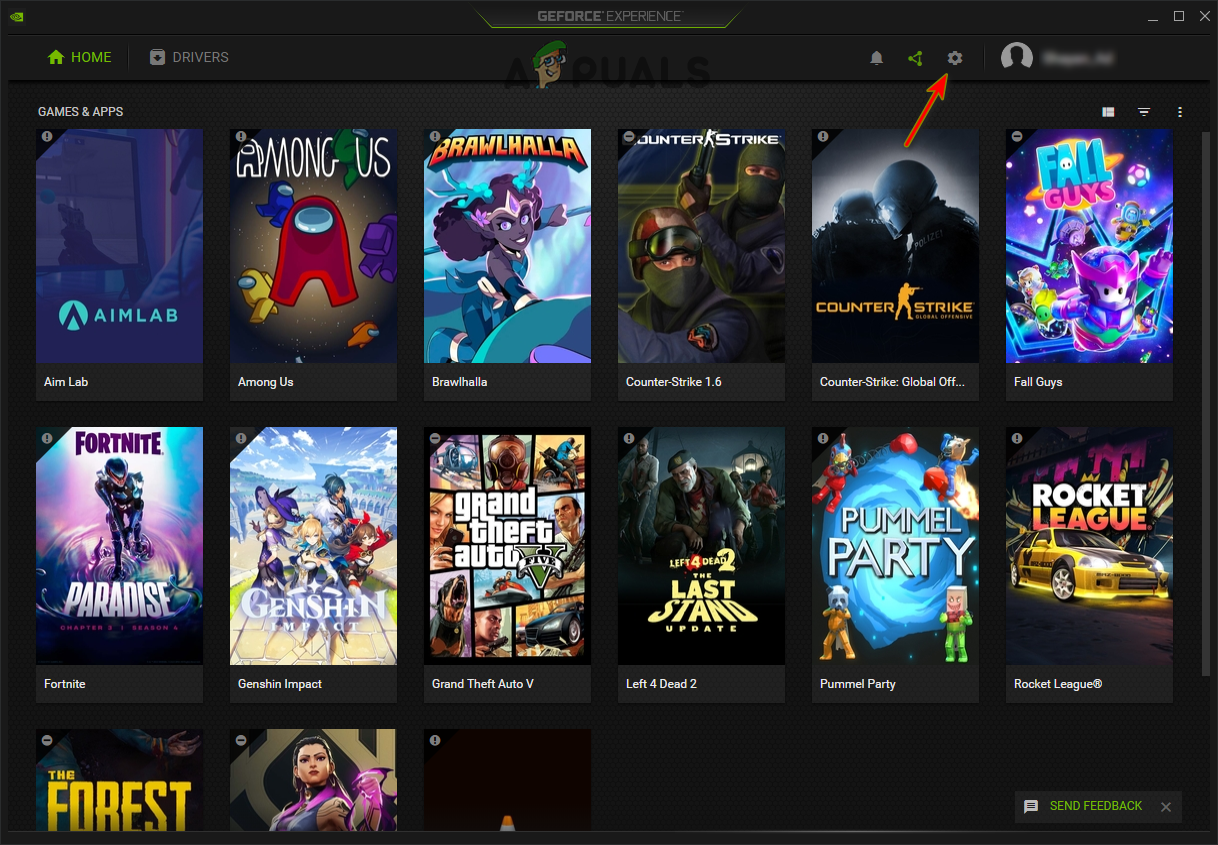
Opening NVIDIA GeForce Experience Settings - Disable the In-Game Overlay option.
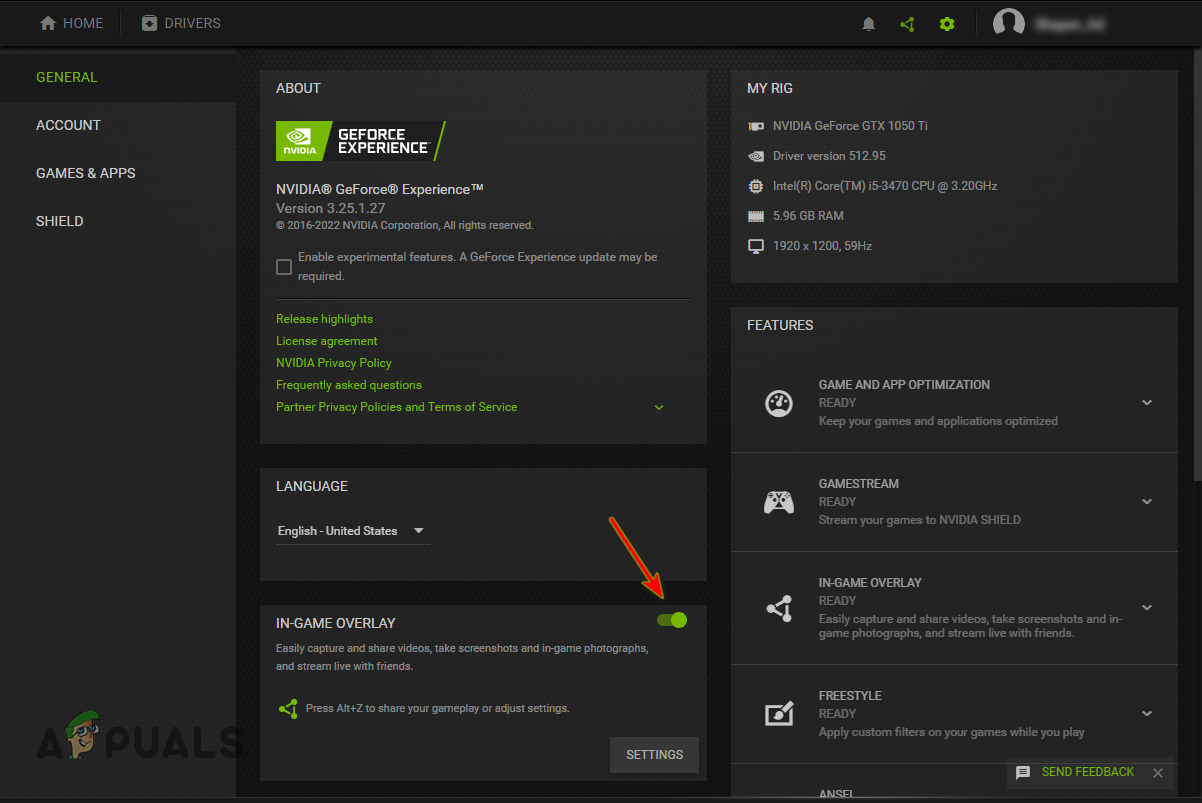
Disabling GeForce Experience In-Game Overlay
To turn off the Steam Overlay, follow the steps written below:
- Launch the Steam application.
- In the top-left corner, click the small “Steam” option.
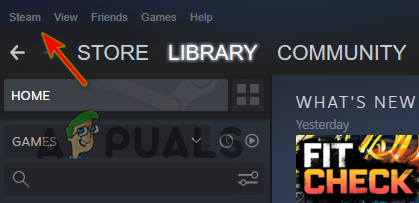
Opening Steam Settings - Click Settings.
- Navigate to the In-Game section.
- Get rid of the checkmark beside the option that says, “Enable the Steam Overlay while in-game.”
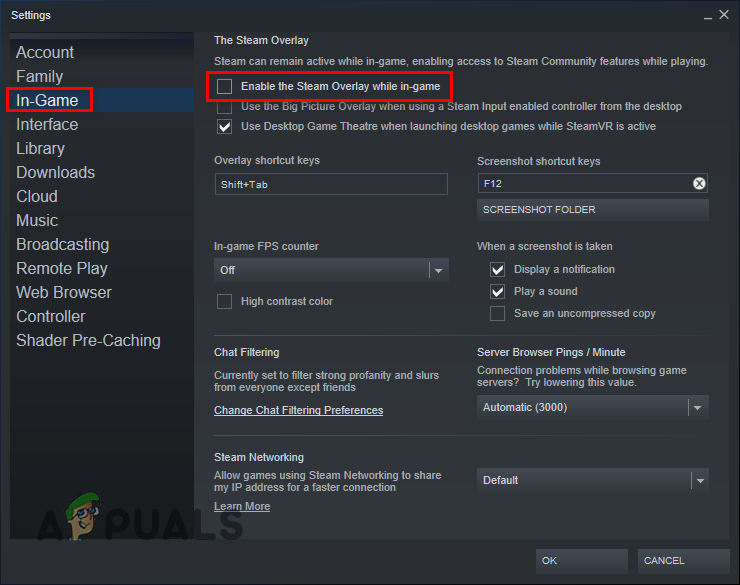
Disabling the Steam overlay
This will turn off the Steam Overlay for all Steam games. If you wish to turn off this overlay just for Modern Warfare 2, follow these steps instead:
- Open Steam.
- Head to your Steam Library.
- Right-click Modern Warfare 2 in the list of games.
- Select Properties.
- In the General section, get rid of the checkmark beside the option that says, “Enable the Steam Overlay while in-game.”
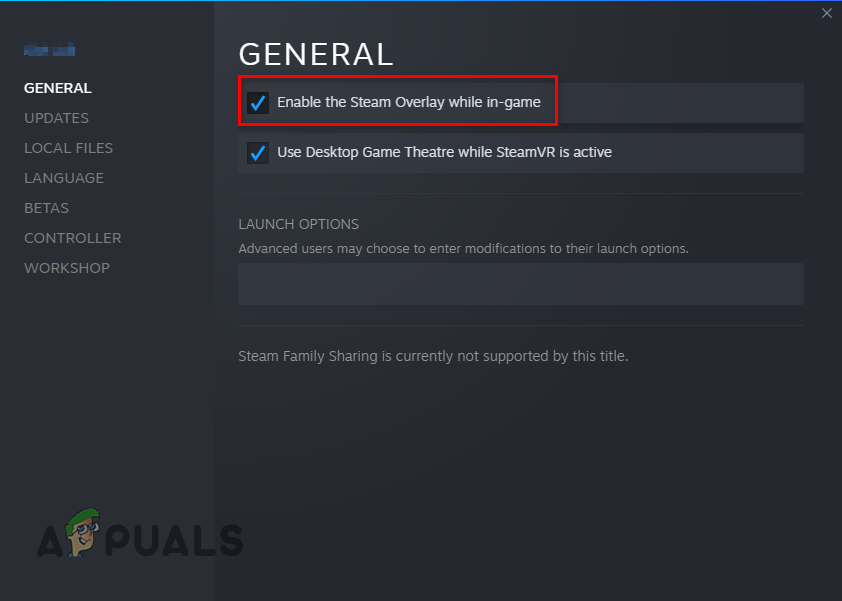
Disabling the Steam Overlay for Modern Warfare 2
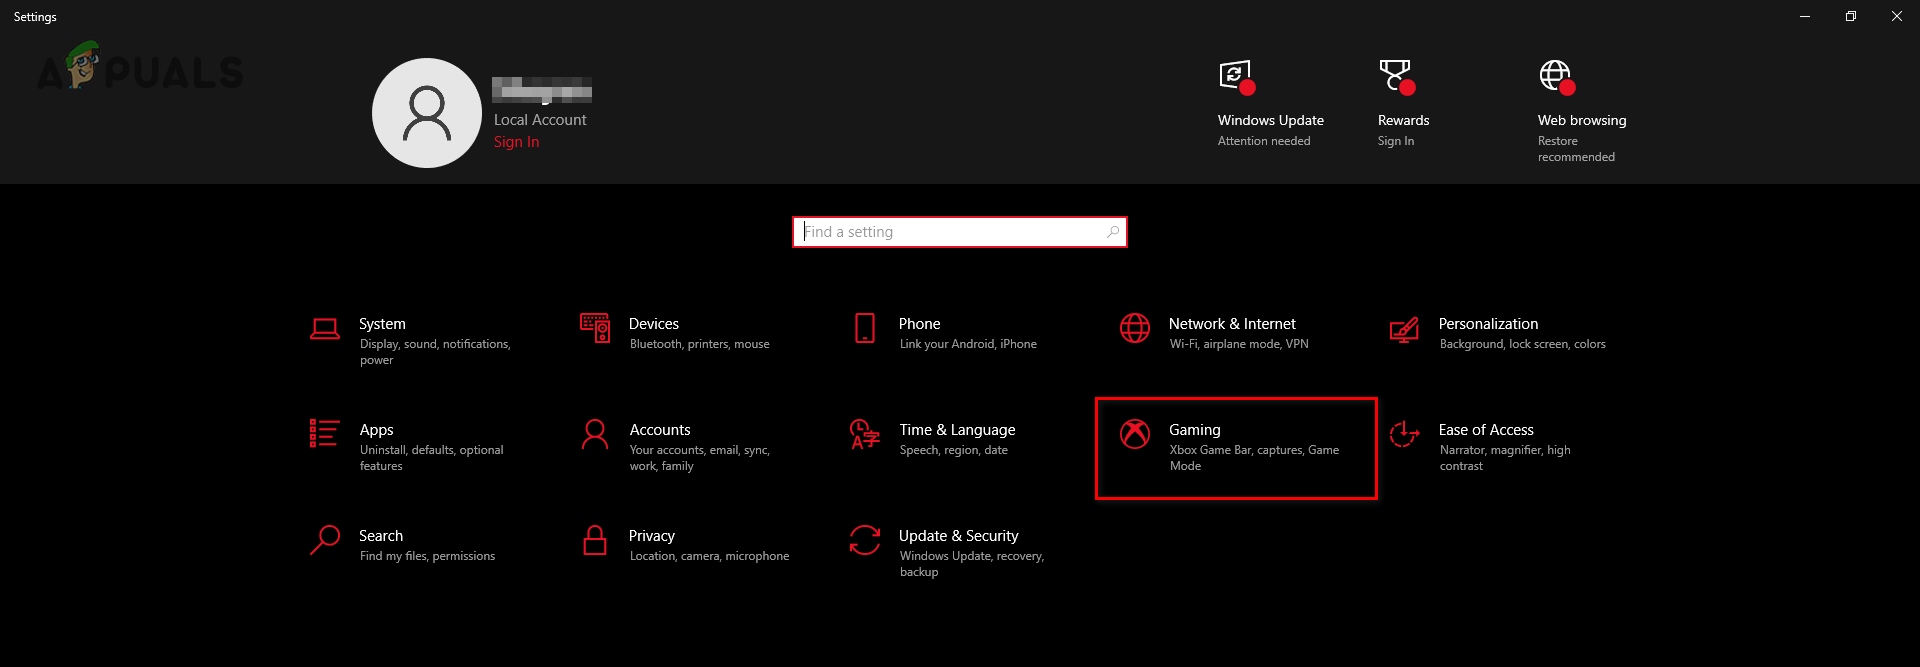
To turn off the overlay of the Xbox Game Bar feature of Windows, follow the steps written below:
- Press Windows Key to open the Start menu.
- Type Settings and press enter.
Opening Settings - Click on “Gaming” in the Settings menu.
Opening the Gaming Settings menu - Disable the Xbox Game Bar.
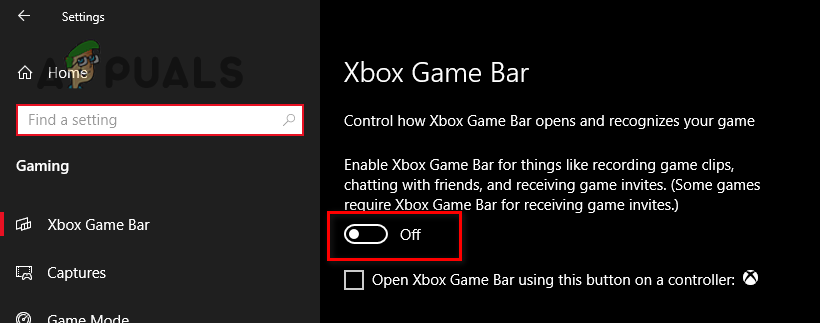
Disabling the Xbox Game Bar
Once you’ve disabled the overlays listed above, launch Modern Warfare 2 and check if it runs into any errors. If the error continues to occur, disable any other overlays that you have active, such as MSI Afterburner, before trying the next solution.
10. Temporarily Disable Antivirus
Any time a brand new game like Modern Warfare 2 comes out, the Antivirus programs we have installed on our system often see it as a threat to the PC, as they are not yet familiar with this new game. When this happens, the Antivirus program prevents the game from accessing read and write privileges.
The game needs these read and write privileges to function as intended. If the Antivirus software blocks the game from obtaining them, it can lead to many errors, such as the 0x00001338 error you’re currently experiencing.
Therefore, your Antivirus software could conflict with Modern Warfare 2 and directly cause the 0x00001338 error.
To fix this issue, you will need to disable your Antivirus program temporarily. There’s no need to uninstall or permanently disable the Antivirus. You just need to keep it turned off while playing Modern Warfare 2.
To temporarily disable your Antivirus software, follow these steps:
- Press the Windows Key on your keyboard to open the Start menu.
- Type Windows Security and enter.
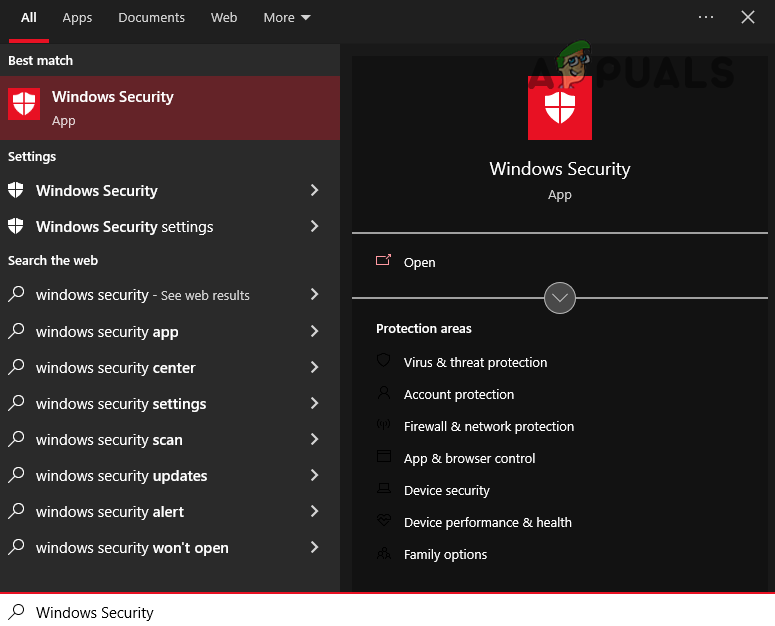
Opening Windows Security - Navigate to the Virus & Threat Protection section.
- Select the Open App option.
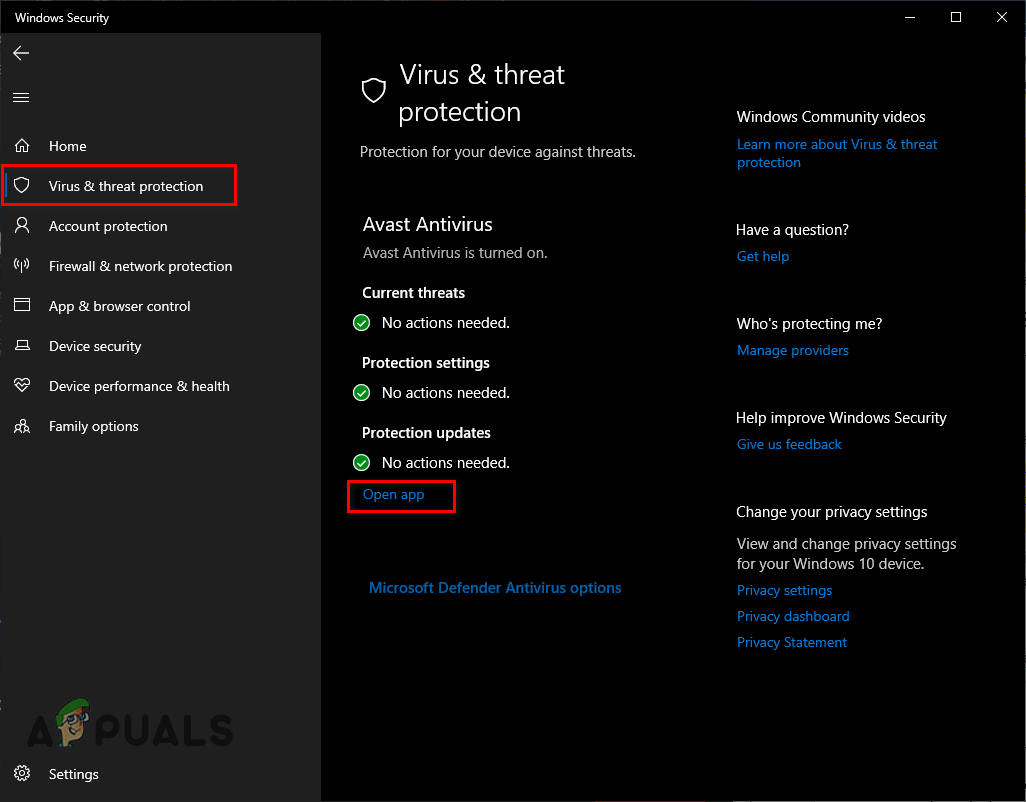
Temporarily disabling Antivirus
Upon clicking on the Open App option, your Antivirus program’s menu will appear on your screen. Go into the settings section of the menu, and you’ll see an option for temporarily disabling the Antivirus.
If you don’t see an option that allows you to temporarily disable the Antivirus, simply select the regular disable option. You can re-enable the Antivirus once you’re done playing Modern Warfare 2, so it can continue protecting your system.
11. Add Exception for Modern Warfare 2 in Windows Firewall
The Windows Firewall is a native feature of Windows which prevents any suspicious files/programs from running on your PC. Every time you download a new program, Windows Firewall examines it to see if it’s safe or not.
If the Firewall deems the program unsafe, it will block it from running. This can help save your PC from malware and viruses.
But Windows Firewall often deems trusted programs unsafe, blocking them from running on your PC, despite these programs being completely safe. It most commonly does this with games. When this happens, the games crash on startup and give different error codes, like the 0x00001338 error you’re currently experiencing.
Therefore, you must ensure that Modern Warfare 2 is not being blocked by Windows Firewall. You must add an exception for the game in the Windows Firewall menu.
To create a Windows Firewall exception for Modern Warfare 2, follow the steps we’ve listed below:
- Press the Windows Key on your keyboard to open the Start menu.
- Type Security and enter.
Opening Windows Security - Navigate to the Firewall & Network Protection section.
- Select the “Allow an app through firewall” option.
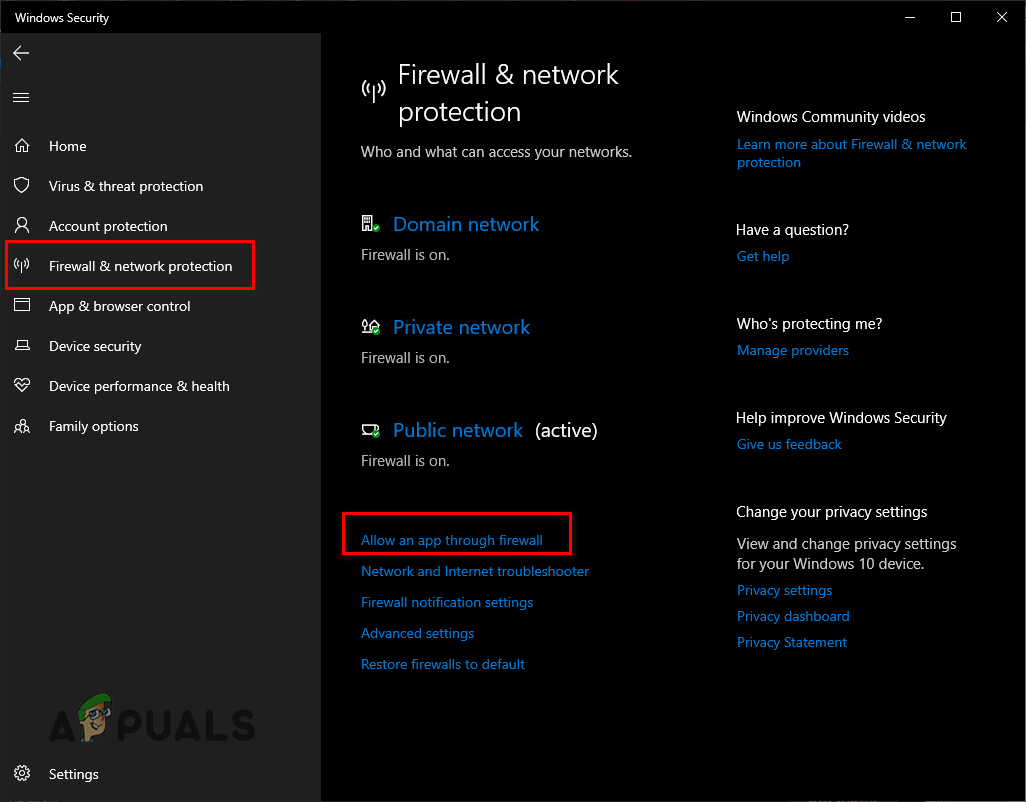
Opening Firewall Settings - In the Allowed Apps menu, press the “Change settings” option.
- Click the “Allow another app…” option at the bottom right.
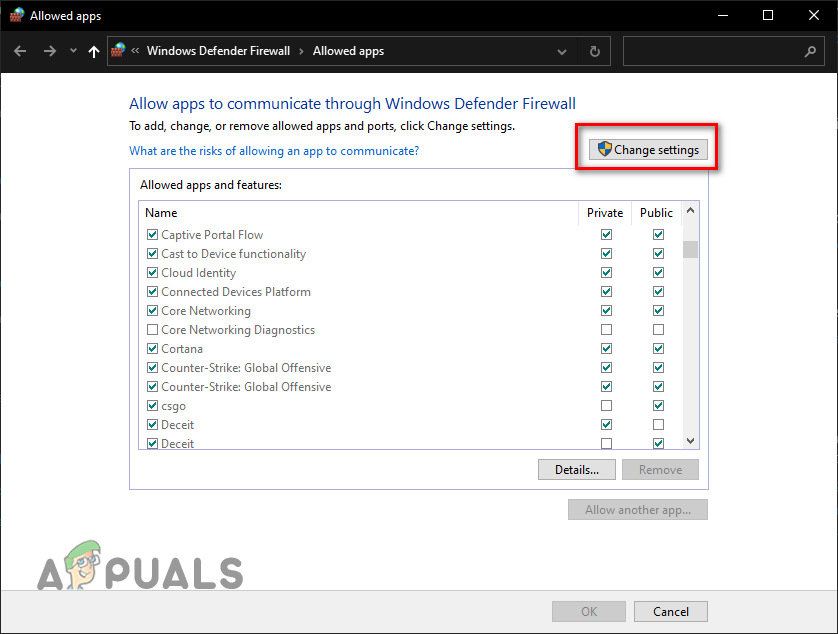
Allowing another app through Firewall - Locate the .exe file of Modern Warfare 2 using File Explorer and double-click on it.
- In the Allowed apps and features list, put a checkmark next to the Modern Warfare .exe file.
- Also, put a checkmark next to Steam/Battle.net launcher.
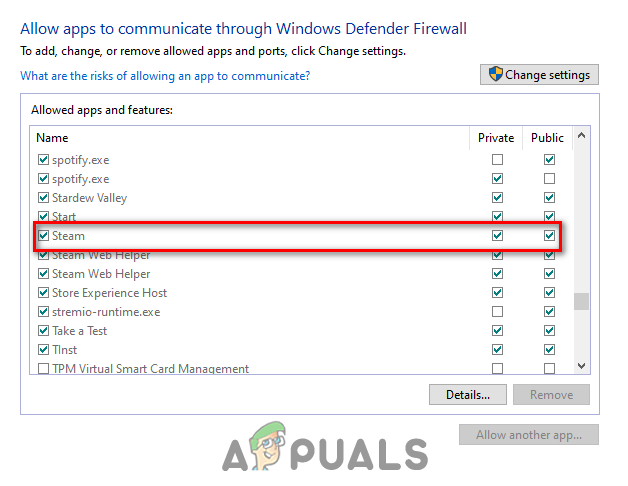
Adding Firewall Exception - Click OK.
This will add a Firewall exception for Modern Warfare 2 and its launcher. And now that these exceptions have been created, the Windows Firewall will stop blocking the game and/or its launcher.
12. Update Your GPU Drivers
To run the latest games like Modern Warfare 2 on your PC, you must keep your Graphics Card (GPU) drivers updated to the latest version. Every time a brand new AAA game like Modern Warfare 2 is released, your GPU’s manufacturer releases a new driver update designed to optimize your GPU for the new game.
Without these latest drivers, your GPU will likely suffer compatibility and/or performance problems. So if you’re using outdated GPU drivers, it is likely a major cause of the 0x00001338 error in Modern Warfare 2.
And even if you have the latest drivers installed, there could be some sort of corruption in the drivers. Therefore, it’s a good idea to do a fresh driver install to ensure that your drivers aren’t the cause of the problem you’re facing.
So the next solution for the 0x00001338 error is to simply perform a fresh install of the latest drivers for your Graphics Card.
To install the new GPU drivers, you need to know what GPU you have installed on your system. If you don’t know that, don’t be alarmed, as you can easily find this out by following the steps we’ve listed below:
- Press Windows Key + X (at the same time) and click Device Manager.
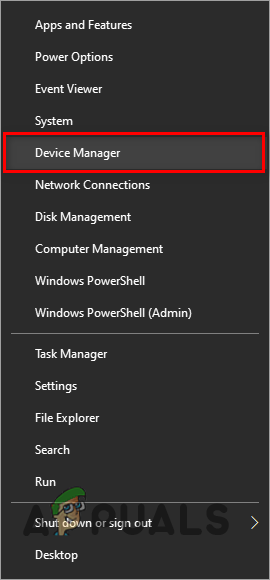
Opening Device Manager - Click the arrow symbol next to Display Adapters to expand it.
- Note down the name of the Graphics Card that appears under Display Adapters.
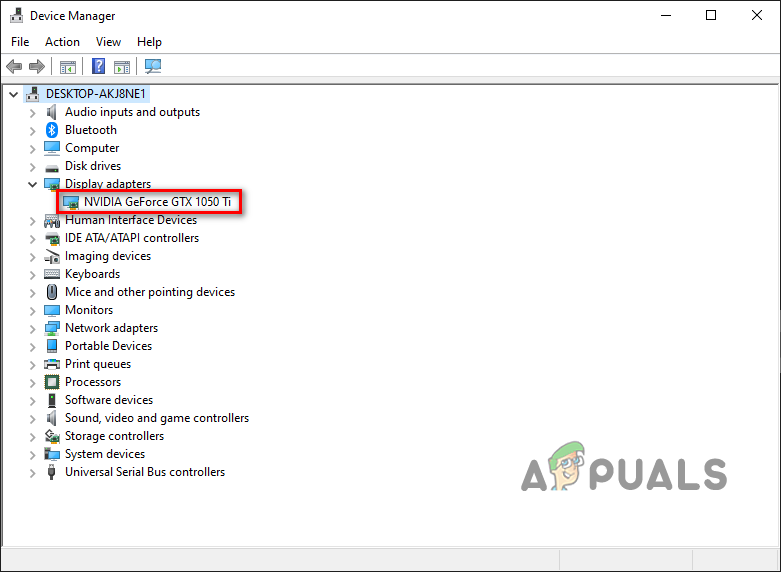
Identifying GPU model using Device Manager
Following the steps listed above, you can find your GPU’s brand and model within a few clicks. However, if you follow the steps above and the device that shows up under Display Adapters is named “Microsoft Basic Display Adapter”, there’s a problem with your current GPU drivers.
Device Manager shows your GPU’s name as such if your GPU drivers are either corrupted or not installed at all. So if you follow the steps listed above and see “Microsoft Basic Display Adapter”, you’ll need to follow the steps listed below to find your GPU’s actual brand and model.
- Press Windows Key + X (at the same time) and click Device Manager.
Opening Device Manager - Click the arrow symbol next to Display Adapters to expand it.
- Right-click Microsoft Basic Display Adapters.
- Select Properties.
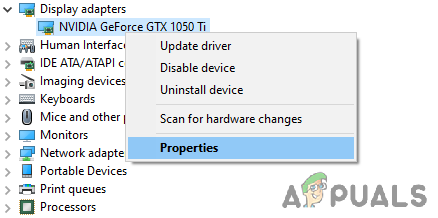
Selecting GPU Properties - Click on the Details tab.
- Click on the drop-down list under “Property” to expand all the options.
- Select the Hardware Ids option.

Selecting Hardware Ids - Copy the first line of text present under Value by right-clicking on it.
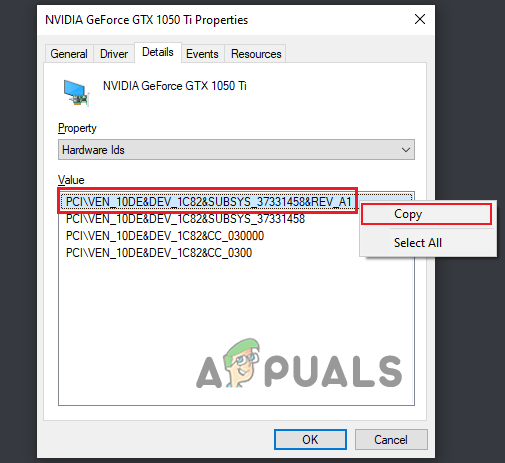
Copying Hardware Id - Launch your browser.
- Paste the copied text into the browser’s search bar and enter.
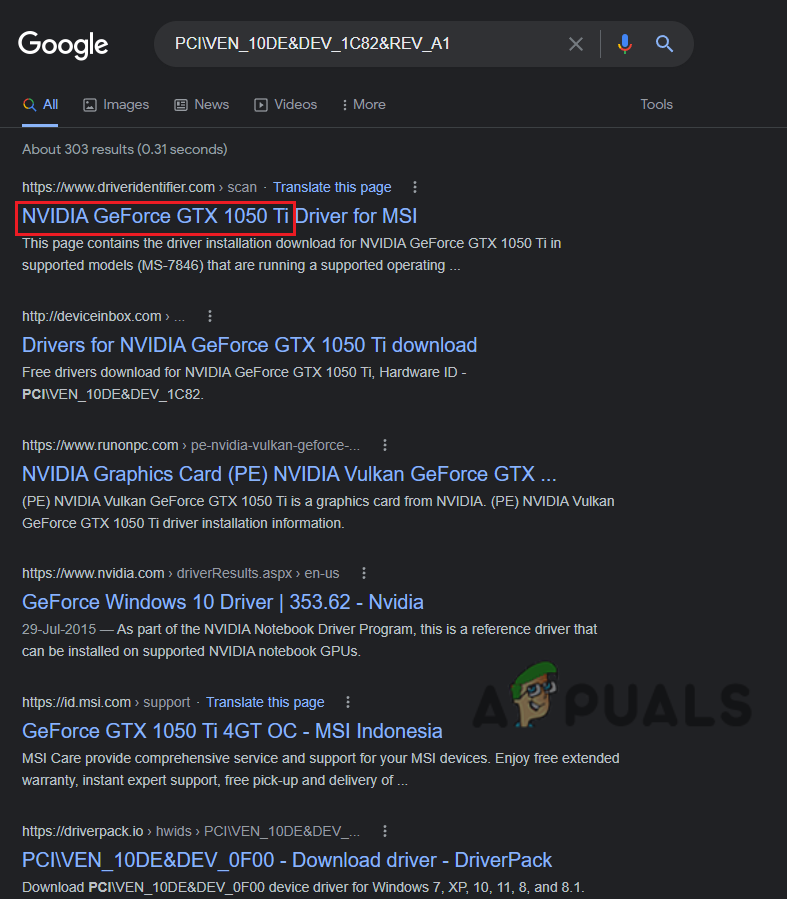
Finding the name of GPU through Google
After pressing enter, look at the top few results on Google. These results should have your GPU’s name written in their title. This will allow you to easily figure out the GPU you have installed, even though the drivers are corrupt/missing.
The next step is to uninstall the GPU drivers that you currently have in your system. This step is crucial in this process because it ensures that there will be no conflict between the current drivers and the new ones that you’ll be installing soon.
We will be using a third-party application called Display Driver Uninstaller (DDU) to uninstall the GPU drivers that are currently present in your system. This trusted application will ensure that the drivers are completely uninstalled and that no single driver file is left behind.
If we used the native Windows driver uninstaller option or the driver uninstaller option in NVIDIA GeForce Experience/AMD Radeon, some residue files would probably be left behind. These residue files can cause many problems with the new drivers, so you should never uninstall the drivers in this way.
Head to this website, download DDU, and install it on your PC. Before you open DDU and uninstall the drivers, you must start Windows in Safe Mode. If Windows isn’t in Safe Mode, some application or driver would interfere with the driver installation process and cause corruption.
But if you start Windows in Safe Mode, all unnecessary applications and drivers will be disabled. This will allow DDU to uninstall your GPU drivers without encountering any errors.
To start Windows in Safe Mode, follow the steps we’ve listed below:
- Press the Windows Key, and right-click the Power button at the bottom-left corner of the Start menu.
- Hold the Shift Key on your keyboard and select the “Restart” option.
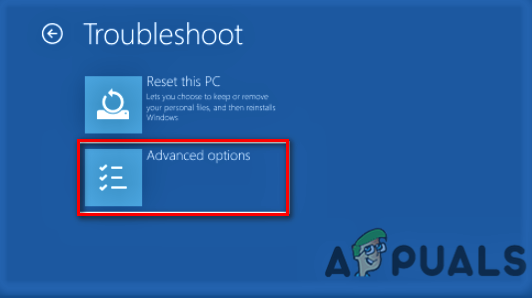
- After the system restarts, click on Troubleshoot.
- Go into Advanced options.
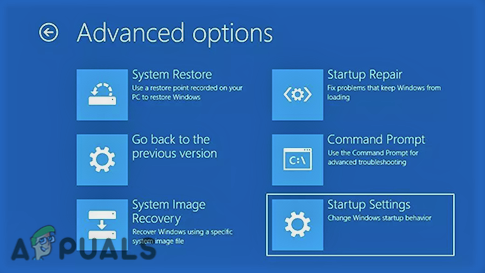
Selecting Advanced Options - Go into Startup Settings and wait for the system to restart once more.
Selecting Startup Settings - If you have Windows 10, press F5 to start Windows in Safe Mode.
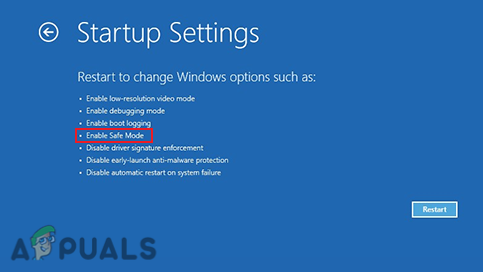
Booting system into Safe Mode on Windows 10 - If you have Windows 11, press F4 to start Windows in Safe Mode.
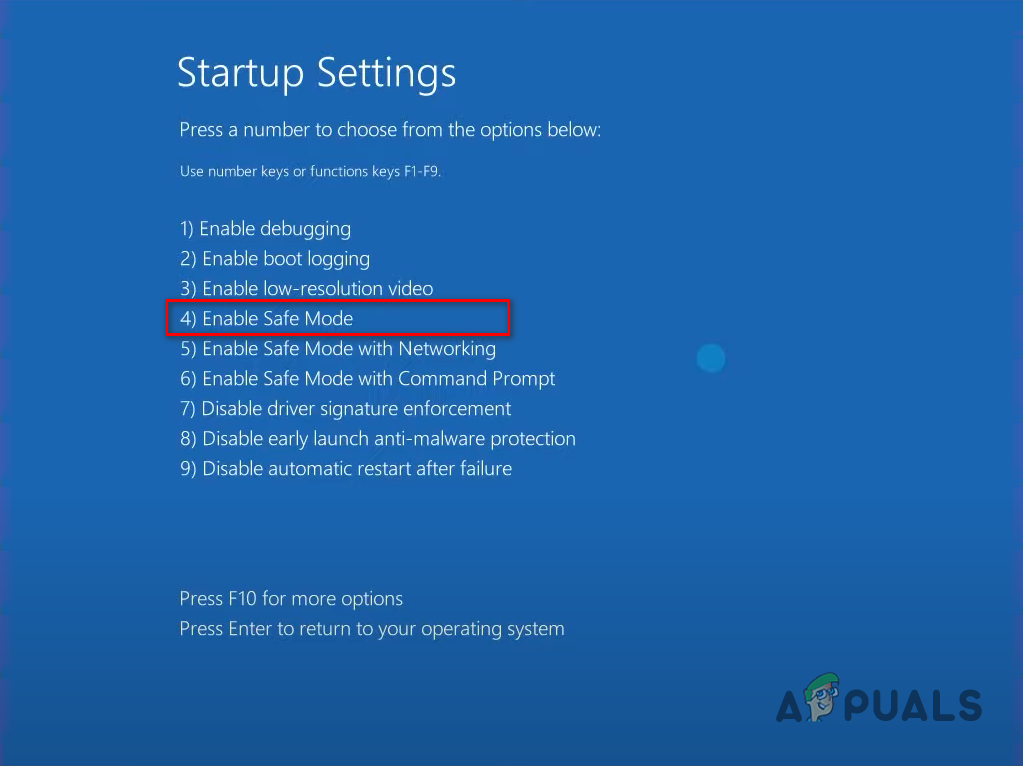
Booting system into Safe Mode on Windows 11
After you press the appropriate key, Windows will boot into Safe Mode. The next step is to open the DDU app and uninstall the Graphics Card drivers.
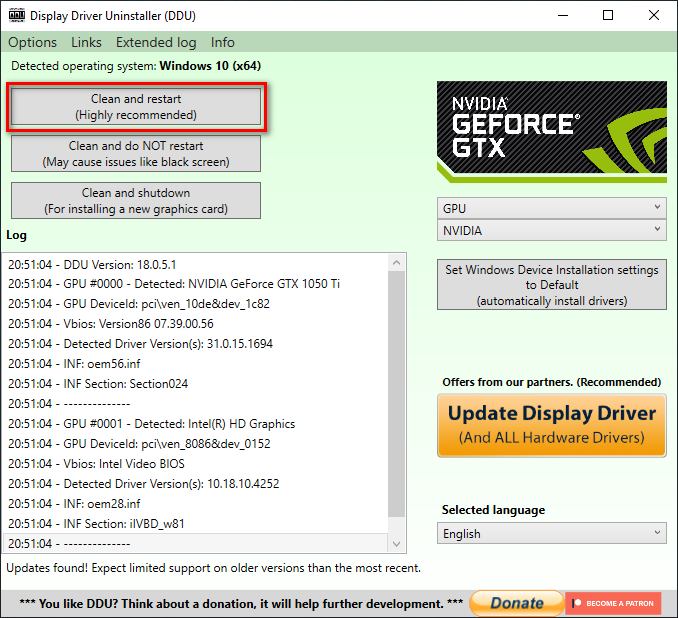
Head to the drive location where you installed DDU and double-click on the “Display Driver Uninstaller” file. After opening the app, set the device type to GPU and select whichever brand of GPU you have installed (NVIDIA, Intel, or AMD).
After that, simply click on the “Clean and restart” button at the top to begin the driver deletion process. DDU will uninstall your drivers within a couple of minutes. And once it finishes doing so, your PC will restart.
Once the drivers have been uninstalled, you can begin installing the latest drivers for your Graphics Card. For this, you’ll need to visit the official website of your GPU’s manufacturer. They will have a download section on their website where you can find the latest drivers for your GPU.
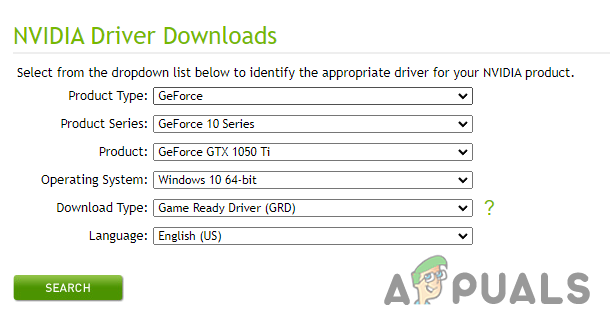
If you have an NVIDIA Graphics Card, visit this website. Below the “NVIDIA Driver Downloads” section, you’ll see many options, with each option having a drop-down list next to it. Use these drop-down lists to enter the exact model of your Graphics Card. After that, press the SEARCH option to find the newest drivers for the GPU you entered.
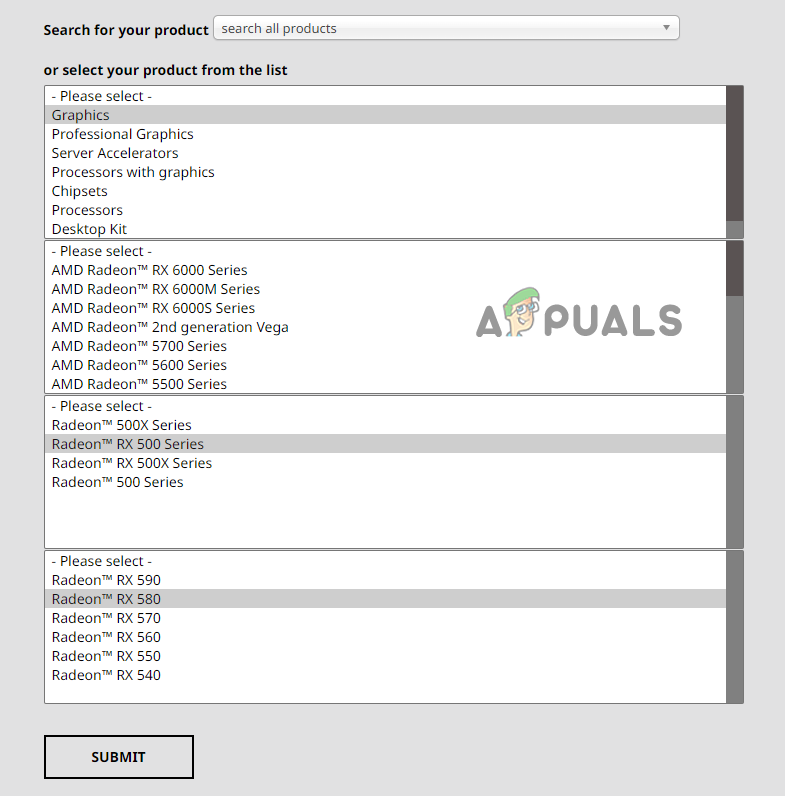
If you have an AMD Graphics Card, visit this website. Click on the “Search all products” option in the center of the page and search for your GPU’s exact model. After that, press the SUBMIT option to find the newest drivers for the GPU you entered.
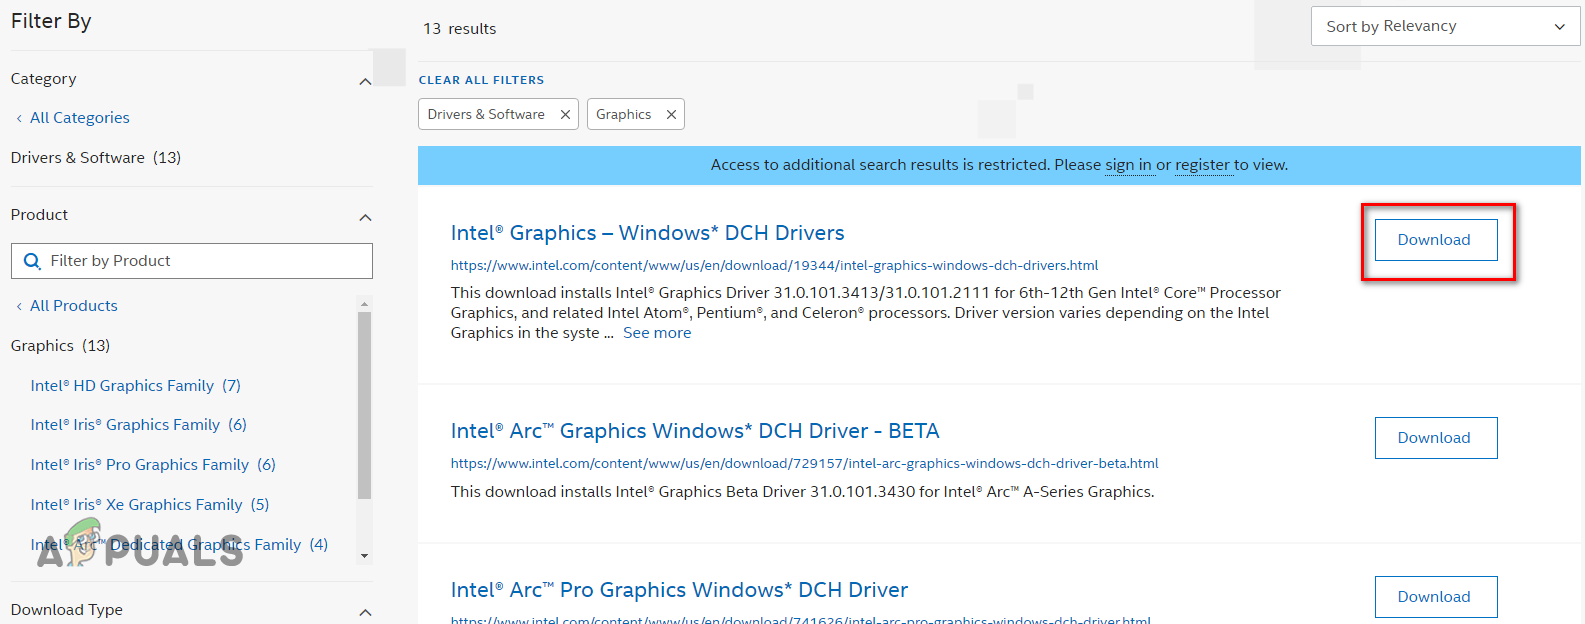
If you have an Intel Graphics Card, head to this website and use the filters on the left side of the page to select your GPU’s exact model. The page will then show you all the drivers available for that GPU. The driver at the top will be the latest driver.
Once you’ve downloaded the driver file, open it, and it will show you an installation menu. Click on the “Express” option in that menu, and the driver will begin installing. It will finish installing within a couple of minutes. Once the installation process is completed, your GPU drivers will be updated to the latest version.
13. Use a Dedicated Graphics Card (If Applicable)
If you feel no performance improvement in MW2 and continue to experience the 0x00001338 error code even after you’ve updated your GPU drivers to the latest versions, the game might not be running on your dedicated GPU.
Modern Warfare 2 could be running on your CPU’s integrated graphics instead of the GPU you have installed in the system. This could explain why the game performance hasn’t been improved even after updating GPU drivers.
Your CPU’s integrated graphics are most likely significantly weaker than your Graphics Card, so if the game runs on them, it could be the root cause of the 0x00001338 error.
To run Modern Warfare 2 on your dedicated Graphics Card, follow these steps:
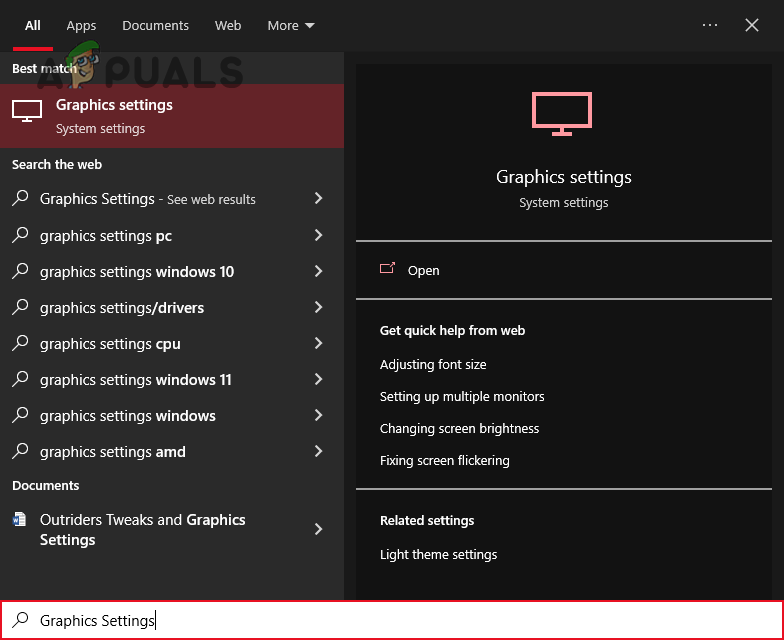
- Press Windows Key to open the Start menu.
- Type “Graphics Settings” and press enter.
Opening Graphics Settings - Click the Browse button.
- Select the .exe file of Modern Warfare 2.
- Press the “Add” button in the bottom-right corner to add it to the list.
- Click on Modern Warfare 2 in the list.
- Select Options.
- Select the “High Performance” options.
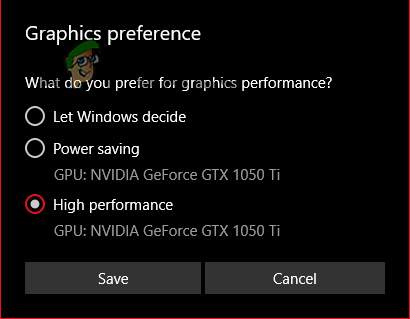
Changing Graphics Settings to High Performance - Press Save.
If the High-Performance option was not selected before, it was likely the cause of the 0x00001338 error. Now that the game is using your dedicated GPU, the errors should be fixed, and you should feel an immediate performance improvement.
14. Update Microsoft Visual C++ Redistributable Package (If Applicable)
Microsoft Visual C++ is an essential compiler software. It allows your system to compile C and C++ code efficiently. This enables games like Modern Warfare 2 to run correctly on your system.
To play the latest games, you must ensure that you have your system’s latest version of Microsoft Visual C++. Using an outdated version of the Microsoft Visual C++ compiler could lead to many game errors, including this error.
To check if you have the Microsoft Visual C++ Redistributable Package installed on your PC, follow the steps we’ve listed below:
- Press Windows Key + R (at the same time) to launch the Run dialogue box.
- In the Run dialogue box search bar, type appwiz.cpl, and enter.
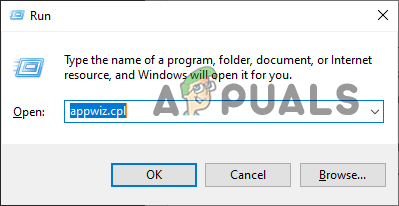
Opening the Programs and Features menu through the Run dialog box - In the list of programs, look for Microsoft Visual C++ 2015-2022 Redistributable.
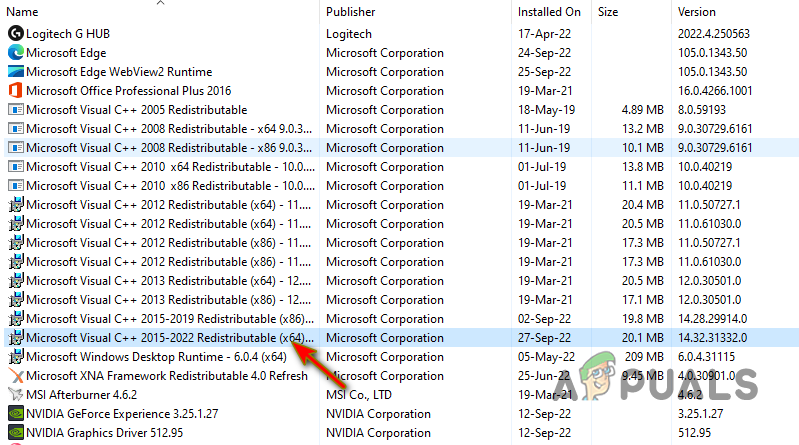
Checking to see if the latest version of Microsoft Visual C++ is installed
This is the latest version of the compiler. If you do not see this version in your list of programs, you must download and install the latest version from Microsoft’s official website.
To do so, follow the steps we’ve written below:
- Visit this website.
- Under the “Visual Studio 2015, 2017, 2019, and 2022” section click on the link to download the installer file.
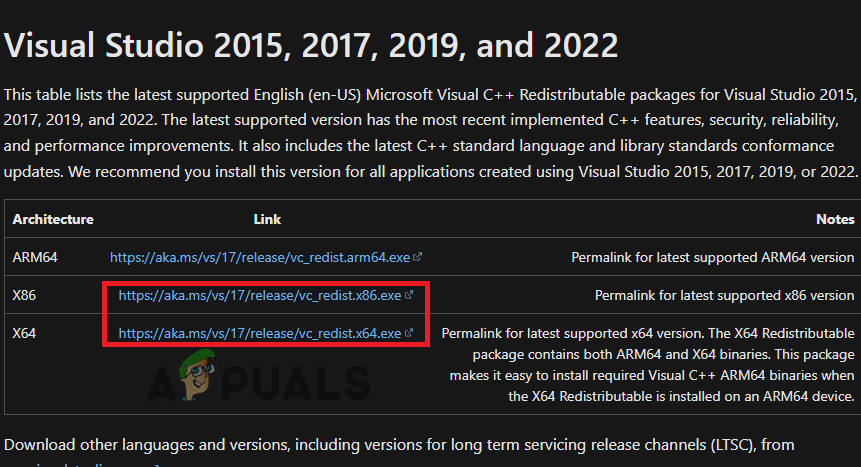
Downloading Microsoft Visual C++ - If you have a 32-bit processor, download the file with the x86 architecture.
- If you have a 64-bit processor, download the x64 and x86 architecture files.
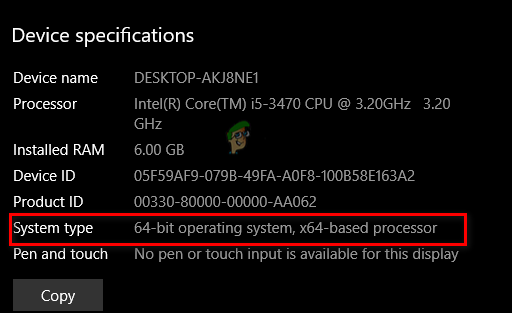
Downloading the file with appropriate architecture is very important. If you’re not certain what type of processor you have, you can quickly figure that out by following the steps below:
- Press Windows Key to open the Start menu.
- Type This PC in the search bar.
- Click on the Properties option at the bottom (on the right side).
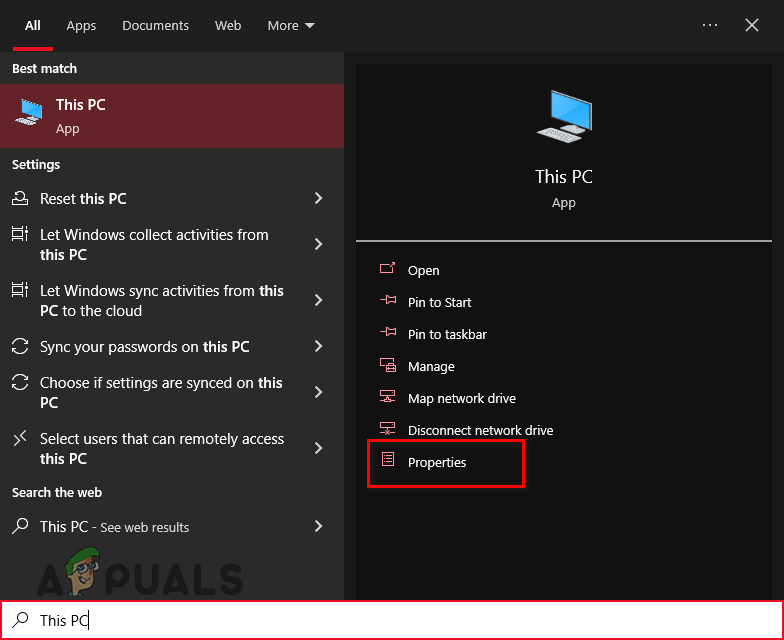
Opening Properties of your PC
Under the “Device Specifications” section, you’ll be presented with all the essential information about your system. Next to “System Type,” it will show whether you have a 32-bit or 64-bit processor.
Now that you know what type of processor you have return to the website linked above and download the appropriate version of the Microsoft Visual C++ Redistributable Package.
Follow the steps listed below to install the Microsoft Visual C++ Redistributable Package(s):
- Open the downloaded file and select the “Run” option when the Security Warning appears.
- Put a checkmark next to “I agree to the license terms and conditions.”

Agreeing to the terms and conditions of Microsoft Visual C++ - Click on Install.
- Click “Yes” when asked whether you want to allow the installer to make changes to your device.
- Wait for the installation to finish.
Remember that if you have a 64-bit processor, you must install both the x64 and x86 files. This is because if you only install the x64 version of Microsoft Visual C++, 32-bit applications will fail to run. Therefore, after installing the x64 version of Microsoft Visual C++, install the x86 version similarly.
And if you have a 32-bit processor, there’s no need to install the x64 version of Microsoft Visual C++, as your PC can only run 32-bit applications.
After you’ve updated your Microsoft Visual C++, remember to restart your PC for the update to take effect. After your PC restarts, relaunch Modern Warfare 2 and check if the error has been resolved. If it hasn’t, move on to the final solution listed below.
15. Reinstall Modern Warfare 2
After trying all of the above solutions, the Modern Warfare 2 0x00001338 error should be fixed. However, if you’re still experiencing the error, the final solution is to reinstall the game completely.
To reinstall the game, you need to first uninstall it by following the steps we’ve written below:
- Press Windows Key + R (at the same time) to launch the Run dialog box.
- In the Run dialog box search bar, type appwiz.cpl, and enter.
Opening the Programs and Features menu through the Run dialog box - In the list of programs, look for Modern Warfare 2.
- Right-click on Modern Warfare 2.
- Select “Uninstall.”
Once the game has been uninstalled from your system, open Steam or the Battle.net launcher and reinstall the game, after the game has been reinstalled, the 0x00001338 error should finally go away.


I tried nearly every step of this help tutorial. Nothing would help. Except taking this advice:Overlay Interference: The overlays of apps like NVIDIA GeForce Experience, Steam, and Xbox Game Bar can conflict with Modern Warfare 2 and lead to many errors. I deactivated the Overlay of AMD Adrenaline and then it worked properly. No more crashes – so far! Thank you very much!