How to Fix OS Error 4294956486 in Steam (Windows and macOS)
Some Steam users are encountering the OS Error 4294956486 whenever they attempt to launch a game. This issue is confirmed to occur on both Windows and macOS.

After investigating this particular issue, it turns out that there are several different causes that are known to cause this particular error code. Here’s a shortlist of potential culprits that might trigger the OS Error 4294956486 in Steam:
- Corrupted game installation – One of the most common occurrences that will trigger is error is some type of corruption that’s currently affecting the installation folder. If this scenario is applicable, you should be able to fix the problem by checking the integrity of the game files via Steam’s menu in order to fix corruption affecting the game file and associated dependencies.
- macOS Steam version inconsistency – If you’re encountering this error code while attempting to launch a game through the macOS version of Steam, chances are you’re dealing with a common glitch that is occurring exclusively on macOS. In this case, you can circumvent the problem by using the Terminal app to create a shortcut for the game that’s triggering the issue.
- Outdated Steam client – It’s also possible to see this error code because your Steam client is in a state in which it can’t update itself due to a partially corrupted file (or set of files). In this case, you should be able to fix the problem by deleting a set of files that will force your Steam client to update itself even if it’s currently stuck in a limbo state.
- Corrupted Steam installation – Corruption plaguing your Steam installation or an associated dependency can also be responsible for the apparition of this particular error code. In this case, you can fix the problem by uninstalling Steam conventionally and then reinstalling the client from the official channels.
- 3rd party AV / Firewall interference – If you’re using an external 3rd party Antivirus of Firewall, it’s possible that the security suite ends up conflicting with your Steam installation. In most cases, Cylance and Comodo are reported by users for causing this problem. If the same kind of interference happens to you, you should be able to fix the problem by removing the 3rd party interference or by uninstalling the problematic suite altogether.
- NVRAM or PRAM inconsistency – In case you’re seeing this error code on a macOS computer, and you’ve tried every possible fix for this platform, chances are you’re dealing with an NVRAM or PRAM issue that’s affecting RAM allocation for Steam. In this case, you should be able to fix the issue by resetting the NVRAM and PRAM crashes.
Now that you know all the potential culprits, here’s a collection of methods that will allow you to fix the error 4294956486 in Steam:
Method 1: Verifying the Integrity of the Game
Since the most common problem that will cause this particular error is some type of corruption affecting the installation folder, you should start by checking the integrity of the affected game files. In most cases, you’ll see the 4294956486 error occurring due to a corrupted file or an associated game dependency that’s affected by corruption.
If this scenario is applicable, you should be able to fix the problem by using a built-in Steam utility to verify the integrity of the game files. To do this follow the instructions below and restart your computer at the end of it:
Note: The instructions below will be applicable to both Windows and macOS computers.
- Start by open your Steam client and then sign in with your account credentials (if this process is not automatic).
- Once you have successfully signed in, right-click on the game that’s crashing with the 4294956486 error and click on Properties from the newly appeared context menu.
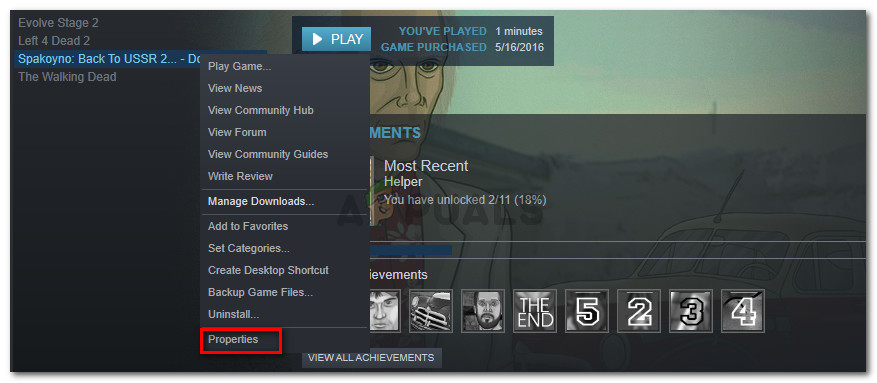
Accessing the Properties screen of the affected game - Once you’re inside the Properties screen of the affected games, click on Local Files, then click on Verify Integrity of Game Cache.
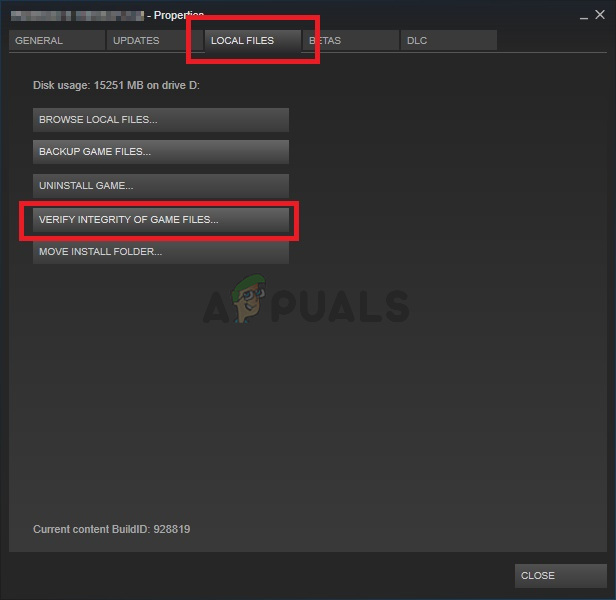
Verifying the integrity of game files - Confirm the operation, then wait for the process to complete before restarting your computer.
- Once your computer boots back up, launch the game that was previously triggering the issue and see if the problem is now fixed.
In case you still end up seeing the 4294956486 error code, move down to the next method below.
Method 2: Creating a Shortcut on macOS (if applicable)
As it turns out, if you’re encountering this problem on macOS when trying to launch a game from within Steam, chances are you’re dealing with a fairly common glitch. This problem is known to affect the launch of certain games from the Steam desktop.
If this scenario is applicable, you might be able to avoid the 4294956486 error code entirely by using the Terminal on your macOS computer to create a dedicated shortcut that will allow you to launch the game without relying on the Steam interface.
This potential fix has been reported to work by a lot of users that where having problem launching certain games on macOS.
In case you’re also seeing this error code on macOS when trying to launch a game from Steam, follow the instructions below to use the Terminal app to create a shortcut for the game that’s causing the problem:
- Start by opening the Terminal App. You can use the application dock or you can launch the app by going to Applications > Utilities and double-clicking on Terminal.
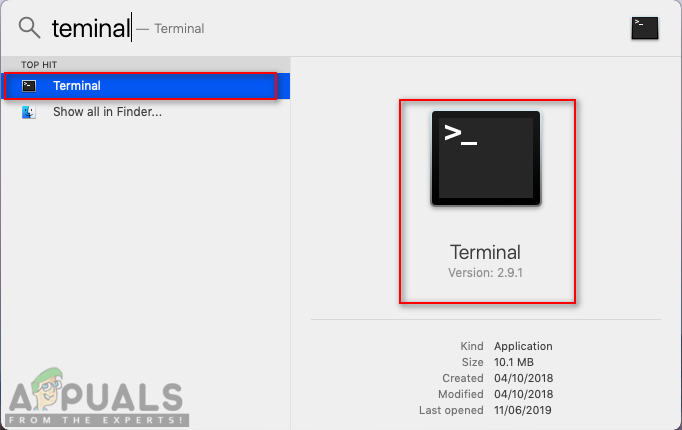
Opening Terminal - Once you’re inside the terminal app, navigate to the location where your Steam games are installed. By default, that location is:
cd Library/Application/Support/Steam/steamapps/common
- After you arrive at the correct location, type ‘ls‘ and press Enter to list the games that you currently have installed via Steam. Once the list of games becomes visible, make a note of the exact game name.
Note: In our example, the name of the game was ‘Enclave‘. - Next, type the following commands in order to launch the game that was previously triggering the 4294956486 error:
cd "Enclave/Enclave.app/Contents/MacOS"
./"Enclave”
Note: Keep in mind that Enclave is the name of the game in our example. You’ll need to change any mention of it to the exact name of the game (as displayed in the common folder) in order to ensure that the commands are processed successfully.
- If everything goes well, you should see the game launching without the same error code.
Note: In case the operation was successful and you don’t want to do this every time, you can use the commands below (and make the proper changes) to create a shortcut that launches the game when you click it:ln -s "/Volumes/*Your Username*/Shared/Steam/steamapps/common/*Gamename*/*Gamename*.app/Contents/MacOS/*Gamename*" ~/Desktop/
Note: Keep in mind that *GameName* and *YourUsername* are 2 placeholders that will be different from instance to instance. Ensure that the operation is successful by replacing these placeholders with the correct values.
In case the same problem is still occurring, move down to the next potential fix below.
Method 3: Forcing Steam to Update (Windows Only)
As it turns out, this problem can also occur if your client is stuck in a state where it can’t update itself due to a partially corrupted file. This problem is fairly commonly reported to occur on Windows computers (particularly if the client is forcibly shut down when in the middle of updating itself).
If you find yourself in a situation similar to the one described above, you should be able to force your Steam client to update itself by navigating to the Steam installation folder and deleting everything inside aside from Steamapps, Userdata, and Steam.exe.
Doing this will strip the application to the bare essentials, but leaving behind the essential files that will allow it to update itself and install the latest version available.
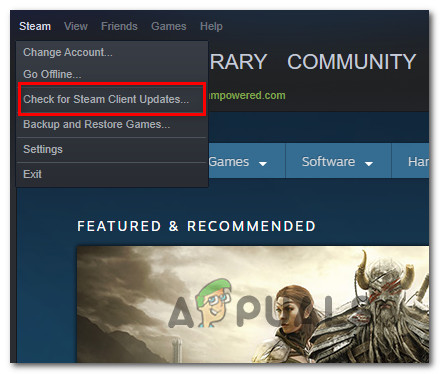
Note: Before following the instructions below, you should see if Steam is not actually capable of updating conventionally by clicking on Steam > Check for Steam Client Updates.
Here’s a quick guide on how you can do this:
- First things first, start by making sure that Stream is completely closed. Do this by accessing your tray bar icon and making sure that the application is closed.
- Once you do this, open File Explorer and navigate to the following location:
C:\Program Files (x86)\Steam
Note: In case you have installed Steam in a custom location, navigate there instead.
- Once you finally manage to arrive inside the Steam installation folder, delete everything inside conventionally, aside from the following items:
Steamapps (folder)
Userdata (folder)
Steam.exe
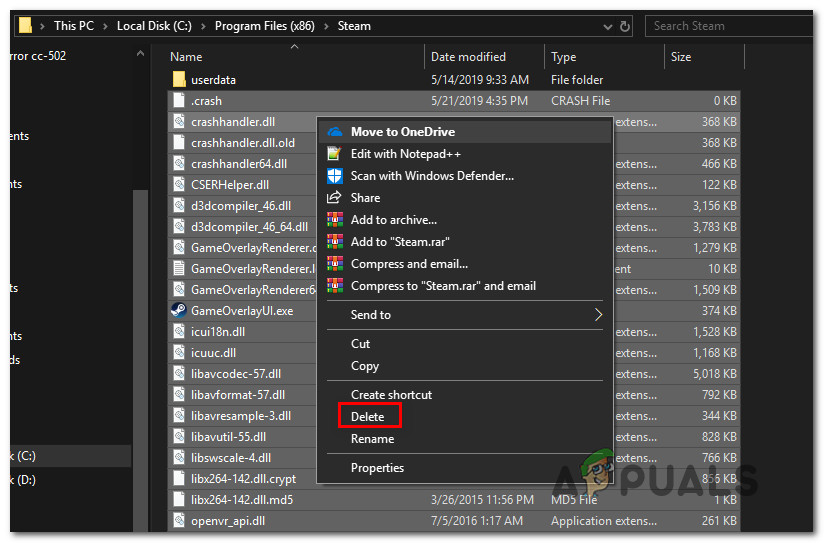
Deleting the non-essential files Once your Steam folder is stripped clean, reboot your computer and wait for the next startup to complete.
- After your computer boots back up, launch Steam conventionally and wait until it verifies itself and downloads the latest version available.
- Immediately after the update is complete, launch the game that was previously causing the 294956486 error and see if the issue is now resolved.
In case the same problem is still occurring, move down to the next potential fix below.
Method 4: Reinstalling Steam
If forcing the application to update itself was not effective in your particular scenario, the next thing you should try is to reinstall Steam and every associated component. This will be effective in those scenarios where some kind of file corruption affecting Steam is causing the 294956486 error code.
Several affected users finding themselves in a similar scenario have reportedly managed to fix the issue by uninstalling the current Steam installation and re-downloading & installing the latest version.
Here’s a quick step by step guide that will guide you through the process of doing this on a Windows computer:
- Open a Run dialog box by pressing Windows key + R. Next, type ‘appwiz.cpl’ and press Enter to open up the Programs and Features menu.

Type appwiz.cpl and Press Enter to Open Installed Programs List - Once you’re inside the Programs and Features screen, scroll down through the list of applications, then right-click on Steam and choose Uninstall from the context menu.
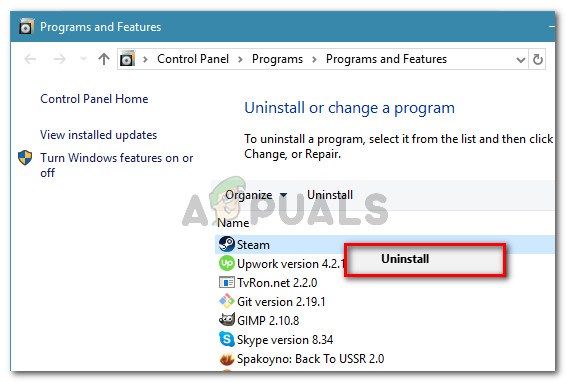
Uninstalling the Steam client - Once you’re inside the uninstallation screen, follow the on-screen prompts to complete the uninstallation, then reboot your computer at the next of this procedure.
- After your computer boots back up, visit the official download page of Steam and download the latest build and click on Install Steam.

Re-installing Steam - Once the latest installer has been downloaded, follow the on-screen prompts to install the latest version of Steam, then reboot your computer once again and see if the 294956486 error is now fixed.
In case the same problem is still occurring, move down to the next potential fix below.
Method 5: Removing the 3rd party Interference
As it turns out, this issue can also occur because Steam’s connection to the server is being interrupted by an overprotective 3rd party firewall – In most cases, this is reported to occur due to a false positive.
This problem is confirmed to occur with Cylance, Comodo, and a few other AV suites that are known to conflict with Steam.
If this scenario is applicable to your particular scenario, the first thing you should do is disable the real-time protection before opening Steam and see if the issue is now fixed.
To do this, right-click on the tray-bar icon of your antivirus and look for an option that allows you to disable the real-time protection.
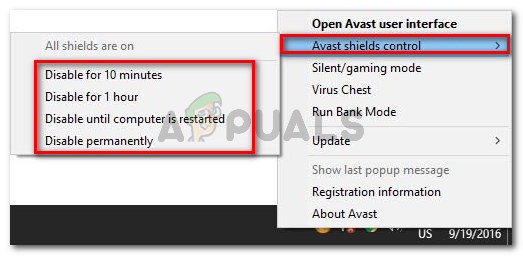
Important: If you’re using an AV suite that includes a built-in firewall (or the issue is caused by a standalone 3rd party firewall), disabling the real-time protection will not fix the issue since the same security rules will remain firmly in place.
In this case, the only way of fixing the issue is to uninstall the problematic 3rd party suite in order to eliminate the conflict:
- Press Windows key + R to open up a Run dialog box. Next, type ‘appwiz.cpl’ and press Enter to open up the Programs and Features menu.

Type appwiz.cpl and Press Enter To Open Installed Programs Page - Once you’re inside the Programs and Files menu, scroll down through the list of installed applications and locate the entry associated with your 3rd party firewall / AV suite.
- Once you have your culprit, right-click on it and choose Uninstall from the context menu.
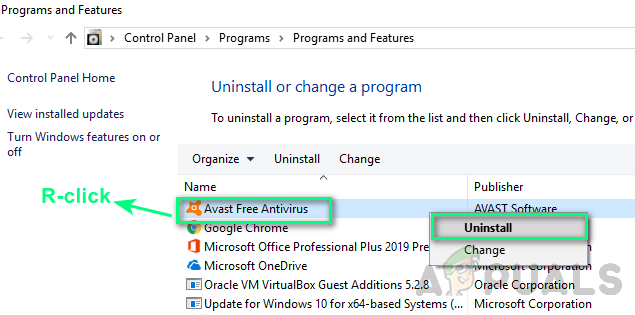
Uninstalling Third-party Antivirus Software - Next, follow the uninstallation prompts to complete the uninstallation, then reboot your computer and see if the conflict is fixed once the next startup is complete.
In case the problem is still occurring or this scenario was not applicable, follow the next method below.
Method 6: Resetting the NVRAM & PRAM caches (if applicable)
In case you’re seeing the 4294956486 error on a macOS computer and none of the instructions below have worked for you, it’s possible that you’re dealing with an NVRAM (Non-Volatile Random-Access Memory) or PRAM (Parameter Random-Access Memory) issue.
Note: macOS computers will use NVRAM to store certain settings data that can be accessed quickly, while PRAM is used to store information related to some core components of your MAC.
If this scenario is applicable, you should be able to fix the problem by resetting both the PRAM and NVRAM caches by following the instructions below:
- First things first, shut down your MAC conventionally (regular shut down, not hibernation mode).
- Once your Mac is turned off completely, turn it ON and immediately press and hold on the following keys:
Option + Command + P + R
- Keep these keys pressed for over 20 seconds. After this period has passed, your macOS will give the impression like it’s preparing to restart – When this happens, DON’T let go of the four keys yet.

Forcing an NVRAM and PRAM reset - Next, listen for the 2 startup tones. Once you hear the second one, release all keys at once.
Note: In case you’re encountering this issue on a Mac with T2 Security chip implementation, you can fix the issue by releasing all 4 keys after the Apple logo disappears for the second time. - Once the next startup is complete, launch the game normally from Steam and see if the issue is now fixed.


when I enter the directory into my terminal I wind up with thiscd Library/Application/Support/Steam/steamapps/common-bash: cd: Library/Application/Support/Steam/steamapps/common: No such file or directoryWhat did I do wrong?