[FIX] Emails Stuck in Gmail Outbox Folder
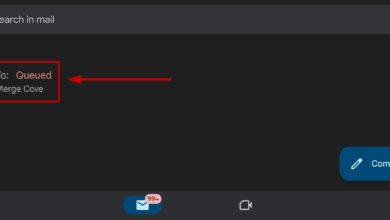
Gmail is one of the most popular email services in the world right now. Emails have become a day-to-day part of our life and are used everywhere, be it education, business, or more. When you are not able to send your emails to the recipients, it can be quite tedious and annoying. One issue that users face while using the Gmail application on their Android smartphone is that the emails they compose are not sent out but rather get stuck in the Outbox folder. The emails are queued in the Outbox folder, however, not sent ever. As it turns out, in some cases the emails cannot even be deleted or archived and thus they are just stuck in the Outbox folder.

Now, this issue has affected several users and it can be caused by various different reasons. One of the known reasons for the said issue turns out to be insufficient permissions of the Gmail app. This happens when the app is updated through the Play Store and as a result, some of the permissions are reset. Other than that, the issue can also appear in the Outbox folder is not synced properly with Gmail in which case you will just have to refresh the app. We will be going through the causes in more detail down below, so let us get started.
- Storage Permissions — As it turns out, one of the reasons why this error may appear is if the Gmail app doesn’t have the storage permissions. This can sometimes happen when you update the application via the Play Store and as a result, it changes the permissions of the app on your phone. In such a case, what you have to do is simply grant it storage permissions again to circumvent the problem.
- App Cache — Another reason for the appearance of the said problem could be the cache of the app on your phone. A cache is used by every application that stores certain data about your application, however, in some scenarios, it can cause several issues as well. In such a case, you will have to clear out the cache of the app which is completely safe to do.
- Out of Sync Outbox Folder — In some scenarios, the issue can also occur if the Outbox folder on your Gmail application is out of sync. This does not happen often but is still a possibility and can be easily resolved by just refreshing the folder.
- Offline Mode — If you are facing the issue on a web browser on your PC, the issue could be due to the Offline Mode that is offered by Gmail. In such a scenario, you will just have to turn off the offline mode and then try again.
Now that we have gone through the possible causes of the issue, let us go through the different methods that you can use to get rid of the issue and have your emails sent successfully.
Method 1: Force Stop App
One of the ways that you can resolve the problem is by simply force-stopping the application. Once you do this, when you launch the app again, it will be forced to establish a new connection with the servers which may fix the issue as it did for some other users. This can be done pretty easily, just follow the instructions down below:
- First of all, on your smartphone, go to Settings.
- Then, on the Settings screen, go to the Apps options. On some phones, you will have to go to the Application Manager category.
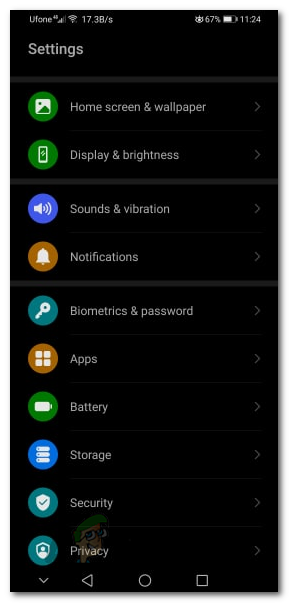
Settings Screen - There, find the Gmail application and then tap on it.
- Finally, tap the Force Stop option to stop the application forcefully.
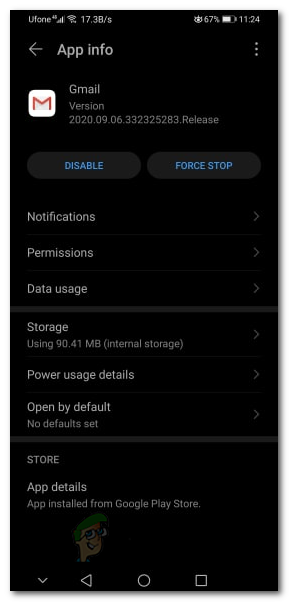
Gmail App Info - After that, open up the app again and try sending the email. See if that fixes the issue.
Method 2: Grant Storage Permissions
As it turns out, when you try to update the Gmail application on your Play Store, it may sometimes interfere with the app permissions. This results in the permissions being changed by the update in some scenarios. In this case, the issue seems to be caused when the Gmail app does not have Storage permissions on your phone. The app requires permission to read the Storage files in case you may want to embed some attachments with the email. Therefore, permissions are important. To grant the application storage permissions, follow the instructions down below.
- First of all, open up the Settings app on your phone.
- Then, make your way to the Apps or Application Manager option.
Settings Screen - There, find the Gmail app and tap on it.
- Then, on the App Info page, tap the Permissions option to change the permissions for the Gmail app.
Gmail App Info - Grant it storage permissions and then open up the application.
- See if that resolves the issue.
Method 3: Clear App Cache
In some cases, the issue can also be caused by corruption in the cache of the application. In such a scenario, you will have to clear the app’s cache to circumvent the problem. This is pretty safe as the cache is automatically generated by the app again. To do this, follow the instructions down below:
- First of all, open up the Settings app on your phone.
- Then, on the Settings screen, go to the Apps option.
- Find the Gmail app from the list and tap on it.
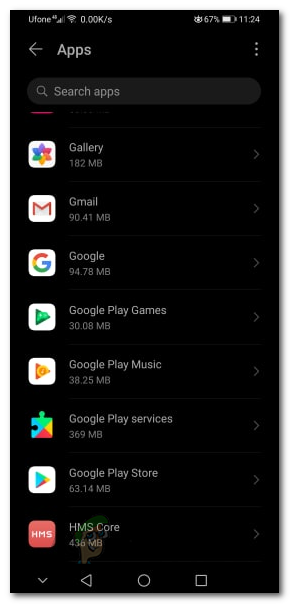
Installed Apps - On the Gmail app info screen, tap on the Storage option to access the storage information of the app.
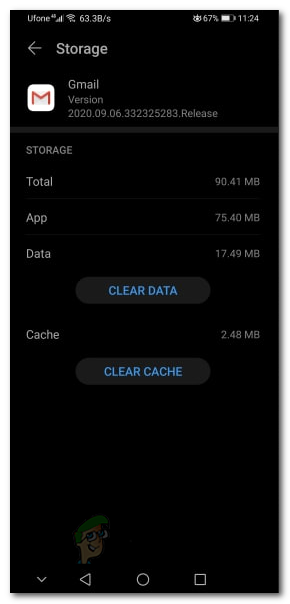
Gmail Storage - Here, tap the Clear Cache and Clear Data options one-by-one.
- Once you have done that, go back and force stop the app.
Gmail App Info - After that, go ahead and reboot your phone.
- Finally, once your phone boots up, open up the Gmail application and send the email again.
Method 4: Refresh Outbox Folder
It so happens that in some scenarios, the issue is caused because the outbox folder is out of sync. This does not happen very often, however, the chances are still there. In such a scenario, what you have to do is simply refresh the folder on your Gmail application. This will sync up the folder again and your email should change its status from Sending to Uploading. That should resolve the issue. Follow the instructions down below:
- First of all, open up the Gmail application.
- Then, tap on the More icon (the three parallel bars) on the left-hand side of the Search Bar.
- From the list shown, go to the Outbox folder.
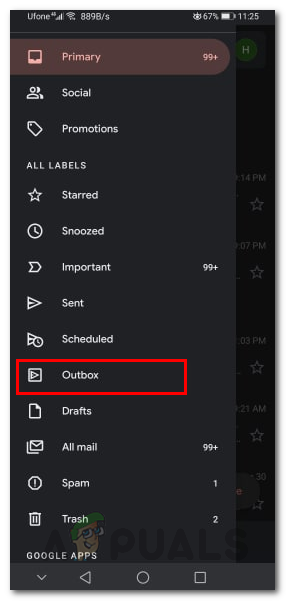
Accessing the Outbox Folder - Here, just drag your finger down until you see a circle with a circular arrow.
- Release your finger when the arrow stops rotating. This will refresh the app and hopefully, solve your issue.
Method 5: Turn Off Offline Mode
In some cases, users face the said issue on the web version of Gmail. This is highly unlikely but it does happen to some users. Gmail has an offline mode that lets you read, respond to, browse your Gmail messages even when you are not connected to the internet. If you are using this feature, it can cause the said issue in some cases. Therefore, you will have to turn it off to send the emails and then you can turn it on again. To do this, go through the following instructions.
- First of all, open up Gmail on your browser.
- Then, click on the Settings icon on the top-right corner of the page.
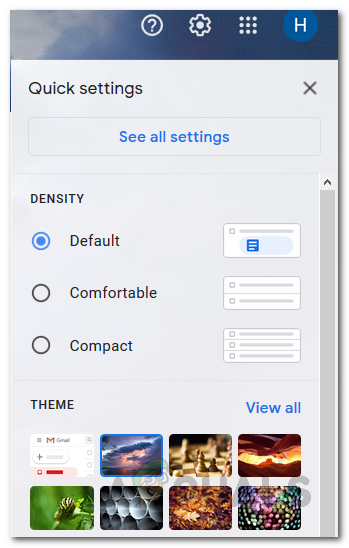
Gmail Settings - Click on the See all settings button to show more options.
- Switch to the Offline tab, and then make sure the Enable Offline mail option is unchecked.
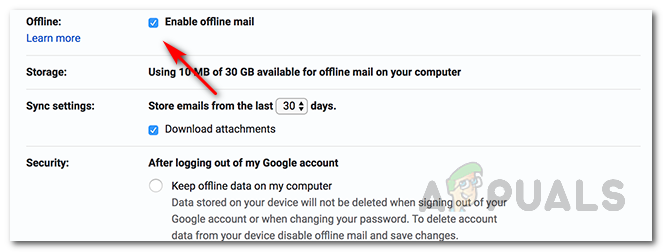
Gmail Offline Mode - Save the changes and then refresh the page. See if that resolves the issue.