How to Fix Gmail Error Code #2013 and #2014
Some Gmail users are frequently encountering the error codes #2013 and #2014 (Oops the system encountered a problem) when using the Web interface of Gmail. This problem is not OS specific as it’s reported to occur on Windows 7, Windows 8.1, and Windows 10.
After investigating this particular issue, it turns out that there are multiple causes that are capable of spawning one of these 2 error codes. Here’s a rundown of all the potential culprits that we’ve managed to identify:
- 3rd party interference – If this problem is caused by some kind of 3rd party interference, one quick workaround that will ensure that the same error code will no longer appear is to use Incognito Mode (Google Chrome) or Private Mode (Mozilla Firefox) to avoid any kind of 3rd party interference.
- Browser is not fully supported by Gmail – As it turns out, this problem can also occur in instances where your browser is not fully supported by Gmail (this typically happens with Chromium-based browsers). In this case, making the switch to a different browser should allow you to fix this problem.
- Corrupted browser cache – As it’s been confirmed by several different affected users, this problem can also be introduced by corrupted cached data stored by your browser. If this scenario is applicable, you should be able to fix this problem by clearing your browser cache.
- Outdated browser version – It turns out that Google might decide to cut support for older browser builds if a security loophole is exposed. In this case, updating your browser build to the latest should fix the issue for you.
- Interfering adblocker – The Web interface of Gmail is known to conflict with a lot of Ad-blockers (especially those installed at a browser level). In this case, you should be able to fix the error code by disabling or uninstalling your ad-blocker.
Method 1: Using Incognito Mode
If the problem is being caused by a 3rd party component that is interacting with your Chrome browser while it’s triggering one of these errors, chances are utilizing Incognito Mode should circumvent the apparition of the error.
But keep in mind that this should not be regarded as a fix (it’s more of a workaround).
By running the web interface of Gmail in an incognito window, you are preventing any type of 3rd party interference from affecting the operation. And while this will prevent the error message from occurring, it will not help you identify the culprit.
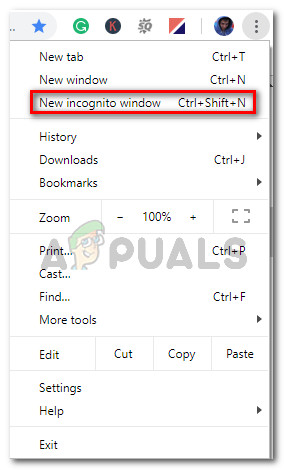
If you don’t mind a temporary fix, you can access incognito mode in your Google Chrome browser by clicking on the action button (three-dot icon) from the top-right corner of the screen and choosing New Incognito Window from the window.
Note: If you’re encountering this issue with Firefox, you can open a Private Window (the equivalent of Incognito Mode in Google Chrome) by clicking on the action button and clicking on New Private Window.
If this operation didn’t mean the end of the error code #2013 or #2014 (or you’re looking for a more permanent fix), move done to the next potential fix below.
Method 2: Ensuring that your Browser is Supported by Gmail
Keep in mind that not all browsers will work well with Gmail. In fact, some browsers are known to trigger a lot of issues of this kind (particularly on desktop versions).
You would think that given the popularity of Gmail, it’s web platform will function seamlessly on all browsers. But unfortunately, that’s not the case. As of now, there are only a handful of browsers that Gmail fully supports:
- Google Chrome
- Firefox
- Safari
- Internet Explorer Microsoft Edge
Note: Even if you’re using a Chromium-based browser, that doesn’t mean Gmail will function without hiccups. Forked versions of Google Chrome are oftentimes heavily segmented which might create issues with the web interface of Gmail.
If your browser is not on the list, that doesn’t mean that Gmail Web won’t work on it. on Browsers like Opera or Brave, you’ll need to enable cookies and JavaScript before you’ll be able to run Gmail Web in a stable manner.
If you have determined that your browser is supported by Gmail, move down to the next potential fix below.
Method 3: Clearing your Browser Cache
As it turns out, this problem can also occur due to corrupted cached data having to do with Gmail. A couple of users that were also struggling with this kind of issue have managed to get the issue resolved by completely clearing your browser cache.
Of course, this operation will be different depending on the browser that you’re actively using.
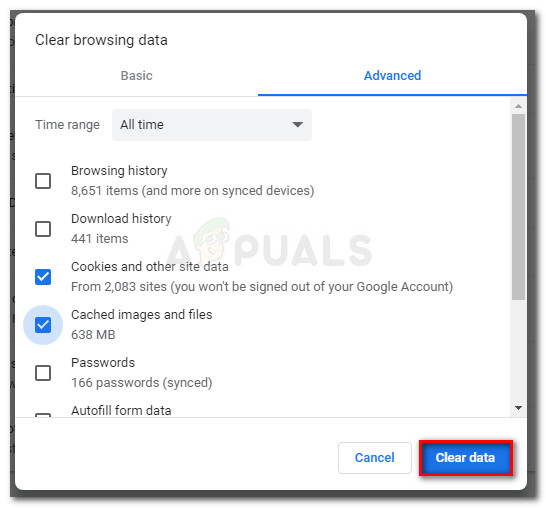
To make things easier for you, we’ve put together a set of instructions that will walk you through the process of cleaning the cache of any Windows browser.
If you already cleared your browser cache to no avail, move down to the next potential fix.
Method 4: Update Browser to the Latest Version
As it turns out, this problem can also occur in instances where you’re using a browser version that is frowned upon by Google due to a security exploit. If this scenario is applicable, you should be able to fix this problem by updating your browser to the latest version available.
This will patch the security flaw that might be determining Gmail to throw the error messages.
However, the exact steps of doing this will be different depending on the browser that you’re using. Because of this, we’ve put together a couple of sub-guides that will walk you through this process on the browsers with the most market share.
A. Update Google Chrome
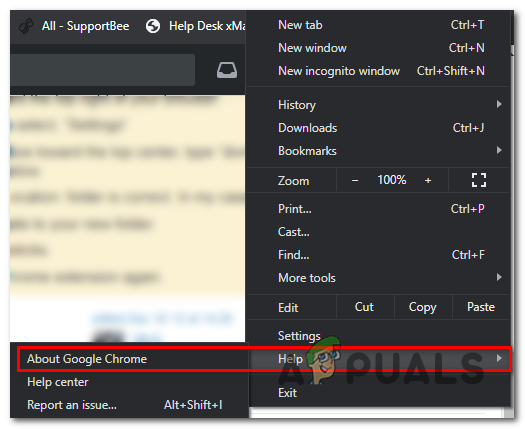
- Open Google Chrome and click on the action button from the top-right corner of the browser window.
- Once you manage to open the Settings context menu, access the Help submenu, then click on About Google Chrome.
Click on Apply Google Chrome - Once you’re inside the About Google tab, your browser will begin scanning for a new browser version.
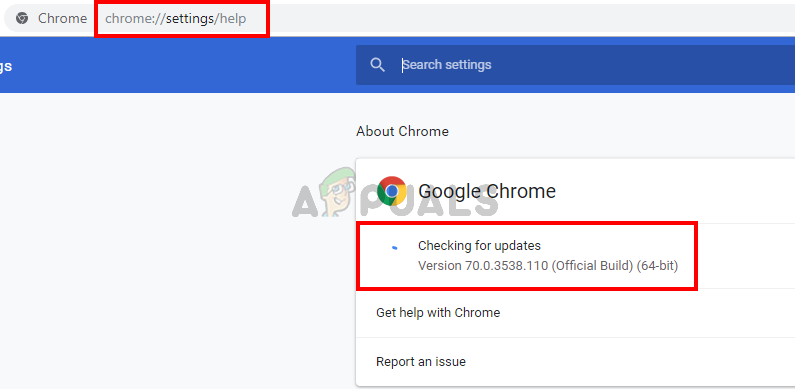
Update Google Chrome - If a new browser version is found, it will automatically get downloaded and installed. Once the operation is complete, restart your computer and see if the problem is resolved at the next startup.
B. Update Mozilla Firefox
- Open up Mozilla Firefox, then click on the action button (top-right corner of the screen).
- Next, from the main menu of your browser, click on Help to bring up the sub-tab, then click on About Firefox from the context menu.
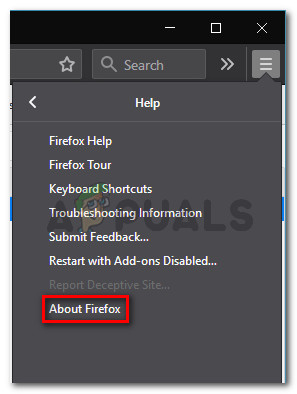
Accessing the Help menu of Firefox - Inside the About Mozilla Firefox menu, click on Restart and update the Firefox button (if a new version is available).
- Wait for the operation to complete, then click Yes at the User Account Control (UAC) when prompted to do so.
Updating Firefox to the latest version available - Once your browser is updated, restart Mozilla Firefox and see if the problem is resolved.
Method 5: Disable Ad-Blocker (if applicable)
As it turns out, this problem can also occur due to the fact that Gmail doesn’t play nice with certain Ad-blockers imposed at a browser level.
According to some affected users, if you’re encountering the #2013 or #2014 errors, you might be able to fix this problem by disabling or uninstalling your ad-blocker from your Extensions or Add-ons tab.
But keep in mind that the exact instructions on doing so will be different depending on the browser that you’re using.
Google Chrome
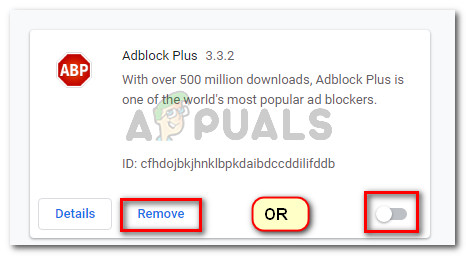
On Google Chrome, you can go ahead and disable the problematic ad-blocker simply by typing ‘chrome://extensions/‘ inside the navigation bar and pressing Enter. If you prefer the GUI approach, you can access this menu by going to Settings > More Tools > Extensions.
Once you manage to reach the correct Extension menu, scroll down through the list of extensions, and locate the Ad-blocking extension. When you see it, you can disable it by using the On/Off toggle or you can uninstall it via the associated button.
Mozilla Firefox
If you’re using Mozilla Firefox, you can access the Addons tab by typing “about:addons” inside the navigation bar and pressing Enter. Additionally, you can access the same menu by clicking on the action menu and clicking on Extensions.
Once you’re inside the add-ons menu, locate the ad-blocking addon that you think might be causing the problem and disable it or uninstall it.

Hi! my sister’s having this error #2014 even thought we have internet connection.. she cant send outgoing email but she can receive emails.. tried incognito, Opera. clearing cache, logging in and out. tried different device, but same outcome.. Kindly help us on this one. Thank you!