How to Fix Dolby Atmos Speaker Audio Buzzing Problem?
Dolby Atmos Speaker Audio Buzzing problem will likely appear after installing the latest Windows update. Many reports were made regarding the problem on the forum threads. As per the users, the sound buzzing problem appears unexpectedly while adjusting the audio in their built-in speakers.
Generally, the sound buzzing problem occurs due to a wide range of software or hardware problems. However, there are other reasons as well. So, here we have listed the DIY workarounds to fix the problem in your case.
But first, let’s look at the common culprits triggering the audio buzzing in the Dolby Atmos speakers.
- Outdated Audio Drivers: The most common reason that might be causing the problem is the audio drivers are outdated or incompatible. If the audio drivers in your device are outdated, then they can cause this issue. So, check for the latest updated drivers and install or update the existing ones.
- Audio Enhancements: If you are using any type of third-party application or Windows services to enhance the audio performance of your device/speaker, then those enhancements can cause conflict, which results in a sound buzzing problem. So, disable the audio enhancement feature if using it.
- Using Exclusive Control feature: This is an important Windows feature, but, in many cases, it is likely to cause trouble due to incompatibility. If you use this feature, then disabling it might work for you.
Now, as you know the common culprits triggering the problem, it is time to start following the fixes mentioned until you find the one that works for you.
1. Use Audio Troubleshooter
Very first, it is suggested to run the inbuilt Windows audio troubleshooter. This tool, just by scanning once, detects and fixes various audio and connected speakers problems. So, it is advised to run the troubleshooter and check if it can help you to fix the problem. To run the audio troubleshooter, follow the steps given:
- Press Windows + I key together to open the Settings.
- Now click on the System option and click on Troubleshoot option.

Click on System in Windows Settings - Now head to the Other troubleshooter
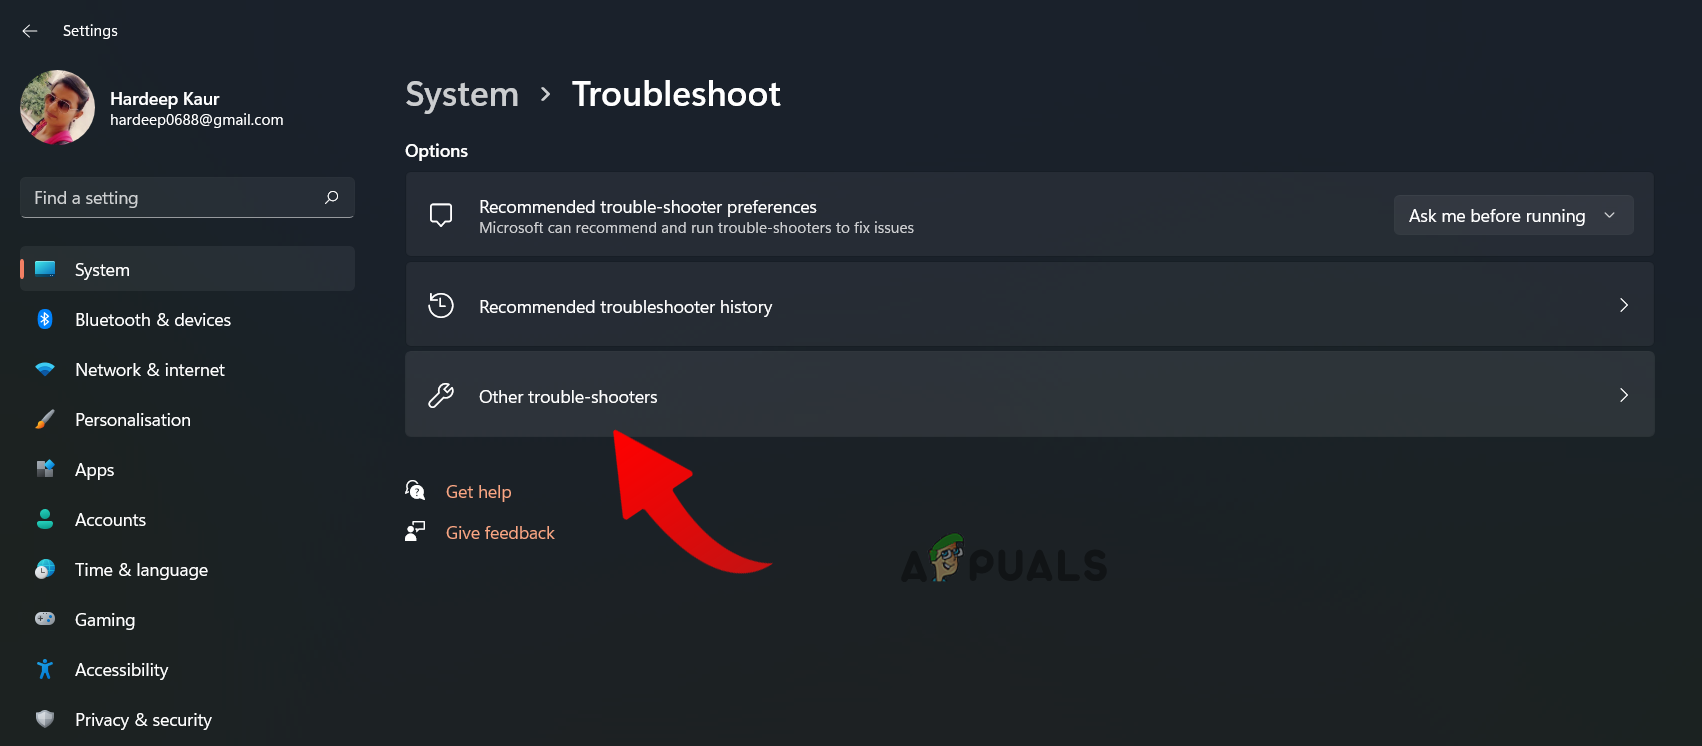
Click on Other troubleshooters - And click the Playing Audio option and then on Run
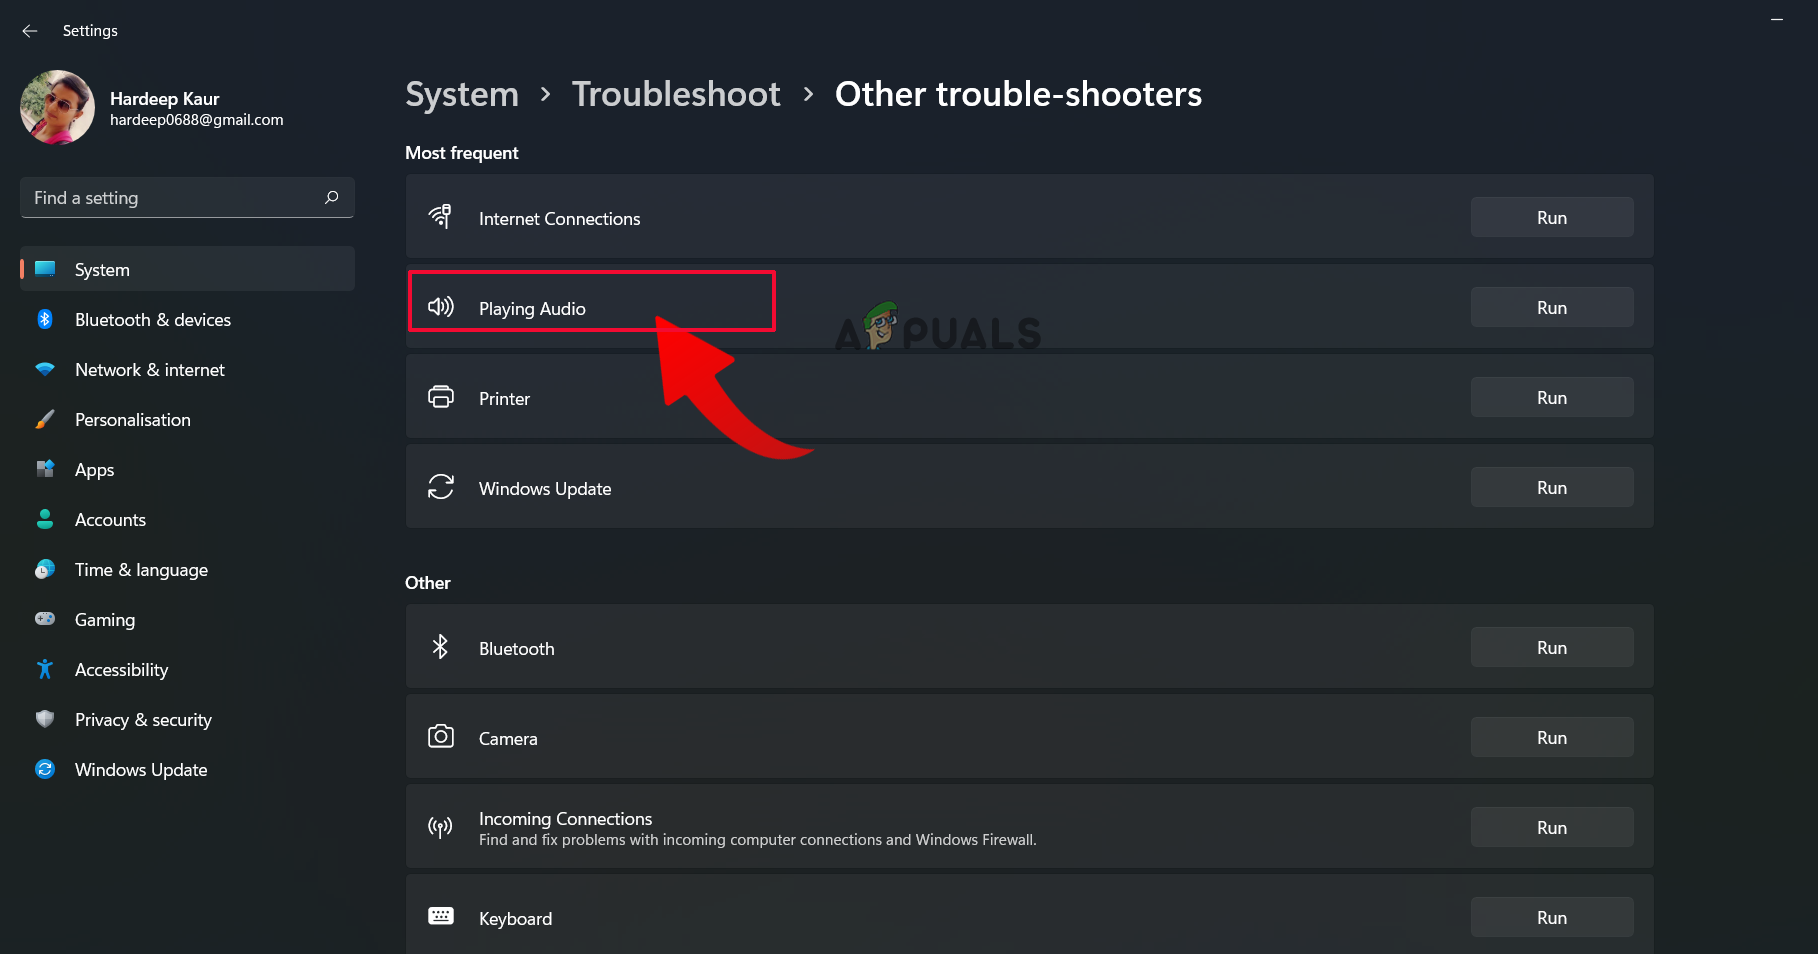
Click on Playing Audio to run the troubleshooter - Wait for the scanning process to complete
- If the troubleshooter is showing any error, then fix it, check if the problem is resolved, or move to the next fix.
2. Update Audio Drivers
Audio drivers help the speakers connect to the computer properly, and if the audio drivers of your device are outdated or incompatible, they can be the real culprit of the issue. So, updating the drivers and checking if it helps you solve the issue is recommended. To update the audio drivers, follow the steps given:
- Press Windows + X on your keyboard and click the Device Manager option.
- Click the Sound, video, and game controllers option to expand it.

Click on Sound, video, and game controllers. - Then right-click on the Realtek audio option and the Update driver option.
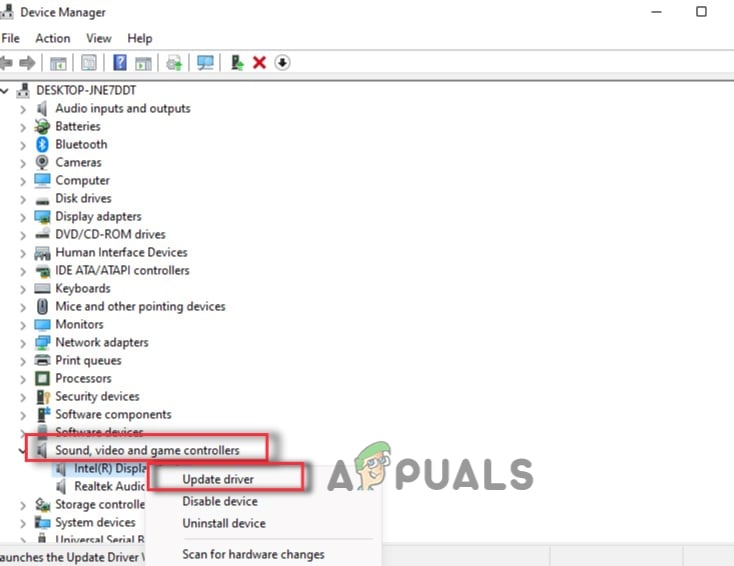
Update the Audio Drivers - Now Windows will search for updates for the driver (if available) and download and install it.
- Then play audio on your Dolby Atmos speaker and check whether the issue is resolved.
3. Disable Audio Enhancements
If you are using any audio enhancement software to enhance the audio quality of your device, then it is recommended to disable them as they are causing issues for many users. You can uninstall any third-party audio enhancement software, and if you are using Windows audio enhancement features, follow the steps mentioned given to disable them:
- Press Windows + I on your computer to open the Windows Settings.
- Now click on the System option on the left side and the Sound option.

Click on System in Windows Settings - Then click on the Sound and audio device you are using.
- Now turn off the Enhance audio option and restart your device.
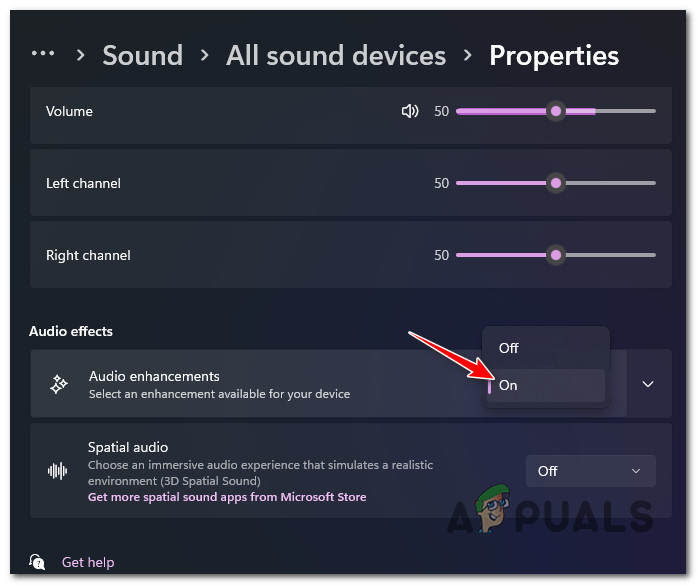
Enable the audio enhancement
Then check if the issue is resolved or not.
4. Disable Exclusive Controls Feature
Sometimes, this feature is incompatible with all devices and can cause various problems. Therefore, here it is recommended to disable the exclusive controls option and check if it helps you to solve the issue. To disable the exclusive controls option, follow the steps given:
- Press the Windows key on your Keyboard, and in the search box, type Control panel
- Now open Control Panel from the list of results
- And choose Hardware and sound and click on Sound
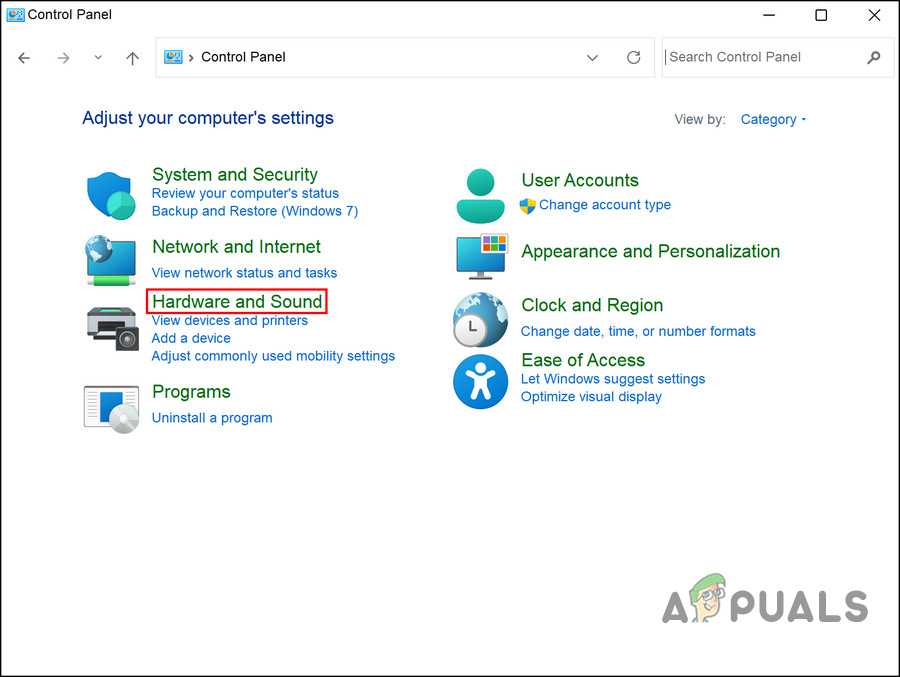
Click on Hardware and Sound - Then in the Recording tab and click on highlight the microphone, choose Properties.
- Now click on the Advanced tab and untick the box next to Allow applications to take exclusive control of this device.
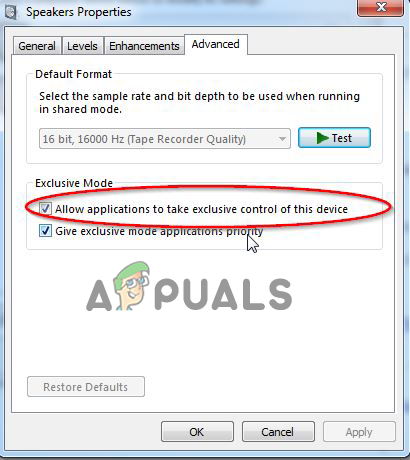
Click on Allow applications to take exclusive control of this device. - Then click on OK and Apply to save the changes.
- Now close the Windows and see if the error is fixed
5. Use System Restore
If none of the options mentioned above helped you to solve the issue, then you can use the system restore feature and restore your system when the Dolby speaker is working properly without causing the audio buzzing problem. So, trying it and checking if it helps you solve the issue is recommended.
However, remember that to restore a previous working state of Windows, this feature must be enabled on your PC to create a restore point. If it is not, there will be no restore points.
Check if the feature is enabled already, follow these steps to proceed:
- Press the Win + R keys together to launch the Run dialog.
- Type rstrui.exe in the Run box and click on Enter.
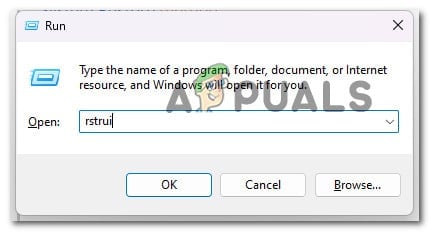
Deploy a Rstrui scan - Here you will see the list of restore points available. Select one of them (especially the new one, preferably) and hit Next.
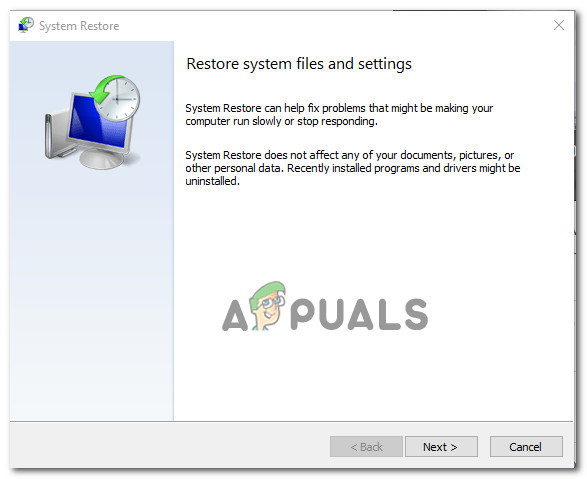
Accessing the System Restore - Click Finish to end the process.
There are 2 audio drivers available on the Windows PC/laptops. One comes by default in the Windows system, and another is provided by the PC manufacturer. If you are facing an issue with the manufacturer, you can switch to the default one available on Windows anytime and check if the problem gets resolved. To do so, follow the steps listed:
- Right-click on the Start icon and click on the Device Manager option.
- Click the Sound, video, and game controllers option to expand it.

Click on Sound, video, and game controllers. - Then right-click on the audio option and click on the Update driver.
- Now click on the Browse my Computer for driver software option.
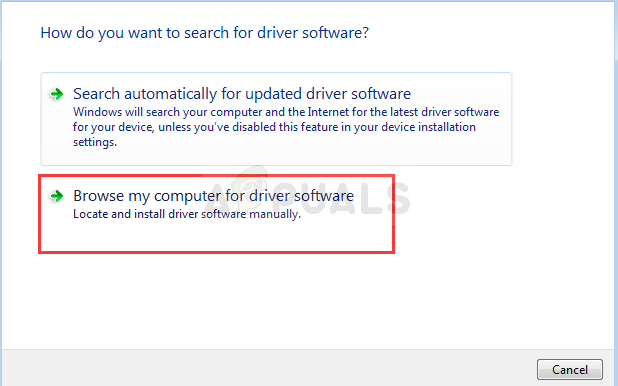
Browse my computer for driver software - Then click on the “Let me pick from a list of Device Drivers on my Computer.”
- And click on the High-Definition Audio Device option and click the Next button.
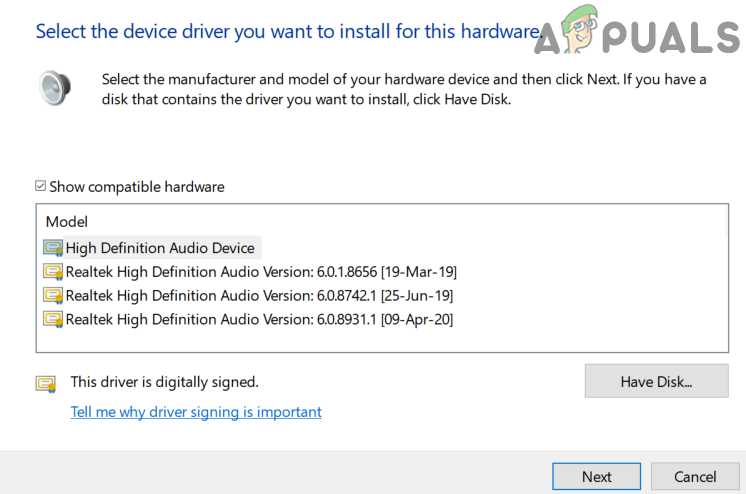
Default High Definition Audio driver - Then complete the process, restart your device, and check if the issue is resolved.
7. Reinstall Driver
Lastly, if none of the methods mentioned above worked for you to fix Dolby Atmos Speaker Audio’s start to buzz, then we suggest you uninstall and reinstall the audio driver and check if it helps you solve the issue. To reinstall the driver, follow the steps underneath:
- Right-click on the Start icon and click on the Device Manager
- Click the Sound, video, and game controllers option to expand it.

Click on Sound, video, and game controllers - Then right-click on the audio driver and click the Uninstall driver option.
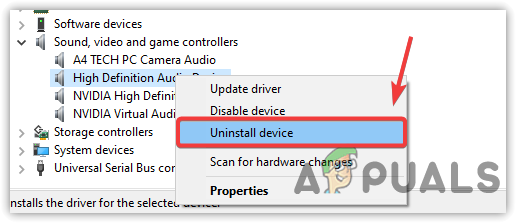
Click to Uninstall Audio Driver - Now restart your device, and the driver will be reinstalled again automatically.
After installing the driver successfully, try playing the audio on the Dobly Atmos speaker and check if the problem is fixed. It is estimated our article works for you to solve the problem in your case, but if you still face the problem, then post your query in the feedback hub, and they will get back to you with a workaround.


