How to Disable Sound Recorder in Windows 10?
The Sound Recorder is an audio recording program included in most versions of Windows operating systems. It is an app that is used for recording sounds, conversations, and lectures. However, if you use an alternative sound recorder and you don’t need to use Windows Sound Recorder anymore. Rather than deleting the app from the system, you can temporarily disable it for one or all the users. In this article, we will show you the methods through which you can disable the Sound Recorder on your system.

The setting for disabling Sound Recorder can be found in the Local Group Policy Editor. However, the Local Group Policy Editor isn’t available in the Windows Home Editions. Therefore, we have also included the Registry Editor method, which will work the same.
Disabling Sound Recorder through the Local Group Policy Editor
The Local Group Policy Editor is used to configure many important settings of the operating system. The administrator can use and modify specific settings for computers or specific users. For Sound Recorder, there is a specific policy setting named “Do not allow Sound Recorder to run” in the Group Policy. By enabling this, you can restrict the access of the Sound Recorder.
Note: If you are using the Windows Home operating system, then skip this method and try to use the Registry Editor method.
- Press the Windows + R keys combination on your keyboard to open a Run dialog. Type “gpedit.msc” in the dialog and press the Enter key to open the Local Group Policy Editor.
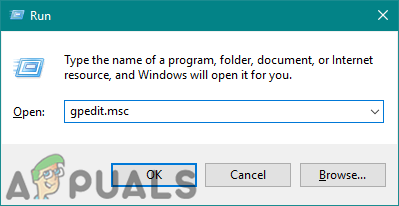
Opening Local Group Policy Editor - In the Local Group Policy Editor window, navigate to this path:
Computer Configuration\Administrative Templates\Windows Components\Sound Recorder\
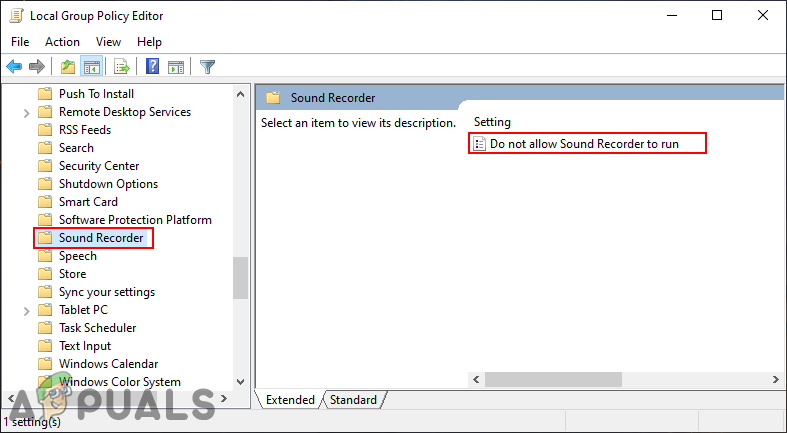
Navigating to the setting in GPO - Double-click on the setting named “Do not allow Sound Recorder to run” and it will open up in another window. Change the toggle option from Not Configured to Enabled and click on Apply/Ok button to save changes.
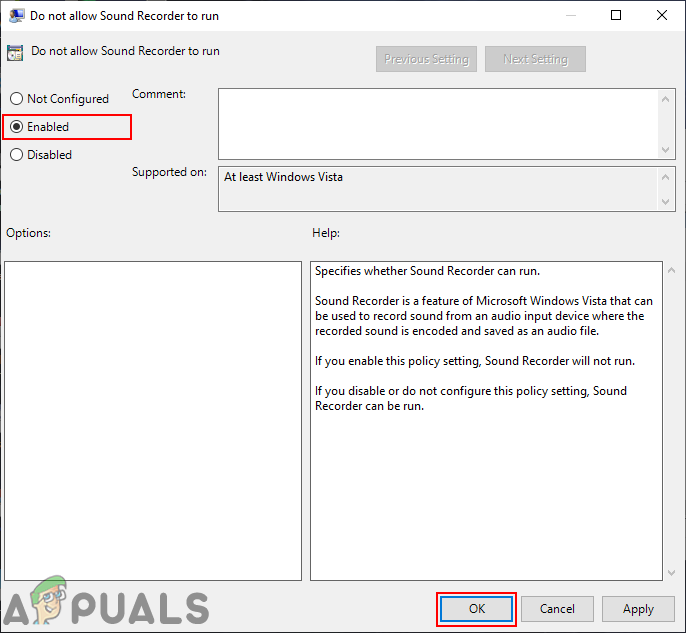
Enabling the setting - This will prevent the users from using the Sound Recorder on Windows operating system.
- To enable the Sound Recorder back, simply change the toggle option in steps 3 to Not Configured or Disabled.
Disabling Sound Recorder through the Registry Editor
The registry is a central hierarchical database that stores information, which is necessary to configure the system. It allows users to create, manipulate, rename, or delete subkeys, keys, values, and value data. We always recommend the users to back up the Registry before making any changes in any path. However, by following the below steps correctly, there will be nothing to worry about.
The value can be added for both the Current User (HKEY_CURRENT_USER) and All Users (HKEY_LOCAL_MACHINE). The path will be the same for both but the hive will be different.
- Press the Windows + R keys combination on your keyboard to open a Run dialog. Now type “regedit” and press the Enter key. It will open up Registry Editor and also choose the Yes option for UAC (User Account Control) prompt dialog.
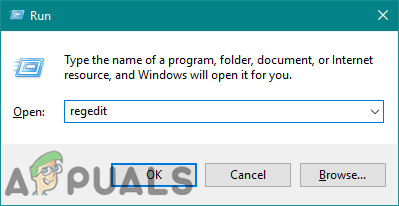
Opening the Registry Editor - In the Registry Editor window, navigate to this path:
HKEY_LOCAL_MACHINE\SOFTWARE\Policies\Microsoft\SoundRecorder
- If the SoundRecorder key is missing, simply create it by right-clicking on the Microsoft key and choosing the New > Key option. Then name the key as SoundRecorder.
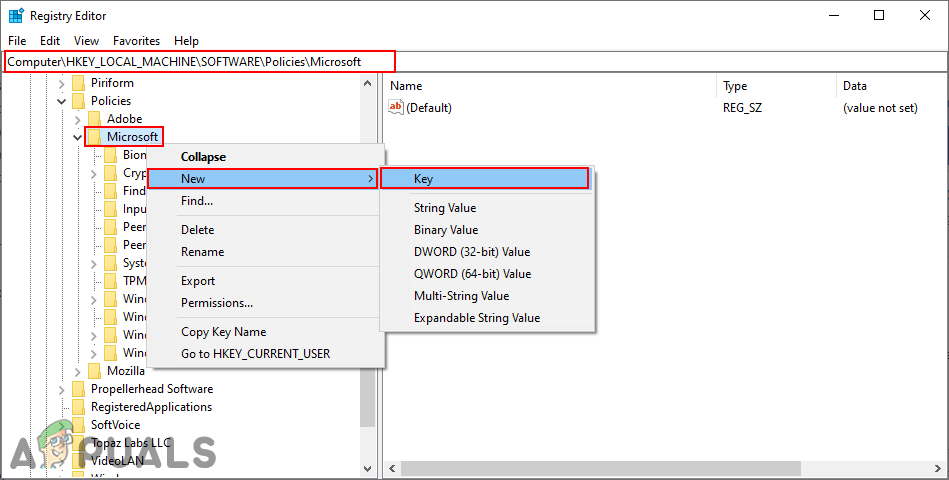
Creating Sound Recorder key - Right-click on the right pane of the SoundRecorder key and choose New > DWORD (32-bit) Value. Name this newly created value as “Soundrec“.
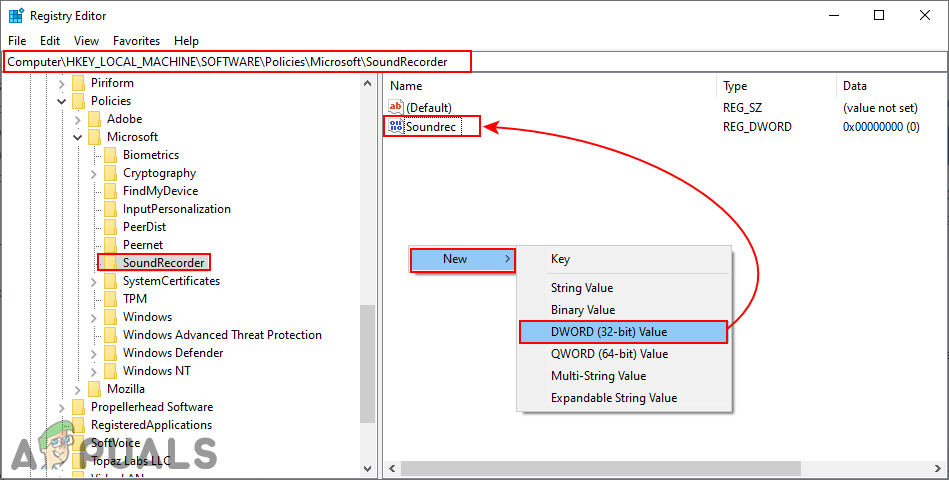
Creating a new DWORD value - Double-click on the Soundrec value and change the value data to 1.
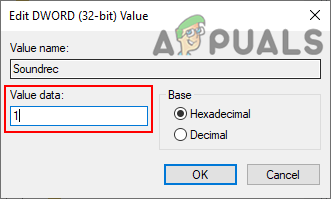
Changing the value data - Finally, make sure to restart your computer to let this value work.
- To enable it back, you need to change the value data back to 0 or need to delete the Soundrec value from Registry Editor.


