Instant Fix: DHCP is not enabled for “Wi-Fi” Error
 Reviewed by Muhammad Zubyan
DHCP is Not Enabled for Wi-Fi error means your Wi-Fi access point is not running as a DHCP server from your router. DHCP (Dynamic Host Configuration Protocol) is used to assign the IP addresses automatically to the connected devices. If you want to access the internet, you will need a unique IP address that will be assigned by the DHCP server.

Since you are facing this error, it means the DHCP did not assign the IP address to your device. As a result, you cannot access the internet. This mostly happens when the device fetches the IP address manually Now, let’s take a look at the solutions to fix this issue.
1. Obtain an IP address Automatically
This error often occurs when the user manually configures the IP address by typing it into the network settings. When the IP address is configured manually, the DHCP does not need to assign the IP address to the device, resulting in the ‘DHCP is not enabled for Wi-Fi’ error message. Therefore, in this step, we will start by configuring the network settings to automatically obtain the IP address. To do so, follow these steps:
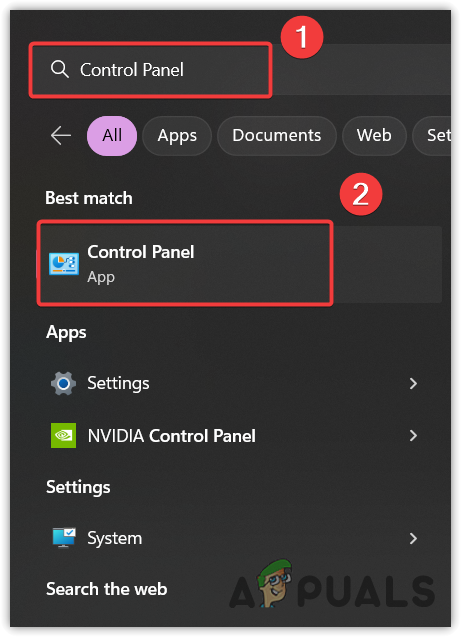
- Click the Start Menu and type Control Panel to open it.
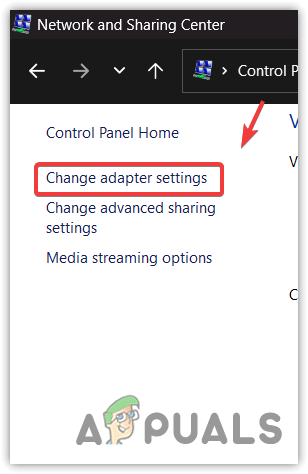
- Navigate to the Network and Internet > Network and Sharing Center.
- Go to the Network adapter settings by clicking on the Change Adapter Settings from the left sidebar.
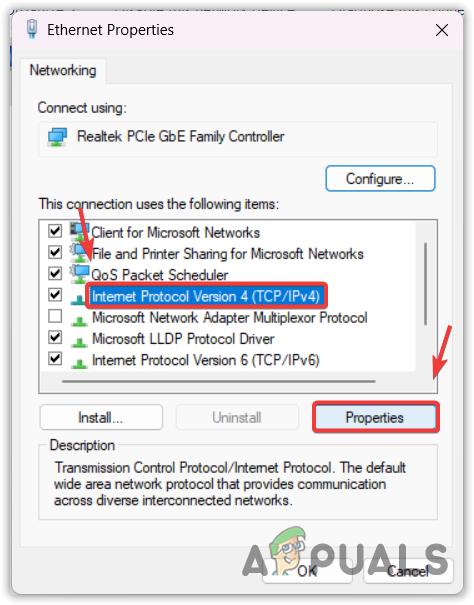
- Here, you will see the network adapters. Right-click the network adapter and select Properties.

- Select the Internet Protocol Version 4 (TCP/IPv4) and click Properties.
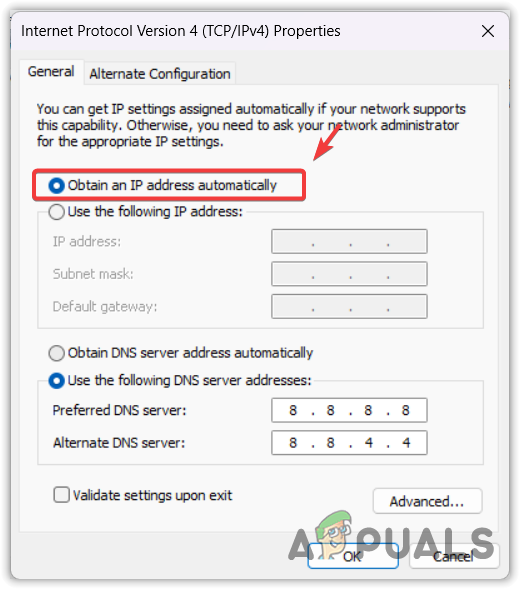
- Here, tick Obtain an IP address automatically and click OK to save the settings.
- Once done, check if the DHCP is Not Enabled for Wi-Fi error is fixed or not.
2. Enable DHCP client service
DHCP client service is used to register and update the IP addresses and DNS records. When this service is disabled, the DNS and IP addresses won’t be updated, which might cause this issue. Thus, if you have not checked the DHCP client service, check it, as it might be disabled.
To enable the DHCP client service, follow the steps:
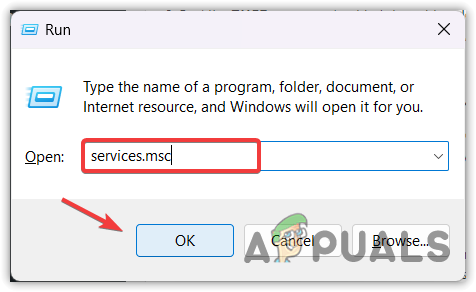
- Right-click the Sart Menu and select Run from the listed options.
- Here, type services.msc in the input box and click OK.
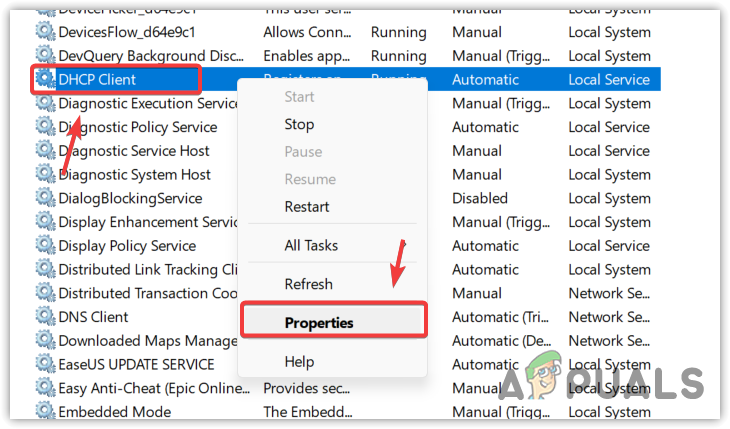
- Find the DHCP Client service and right-click on it to select Properties.
- Change the Startup from Manual to Automatic, then click Apply and click OK.
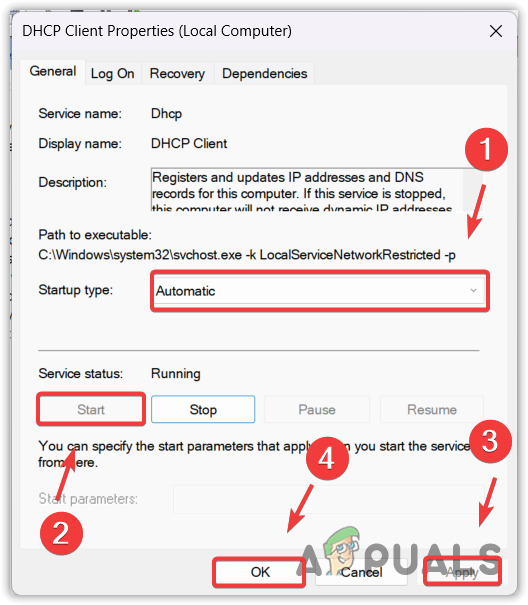
- Once done, the error should be fixed.
3. Power cycle Your Wi-Fi Router
Power cycling the router means turning off the router and then turning it back on. This clears the short-term memory from the router, which saves the temporary files. Sometimes, these temporary files become cluttered after a period of time, which might cause the DHCP not to assign the IP address to your device. Therefore, we recommend performing a power cycle on the Wi-Fi router. Follow the steps to perform a power cycle.
- Unplug the router from the power outlet.
- Wait for 15 Seconds, then plug the router back into the power outlet.
- Once done, check if the error is fixed and Wi-Fi is working on the device.
4. Reinstall your network driver
If the error persists, you need to check for the network driver. It is because if there is a problem with your network driver, it could cause issues such as this one. Therefore, try reinstalling the driver by following the steps.
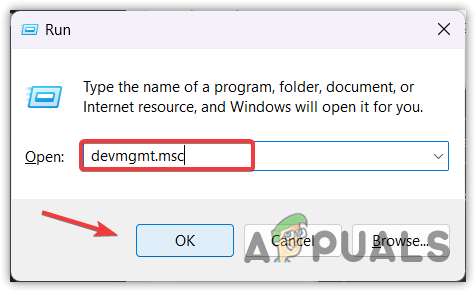
- Use the Win + R keys simultaneously to open Run Program.
- Here, type devmgmt.msc in the input box and click OK to navigate into the device manager.
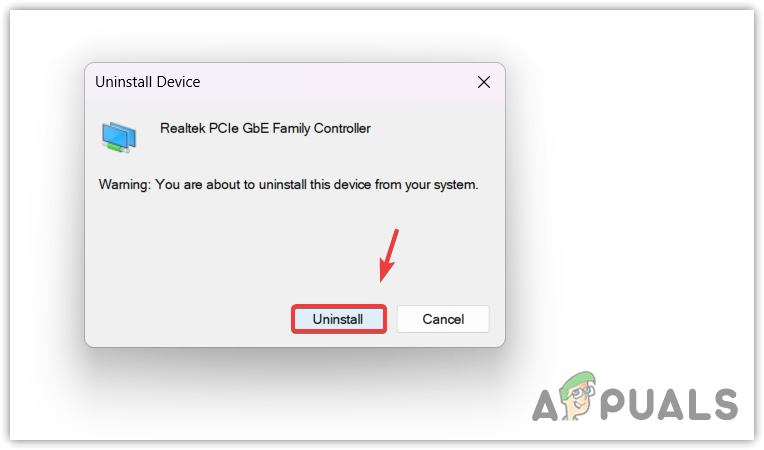
- Expand the Network Adapters, right-click on your network driver, and select Uninstall device.
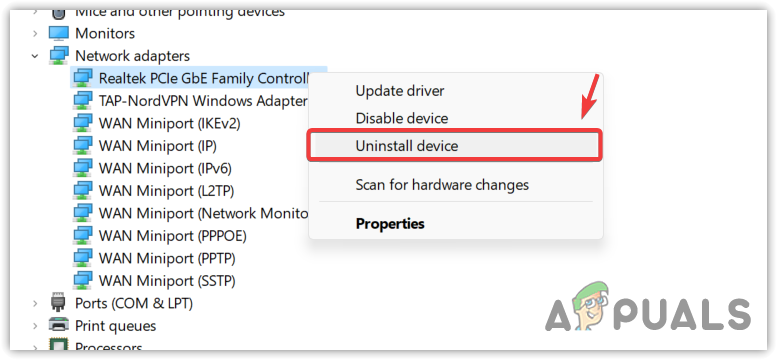
- Click Uninstall to remove the driver.
- Once the driver is uninstalled, restart your computer to install the driver.
5. Reset the network settings
Resetting the network settings means you are going to reset all the settings to the default, such as DNS and Proxy settings. It also reinstalls the network drivers and re-assigns the IP address. Since you have come this far, it is recommended to try resetting the network settings by following the steps:
- Click the Start Menu and type Network Reset.
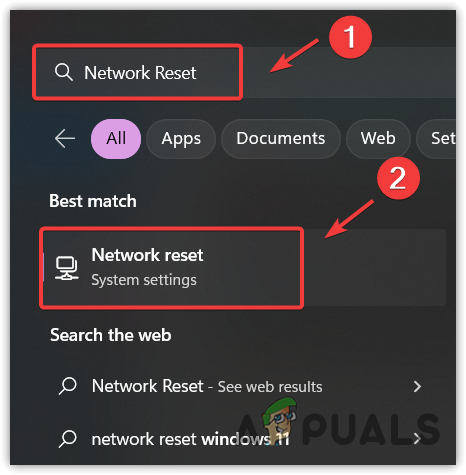
- Hit Enter to navigate into the settings.
- Click the Reset now button to set the network component settings to default.

- Once your PC is restarted, check if the error is fixed or not.
While you shouldn’t encounter this error after following the methods listed in this ultimate guide, if the issue persists and you’re unable to access the Internet, it’s recommended to contact your ISP (Internet Service Provider) for further assistance.
DHCP is Not Enabled for Wi-Fi- FAQs
When DHCP is not enabled for WiFi error means the DHCP did not assign the IP address to your device. This mainly happens due to the manual configurations in the network settings.
To fix this issue, you will have to configure the network settings to fetch the IP address automatically.
Reviewed by Muhammad Zubyan


