What is (Code 31) in Device Manager and How to Fix it?
Device Status (Code 31: Operation Failed) Explained and Solved
Error Code 31 is one of the many Device Manager errors. You will face this error with the Device Manager when an incorrect driver is installed on your device. This prevents the driver from working properly and show the error code 31.
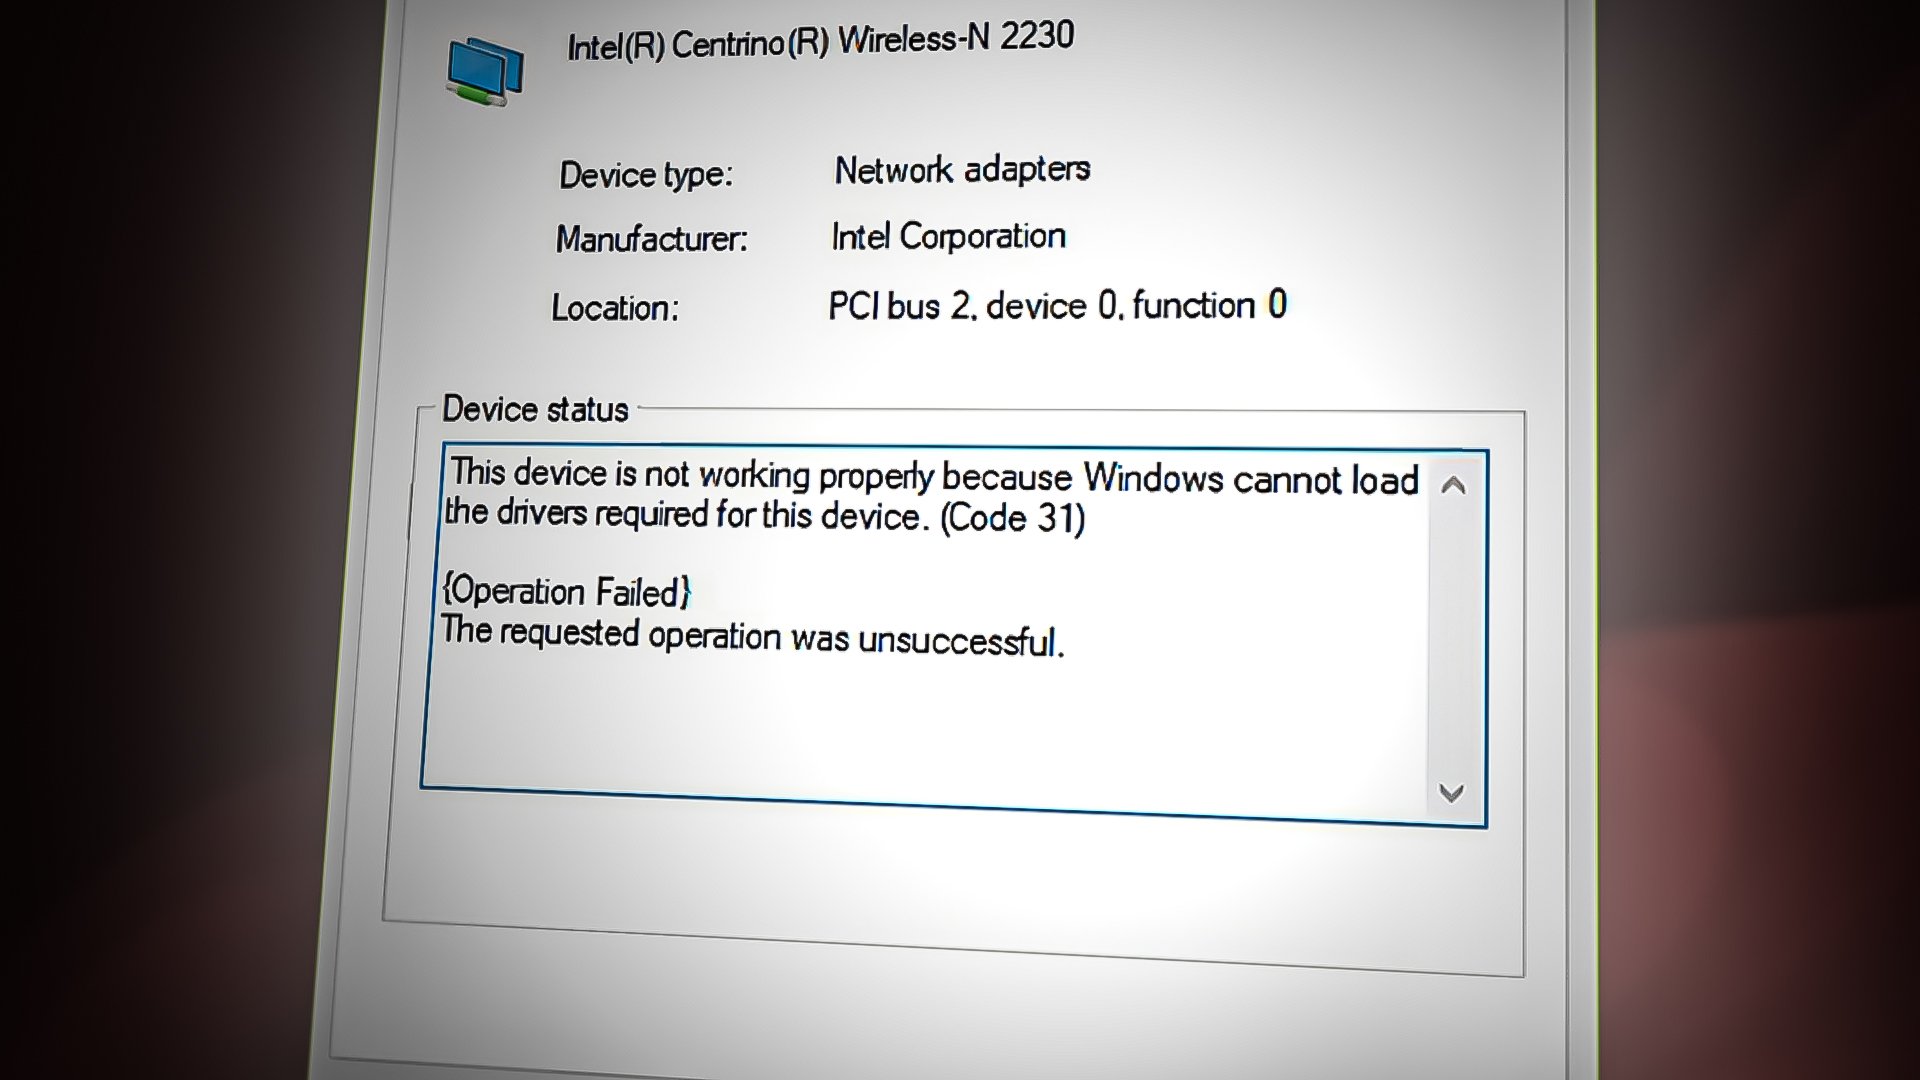
In this guide, we will show you some methods you can try to resolve this issue.
1. Update the Driver
An outdated Network driver will also lead to this error. Having an older version of the driver prevents the system from loading properly. Therefore, you must ensure that the driver you are using is fully updated. Below are the steps you must follow to update the driver
- Open the Run utility by pressing the Win + R keys together.
- Type “devmgmt.msc” in the search box and click OK to open the Device Manager.
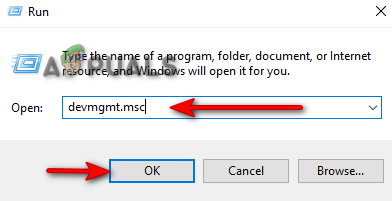
Opening Device Manager - Right-click the driver installed on your system and click on the “Update Driver” option.

Updating the Driver - Allow the device to automatically find the best update for your driver online by clicking on “Search automatically updated driver software.
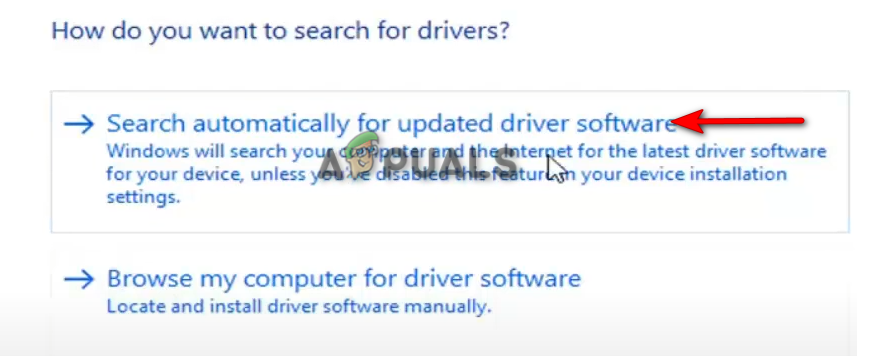
Searching updates for drivers automatically - After the driver has been found, install and update it.
- Open the Windows Start Menu by pressing the Win key.
- Restart your computer by clicking on the Power option and selecting “Restart”
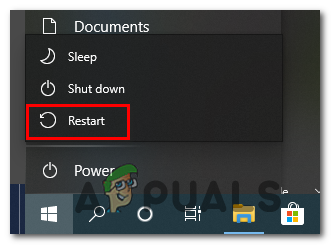
Restarting the Windows computer - Open the Run command by pressing the Win + R keys together.
- Type “devmgmt.msc” in the search box and click OK.

Opening Device Manager - Right-click the driver showing the error code and click on the “Properties” option.
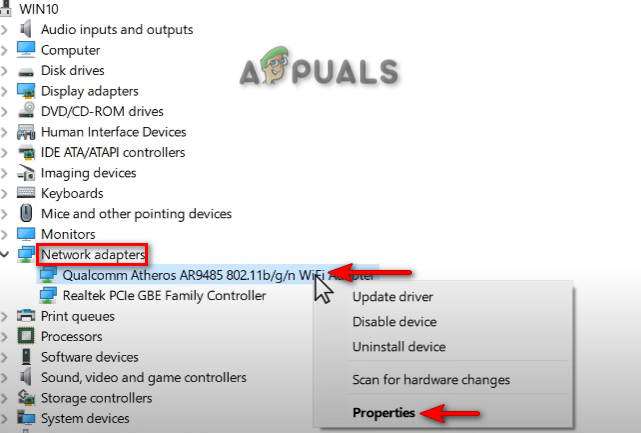
Opening Driver Properties - Go to the Details tab on the properties page.
- Select “Hardware ids” under “Property” and copy the last value in the Value Box below.
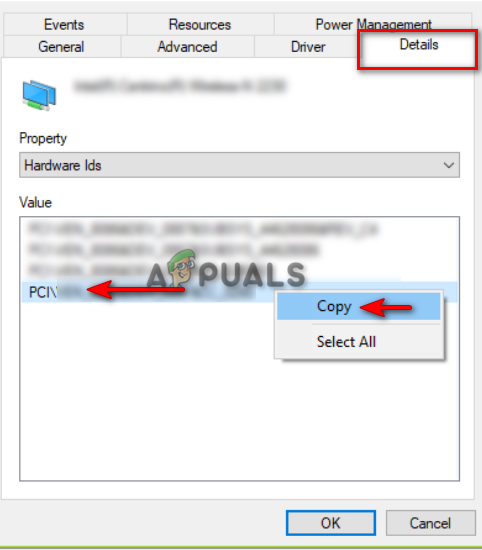
Copying Hardware ID - Now, search for the same value and find the corresponding driver to download and Install.
- Once you have installed the correct drivers, restart your computer and see if this fixed the error.
2. Delete the corrupted registry key
Registry keys contain folders that consist of data from your system. Corruption in these registries will prevent the system from functioning accurately and as a result, will receive such errors. Therefore, you must find the corrupted registry key that is causing this error to occur. Below are the instructions for deleting the corrupted registry keys:
- Open the Run command by pressing the Win + R keys together.
- Type “regedit.msc” in the search box and click OK to open the Registry Editor.
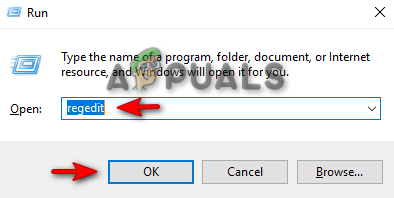
Opening the Registry Editor - Now, navigate to the following path (You will need administrative permissions to perform these tasks):
Computer\HKEY_LOCAL_MACHINE\SYSTEM\CurrentControlSet\Control\Network
- Delete the Registry key by right-clicking on it and selecting the “Delete” option.
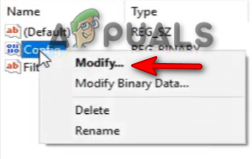
Deleting registry key - If the key does not exist, move on to the next method.
3. Reinstall the Driver
If the error still persists, then, as a last resort, you must reinstall the Adapter Wireless Driver. By following the steps listed below, you can reinstall the Adaptor Driver:
- Open the Run command by pressing the Win + R keys together.
- Type “devmgmt.msc” in the search box and click OK.

Opening Device Manager - Click on the “ Adapters” option.
- Right-click the Wireless Adapter installed on your system and click on the “Uninstall Device” option.Note: if your Wireless Adapter is not shown on the Device Manager then restart your system or reconnect the hardware
- Confirm the uninstallation by checking the “Delete the driver software for this device” box and clicking the “Uninstall” option on the confirmation prompt.
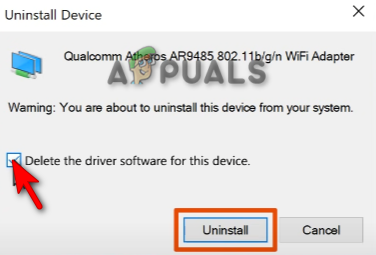
Confirming Uninstallation of the device - To reinstall the driver, click on “Action” at the top of the page and select “Scan of hardware changes.”
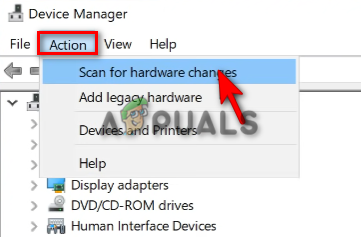
Scanning for Hardware Changes - After the system scans for the hardware changes, you will get the Wireless Driver reinstalled under Adapter.
4. Perform a System Restore
System Restore is a feature in Windows that allows you to revert the state of your system to a particular time. This feature is mostly used to recover malfunctions and other errors. Using System Restore, you can easily create a restore point where the Driver was not facing any type of error. You can follow the steps below to see how to perform a system restore:
- Open the Windows Start Menu by pressing the Win key.
- Type “Restore Point” in the Windows Search Box and click on the “Create a Restore Point” option.
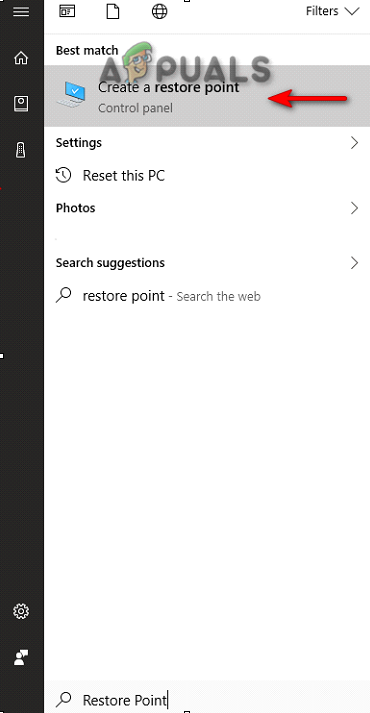
Opening System Restore - To create a restore point, click on the Create option under Protection Settings.
- Now, type the restore point you prefer to create (for example, restore 12/15/2022) and click Create.
- Click on the System Restore Option.
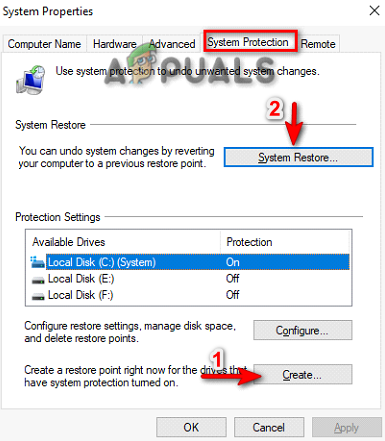
Creating restore point - To create a custom restore point, select “choose a different restore point” and click Next.
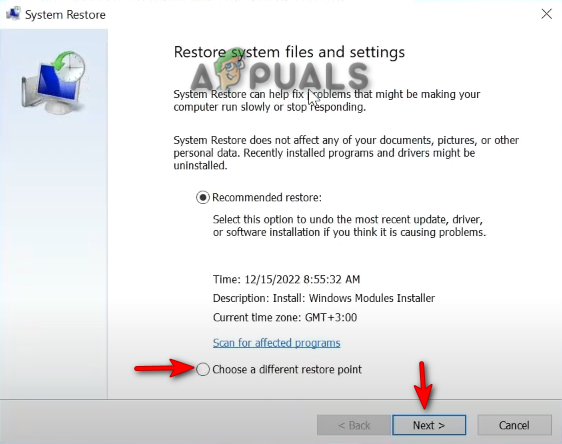
Choosing a different restore point - Select a restore point and click on Next to restore your system.
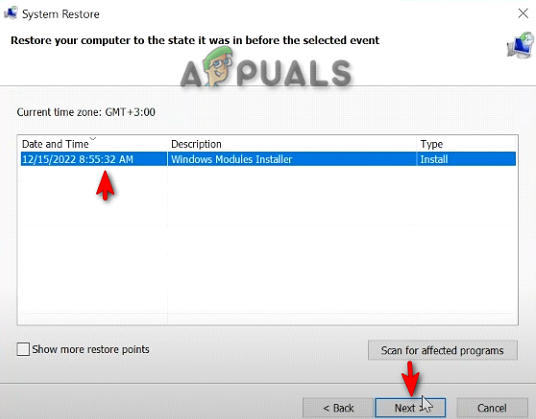
Restoring the System to custom time


