How to Fix ‘Connection Rejected: Invalid Token’ in Apex Legends?
A lot of players are dealing with the ‘Connection rejected: Invalid token’ Apex Legends error while trying to load into a server. This error appears after the initial loading screen, letting the players know that they can’t connect to the server. In most cases, the error is reported to occur on PlayStation or Xbox consoles.
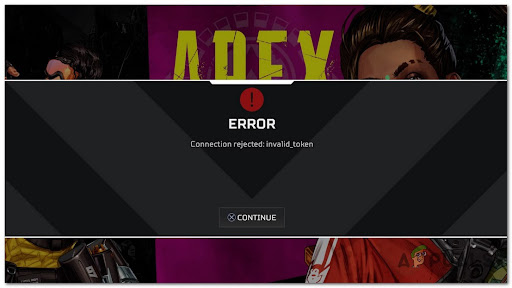
After a lot of players have complained online about this issue, we’ve done an in-depth investigation and come up with a shortlist of all the possible culprits that might cause this error:
Now that you are aware of all the possible causes, here’s a list of all the possible fixes that players have used to fix their Connection rejected: invalid token error for Apex Legends:
1. Reboot or reset your router
The first thing you can try in order to fix this error is to either restart or reset your router. This error could be caused by a network inconsistency, so it may be repaired by a simple restart or a bit more complicated reset.
By doing a simple network reboot, you will be able to reset your network components without making any changes to your credentials and settings. So you don’t have to worry about anything when you are forcing a network refresh.
If you want to perform a router reboot, you need to press the restart (switch) button. In case this option is not available, use the ON/OFF button and press it twice. You can also simply disconnect the power cable from the power outlet and will have the same result.
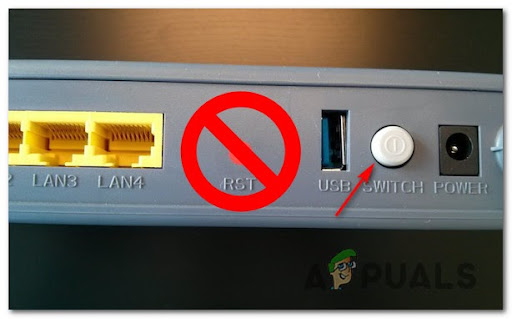
Note: Don’t press the RST button because you will trigger a reset procedure instead.
In case you’ve already done this and still encounter the issue, you can try to go for a router reset. But you need to keep in mind that this procedure will also reset your custom credentials and the default address of your modem.
Note: On top of this, your login credentials will be reverted back to admin for both username and password.
Now all you have to do is to press the reset button and keep it pressed for at least 10 seconds. Your router model might be different, so you may need a small pointy object to manage to reach the reset button. The LEDs on the router will start to blink intermittently when the procedure is complete.
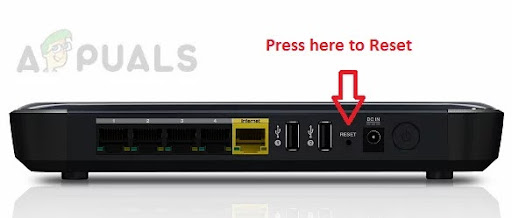
In case the ‘Connection Rejected:Invalid Token’ error is still occurring even after doing this, go to the next possible fix.
2. Create new router profile with unrestricted APN (if applicable)
Another thing you can try is to create a new router profile with unrestricted APN. As players report, they have managed to stop this error from happening on their console by entering their router settings and creating a new profile with new details.
A restricted APN (Access Point Name) will make the game information needed to connect to the game server impossible to handle. By ensuring that your APN is unrestricted, you’re essentially removing the roadblock that is currently causing the ‘Connection Rejected: Invalid Token’ error.
Note: This method will only work if your internet service provider is Telekom.
In case you don’t know how to do this, here are the steps you need to follow:
- You need to start by opening your default browser. Now you need to access the router settings by typing the code below, then press Enter:
192.168.8.1 - After that, you should find yourself at the login screen. Enter your credentials to be able to access the router settings.
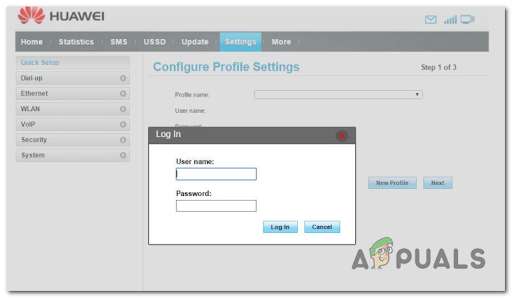
Access the Current Settings menu - Now you need to access the Settings section, then click on Dial-up and Profile Management.
After that, you will have your old profile’s name set as TelekomSA and will be set as default. You need to create a new profile with the following details:
Profile name: unrestricted
IP type: IPv4
APN: unrestricted
Note: You need to leave the rest of the blank space as it is.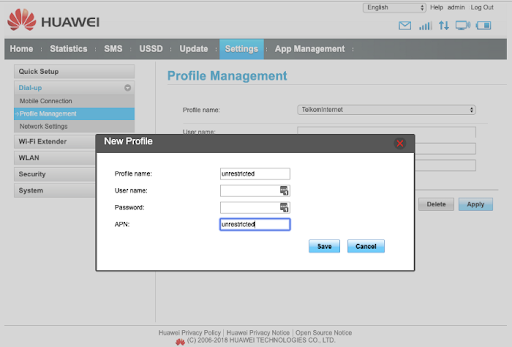
Creating a new profile - Now you need to save the new unrestricted profile and set it as default.
- After that, you should try and launch Apex Legends to see if the Connection Rejected:Invalid Token still occurs.
3. Change DNS to Google
This Apex Legends error could be also caused by the DNS range being inconsistent. This might be making the game server not work properly.
Fortunately, in this case, you can fix this by allowing your console to communicate with the EA game servers by making your default DNS (Domain Name Address)range to a range supplied by Google.
Note: This will also slightly boost your internet speed.
The instructions you need to follow to do this are different depending on your platform of choice, so below you will find the specific guides for this operation on Xbox One, Xbox Series X/S, PlayStation 4, and PlayStation 5.
Here are the guides you need to platform to change the DNS to the range supplied by Google on your specific platform:
Change the default DNS on Xbox One / Xbox Series X/S
The instructions to change the default DNS for the last-gen consoles are approximately identical to ones for the new-gen consoles.
All you have to do is to access the Advances Settings menu of the network that you are connected to, then go to the manual configuration approach to give the option to set a Custom DNS.
Here are the steps you need to follow:
- Go to the main screen of your Xbox console and press the guide menu.
- After you’ve done that and the new menu appears on your screen, select All Settings.
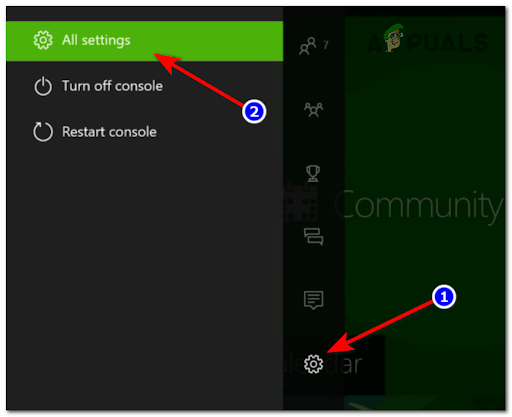
Access the All Settings menu - Now you need to go down until you see Network, then select it to open the network settings.
- When you are inside the Network menu, select Advanced settings from the list of available options.
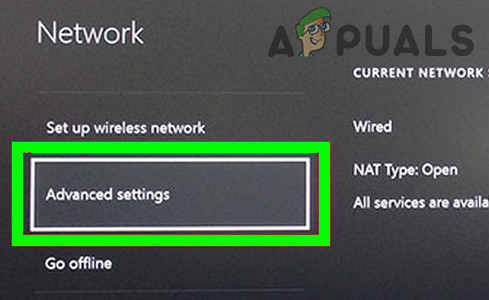
Open the Advanced Network Settings menu - Next, you need to select DNS settings, then choose Manual.
- After that, set 8.8.8.8 as the Primary DNS and 8.8.4.4 as the Secondary DNS, then select Save the changes.
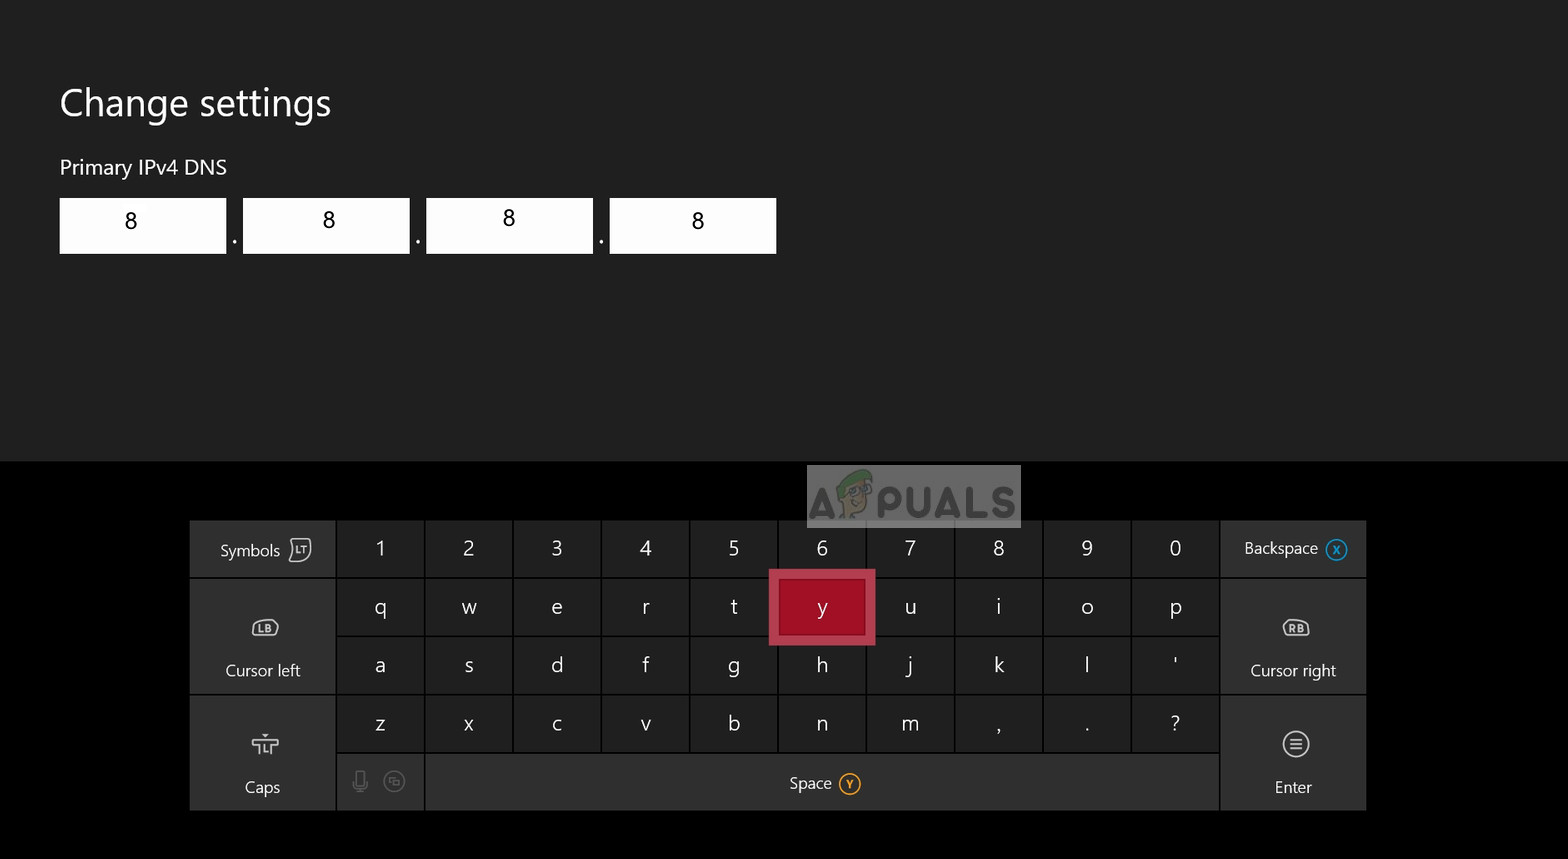
Changing the DNS settings - After you save the changes, restart both your Xbox console and router.
- When your console boots back, launch Apex Legends and try to join a match to see if you still encounter the error.
Change the default DNS on PlayStation 4
The only way to change the DNS on the PlayStation operation system is to choose to Set up a new Internet connection and select Custom when asked if you want to go to automatic settings.
Here is the step by step instructions on how to change the default DNS settings to Google on your PlayStation 4 console:
- Go to the home screen of your PlayStation 4 system, then navigate through the vertical menu until you find Settings, then select it.
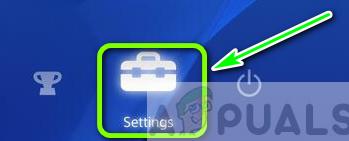
Accessing the Settings menu - After you are inside the Settings section, go and access Network.
- Now you need to choose Set up Internet Connection.
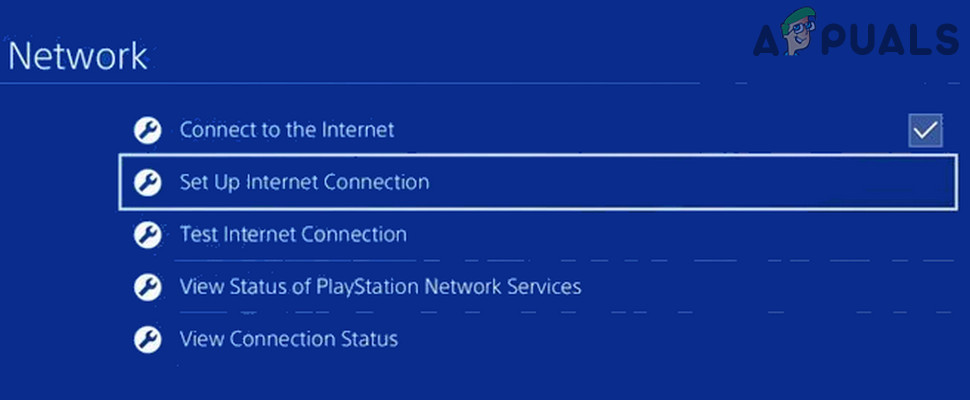
Setting up the Internet connection - Depending on the type of connection you’re using, select either Wi-Fi or LAN cable, then choose Custom to not get a default DNS.
- You will be asked about the address you want. Select Automatic.
- After that, select DHCP Host Name, then Do not specify.

Do not specify the DHCP - Now that you have arrived at the DNS Settings prompt, select Manual, then set 8.8.8.8 to Primary DNS, and 8.8.4.4 to Secondary DNS.
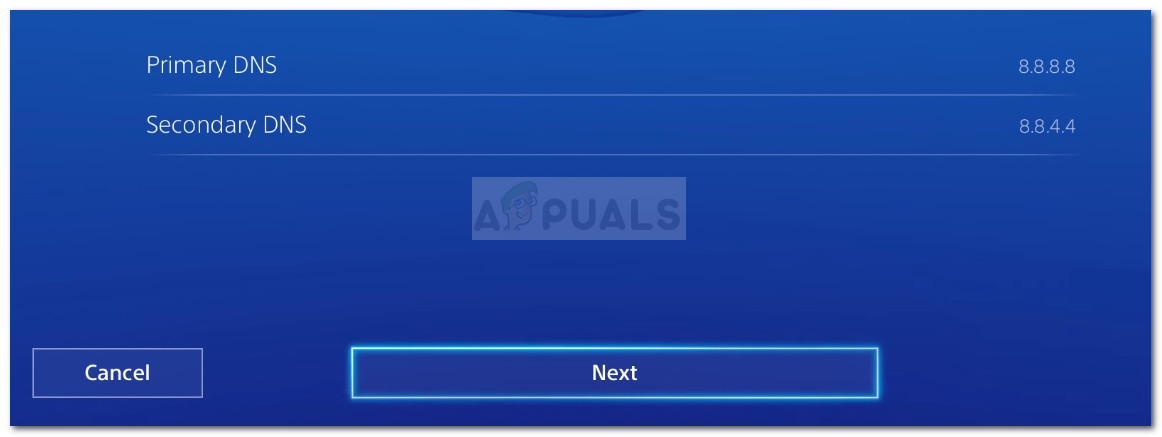
Change Primary and Secondary DNS Note: In case you want to use IPV6 instead, use the following values:
Primary DNS - 208.67.222.222
Secondary DNS - 208.67.220.220
- After you’ve done that, save the changes and restart both your console and router, then launch the game to see if still encounter the Connection Rejected:Invalid Token error.
Change the default DNS on PlayStation 5
For PlayStation 5, you need to change the DNS settings from the Settings menu, then choose the setup of a new Internet Connection by modifying the Network settings.
Here’s the guide you need to follow in order to change the default DNS on PlayStation 5:
- Go to the home screen of your PlayStation 5 console, then navigate to the Settings icon and access it.
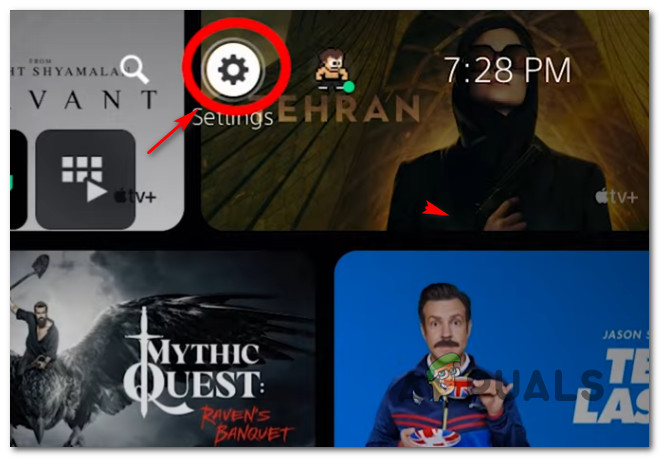
Accessing the PS5 settings - After that, choose Network, then select Settings once again.
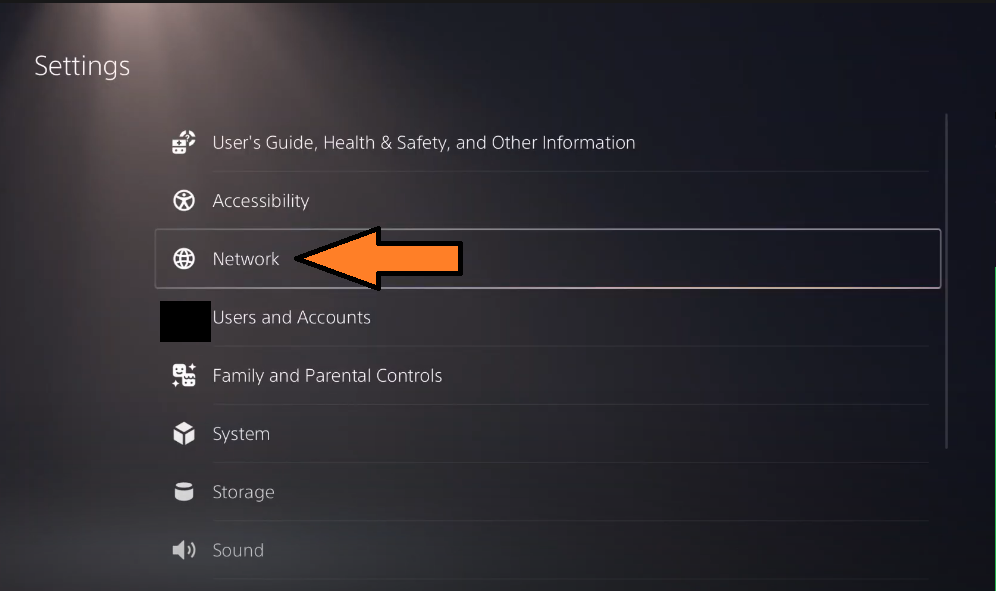
Accessing the Network Settings on PS5 - When you are inside the Settings menu, select Set up Internet Connection, then from the list of options choose Set up Manually.
- Now depending on your type of connection, choose Wi-Fi or LAN Cable. Then select DNS.
- After that, change the Primary DNS to 8.8.8.8 and Secondary DNS to 8.8.4.4. When you are done, save the changes by selecting Done.
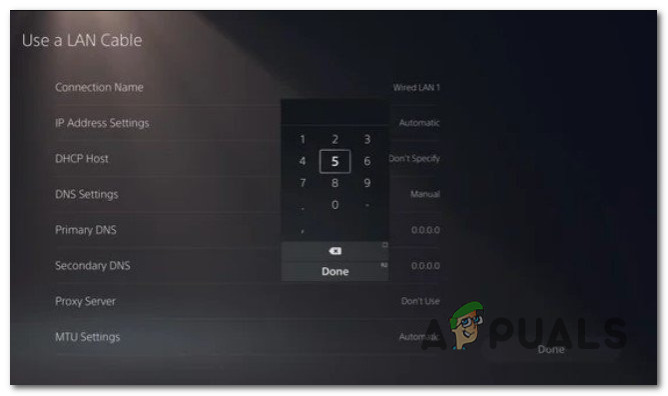
Setting the DNS on Ps5 - Now reboot both your console and router, then launch Apex Legends to see if you still encounter the same error.
In case you’ve followed the guide and it didn’t help you, go below to the next method.
4. Enable UPnP
Users have reported that the Connection Rejected: Invalid Token error could be caused by the fact that the Network Address Translation (NAT) is not opened for the network that your console is connected to. They have managed to fix this by enabling the UPnP option from your router settings.
Note: If your router doesn’t support the UPnP option, skip this method and check the following one.
Here are the steps on how to enable the UPnP (Universal Plug and Play) option on your router:
- Before doing anything, you need to start by making sure that your console is connected to the router that you want to enable the UPnP option on.
- Now open your default browser and type 192.168.0.1 or 192.168.1.1, then press Enter to open the router Settings.
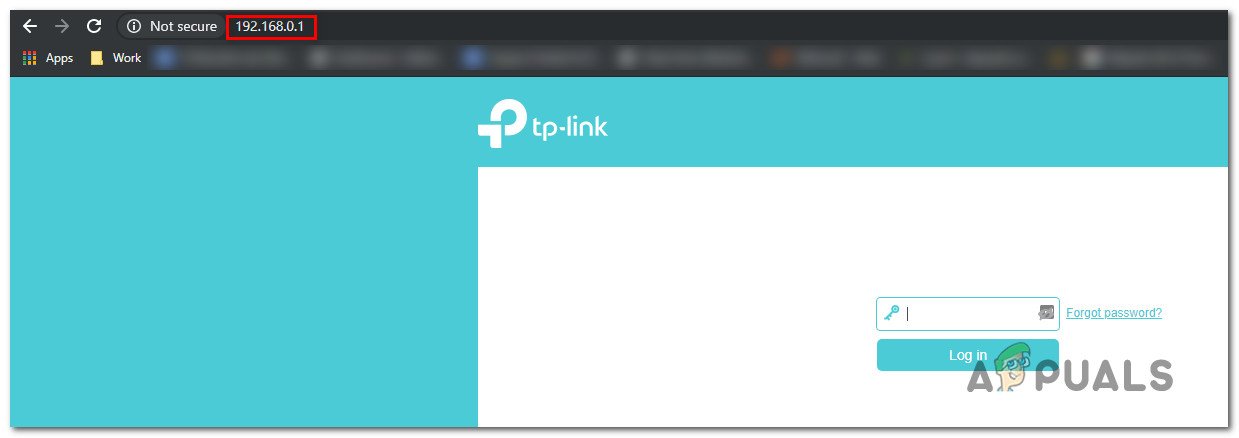
Accessing the Settings page of your router Note: In case your default IP router address is different, search only for your specific one.
- After that, you will find yourself at the initial screen, insert the credentials of your router. In case you haven’t changed the default credentials, the default login username and password should be ‘admin’ and ‘1234’.
Note: If the default credentials are not working and you haven’t previously changed them, search only for the specific instructions for your router. - After you are inside the router settings, access the Advanced menu, then go to the NAT forwarding section and scroll down until you find the UPnP sub-menu.
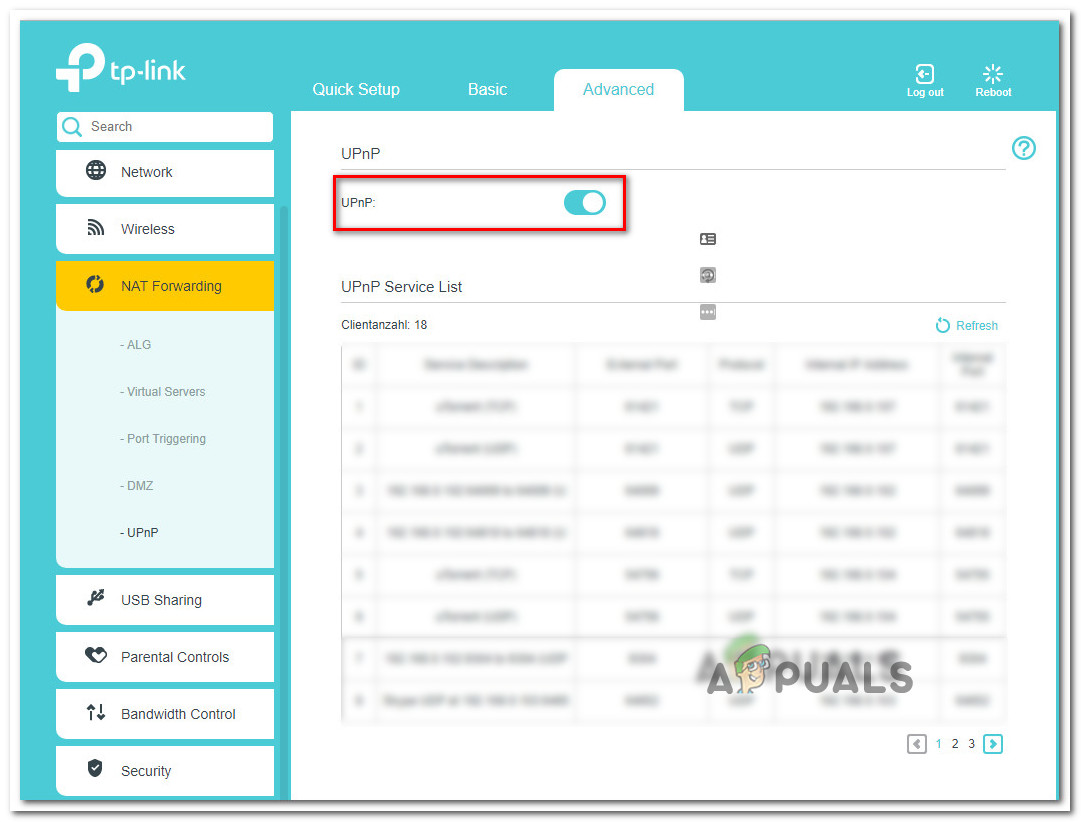
Enabling UPnP Note: The menus might be different depending on your router manufacturer, so if you don’t manage to find the UPnP, search online for instructions.
- Now make sure to enable the UPnP option. After that, restart your router, then restart your console as well.
- When the console boots back, test Apex Legends to see if the Connection Rejected: Invalid Token still occurs.
In case you still haven’t managed to get rid of this error, go to the next method.
5. Manually forward Apex Legend ports
If you’ve tried the UPnP method before and you found out that your router is not equipped to support that, you can try to manually forward the ports used by Apex Legends. By doing this, you will make sure that your network is able to allow incoming network requests from the Apex Legends servers.
In case you don’t know how to forward the ports used by Apex Legends, here are the steps:
Note: The instructions will be slightly different from one router manufacturer to another, so if you’re having trouble using the router settings search online for exact instructions.
- Open any browser you want to use, then type one of the following codes inside the search bar:
192.168.0.1
192.168.1.1
- After that, press Enter to access the router settings.
- When you find yourself at the login screen, you need to enter your login credentials in order to access the router settings.
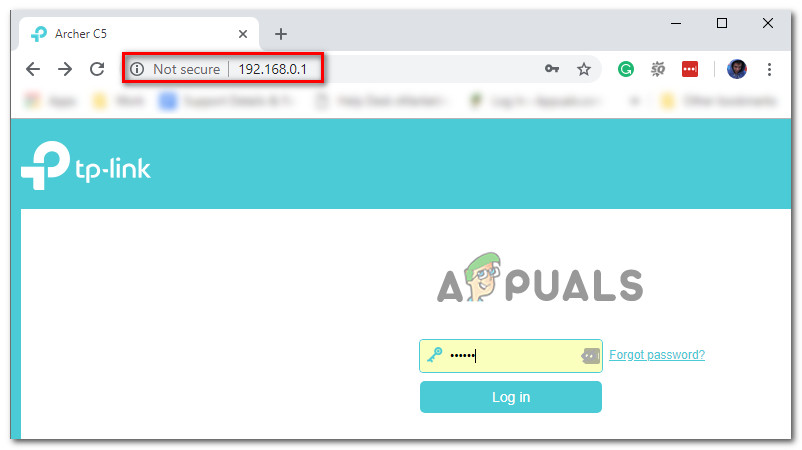
Accessing your router settings Note: If you haven’t previously changed your login credentials, the default should be admin as username and 1234 as password. If they are not working, search online for the specific login credentials for your router model.
- After you are inside the router settings, expand the Advanced / Expert menu, then click on the Port Forwarding / NAT Forwarding option.
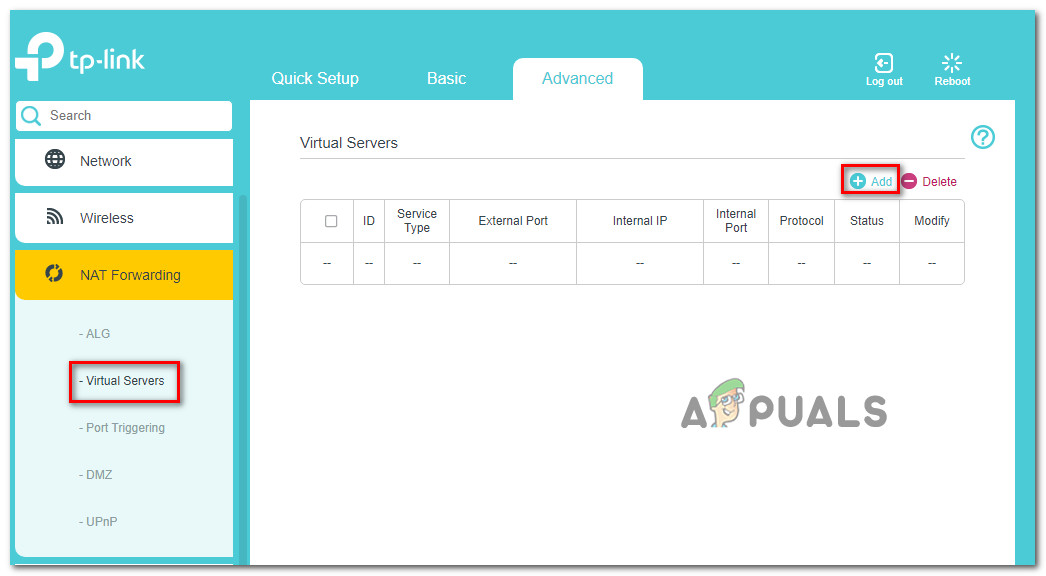
Forwarding the necessary ports - Now you need to manually open the ports below to make sure that your network will accept incoming connections from the Apex Legends server. Here’s a list of the ports that you need to open depending on your platform:
PlayStation 4

TCP: 1024-1124, 3216, 3478-3480, 9960-9969, 18000, 18060, 18120, 27900, 28910, 29900
UDP: 1024-1124, 3074, 3478-3479, 18000, 29900, 37000-40000

PlayStation 5

TCP: 1024-1124, 3216, 3478-3480, 9960-9969, 18000, 18060, 18120, 27900, 28910, 29900
UDP: 1024-1124, 3074, 3478-3479, 18000, 29900, 37000-40000

Xbox One

TCP: 1024-1124, 3074, 3216, 9960-9969, 18000, 18060, 18120, 27900, 28910, 29900
UDP: 88, 500, 1024-1124, 3074, 3544, 4500, 18000, 29900, 37000-40000

Xbox Series X/S

TCP: 1024-1124, 3074, 3216, 9960-9969, 18000, 18060, 18120, 27900, 28910, 29900
UDP: 88, 500, 1024-1124, 3074, 3544, 4500, 18000, 29900, 37000-40000
- After you successfully forward the ports, reboot your computer, then test the game to see if you still encounter the Connection Rejected: Invalid Token error.
In case the error still occurs, go to the next method below.
6. Get in contact with EA’s support team
Another thing you can try is to get in contact with EA’s support team. By doing this, you will get more details about the issue, and maybe they can help you fix it.
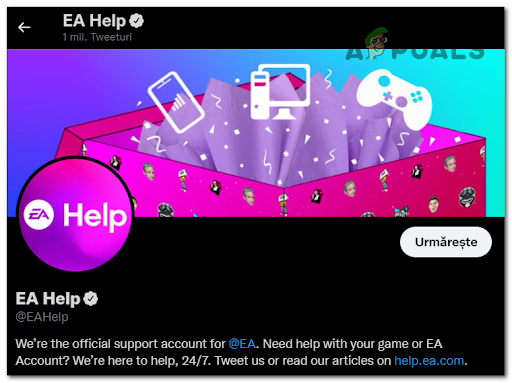
You can get in contact with them on the official EA support team page on Twitter. On this page, they often post about the current errors that other players are encountering and reporting.
They also post the troubleshooting that they recommend in order to fix the issues. Feel free to ask for help on their posts if the troubleshooting doesn’t work, or search on your own for answers that other affected users have received.
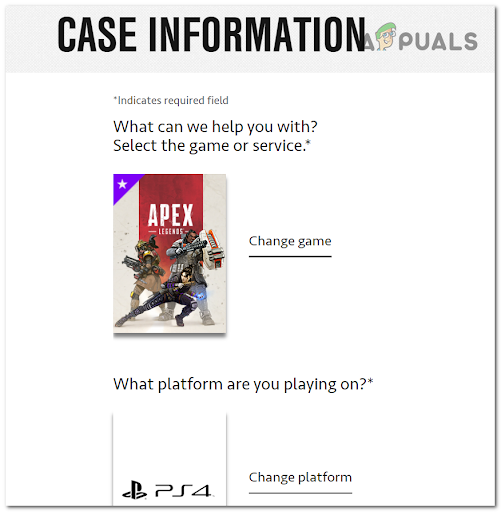
Another alternative you can try is to open a ticket on the official EA site dedicated to helping others with issues. Scrolling down the page until the bottom, you will find a button where it says Contact Us.
Click on it and it will take you to another page where you will be asked different details about the problem. After asking the questions, you will be redirected to a page where you can open a ticket about the error.
If this method wasn’t helpful as well, go below to the next one.
7. Contact ISP and ask them to change NAT type
This method is a bit more complicated than the others because it involves other individuals but still turned out to be effective in some affected users’ cases. They recommend you to call your ISP (Internet Service Provider) and get them to help you fix this issue.
When you manage to get in contact with them, give them the information about your router, then have them transfer you to tech support. They will need to change your NAT type to number two. After a restart of everything, your Apex Legends error should be fixed.
After you’ve tried this and the error is still not fixed, go to the next potential fix.
8. Join someone else’s party (temporary fix)
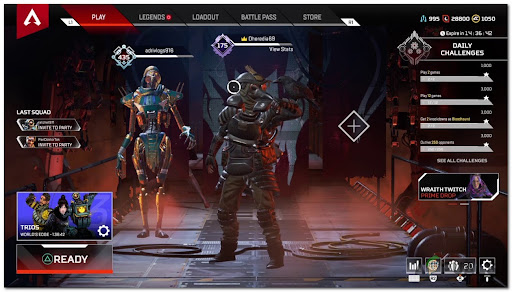
A few users have managed to fix the Connection Rejected: Invalid Token error by joining someone else’s party. By doing this, they were able to play the game temporarily, but after some time of playing the game, the error has reappeared.
When you are encountering the issue, try to leave the party you are in, then join a party created by someone else. Then try to join a match instantly. It will work for some time, but then you will need to repeat the process after the error reappears.
If this temporary fix didn’t help you at all, check the next method.
9. Exit game after sound effect and join again (temporary fix)
Another temporary fix that players have managed to find is to exit the game at a certain moment to be able to join and play a match. But after the match, you have to do that again every time you want to join a match.
So all you have to do is to proceed to enter a match. Right when you hear the sound effect that you hear when you leave the lobby into a match, you have to exit the match. This should place you into a match. If this works, repeat the process every time you want to play.
In case neither of the methods before has helped you fix the Connection Rejected: Invalid Token error for Apex Legends, here’s the last fix we’ve managed to come up with.
10. Deploy the Hotspot Fix on PS4 (temporary fix)
The last thing you can try is to change the connection of your PlayStation 4 from Wi-Fi/LAN cable to mobile data using a hotspot from your phone. This method has helped a lot of users to play the game when using the hotspot.
Important: While this method might work for Xbox consoles and Playstation 5 consoles too, we haven’t been able to test in order to verify.
But before connecting your PlayStation 4 to a mobile hotspot, you first need to download two applications that are necessary for this method to work(Hotspot Shields and Every Proxy).
Note: In case you are an IOS user, this method won’t work because these applications are not available on App Store, you can find them only on Play Store.
Here are the steps on how to do that:
- Open the Play Store from your Android phone and search for the Hotspot Shields app, then download and install it.
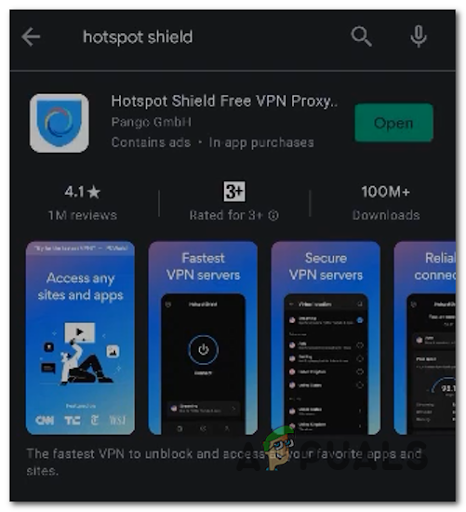
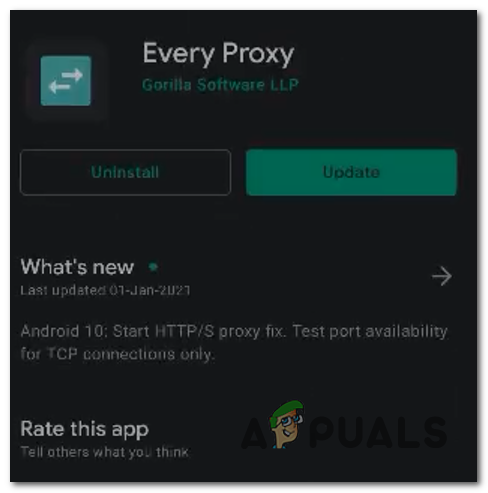
Downloading a hotspot app - Now search for Every Proxy and install the app as well.
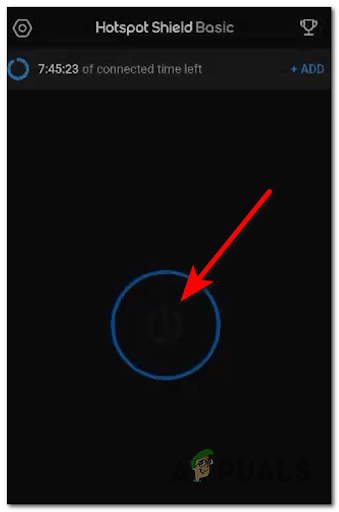
Download & install the Every Proxy app - After the apps are installed, turn on your mobile hotspot from the Settings, then launch the Hotspot Shield app. Inside of it, hit the big circle on your screen to turn on the hotspot VPN.
Turn on the Hotspot Shield - Now you need to launch the Every Proxy app and hit the toggle button next to HTTP/HTTPS to activate the option.
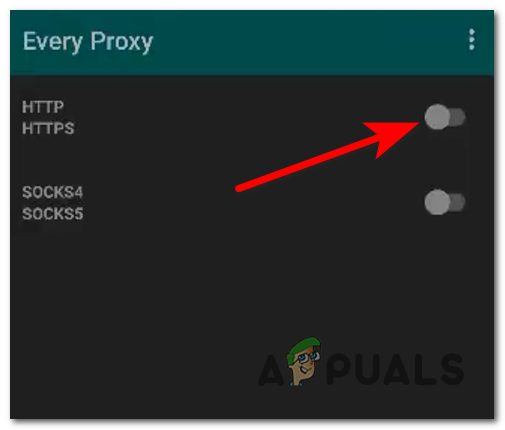
Enable HTTP in Every proxy - After you’ve done that, you can leave your phone aside and access the Settings of your PlayStation 4, but make sure you leave the apps and hotspot turned on.
- Now navigate to Network and select it, then select Set up internet connection. Also, select Wi-Fi, then make sure to choose Custom.

Establishing manual DNS settings - Inside the DNS Settings, for Primary DNS type 8.8.8.8, and for Secondary DNS type 8.8.4.4, then select Next. Now choose Automatic.
- Next, you will see the Proxy Server option, choose Use. Inside of it, enter 192.168.43.1 as the Proxy Address, and 8080 as the Port Number.
- Now test your connection, then when it’s done launch Apex Legends and try to join a match to see if your problem was fixed.


