How to Fix CLR Error on Windows 10?
The CLR Error 80004005 is typically encountered when the user attempts to start MusicBee, Discord, Raser Synapse, Hd Writer AE or any other program based on .NET. In other cases, this error appears at every system startup.
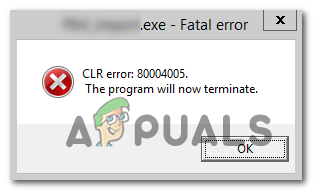
In most cases, this issue will occur due to corruption among the .NET framework version files that the application is using. The easiest way to fix it is by running the Framework Repair tool or by renaming the .NET assembly folder, but you can also get the job done by forcing the program to reinstall and accepting the installation of the .NET framework. It’s also possible that you are completely missing the .NET framework version that is required by the application in question.
However, you might also see the CLR Error 80004005 because the executable that you’re trying to launch doesn’t have admin access or due to some kind of system file corruption.
1. Run the .NET Framework Repair Tool
In most documented cases, the CLR Error 80004005 issue will occur due to some kind of .NET framework corruption problem that ends up affecting your computer’s ability to launch applications. Most affected users have encountered this issue with the following .NET versions: 4.6.1, 4.6, 4.5.2, 4.5.1, 4.5, 4.0 and 3.5.
If this scenario is applicable, you can fix the issue swiftly by running the .NET framework repair tool. This proprietary tool is known for resolving the majority of .NET Framework application issues that might trigger startup errors.
Here’s a quick guide with what you need to do in order to run the .NET framework repair tool:
- Start by accessing this link (here). Next, click on the Download button under the Microsoft .NET Framework Repair Tool.
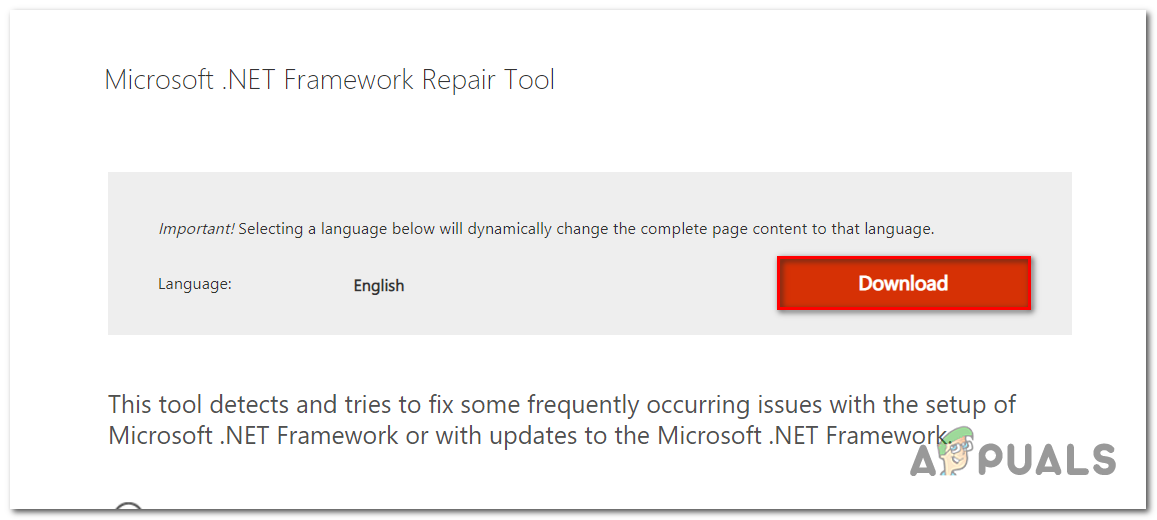
Downloading the Net Framework repair tool - Once you get to the next screen, start by checking the box associated with NetFxRepairTool.exe, then click on the Next button to advance to the next screen.
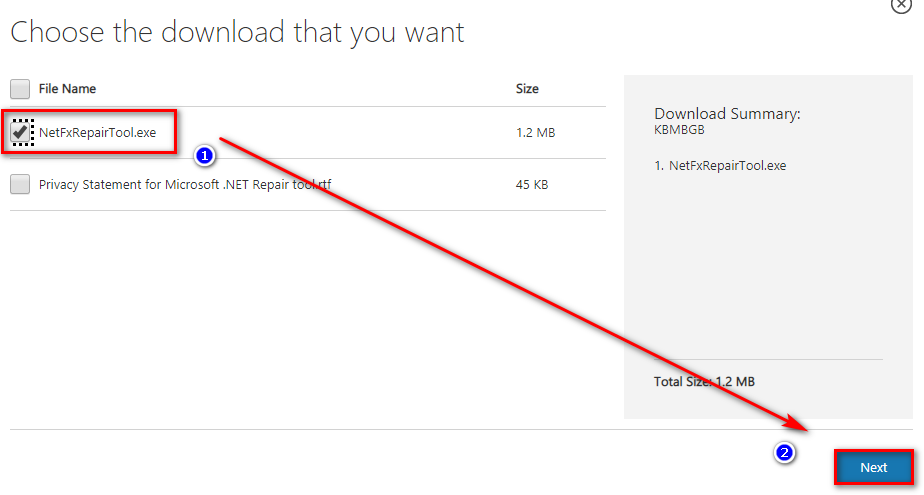
Downloading the .NET Framework repair tool - Wait patiently until the download is complete, then double-click on the executable that you’ve just downloaded. When you’re prompted by the User Account Control (UAC), click Yes to grant administrative privileges.
- Once the Microsoft .NET Framework Repair Tool is opened and you get to the first window, the first thing you should do is check the box associated with I have read and accepted the license terms. After you do this, click on Next to advance to the next window.
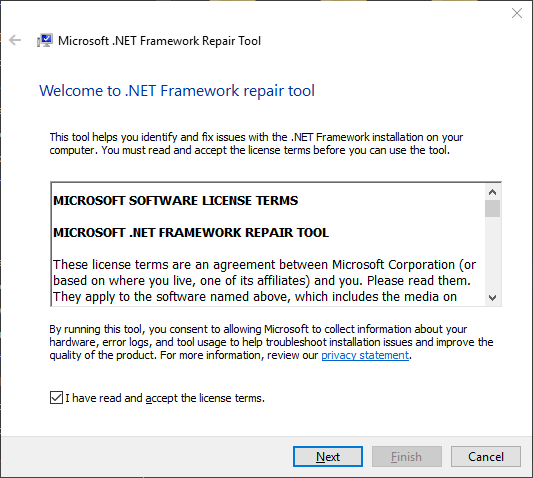
Initiating a repair with the .NET Repair tool - Now the utility should begin its initial scan. Wait patiently until the process is complete and click Next once the option becomes available to automatically apply the repair strategies that are recommended.
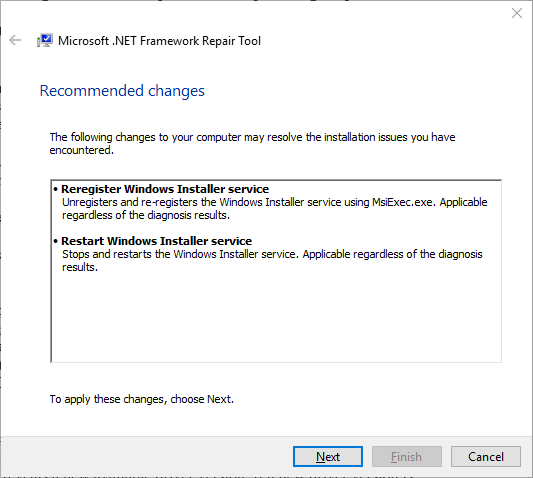
Repairing the .NET framework - Click Next once again to apply the fixes, then click Finish to complete the process.
Note: There’s a high chance that you will be prompted to restart automatically. But just in case the prompt doesn’t appear, restart manually. - After the next startup sequence is complete, repeat the action that was previously triggering theCLR Error 80004005 and see if the problem is resolved.
In case the same issue is still persisting, move down to the next potential fix below.
2. Force the program to run with admin access
As it turns out, the CLR Error 80004005 can also occur due to the fact that the application that’s triggering the issue doesn’t have admin access. For certain programs, this means that they can’t really use .NET dependencies that are required.
Keep in mind that this typically occurs on operating systems that are configured to use a strict UAC. In this case, you can resolve the issue by modifying the properties menu of the launching executable so that it’s forced to obtain admin access at every startup.
This method is effective for users that encountered the issue with HD Writer AE, Discord and Synapse.
Here’s a quick guide on opening the program that’s triggering the CLR Error 80004005 with admin access and see if the issue is resolved:
- Start by making sure that the program you’re encountering the issue with is completely closed (Check for a background process also).
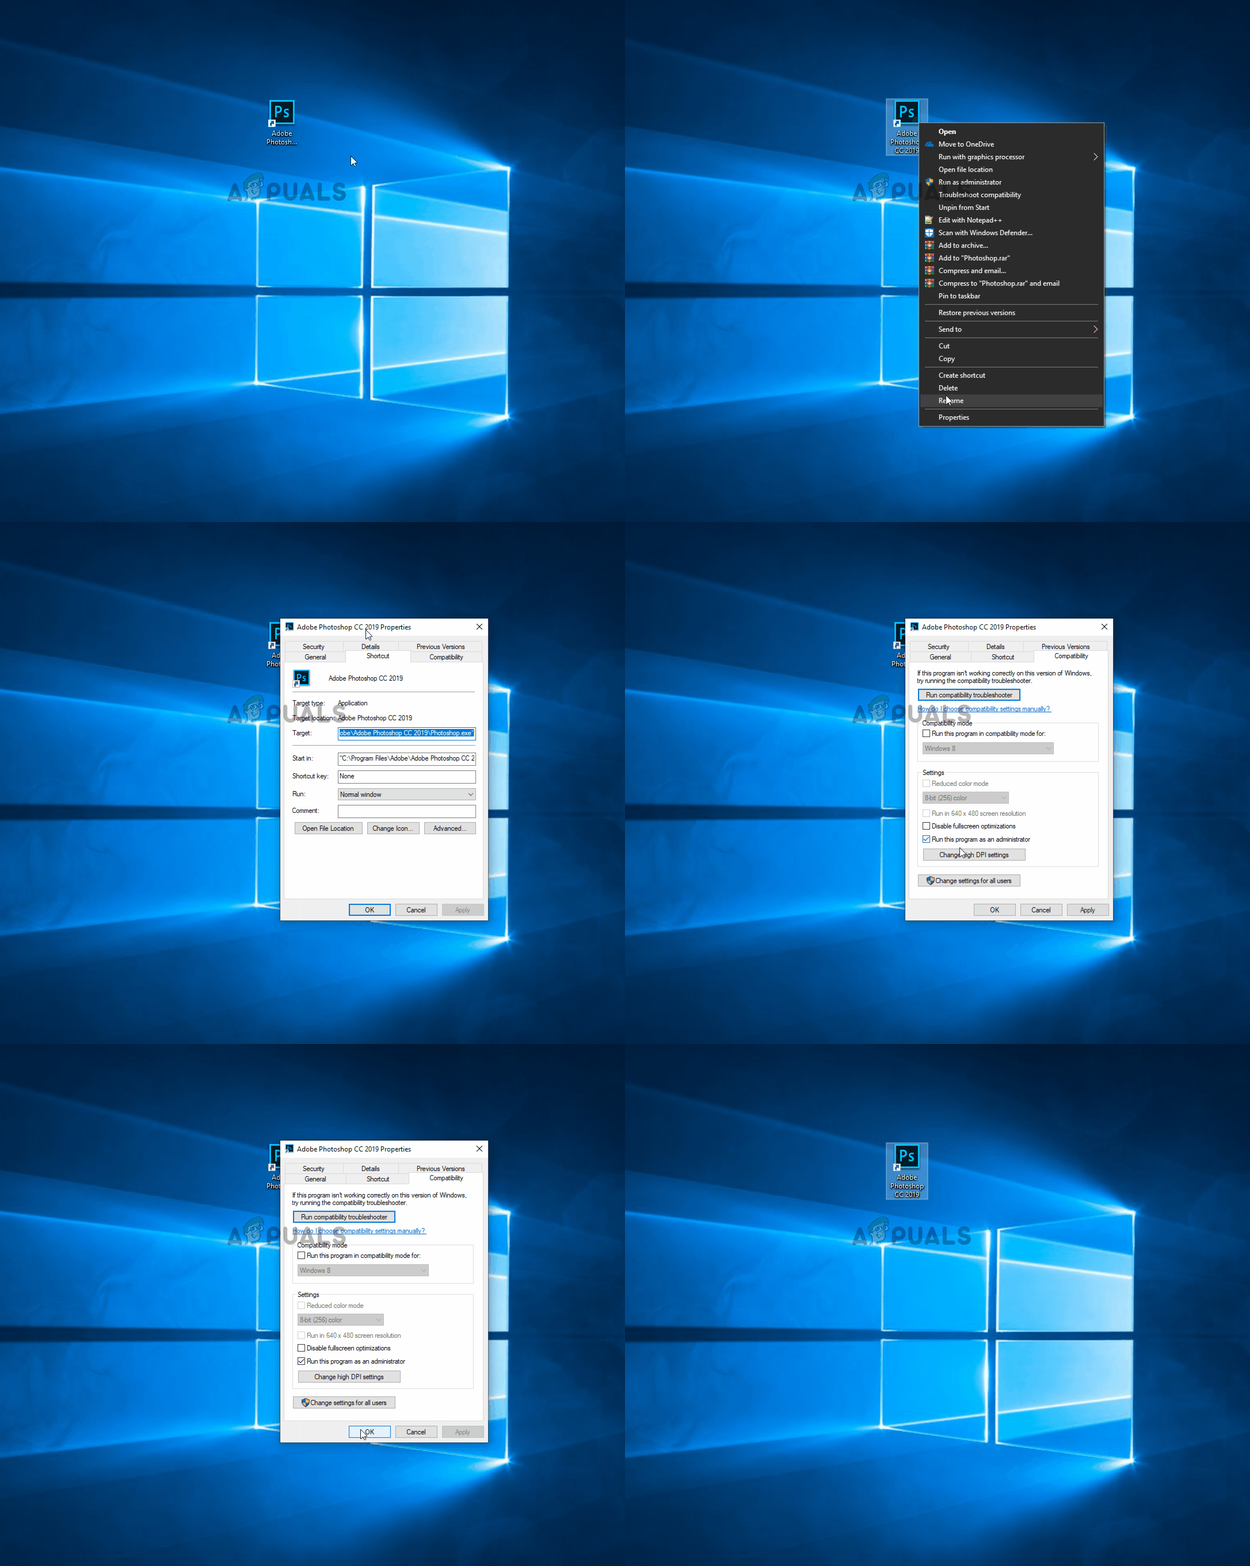
- After every instance of the application is closed, right-click on the executable and then click on Run as administrator from the newly-appeared context menu. If you see the UAC (User Account Control) prompt, click Yes to grant administrative privileges.
- If the program opens normally without the same issue, continue with the steps below to make the changes permanent.
Note: In case the same issue is still occurring, jump directly to the next potential fix below. - Close the application that was failing with this error once again.
- Right-click on the application executable once again, then click on Properties from the context menu once again.
- Inside the Properties screen of Photoshop, make your way to the Compatibility tab via the horizontal menu at the top.
- Next, go to the Settings section below and check the box associated with Run this program as an administrator.
- After the change is enforced, click on Apply to save the changes.
- Launch the application once again and see if you successfully managed to resolve the CLR Error 80004005.
In case the same problem is persisting, move down to the next potential fix below.
3. Reinstall the program & .NET framework installation
Keep in mind that another fairly common culprit that might cause this problem is a missing or partially installed .NET framework. A botched installation or a manual user preference might have forced the application installer to skip the installation of the .NET framework needed for it to run.
One easy way to get this issue resolved is to uninstall the application and then reinstalling again, but this time without skipping the installation of the required .NET framework.
Here’s a quick guide on how to do this:
- Press Windows key + R to open up a Run dialog box. Next, type ‘appwiz.cpl’ inside the text box, then press Enter to open up the Programs & Features.
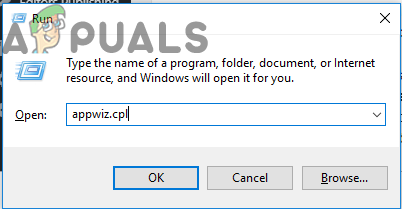
Typing in “appwiz.cpl” in the Run prompt - Once you’re inside the Programs & Features window, scroll down through the list of installed applications and locate the app that’s causing the issue. When you see it, right-click on it and choose Uninstall from the newly appeared context menu.
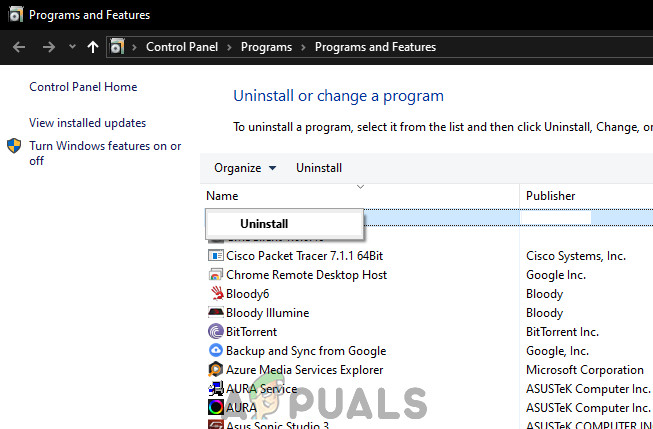
Uninstalling application via Programs and Features - When you’re inside the uninstallation window, follow the on-screen prompts to complete the operation that removes the program from your computer.
- Once the process is complete, restart your computer and wait for the next startup sequence to complete.
- Next, re-install the program that you’re encountering the issue with, but this time, don’t skip the installation of the required .NET Framework.
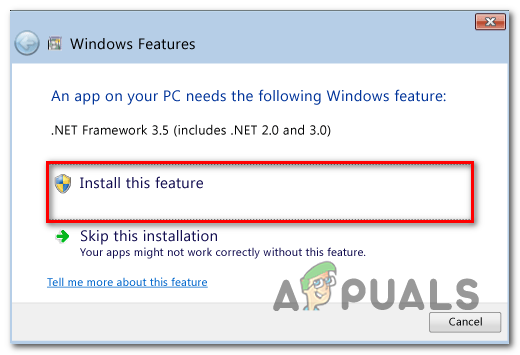
Installing the required net framework - Once the required framework is installed, restart your computer once again and see if the problem is now resolved.
In case you’re still encountering the same CLR Error 80004005, move down to the next fix below.
4. Install the latest .NET Framework Runtime
It’s important to understand that different applications require different .NET frameworks. If you’re trying to run a portable version of an app, chances are your OS will not prompt you that you’re missing a .NET framework that is required by this application.
If this scenario is applicable, you should be able to resolve the issue by installing the latest version of .NET Framework Runtime. This is a cumulative installer that includes everything you need to run existing apps and programs built with .NET Framework.
Here’s a quick guide on using the Runtime release to install every available Framework version on your computer:
- Visit this link (here) and click on the Download .NET Framework Runtime button (under Runtime) to kickstart the download of the installation executable.
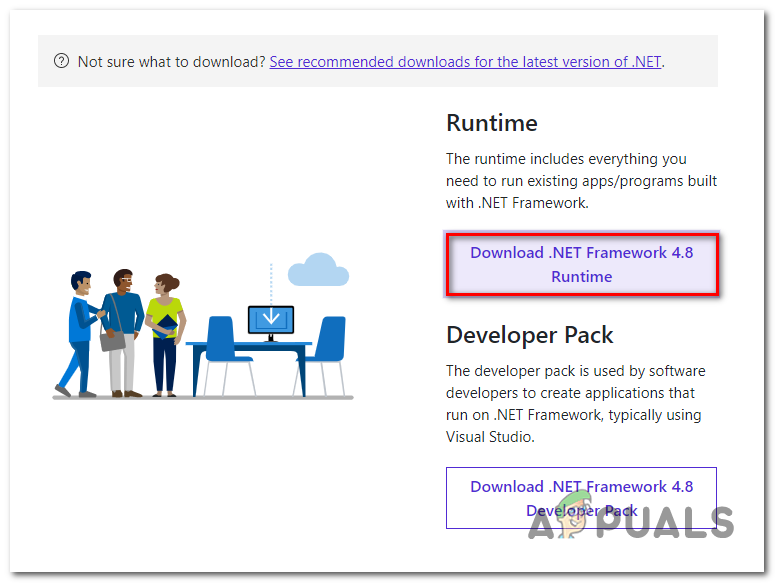
Downloading the .NET Framework 4.8 executable - After the installation executable is successfully downloaded, double-click on it and click Yes at the UAC (User Account Control).
- Next, follow the on-screen instructions to complete the installation of the missing .NET Framework releases.
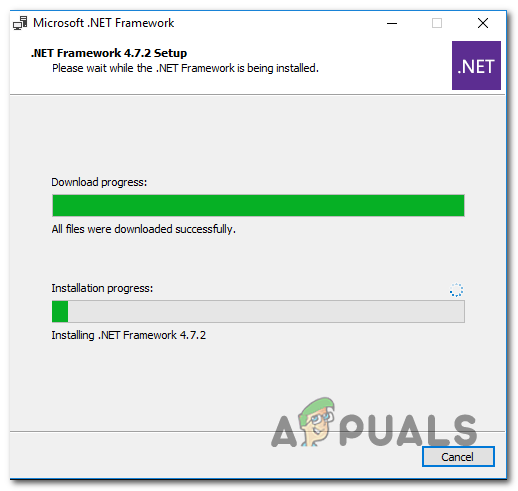
Installing the missing .NET framework releases - Wait until the operation is finished and restart your computer manually if you’re not automatically prompted to restart.
In case the issue is still not resolved, move down to the next potential fix below.
5. Rename the NET ‘assembly’ folder
As it turns out, this issue can also occur due to a conflict between your installed .NET frameworks. This typically occurs if the user has previously installed every .NET Framework redist individually. The issue occurs because every version will share the same assembly folder.
If this scenario is applicable, you can resolve the issue by renaming the assembly folder, forcing your OS to create a new instance, thus eliminating the conflict.
After doing this and reinstalling the program that’s causing the error, it’s installation wizard should only install the NET framework that’s needed
Here’s a quick guide on removing the .NET framework conflict that might be responsible for the CLR Error 80004005:
- Open File Explorer and navigate to the following location:
C:\Windows\Microsoft.NET
- When you arrive at the correct location, simply right-click on assembly and choose Rename from the context menu.
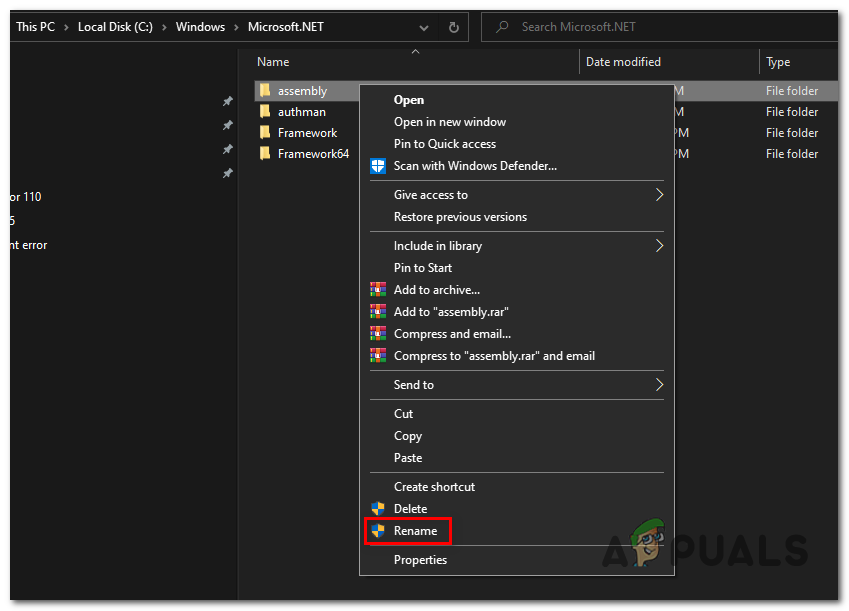
Renaming the assembly folder - When you’re prompted by the UAC (User Account Control), click Yes to grant administrative privileges.
- Rename the assembly folder to something different such as ‘assembly2’. The point is to change the name so you force your OS to create a new instance of the same folder at the next computer startup.
- At the next startup, reinstall the program causing the issue along with the .NET version that it uses.
- Restart your computer and see if the issue is resolved at the next system startup.
In case you’re still encountering the same CLR Error 80004005, error, move down to the next method below.
6. Use System Restore
If the issue has only started to occur recently, it’s possible that a recent software installation or a driver update has ended up causing the CLR Error 80004005. In case this scenario is applicable and the problem has surfaced due to a 3rd party service or process, you should be able to get it resolved by using the System Restore utility.
But In order to do this, you’ll need to leverage a previously created snapshot – But unless you modified the default behavior of System Restore, you should have plenty of restore snapshots to choose from.
Here’s a quick guide on using the System Restore utility in order to fix the ‘CLR Error 80004005′ error:
- Press Windows key + R to open up a Run dialog box. Next, type ‘rstrui’ and press Enter to open up the System Restore wizard.

Opening the System Restore wizard via Run box - After you manage to get inside the System Restore wizard, click Next at the initial screen to advance to the next menu.
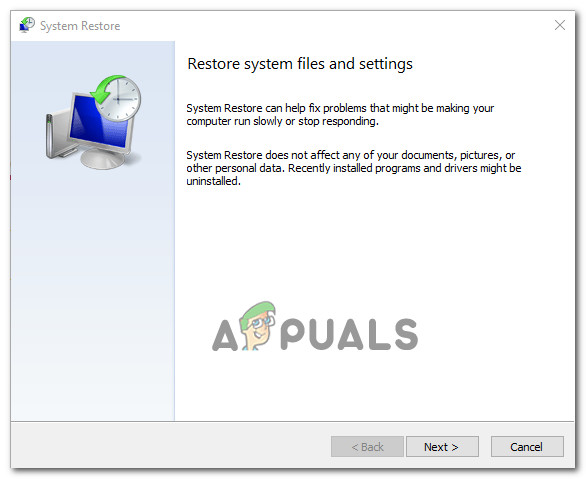
Getting past the initial screen of System Restore - At the next screen, begin by checking the box associated with Show more restore points. After you do this, start looking at the dates of every available restore snapshot and select the one that’s dated closest to the date where the issue first started occurring.
- Next, select the appropriate restore point and click Next to advance to the next menu.
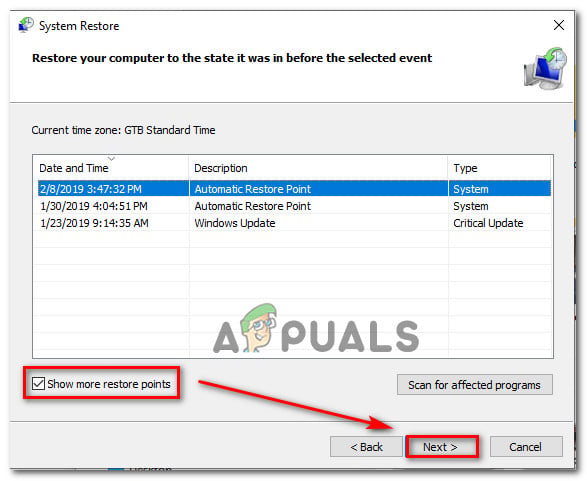
Restoring your system to a previous point in time Important: Keep in mind that once you go through with this procedure, every change that you enforced since the restore snapshot was created will be lost. This includes any app installations, driver updates and anything else that you installed after that point.
- Once you get this far, the utility is ready to go. To start it, simply click on Finish, then click Yes at the confirmation prompt to start the restoring process. Your computer will then restart and the older state will be enforced at the next system startup.

Starting the System Restore process - At the next system startup, see if the issue has been resolved.
In case you’re still seeing the CLR Error 80004005 when you attempt to start the application, move down to the final fix below.
7. Refresh every OS component
If none of the potential fixes above have been successful in allowing you to avoid the CLR Error 80004005, chances are you are dealing with some time of system corruption that cannot be resolved conventionally.
In this case, the only viable fix at this point is to refresh every Windows component and every boot-related process.
This can either be achieved via a clean install or via a repair install (in-place repair).
A clean install it’s the easier procedure that will allow you to do this without using a compatible installation media. But the major disadvantage of this method is that unless you back up your data in advance, you will lose any personal data stored on the OS drive.
In case you want to prevent total data loss, you should go for a repair install (in-place repair). You’ll need a compatible installation media, but you will be able to keep all your personal files including, games, apps, personal media, and even some user preferences.
Note: Here’s how to create an installation media for Windows 10 in case you don’t have one available.


