Fix: ‘An Error Occurred while Renewing Interface Ethernet’
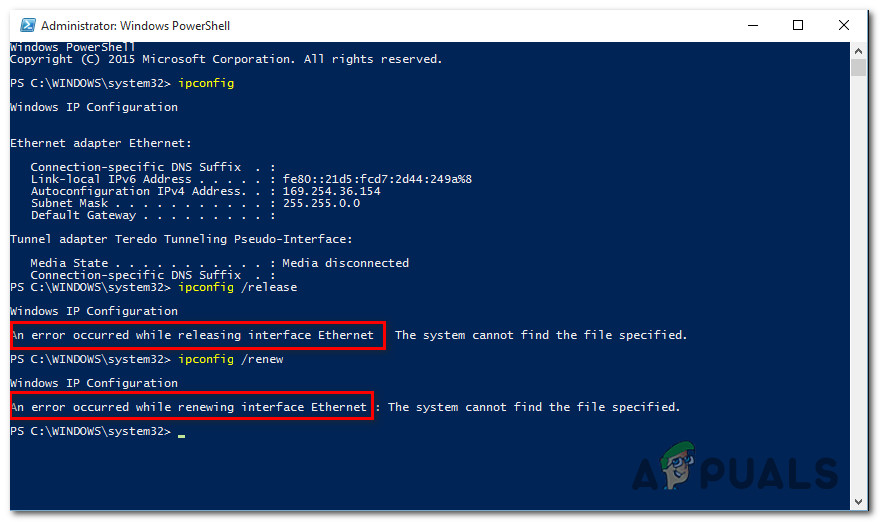
Some Windows users are reporting that whenever they attempt to use an ipconfig command in Command Prompt or PowerShell they end up seeing the ‘An error occurred while releasing interface Ethernet‘ error. In most cases, this error message is accompanied by the message ‘The system cannot find the file specified’ or ‘Unable to Contact your DHCP server’.
As it turns out, there are several different documented scenarios that might be responsible for the apparition of this error code. Here’s a shortlist of potential culprits that might trigger this particular error:
- TCP / IP Inconsistency – In the majority of documented instances, you’ll see this problem occurring due to some kind of badly cached IP & TCP temporary data that cannot be cleared conventionally. If this scenario is applicable, you should start by performing a complete Winsock reset and see if you regain the ability to run ipconfg commands.
- Generic Network Adapter issue – If the problem is facilitated by a fairly common issue having to do with your network adapter, you might be able to fix this problem by running the network adapter troubleshooter and applying the recommended fix.
- Outdated / Incompatible network adapter driver – If you’re encountering this problem after upgrading to Windows 10 from an older Windows version (Windows 7 or Windows 8.1), you’re most likely dealing with a partially incompatible network adapter driver. In this case, you can fix the problem by using Device Manager to update your network adapter to the latest version available.
- DHCP Client service is disabled – Another potential cause that might be contributing to this error is an instance in which the DHCP Client service is disabled as a result of manual user intervention or as a result of an optimization scan by a 3rd party management tool. In this case, you should be able to fix the problem by using the Services tab to re-enable the DHCP Client service and modify the default startup type.
- Fast boot conflict – As it turns out, a conflict between the fast boot functionality and Windows 10 is to be expected with certain network adapter drivers. If you don’t want to replace your current driver, the only solution that will allow you to fix this problem is to disable the Fast Boot functionality from the Power Options menu.
- Network inconsistency – According to several affected users, this problem is often associated with a network issue indirectly caused by the built-in firewall of your router or by some other type of restriction imposed at a system level. In this case, one probable fix is to simply reset your router back to its factory settings.
- System File Inconsistency – Under certain circumstances, you can expect to see this error if some of your system files utilized when your OS is required to run terminal commands are affected by system file corruption. In this case, refreshing all your WIndows files using a procedure like clean install or repair install should allow you to fix the issue.
Now that you know every potential culprit, here’s a list of methods that other affected users have successfully used to fix the error and use ipconfig commands normally:
Method 1: Doing a Winsock Reset
In the vast majority of cases, this particular error will be caused by some type of network inconsistency triggered by bad TCP or IP data that ends up affecting the stability of your Internet connection.
Several affected users that were previously dealing with the same problem have confirmed that they were able to fix the problem by performing a Winsock reset and replacing the ipconfig command with a manual router restart.
If you haven’t tried this yet, follow the instructions below to perform a Winsock reset procedure via a CMD prompt:
- Press Windows key + R to open up a Run dialog box. Inside the text box, type ‘cmd’ and press Ctrl + Shift + Enter to open up an elevated CMD prompt. When you are prompted by the User Account Control (UAC), click Yes to grant admin access.
Open a CMD prompt - Inside the elevated CMD prompt, run the following commands individually in order to press Enter after each one to effectively reset every TCP and IP data that might be causing the ‘An error occurred while releasing interface Ethernet‘ error:
nbtstat -R

nbtstat -RR

netsh int reset all

netsh int ip reset

netsh winsock reset
- Once every command has been successfully processed, go ahead and close the elevated CMD prompt before physically unplugging your router from the power source and waiting for 1 minute or more in order to allow the power capacitors to drain themselves of energy.
- Connect the power cable of your router once again and wait until the Internet access is reestablished before trying to use ipconfig commands once again.
If you still end up seeing the same ‘An error occurred while releasing interface Ethernet‘ error when using ipconfig commands, move down to the next potential fix below.
Method 2: Running the Network Adapter Troubleshooter (Windows 10 Only)
As it turns out, you might be able to fix this problem by running the Network Adapter troubleshooter and applying the recommended fix. If the problem is being caused by an issue with your wireless or wired network adapter, following the instructions below should allow you to fix the problem.
If you haven’t tried this yet, follow the instructions below to fix the ‘An error occurred while releasing interface Ethernet‘ error via the Network Adapter:
- Press Windows key + R to open up a Run dialog box. Inside the text box, type ‘ms-settings:troubleshoot‘ and press Enter to open up the Troubleshoot tab of the Settings app.
Accessing the Troubleshooting tab - Once you’re inside the Troubleshoot tab, move over to the right-hand section and scroll down to the Find and fix other problems section. Once you’re there, click on Network Adapter, then click on Run the troubleshooter from the context menu that just appeared.
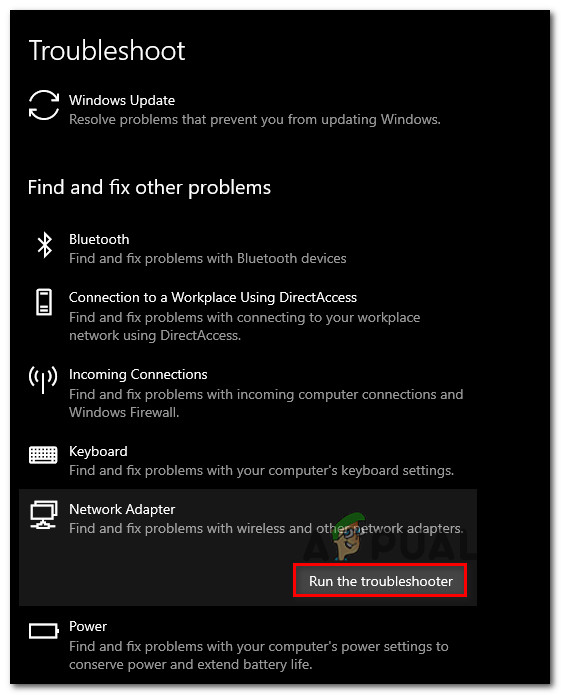
Running the Network Adapter Troubleshooter - From the next menu, use the list to select the Network adapter that you’re actively using when encountering the issue before clicking Next.
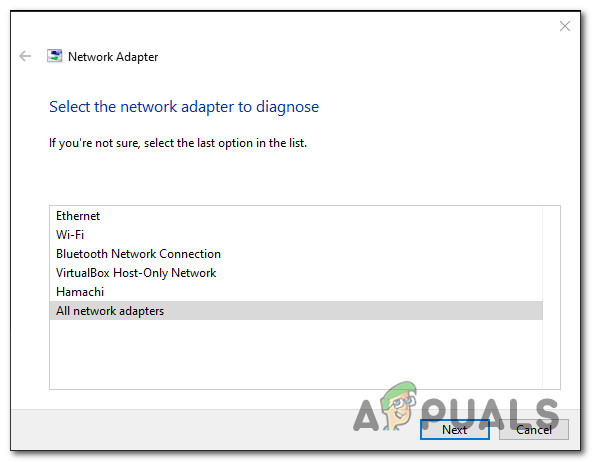
Using the Network adapter - Next, wait until the initial scan is complete.
- If a viable repair strategy is identified, click on Apply this fix and follow the on-screen instructions (if necessary).
- Once the repair strategy is successfully deployed, restart your computer and see if the problem is fixed at the next system startup.
In case you’re still seeing the same ‘An error occurred while releasing interface Ethernet‘ error even after running the Network Adapter troubleshooter, move down to the next fix.
Method 3: Updating your Network Adapter Driver
As it turns out, this particular error is sometimes associated with a severely outdated network adapter driver that was migrated over from an older Windows installation. This is typically the result of an upgrade from Windows 7 or Windows 8.1 to Windows 10.
If this scenario is applicable, you can expect to see the ‘An error occurred while releasing interface Ethernet‘ error due to the fact that you’re actually using a partially incompatible network adapter driver. In this case, you can fix the problem by using Device Manager to update your current driver to a fully compatible version.
In case you’re looking for specific instructions, follow the steps below to update your network adapter driver:
- Press Windows key + R to open up a Run dialog box. Next, type ‘devmgmt.msc‘ inside the text box and press Enter to open up Device Manager.
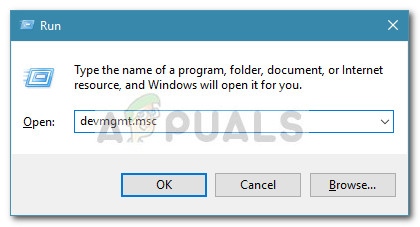
Opening Device Manager Note: If you’re prompted by the UAC (User Account Control) prompt, click Yes to grant admin access.
- Once you’re inside Device Manager, scroll down to the Network adapters sections and expand the drop-down menu associated with it. Next, right-click on your wireless/wired network adapter and click on Update Driver from the context menu.
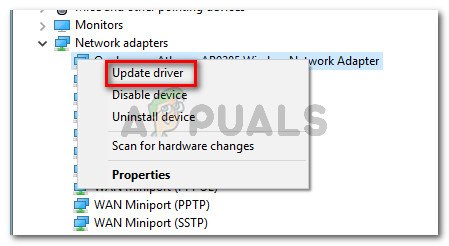
Updating the Network Adapter driver - After you get to the next screen, click on Search Automatically for updated driver software. Next, wait patiently to see if the scan reveals a new version of the network adapter.

Searching for the updated driver software for your network adapter - If the scan manages to identify a new version of the driver, follow the on-screen instructions to install it on your computer and reboot your computer at the end of this procedure.
- Once the next startup is complete, attempt to use another ipconfig command and see if you’re still getting this error.
If you’re still dealing with the same ‘An error occurred while releasing interface Ethernet‘ error, move down to the next potential fix below.
Method 4: Enabling the DHCP Client Service
As it turns out, another common reason why you might end up being stuck with the ‘An error occurred while releasing interface Ethernet‘ error is a disabled instance of the DHCP client service. This might happen as a result of manual user intervention or after a 3rd party optimization tool ended up disabling this service to save up resources.
If this scenario is applicable, you will be able to fix the problem by accessing the Services utility to re-enable the DHCP Client service and modify its default startup type.
Here’s a quick step by step guide that will allow you to do this:
- Press Windows key + R to open up a Run dialog box. Next, type ‘services.msc’ inside the text box and press Enter to open up the Services screen. If you’re prompted by the UAC (User Account Control) screen, click Yes to grant admin access.
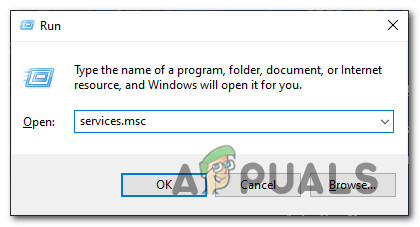
Accessing the Services screen - Once you’re inside the Services screen, move over to the right-hand menu and scroll down through the list of services until you identify the DHCP Client service.
- When you see it, right-click on it and choose Properties from the context menu that just appeared.
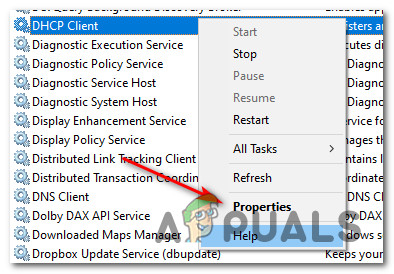
Accessing the Properties screen of DHCP client - Once you’re inside the Properties screen, access the General tab and start by changing the Startup type to Automatic by utilizing the associated drop-down menu.
- After you’ve successfully changed the default behavior, click on the Start button to effectively enable the service, then click on Apply to make this change permanent.
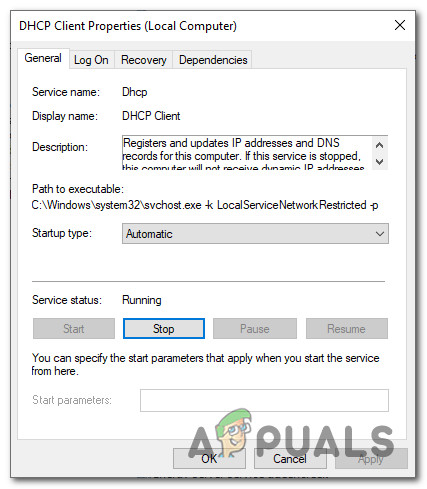
Changing the Startup type of the DHCP service - Finally, repeat the action that was previously triggering the ‘An error occurred while releasing interface Ethernet‘ error and see if the issue is now fixed.
In case the same problem is still occurring, move down to the next potential fix below.
Method 5: Disabling Fast Boot (Windows 10 Only)
According to some affected users, the symptoms of this issue can also be indirectly caused by the startup sequence – The Fast Startup feature present on Windows 10 is known to cause various issues with network-related components, especially if they are suspended instead of close in-between system startups.
If you think fast startup might be contributing to the apparition of this issue, you can try disabling fast startup and see whether this eliminates the apparition of the ‘An error occurred while releasing interface Ethernet‘ error.
If you’re looking for specific instructions on disabling the Fast Startup feature on your Windows 10 computer, follow the instructions below:
- Open up a Run dialog box by pressing Windows key + R.
- Next, type ‘powercfg.cpl’ inside the text box and press Enter to open up the Power Options menu.
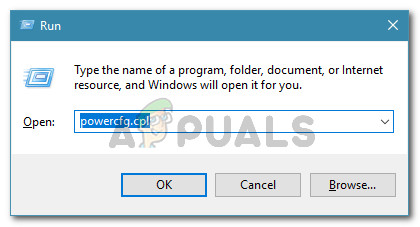
Open the Power Options menu - Once you’re finally inside the Power Options menu, move over to the left-hand side of the screen and click on Choose what the power buttons do.
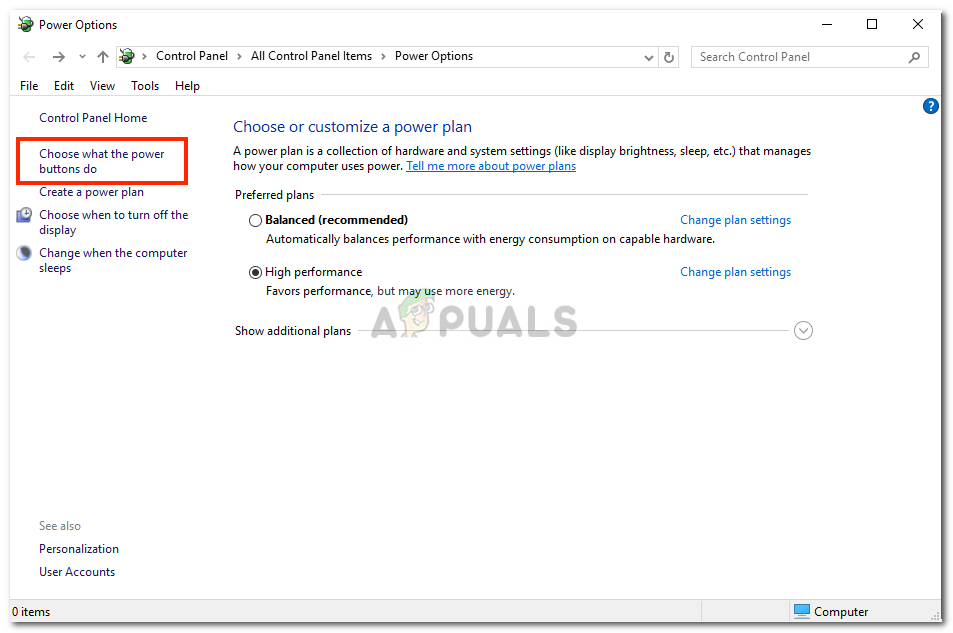
Choosing what the power buttons do - After you’re inside the System Settings menu, start by clicking on Change settings that are currently unavailable.
Note: This step is important since it will allow you to disable the fast startup feature. - Scroll down to the Shutdown settings and start by unchecking the box associated with Turn on fast startup.
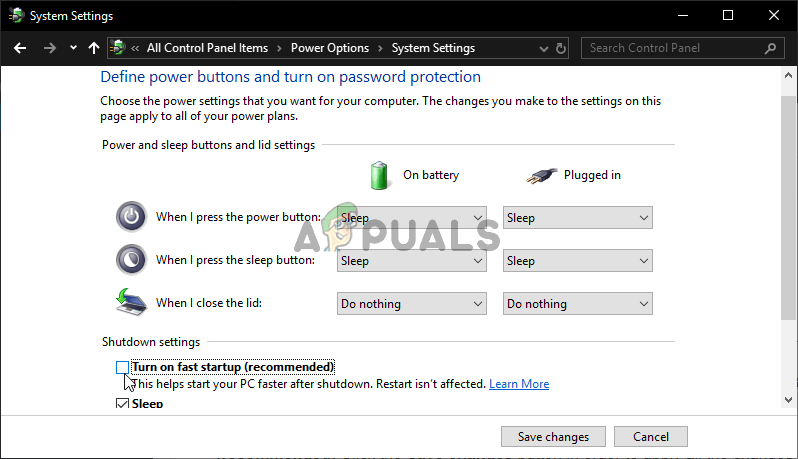
Disabling Fast Startup - Finally, click on Save Changes, then restart your computer and repeat the action that was previously causing the ‘An error occurred while releasing interface Ethernet‘ error and see if the issue is now fixed.
In case the same problem is still occurring, move down to the next potential fix below.
Method 6: Resetting your Router
According to some affected users, this issue can also be related to a network inconsistency that cannot be resolved conventionally with a simple router reboot or a Winsock reset.
If the problem is being caused by a setting enforced by your router or you see this error message as the result of an action undertook by the built-in router firewall, the only way to fix this problem is to perform a router reset.
Several affected users that were previously encountering the same issue have confirmed that resetting their users finally allowed them to get rid of the ‘An error occurred while releasing interface Ethernet‘ error permanently.
Before going forward with a router reset procedure, you need to understand that this operation will effectively revert any previously saved router settings, cached data, and saved information that your network device holds. On top of this, if your ISP is using PPPoE, you’ll need to reinsert the network credentials at the end of the reset procedure.
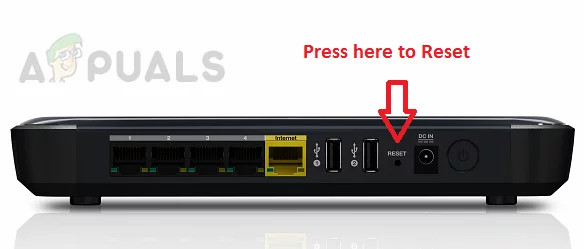
If you understand the consequences and you’re ready to go forward with this procedure, you can initiate a router reset by finding the reset button (typically located on the back of your router). When you see it, use a sharp object like a small screwdriver or toothpick to press and hold on it for about 10 seconds or until you notice that every LED on the front flashes at the same time.
Once the reset procedure is triggered, wait for internet access to be re-established or re-do the PPPoE connection manually if applicable.
If you’re still seeing the same ‘An error occurred while releasing interface Ethernet’ error even after you’ve reset your router, move down to the next potential fix below.
Method 7: Reset every Windows Component
If none of the methods above have worked for you, chances are you’re dealing with some type of underlying system file corruption that’s inhibiting your OS’s ability to process terminal commands. If this scenario is applicable, your only chance at fixing this problem is to reset every relevant OS component related to your Windows installation.
If you haven’t tried this yet and you’re determined to do it, here are 2 different methods that will allow you to do this:
- Clean install – This is by far the easiest procedure since you can initiate it directly from the menus of your WIndows installation without the need to use compatible installation media. But the major drawback is that unless you backup your data in advance, you will lose every bit of personal data from your OS drive (C:/ by default)
- Repair install – This is considered the more tedious approach, but the major advantage is that you get to keep personal files, applications, games personal media, and even some user settings that are currently stored on your OS drive. However, you’ll need to use an installation media that’s compatible with your Windows version.


DHCP server stopped working after winsock reset. I am unable to stop/restart the DHCP client service. What to do now? The DHCP service is not responding despite of system restart. and my system keeps getting APIPA IP address.