[FIX] ‘NET.TCP Port Sharing Service’ Failed to Start
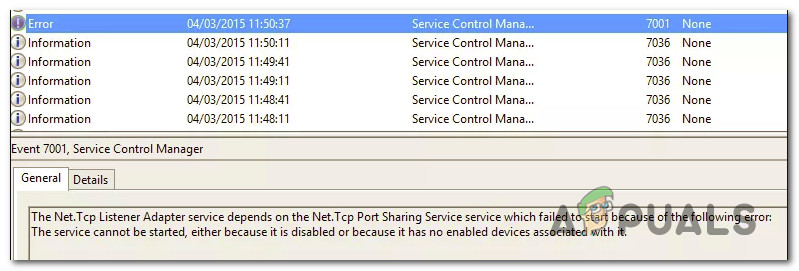
Some Windows users have noticed that the Net.TCP Port Sharing Service fails to start even though it’s configured to start Automatically at every startup from the Services screen. The majority of affected users have discovered this error after discovering relevant events inside the System Event Log.
After investigating this particular issue, it turns out that there are several different culprits that might be responsible for the apparition of this issue with the Net.Tcp Port Sharing Service. Here’s a shortlist of scenarios that might be contributing to this error:
- Glitched or Disabled Net.TCP Port Sharing Service – As it turns out, it’s completely possible to encounter this problem due to a Windows 10 glitch that forces this service to remain stuck in a limbo state (neither opened nor closed). In this case, you can fix the problem by forcing the service to start or by modifying the default Startup Type behavior from the Services screen.
- Corrupted TCP / IP Data – According to some affected users (and MS technicians), you can also expect to see this error if you’re dealing with inconsistent TCP or IP data associated with your connection to the Internet. In this case, performing a Winsock reset from an Elevated Command Prompt should be enough to fix the problem.
- .NET Framework 3.5 is Disabled – This very important dependency can also produce this error in instances where .NET Framework 3.5 (or an associated dependency) is disabled or glitched to the point where the system cannot use it. In this case, you should be able to fix the problem by enabling (or re-enabling) the framework pack from the Windows Features screen.
- Recent critical system change – A recent system change that might have a system-wide effect (driver installation, critical update, .etc) that will produce this error. If you don’t have a specific culprit in mind, the best thing you can do is use a viable restore snapshot to restore your OS back to a healthy state.
- System file corruption – Underlying system file corruption can also be responsible for the apparition of this particular error. In this case, the best course of action is to refresh your Windows installation with procedures like clean install or repair install (in-place repair).
Method 1: Restarting the NET.TCP Port Sharing Service
According to several different affected users, this issue is widely associated with a Windows 10 glitch that forces the Net.TCP Port to become stuck in a limbo state in which is neither opened nor closed. Under certain circumstances, this service state can persist in-between restarts.
Note: By default, the Net.Tcp Port Sharing service is disabled by default on Windows 10. If you want to use this infrastructure, you need to enable the service.
Several affected users were previously dealing with the same error associated with the Net.Tcp Port Sharing service has reportedly managed to fix the problem by using the Services screen to change the default behavior of this service.
Follow the instructions below to fix the Net.Tcp Port error by changing the Startup Type of this service from the Services Screen:
- Press Windows key + R to open up a Run dialog box. Next, type ‘services.msc’ inside the text box and press Enter to open up the Services screen.
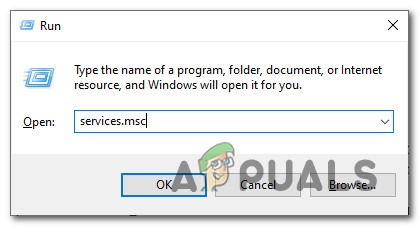
Opening the Services screen - Once you’re inside the Services screen, move over to the right-hand pane and scroll down through the list of services until you find the Net.Tcp Port Sharing Service.
- When you see it, right-click on it and choose Properties from the context menu that just appeared.

Accessing the Properties screen of Net.Tcp Port - Inside the Properties screen of the Net.Tcp Port Sharing service, click on the General tab from the menu at the top, then access the drop-down menu of Startup type and set it to Automatic.
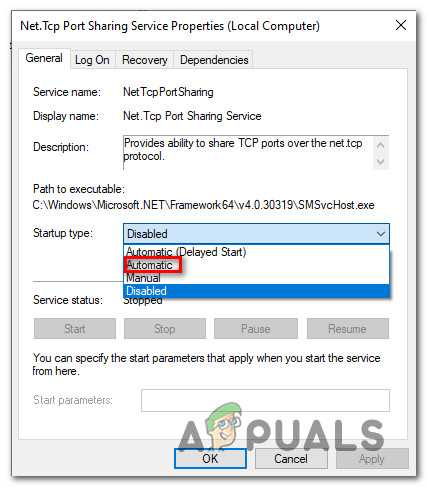
Changing the Startup type of the Net.Tcp Port Sharing service Note: If the service is already set to Automatic, click the Stop button to disable it, then click Start again.
- Click Apply to save the changes, then restart your computer and see if the problem is fixed at the next computer startup.
In case you’re still stuck with the same Net.Tcp Port error inside Event Viewer, move down to the next potential fix below.
Method 2: Performing a Winsock Reset
As it turns out, this particular issue can occur due to a potential issue having to do with the Internet Protocol or Transmission Control Protocol. Most affected users have reported that in their case, the problem occurred due to a glitch with the network adapter – In this case, the issue is typically fixed by going for a procedure known as Winsock Reset.
This operation will clear any temporary data related to your current connection to the internet and might even force your ISP to assign a new DNS (Domain Name System) range.
Here’s a shortlist of performing a Winsock reset to fix the error related to the Net.Tcp Port Sharing Service:
- Press Windows key + R to open up a Run dialog box. Next, type ‘cmd’ inside the text box, then press Ctrl + Shift + Enter to open up an elevated Command Prompt. When you see the prompt associated with User Account Control), click Yes to grant admin access.

Opening an elevated CMD prompt - Once you’re inside the elevated Command Prompt, type the following commands and press Enter after each command to effectively reset the entire Winsock component:
ipconfig /flushdns
nbtstat -R
nbtstat -RR
netsh int reset all
netsh int ip reset
netsh winsock reset
- After every command is processed successfully, close the elevated CMD prompt and reboot your computer to see if the problem is now fixed.
In case you’re still discovering new System Event logs with the Net.Tcp Port Sharing Service error, move down to the next potential fix below.
Method 3: Enabling / Re-enabling the .NET Framework 3.5
According to some affected users, this issue can also occur due to the fact that a necessary dependency (.NET Framework 3.5, which includes .NET 2.0 and 3.0) is disabled or glitched to the point where the system cannot make use of it.
If one of the scenarios presented above is applicable, you should be able to fix the Net.Tcp Port Sharing Service error by enabling or re-enabling .NET Framework 3.5 from the Windows Features screen and restarting the computer.
This fix was confirmed to be successful by a lot of affected users that were previously unable to use the net.tcp protocol for various web services.
If you didn’t tried this particular fix yet, follow the instructions below to enable or disable and then re-enable the .NET Framework 3.5 dependency from the Windows Features screen:
- Press Windows key + R to open up a Run dialog box. Inside the text box, type ‘appwiz.cpl’ and press Enter to open up the Programs and Features menu.

Opening the Programs and Features screen - Once you’re inside the Programs and Features screen, click on Turn Windows features on or off. When prompted by the UAC (User Account Control) window, click Yes to grant admin access.

Accessing the Windows features screen - Once you’re inside the Windows Features screen, enable the checkbox associated with .NET Framework 3.5, then check the two checkboxes associated with Windows Communication Foundation HTTP Activation and Windows Communication Foundation Non-HTTP Activation.
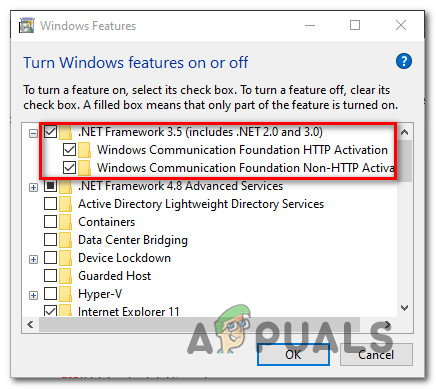
Enabling .NET Framework 3.5 and associated dependencies Note: In case .NET Framework 3.5 is already enabled, temporarily disable it before clicking Ok and restarting your computer. At the next startup, return to this screen and re-enable .NET Framework 3.5 and see if the problem is now fixed.
- Click Ok to start the changes, then reboot your computer.
- Once the next startup is complete, check back on the Event Viewer and see if you can spot any new instances of the Net.Tcp Port Sharing Service error.
In case new instances of the same error is still appearing, move down to the next potential fix below.
Method 4: Using System Restore
If you started seeing this error after you enforced a change on your system, chances are you might be able to use an older System Restore point to restore your computer back to a healthy state.
You might start to experience this issue after installing a new application, after an unexpected startup, or after the installation of a new Windows Update or driver – If you’re dealing with a botched installation, using System Restore should allow you to fix the problem.
IMPORTANT: It’s important to understand that using an older System Restore snapshot will return your computer state exactly to how it was back when it was originally created. This means that every installed application, installed driver/update, or any other setting change you’ve enforced since will be reverted.
If you understand the consequences and you want to move forward with this procedure, here are some step-by-step instructions on using System Restore.
In case you already tried to go this route or you were unable to find a viable restore snapshot, move down to the next potential fix below.
Method 5: Refresh your Windows Installation
If none of the methods below have worked for you, it’s likely that you’re dealing with some type of underlying system corruption that cannot be resolved conventionally. In this case, the only viable fix is to reset every relevant OS component that’s related to your current Windows installation.
When it comes to doing this, you have 2 ways forward:
- Clean install – This is the easiest procedure you can go through since it can be started directly from the Windows menus and it won’t be required to use a compatible installation media. However, the main disadvantage is that unless you back up your data in advance, you’ll lose every bit of personal data that’s currently saved on the OS drive.
- Repair install – If you’re looking for a way to reset every Windows component without touching your personal files (applications, games, files, user preferences), this is it. This operation will only affect generic files related to your Windows installation. But in order to start this operation, you’ll need to insert or plug in a compatible installation media.


By the way if you give “Everyone” modify access to below, the port sharing works
C:WindowsServiceProfilesLocalServiceAppDataLocal