Fix: Error Occurred Trying to Retrieve a List of Virtual Switches
The message “An error occurred while trying to retrieve a list of virtual switches” shows up in Hyper-V’s Virtual Switch Manager when there’s a problem. This usually makes the window freeze or not show your switches. It means Hyper-V cannot load the list of virtual switches because something is blocking the connection.
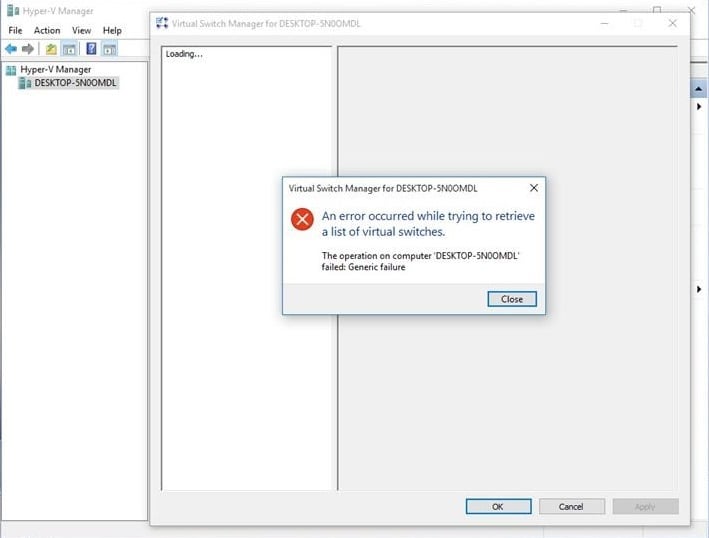
Common reasons for this error are a missing or damaged Default Switch, issues with network adapter settings, or if the Hyper-V Extensible Virtual Switch protocol was removed. Sometimes, leftover files from uninstalled VPNs or network tools can also cause the problem.
In this article, we will discuss different ways to solve this error.
1. Enable the Protocol in Hyper-V Extensible Virtual Switch
For our first solution, we will enable the necessary protocol in the Hyper-V Extensible Virtual Switch settings on your physical network card. Select the network card you plan to use as an external switch. The external switch allows your virtual machines to communicate with the rest of your network.
- Hold the Windows logo key and press R, then type ncpa.cpl and press Enter.
- Right-click on the network card you are using to create the external switch, then click Properties.
- Find and select Hyper-V Extensible Virtual Switch. If it’s not already installed, click Install.
- Next, select Protocol and click Add.
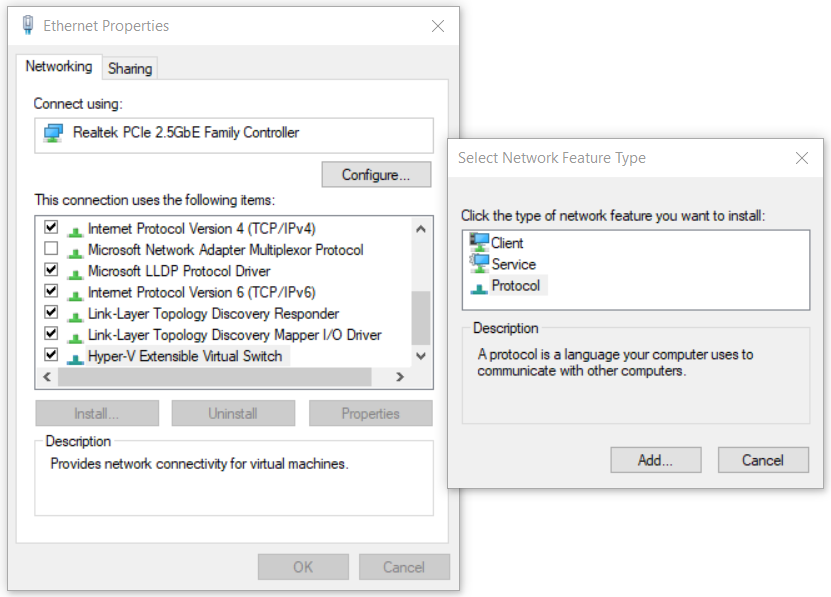
- Under Select Network Protocol, choose Reliable Multicast Protocol and click OK.
- Click Close and then restart your Windows computer.
- After restarting, open the Virtual Switch Manager in Hyper-V and try creating an external network switch again.
2. Create a Virtual Switch Using PowerShell
If you’re facing issues when using the graphical interface, some users have found success by creating an external switch using PowerShell.
- Click on the Start Menu and type PowerShell. Right-click on PowerShell and choose Run as administrator.
- Click Yes to confirm the action, then type the following command to create a new external virtual switch:
New-VMSwitch -Name ExternalSwitch -NetAdapterName Ethernet -AllowManagementOS $true
- -Name: The name as it will appear in Hyper-V Manager.
- -NetAdapterName: The name of your network adapter (replace
Ethernetwith your actual adapter’s name if different). - -AllowManagementOS: Set to
$trueso that both your host and virtual machines have network access.
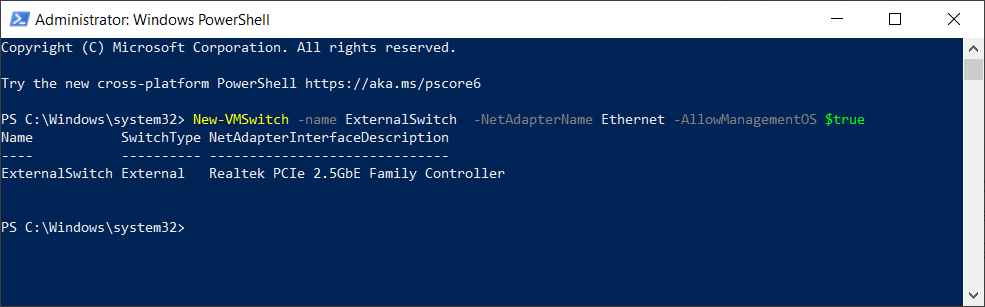
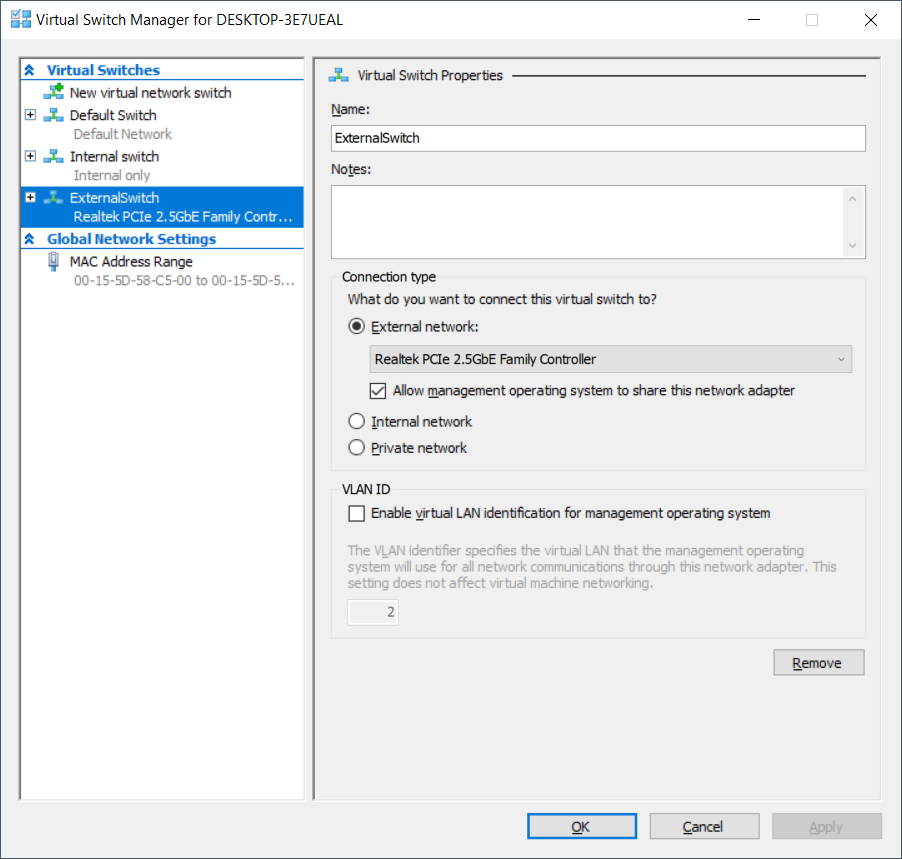
- Open Virtual Switch Manager in Hyper-V Manager and check if the external switch now appears in the list. In our example, it does.
3. Reinstall the Hyper-V Role
For this solution, we will temporarily disable and then re-enable the Hyper-V role in Windows 10. Don’t worry—your virtual machines will remain available in Hyper-V Manager throughout this process. We’ve previously shared a guide on how to enable the Hyper-V role in Windows 10. If you need step-by-step instructions, you can check out this Hyper-V Role article.


