AirPods Pro Noise Cancellation Not Working? Here’s What to Do
 Reviewed by Muhammad Zubyan
Active Noise Cancellation (ANC) on AirPods Pro can sometimes stop blocking background noise, making sounds like people talking or traffic easy to hear, even when Quiet Mode is on. This usually means that the ANC feature is either turned off or not working correctly, even if it looks like it’s enabled in your settings.
The most common reason for this is that the microphone vents are clogged with earwax or dust. Sometimes, the problem can also be caused by glitches after a software update or the AirPods’ hardware getting worn out. Many users have also noticed that ANC performance can get worse after updating iOS or the AirPods firmware.
Before you start troubleshooting:
- Make sure both the AirPods and their charging case are fully charged.
- Remove the AirPods from your ears and place them back in to see if noise cancellation improves.
1. Re-enable the Noise Cancelling Feature
If the Noise Cancelling feature on AirPods Pro isn’t working as expected, there could be a temporary glitch. Re-enabling the feature will reset its operational modules to default and may fix the issue.
- Open Settings on your iPhone and tap on Bluetooth.
- Tap the info icon next to your AirPods Pro, and set Noise Control to Off.
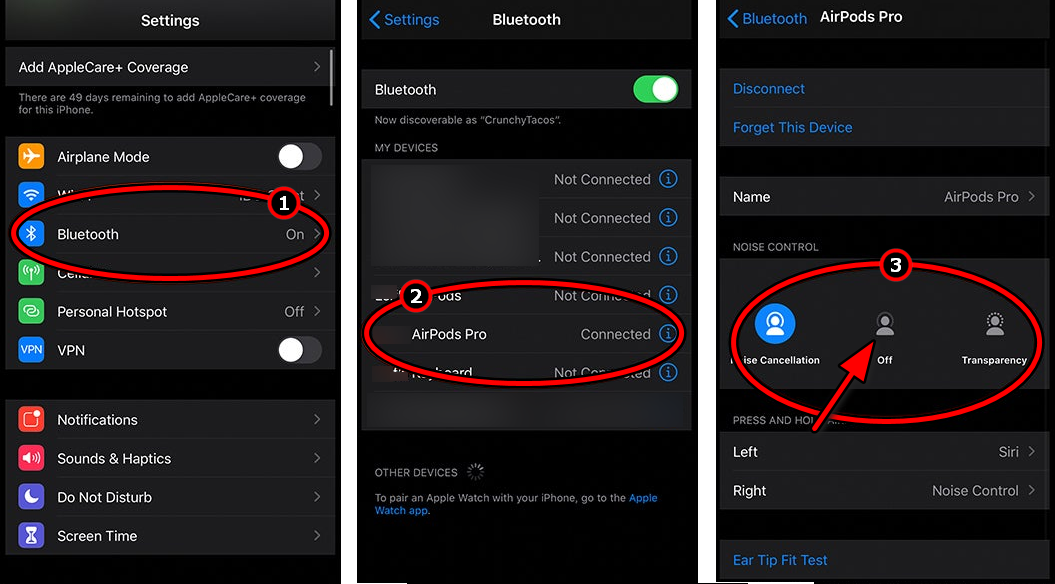
Turn Off Noise Cancellation on the AirPods Pro - Restart your Apple device, then turn Noise Cancelling back on. Check if it’s working properly now.
2. Update the Device and AirPods to the Latest OS/Firmware
AirPods Pro may stop cancelling noise if your device’s operating system or the AirPods’ firmware is outdated. This can lead to compatibility issues or software bugs affecting performance.
Make sure both your device’s OS and the AirPods firmware are updated to the latest version.
2.1. To Update an iPhone:
- Back up your phone and fully charge it.
- Connect to a Wi-Fi network, then go to Settings > General > Software Update.
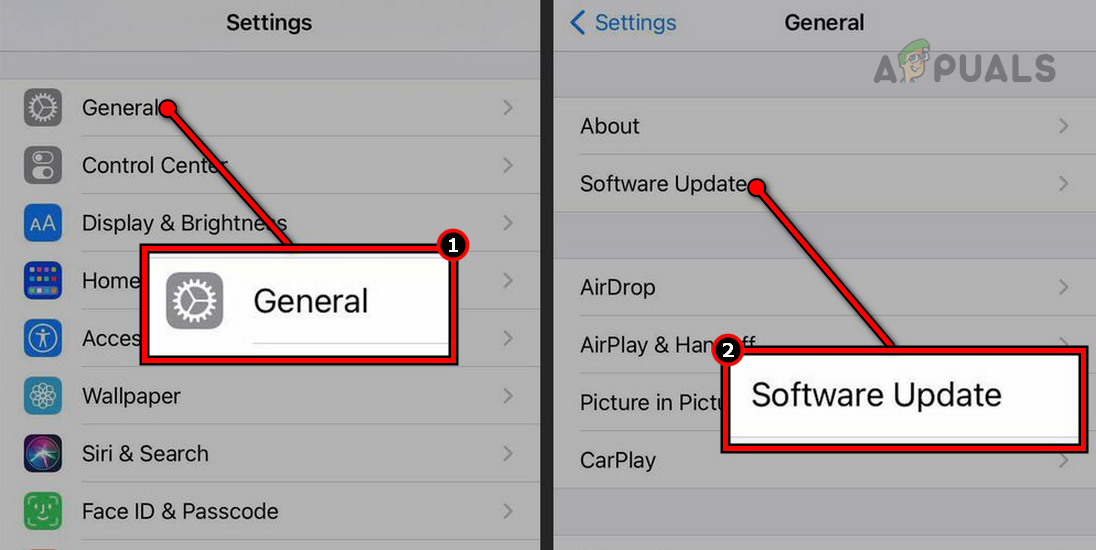
Update Software on an iPhone - Install any available update and restart your iPhone. Test the AirPods Pro to see if noise cancellation is restored.
2.2 To Update AirPods firmware:
- Put your AirPods in their case and connect the case to its charger.
- Keep your paired Apple device (iPhone, iPad, etc.) close to the AirPods, with Wi-Fi enabled.
- If an update is available, it will install automatically.
- Once the update finishes, check if noise cancellation works.
3. Disable Spatial Audio
Spatial Audio provides a surround sound experience on the AirPods. However, this feature might conflict with noise detection and affect noise cancellation. Disabling Spatial Audio may resolve the issue.
- Go to Settings on your iPhone, then Bluetooth > AirPods Pro.
- Turn off Spatial Audio and check whether noise cancellation works.
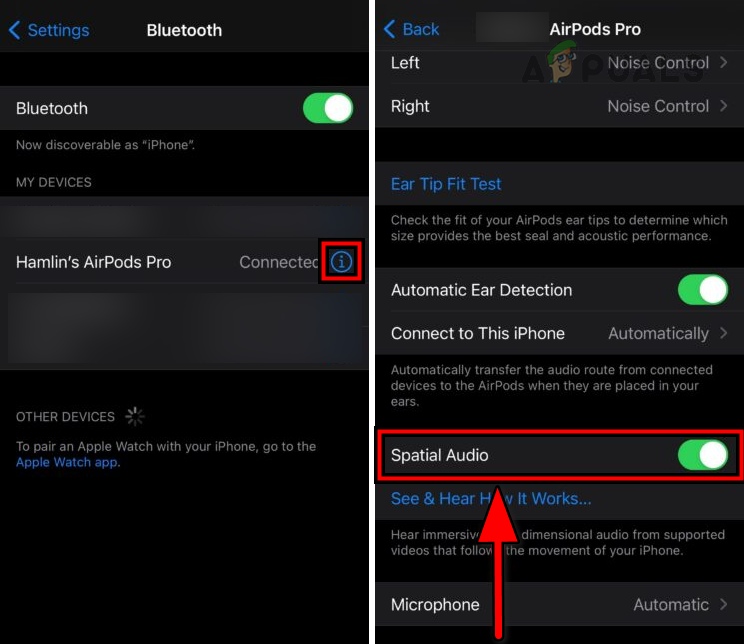
Disable Spatial Audio on the AirPods Pro - If Spatial Audio was already off, try enabling it, then check noise cancellation again.
4. Clean the AirPods Pro
AirPods Pro use their microphones to detect outside noise and counter it with opposing sound waves. If dirt or debris blocks the microphones, noise cancellation may not work properly. Cleaning your AirPods Pro can be an effective fix.
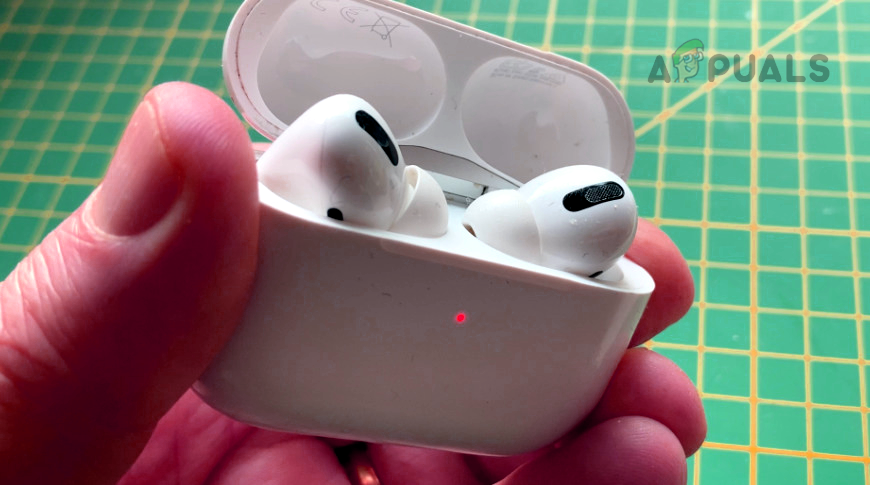
- Use a new, clean toothbrush to gently brush the vents of your AirPods.
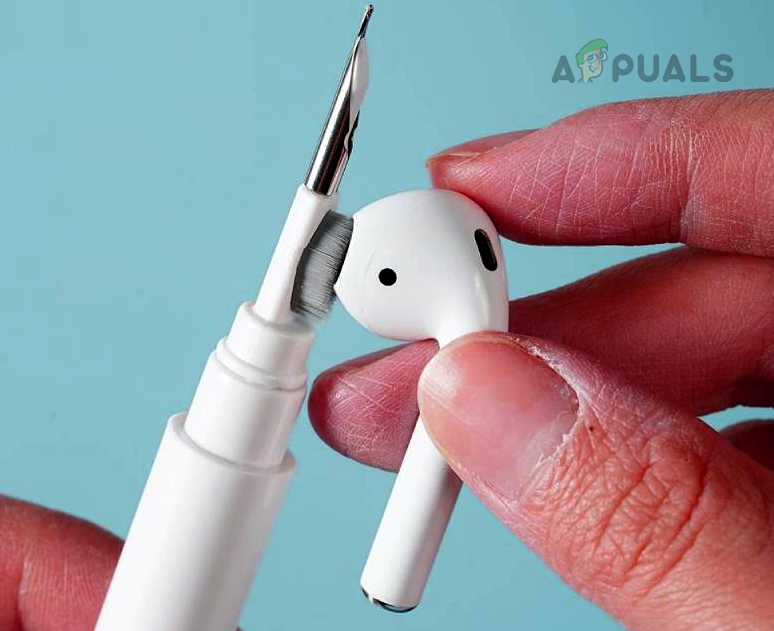
Clean AirPods Pro - Use a Q-tip to lightly clean the vents.
- Cover all speakers and vents except the one you are cleaning to avoid pushing debris into the device.
- Use a small, low-power vacuum cleaner to clean the vent, if available. If not, try gently sucking on the vent for 5 to 10 seconds.
- Carefully use sticky tack, blue tack, or tape to lift out any dust or debris. Be gentle to avoid pushing anything inside. You can also use isopropyl alcohol to further clean the vent.
Use Blue Tack to Clean the Vents of the AirPods - Repeat the process for the other vents.
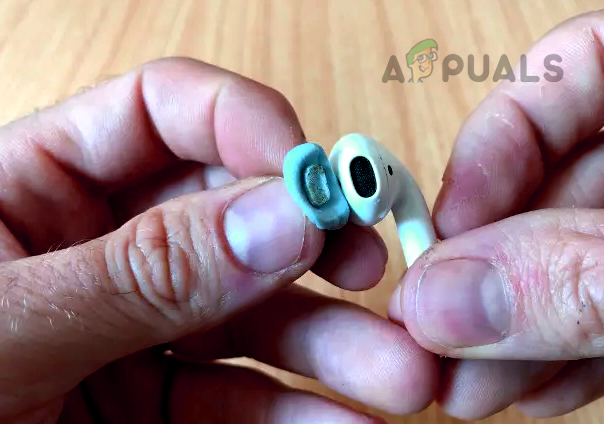
- Clean the ear tips of your AirPods.
- Repeat these steps for the other AirPod and see if noise cancellation improves.
5. Re-pair the AirPods with Your Apple Device
If the connection profile between your AirPods Pro and device becomes unreliable, it can impact features like noise cancellation. Re-pairing the AirPods often resolves such communication issues.
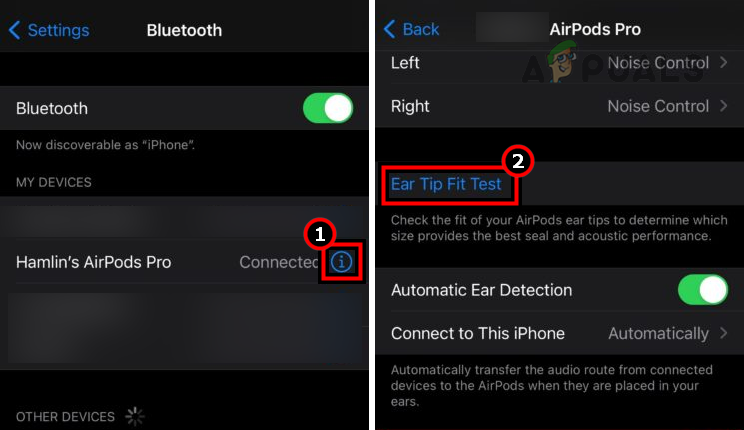
- Go to Settings on your iPhone, then Bluetooth.
- Tap the More Info icon next to your AirPods Pro, and select Forget This Device.
Forget AirPods Pro in the iPhone Settings - Confirm your choice and restart your iPhone.
- Pair your AirPods Pro with your device again.
- Turn Noise Cancelling back on and see if it works properly.
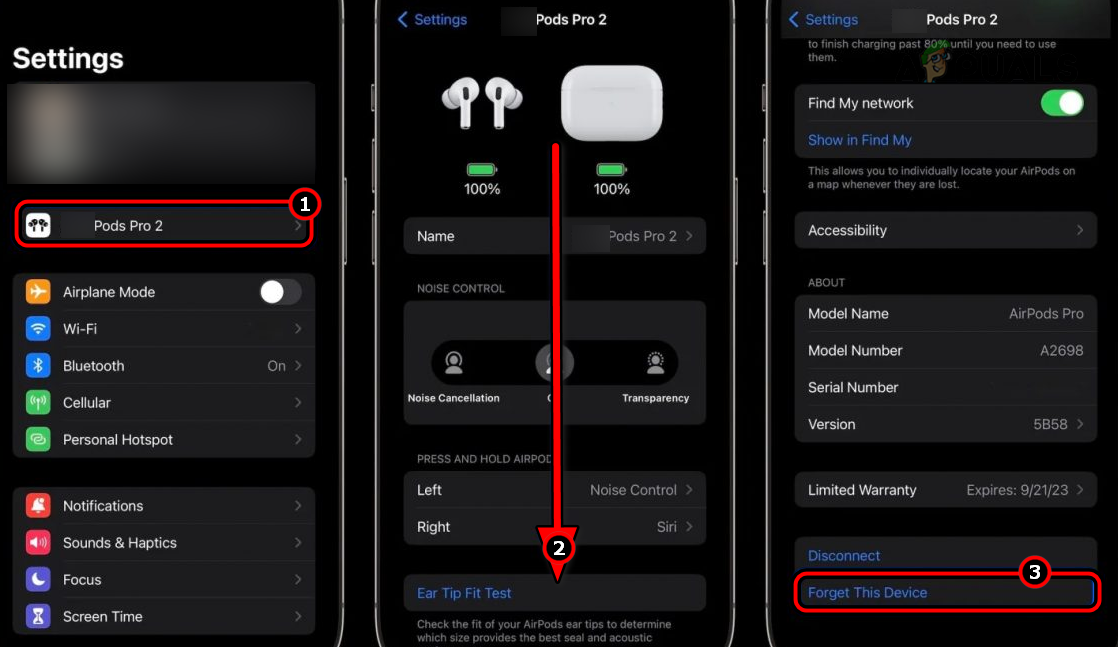
6. Try the ‘Ear Tip Fit Test’
If your AirPods are not sealing well in your ear canal, noise reduction can be much less effective. This may be due to improper ear tip size. The ‘Ear Tip Fit Test’ can help determine if this is the issue.
- With your AirPods in your ears, go to Settings > Bluetooth > your AirPods on your Apple device.
- Tap Ear Tip Fit Test, select Continue, and then tap Play.
Try Ear Tip Fit Test - If the test fails, try adjusting the AirPods in your ears and repeat the test.
- If it continues to fail, try other ear tip sizes—foam-based tips can be especially helpful—and test both ears.
- Keep trying different sizes until a good fit is found.
- If the issue continues, go to Settings > Bluetooth > your AirPods.
- Turn off Automatic Ear Detection and see if that improves noise cancelling.
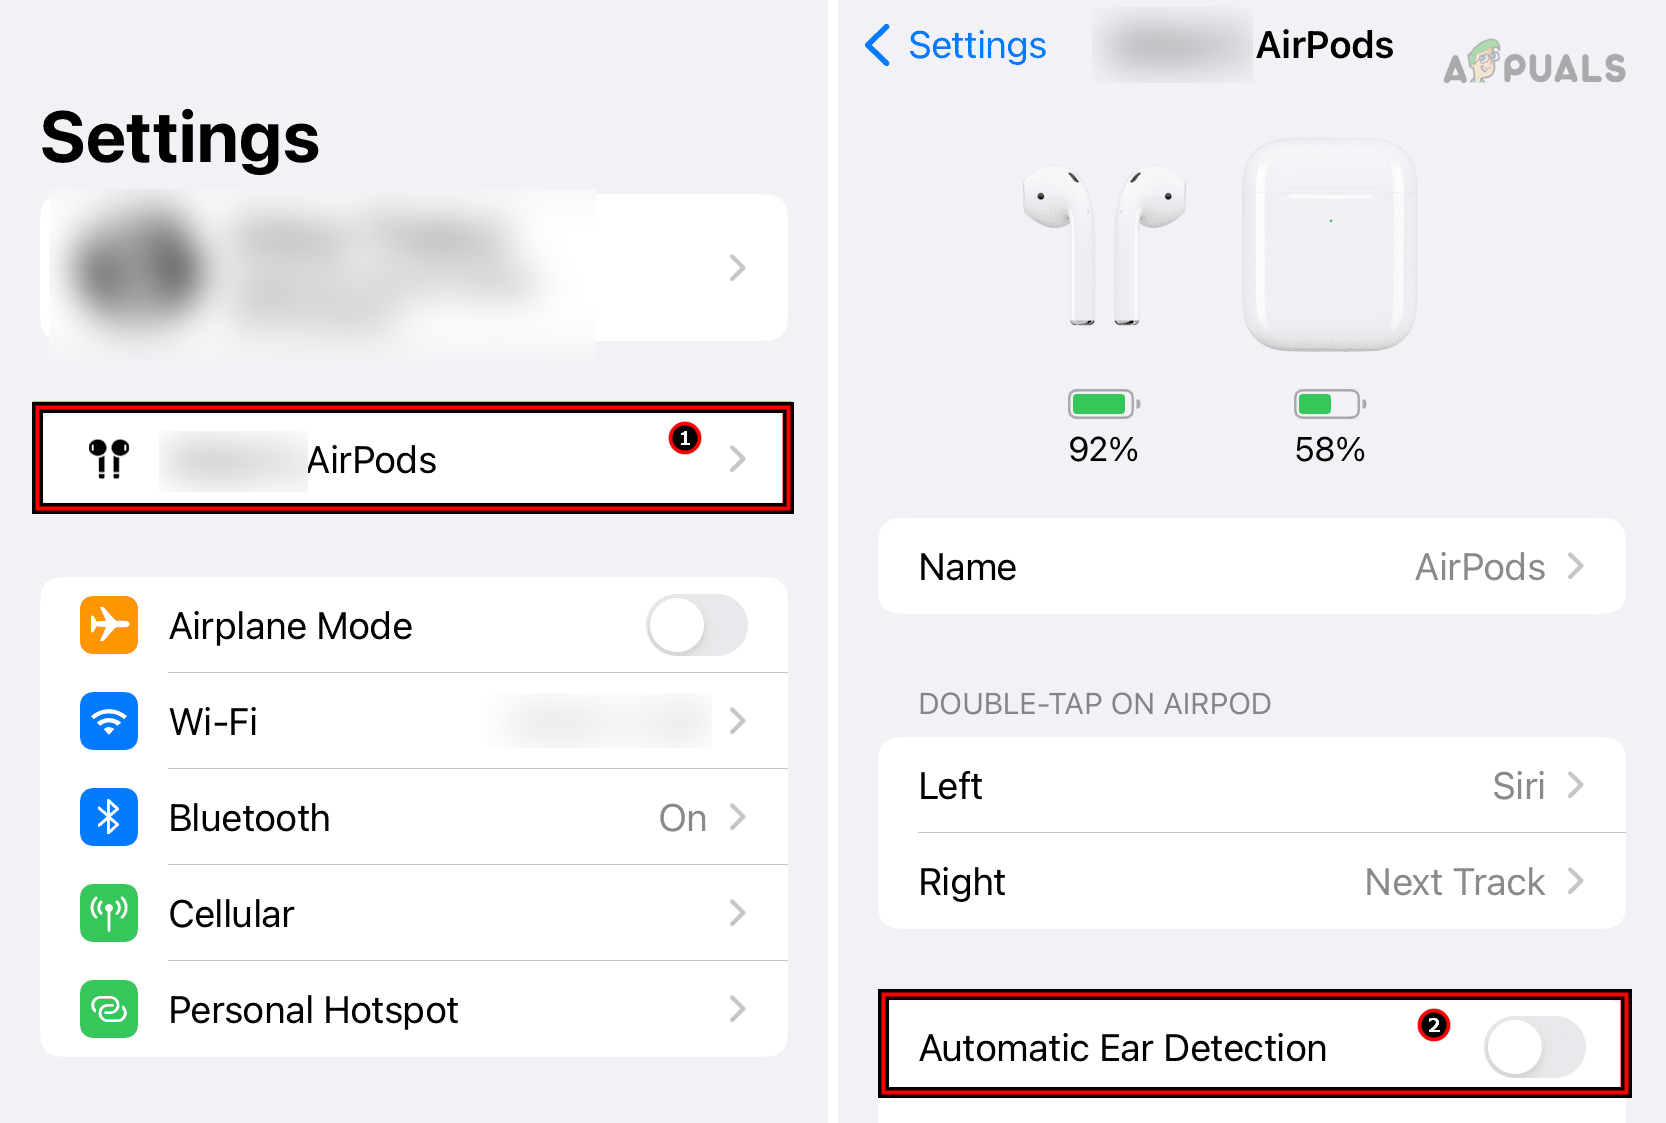
Disable Automatic Ear Detection of the AirPods Pro
7. Reset the AirPods to Default Settings
If a firmware glitch is causing noise cancellation to stop working, especially after a recent update, resetting your AirPods Pro to factory settings can help.
- Charge both your AirPods Pro and the case to at least 80%.
- On your iPhone, go to Settings > Bluetooth.
- Tap on your AirPods and select Forget This Device.
- Repeat this with every Apple device where your AirPods were previously paired (iPad, Mac, etc.).
- Place the AirPods in their charging case and keep the lid open.
- Press and hold the Setup button on the back of the case until the light changes from amber to white (about 15 seconds).
Reset AirPods Pro to the Factory Defaults - Keep the lid open and wait for another 15 minutes.
- Restart your phone and pair it again with the AirPods.
- Turn on Noise Cancellation and test if it now works correctly.
8. Reset Your Phone to Factory Settings
If you have tried everything else and your AirPods Pro work correctly with other Apple devices, you might need to reset your current device to factory settings. This can resolve any deeper software problems.
- Back up your phone and charge it completely.
- Open Settings on your iPhone, then go to General > Reset.
- Select Erase All Content and Settings.
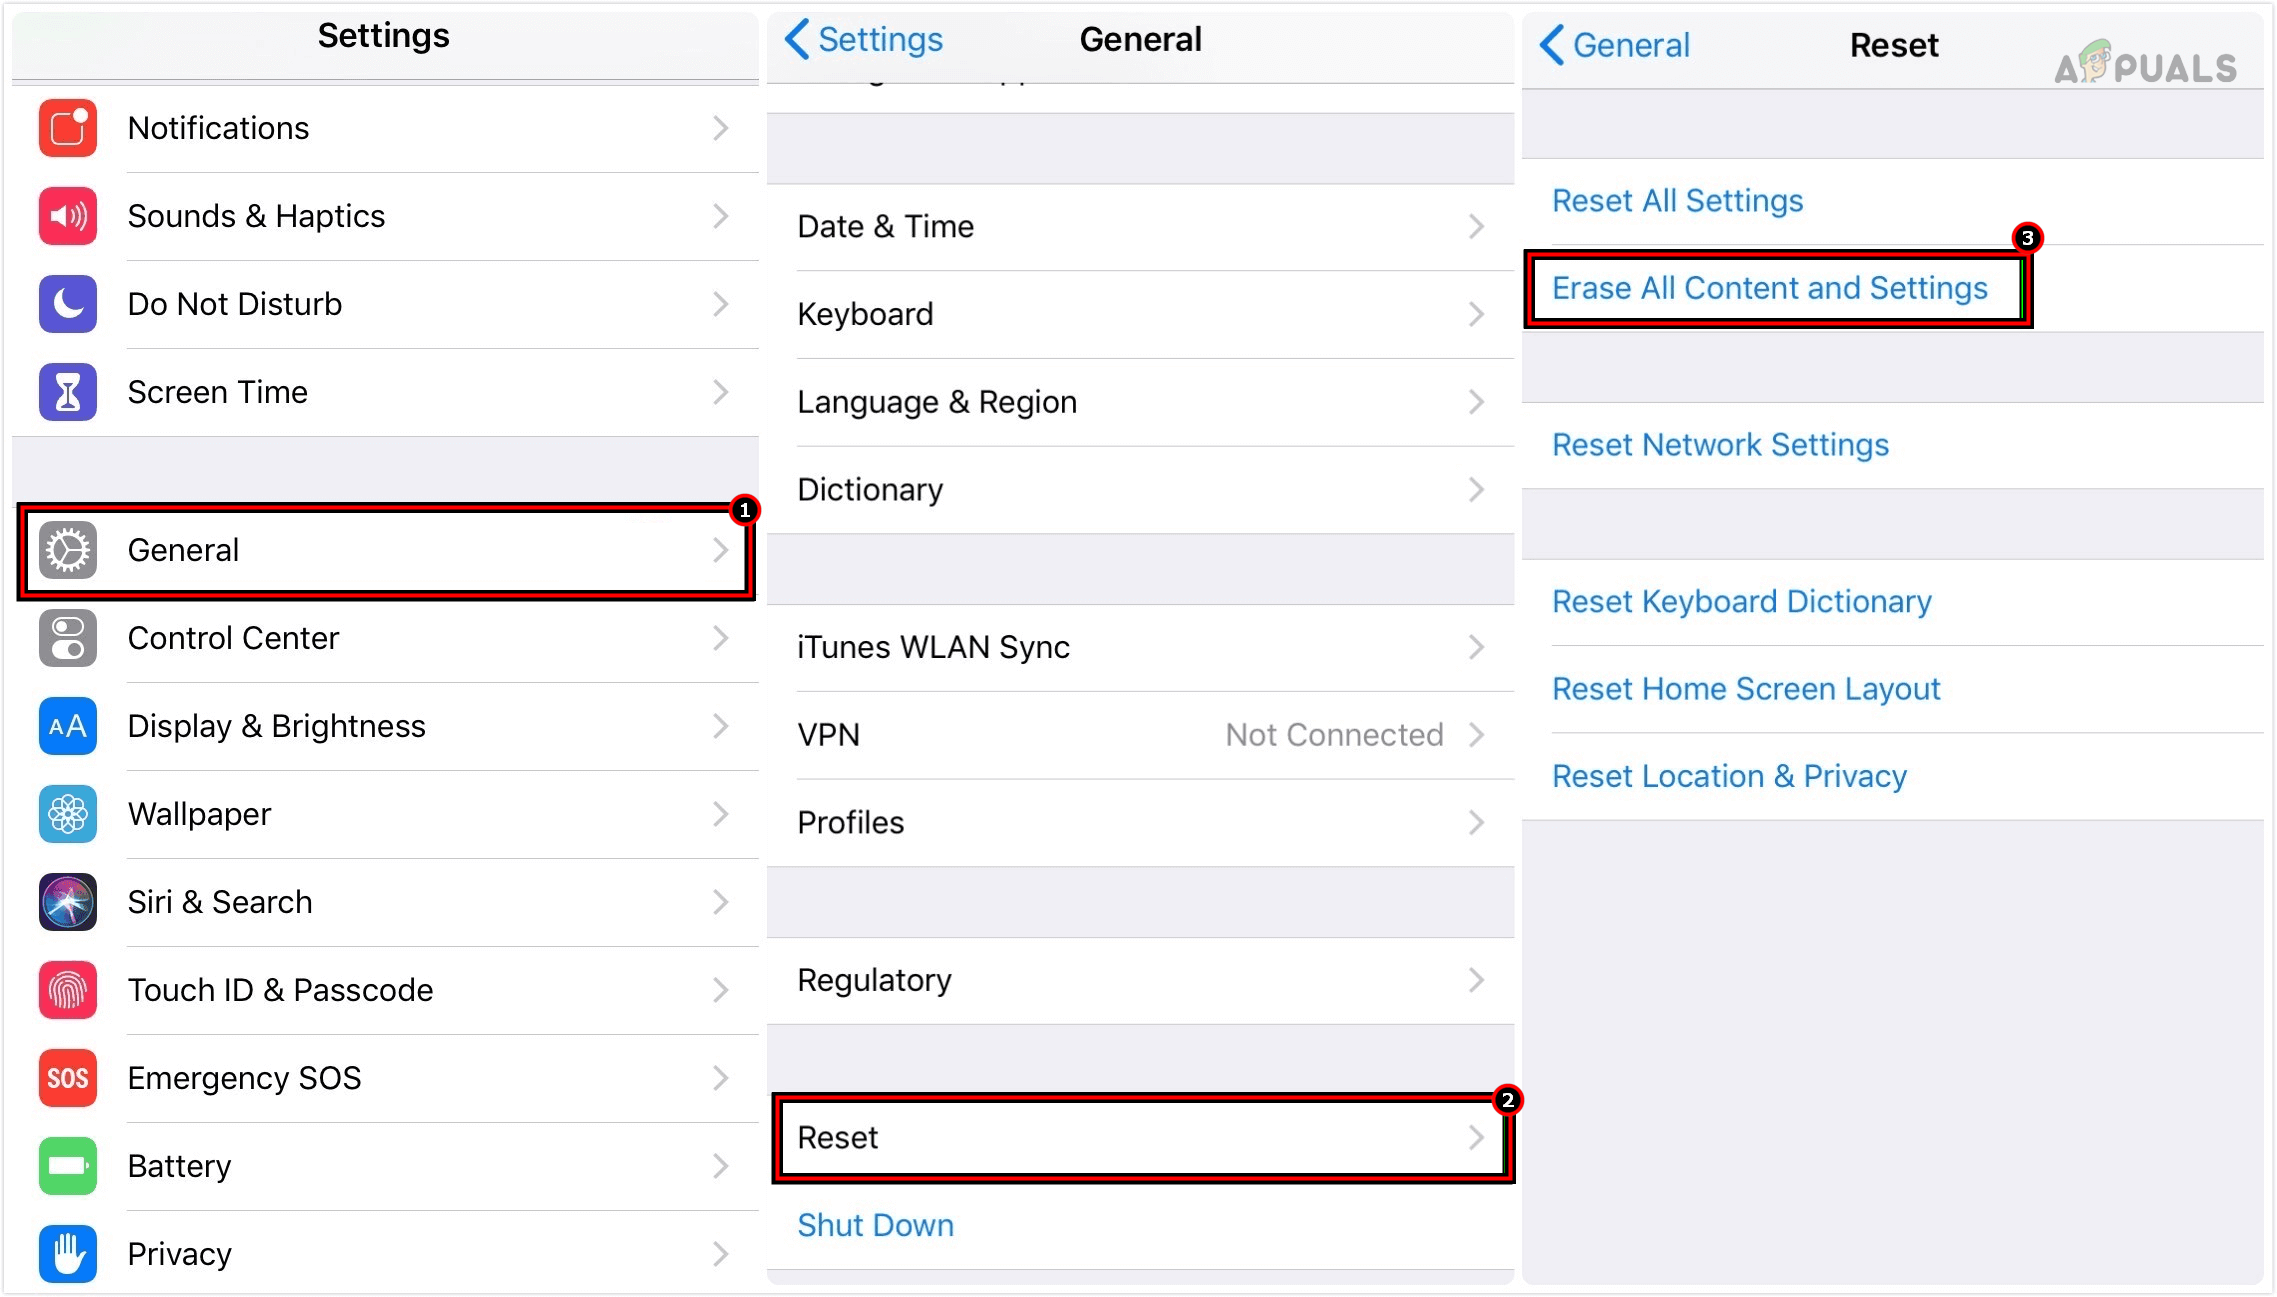
Erase All Content and Settings on the iPhone to Reset it to the Factory Defaults - Confirm and wait for the reset to complete.
- Set up your device as new and check if the noise cancellation issue is resolved.
If none of the above solutions work, contact Apple Support to have your AirPods Pro checked for hardware issues. If your AirPods are still under warranty, you may be eligible for a replacement.
Reviewed by Muhammad Zubyan