Advanced Motherboard Buying Guide – How to Buy A Motherboard For A Gaming PC
When building a custom PC some of the more interesting purchase decisions are usually the CPU and the graphics card. Enthusiasts mull over these decisions for weeks and months on end, watching benchmark videos and comparing every last detail in reviews, but when it comes to motherboards there is not a whole lot of thought given to that decision. Usually, PC builders tend to focus more on other components and they just pick whatever motherboard fits their budget and can support their CPU. While this is a fine approach, buying a motherboard can become way more complicated than you think. This guide is going to focus on the core aspects of a motherboard that you should look out for while buying one. In the meantime, if you are worried about the budget segment, check out our How Much Should You Spend On A Motherboard Guide.
Motherboards are among the most critical components of your build. Not only is the motherboard responsible for supporting your processor, but it is also the central hub to which all other components connect. Not only that, but the motherboard also takes power directly from the power supply and efficiently distributes it among all the components on the board. Buying a motherboard can be very simple if you want it to be, but it can also become extremely complex if you are a true enthusiast looking for the very best for your build.
Motherboard Buying Guides: Best B450 Motherboard
In this guide, we will focus on three main approaches to buying a motherboard. The Basic Level is for the general audience who just want to put together a gaming PC (or a work PC) and would never open it again after assembly. The Intermediate Level is for those buyers who are enthusiastic about their hardware and want the best features in their budget. This approach should provide the best buying experience without going overkill.
And for the advanced users, we will also focus on some complex factors that are important for enthusiasts who are looking to overclock, tune memory speeds, install bleeding-edge components, and generally want to buy the best motherboard they possibly can for their build.
Basic Level
When you are shopping for your motherboard, these are the most important decisions you will have to take. Making the wrong decision in these categories might even prevent your PC from turning ON.
Compatibility
The very first decision that you will have to make is which CPU you want to put in your PC. Choosing a motherboard must be preceded by the process of choosing a CPU. In the processor market, we have two major competitors: Intel and AMD. Both offer CPUs ranging from entry-level options all the way up to ultra-powerful CPUs with many cores that can handle the most demanding games and productivity workloads.
After deciding on your CPU, you will have to check the compatibility of your CPU to your motherboard. There are two things that need to be checked here:
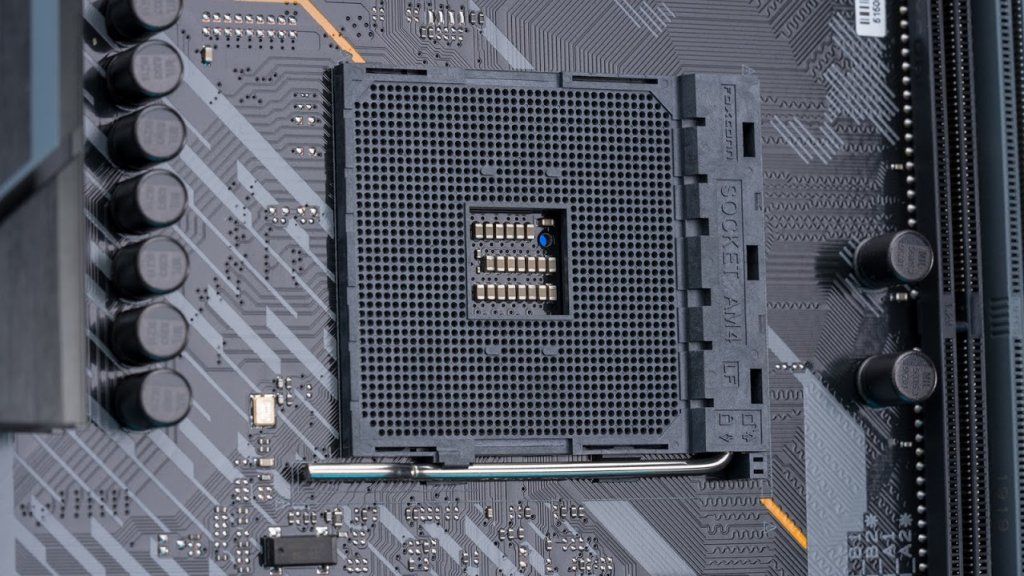
- Socket: You have to check what socket your CPU uses. You will find this information on the product page of the CPU. For example, all of the Ryzen CPUs from AMD use the AM4 socket. This is a step to ensure the physical compatibility of the CPU with the motherboard.
- Chipset: A chipset is the motherboard’s own software and hardware that allows all the different components on the board to communicate with each other. Each particular motherboard is assigned a chipset, and that determines the compatibility of the motherboard to the CPU itself. The socket is usually the same between different chipsets in the same generation. Therefore, you need to research beforehand what chipsets support your CPU of choice. Following are some common chipsets and sockets nowadays. Note that not all CPUs of the same series (Ryzen for example) are compatible with each and every chipset listed alongside them.
RAM Slots
The number of RAM slots on the board is another consideration. In most desktop motherboards, the standard number of RAM slots is four, but there are also some more affordable boards that include only two RAM slots. Unless you are on a really tight budget, it is best to invest in a board that offers four RAM slots. This will ensure that you can use your current memory kit (usually two sticks) in the board while also preserving an upgrade path further down the line.
RAM compatibility is less of an issue nowadays as most motherboards can support a wide range of memory speeds by enabling XMP/DOCP in the BIOS. However, for peace of mind, it is always best to visit the motherboard’s official product page and check whether your selected memory speed is supported by the motherboard.
Size and Form Factor
Desktop motherboards usually come in three different sizes. These different sizes allow the users to have flexibility in their choice of cases and form factors. Many users prefer a compact case that does not take much space on their desk, while others prefer full-sized motherboards that are packed with more features. The three common form factors are:
- ATX: The standard size for the desktop motherboards is ATX which measures 12 x 9.6 inches. It usually has 7 expansion slots (PCI Express slots) and almost all of the ATX motherboards have 4 RAM slots. Some special motherboards for HEDT or Extreme Edition CPUs can even have 8 RAM slots. This size is the most common one and it is also a bit more expensive than the smaller sizes due to the extra cost of production. ATX motherboards also have the most ports and the most expandability options.
- Micro-ATX: The smaller variant of ATX boards that measures 9.6 x 9.6 inches, the MicroATX form factor offers most of the functionality of ATX boards in a smaller footprint. MicroATX boards are generally cheaper than ATX boards and provide very similar functionality. They can also have 4 RAM slots although many of the cheaper boards have only 2 RAM slots. These motherboards have 4 expansion slots commonly and also lack some headers and extra USB ports.
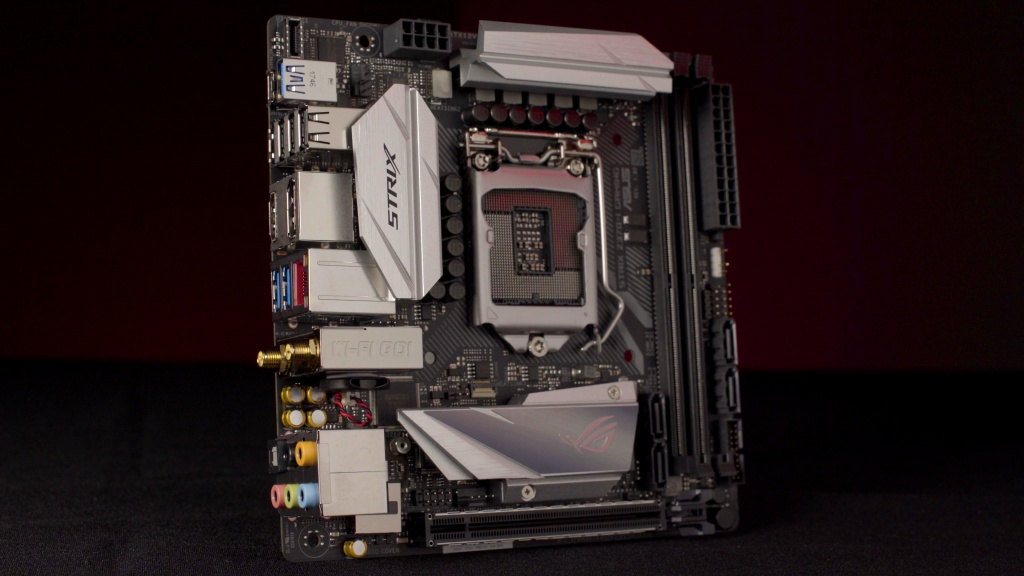
- Mini-ITX: This is the smallest desktop motherboard and it is meant for ultra-compact builds in small cases. It measures 9.0 x 7.5 inches and only has 1 PCIe slot generally. Due to the limited space, there are only 2 DIMM slots on these boards. Moreover, these boards have very few headers and ports due to a lack of space.
Basic Connectivity
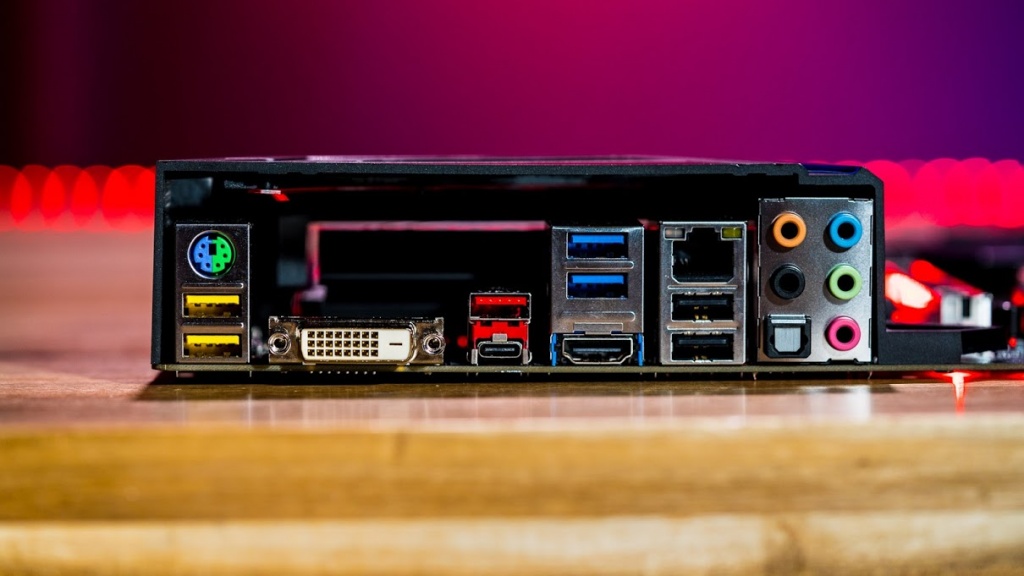
Another area that should be considered by everyone while buying a motherboard is the basic connectivity that the motherboard offers. This category includes the USB ports, the fan connectors, M.2 slots, SATA ports, and any other ports or connectors that you might need in the motherboard.
Most product pages list the number of USB ports, Ethernet ports, and SATA ports, etc. quite clearly. It is easy to just go to the product page and find out if your peripherals, fans, storage devices, and other components can be easily connected to the motherboard. WiFi is also a feature that is offered by some motherboards. You should check the motherboard’s product page for WiFi or “AC” if you want to make sure if your selected motherboard has this feature.
Intermediate Level
When moving up to the intermediate level, we try to look at this decision a bit more critically. Not only do we want the best motherboard for right now, but we also want enough features and “nice-to-haves” for the future as well.
Buying Guide: The 7 Best Motherboards For i9 9900k In 2021
Different Chipset Choices
Imagine you have selected a particular CPU that is perfect for your system. You have identified the socket type and are met with a variety of chipsets that are compatible with the particular CPU. How do you choose? Well for this decision, we will take AMD’s Ryzen CPUs as an example particularly the AMD Ryzen 5 3600. If we look at the compatible chipsets, we find that A320, A520, B350, B450, B550, X370, X470, and X570 are all compatible with this CPU. This is where we need to decide which chipset we want to choose as the platform of this build.
The way to do this is to research the differences between the various chipsets that are compatible with a particular CPU. In our example, X570 and B550 are the highest-tier chipsets that support advanced features such as PCIe Gen 4. B450 and X570 are older versions of these chipsets that do not support PCIe Gen 4 and might have some other features missing as well, but will be generally cheaper than X570 and B550 motherboards. A320 chipset does not support overclocking so that would be the cheapest option available. However, in AMD’s newer Ryzen 5000 gen CPUs you might not be able to have backward compatibility out of the box if you are buying an older chipset motherboard. So definitely research properly before making the final decision. For your ease, we have a buying guide for the Best Ryzen 5000 supported motherboards as well.
Researching the different chipsets and finding out the differences between them will lead to a better purchase decision. Similarly, on Intel’s side, only the Z series chipsets support overclocking so you would want to pair your “K” series unlocked CPU with a Z-series motherboard, or you are wasting the potential of your processor.
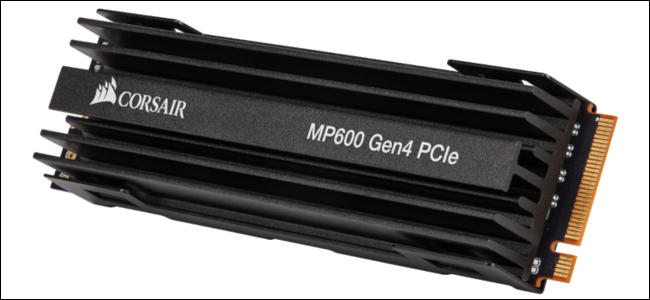
PCIe Gen 4
One of the more exciting new features in modern motherboards is the introduction of PCIe Gen 4. You can read all about it in this article, but the crux of it is that PCIe Gen 4 is a new extremely fast PCIe iteration that is going to be mainstream soon. PCIe Gen 4 capability can allow your motherboard to support extremely fast PCIe Gen 4 SSDs and Gen 4 Graphics Cards, although SSDs show the more prominent speed difference.
As of the time of writing, you need an AMD CPU to be installed in a B550 or an X570 motherboard in order to take advantage of PCIe Gen 4. Intel’s upcoming Rocket Lake CPUs are also rumored to support PCIe Gen 4 on Z490 motherboards, although that has not been confirmed yet.
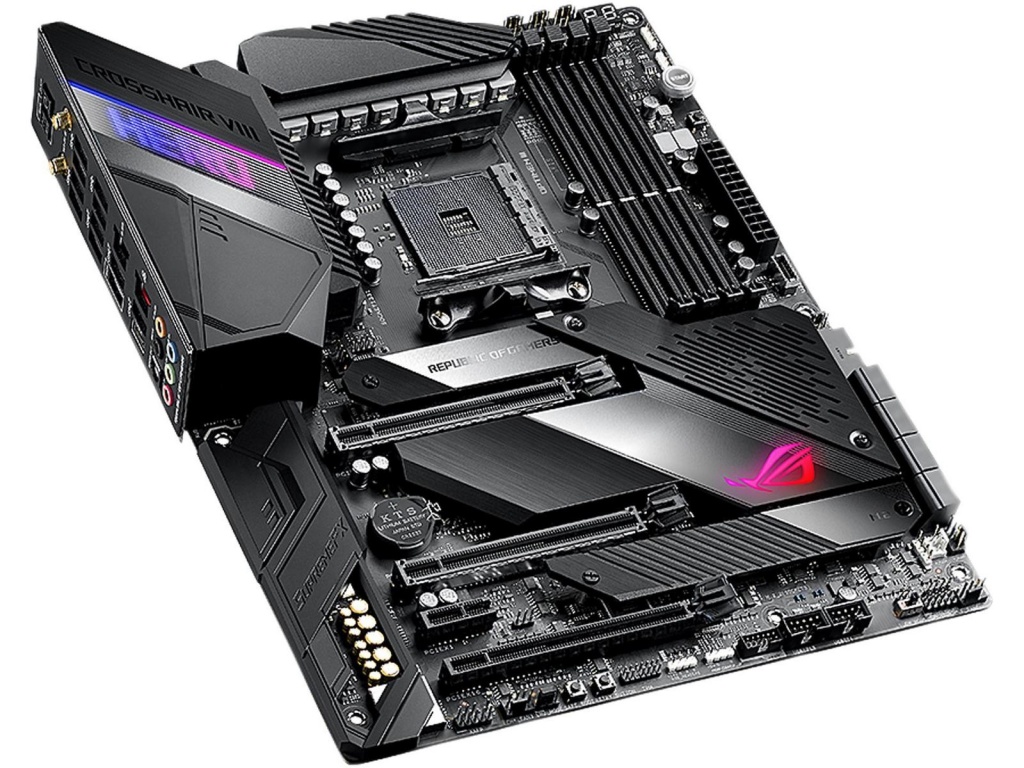
Aesthetics
Granted, a motherboard is just a fancy PCB when all is said and done, but that is no reason to believe that it should look ugly and unsightly in your PC case. In fact, motherboard manufacturers have made impressive improvements lately in the aesthetics of their motherboards as we have departed from the trend of green PCBs. Nowadays, motherboards generally offer color-neutral PCBs like black, with other elements on the board being colored in white, silver, or gray. These colors tend not to clash with the lighting and other colored elements in your case, therefore are the safest bet.
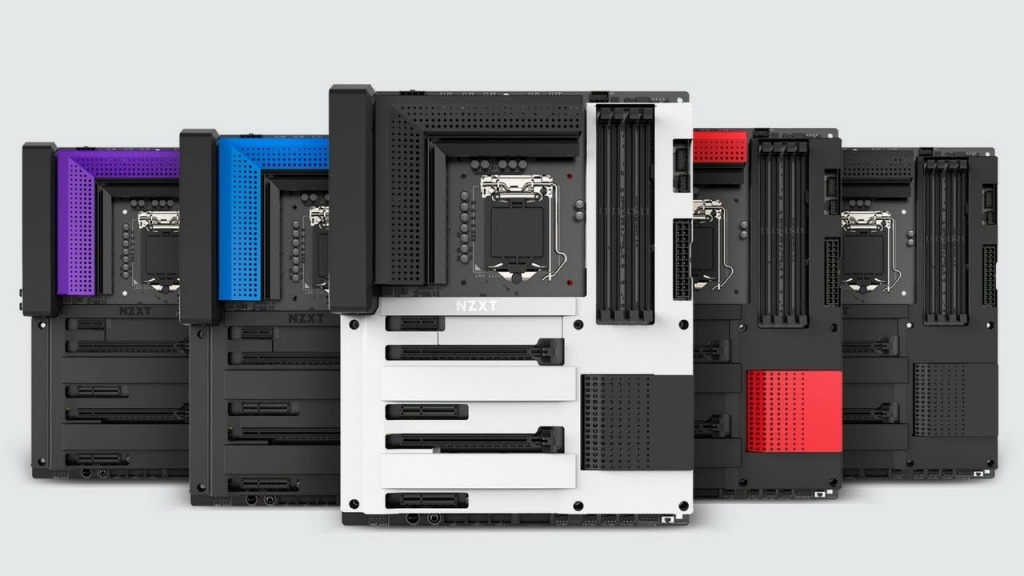
Many motherboards also offer built-in lighting which also does look quite nice. Motherboards have the potential to lift the aesthetics of your PC to the next level if their design language complements the look of your PC. You can also customize the motherboard’s lighting and make it match with the rest of your lighting theme for bonus points. Choosing a motherboard on the basis of aesthetics is unwise, however, when you have finalized your choice it doesn’t hurt to look at some better-looking options within the same category.
Important Headers
At this stage, it would also be a wise step to consider all the different headers you might need that are usually a little less common. Firstly, if your case uses a USB Type-C front panel header, then you should look for a special header on the motherboard that supports this connection. These might be a bit more expensive than comparable boards though.
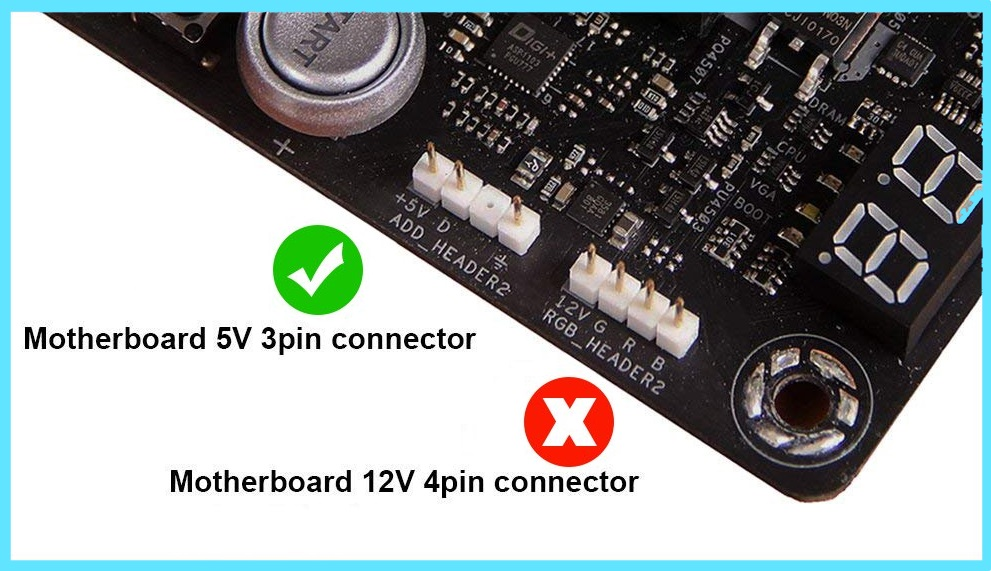
Another important header is the RGB/aRGB header that is often included in modern motherboards. If you are looking to connect lighting elements such as fans or LED strips to your motherboard, then you should look for the RGB/aRGB headers on the board. The RGB header is a 12V 4-pin header that is a bit older but is generally more easily available on affordable boards, while the aRGB header is a 5V 3-pin header that is often found on slightly more premium boards. These headers are not inter-compatible with each other so you should look at your device’s connector to find out which header it plugs into.
Upgrade Path
If you are investing this much time and effort in your purchase decision for the motherboard, it is important that the motherboard lasts for some time and you don’t have to replace it in a while due to a lapse in judgment. The upgrade path is an important consideration in the purchase decision of a motherboard. Many chipsets only support one or two generations of CPUs so it should be researched beforehand that you can put a next-generation CPU in the same motherboard without changing it.
Most Intel motherboards offer a very limited upgrade path which usually spans two generations. AMD motherboards, on the other hand, are much more flexible in terms of upgrades and compatibility. A B450 motherboard can support Ryzen 1000 series, Ryzen 2000 series, Ryzen 3000 series, and even the Ryzen 5000 series CPUs all in one motherboard. BIOS updates may be required to ensure compatibility with newer CPUs, but motherboards like this are a good purchase because they tend to last a long time.
Advanced Level
At this level, we are concerned with getting the best motherboard for our money. This is all about overclocking and tuning, as well as some extra features that normal consumers might not care about.
VRMs and Power Delivery
The VRMs or Voltage Regulating Modules are the power delivery components that provide clean and stable power to your CPU. It is imperative that the cleaner and more stable the power, the better the CPU will perform especially under stressful conditions. VRMs utilize the power coming in through your power supply and then optimize it for the consumption of the CPU. VRM components are actually some of the most important electrical components in the motherboard, and they are extremely important when overclocking.
When you are overclocking your CPU, the power demands of your CPU increase dramatically. Not only does the CPU demand more power to hit the higher frequencies, but it also requires clean and stable delivery of that power. A strong and robust VRM configuration is crucial for this process as it allows the CPU to reach higher frequencies with low voltages.
You might often hear marketing terms like “14+2 phase VRM design” on motherboard product pages. These refer to the number of power phases that the VRM design of a particular motherboard uses. Generally, higher is better, but there is also a lot of conflicting and misleading marketing out there so it is not always the most reliable measure of VRM quality.
So, how should you judge the quality of a motherboard’s VRM or power delivery? Well, you don’t have to. There are several people in the PC Hardware industry that do great work in this regard. Deep VRM analysis and comparisons are posted by YouTube channels such as Hardware Unboxed, Gamers Nexus, and Buildzoid among many others. Generally, VRM temperature under load is the value that you want to focus on, and the cooler a particular VRM setup stays under load, the better it is for the board as well as the CPU.
VRM Cooling
Generally, a hallmark of a great overclocking motherboard is its impressive VRM cooling. Many motherboards nowadays offer big VRM heatsinks on their boards in order to keep the VRM temperatures down. Comparative data is needed to show the differences in temperature between the VRMs of different motherboards, so research is necessary for this part too. You should avoid any motherboard that does not have a VRM heatsink or has very small ones, as that motherboard will likely not be suitable for overclocking.
Additional Features
Some additional features that are nice to have in a motherboard include a built-in I/O shield, debug LEDs, code readout, BIOS flashback, and mounted buttons for booting. These are some small but really helpful features that can save a lot of time when troubleshooting or installing the motherboard in the first place.
Many premium boards nowadays come with an I/O shield that is built into the back of the board so you do not have to install a separate I/O shield which is a nice touch. Debug LEDs are small LEDs that are mounted in a visible position on the motherboard and they help in diagnosing a problem during troubleshooting. The same is the case with the code readout, which is a feature that only a few boards possess. Code readout actually shows a double-digit code instead of small LEDs and that helps to narrow down the problem to one particular area. Moreover, surface mounting boot buttons allow you to boot and reboot the board using a button rather than the pins that most boards use.
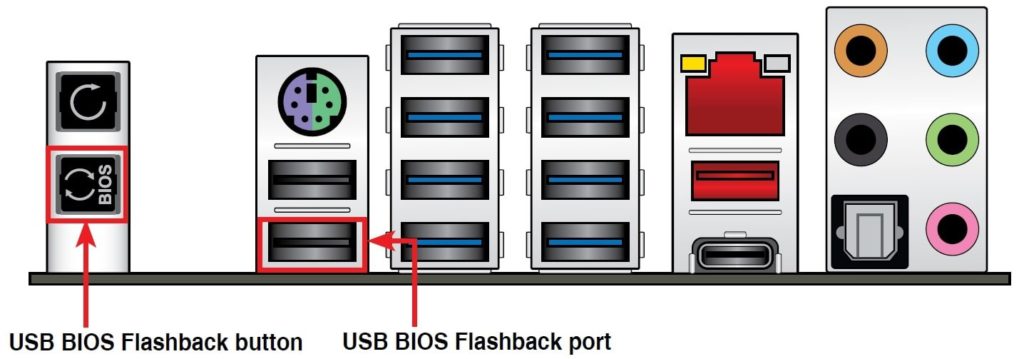
BIOS Flashback is a relatively new feature and thankfully a lot of manufacturers have adopted it. With this feature, you can update the BIOS of a motherboard by inserting a USB stick in one of the rear ports and pushing the BIOS Flashback button. The great thing about this feature is that you do not need to have a CPU or memory installed on the board in order to update the BIOS. This can come really handy in a pinch if you bought a processor that requires a BIOS update but you do not have any older processor at hand.
Variations between Manufacturers
Finally, you have to take into consideration the differences between the various motherboard manufactures. Before buying a motherboard, you should research the pros and cons of each different company. It is important to know about the warranty situation, ease of RMA process, and general customer support network of the company should something go wrong with your board.
There are other small differences between the motherboard vendors as well such as different BIOS implementations, slightly different VRM configurations, and different RGB control software. These are minor differences that shouldn’t really affect the purchase decision.
Final Words
Buying a motherboard can be a relatively simple process unless you want to maximize your value for money. It is easy to just buy the cheapest motherboard that would run your processor, but that motherboard will most likely not be an ideal fit for your whole build. It is important to research the different motherboard components and to know which features you need for your particular build. There is no perfect motherboard for everyone, and it is more than likely that the best motherboard for your PC might not be a great choice for someone else.