Fix: Zoom Unable to Connect Error Code 5003
The recent popularity of Zoom made several users register on the platform as everyone was forced to work and study from home. While using the desktop client of Zoom, one of the issues that users often come across is the error code 5003. The error code reads “Unable to connect” along with some additional text that provides some troubleshooting steps. The error message occurs when users try to join a meeting through the desktop application. The issue seems to be only limited to the desktop client as the meetings work fine on the browser.
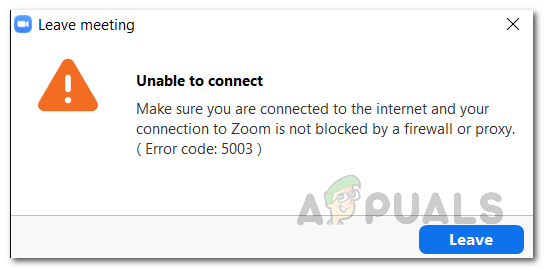
In this article, we will be going through the error code 5003 to provide you some methods that can circumvent the issue. As it turns out, the said error code appears when your system is not able to establish a connection with the Zoom servers. This means that something on your system is interfering with the desktop client and thus, preventing it from establishing a connection. As a result, you are not able to join meetings and the mentioned error message pops up. There are different factors that could actually trigger this behavior. Let us go through them one by one.
- Third-party antivirus or VPN software — One of the most common reasons why such issues often occur is the existence of a third-party antivirus or VPN software. In most cases, the antivirus software on your system can interfere with the applications on your system which as a result causes unexpected behavior. The case is similar here. If your antivirus software is interfering with the Zoom application, it won’t be able to establish a connection and thus the error message pops up. Along with that, in some cases, the VPN apps can also be the culprit party. If you are using a VPN while establishing a connection, it could be blocking the connection due to which the error is emerging.
- Network settings — As it turns out, in some scenarios, the issue can also be triggered by your Windows network settings which aren’t allowing the connection to be established successfully. In such a scenario, you will simply have to reset your network adapter settings to circumvent the issue.
With that said, you probably have established an understanding of what could be causing the error message. Now that we have gone through the potential causes of the issue, let us go through the different methods that you can implement to get the issue resolved.
Method 1: Uninstall Third-Party Antivirus
As you are probably aware at this point, the error message comes up when your desktop client cannot establish a connection with the Zoom servers successfully. This occurs when something on your system is blocking this process or simply interfering with it. Antivirus software is widely known to be interfering with other applications installed on your system to make sure that they are safe to use. While this is appreciable, oftentimes they can trigger a false alarm that stops certain applications from working as intended. In such a scenario, you will have to completely turn off the antivirus software on your system and then try joining a meet on Zoom.
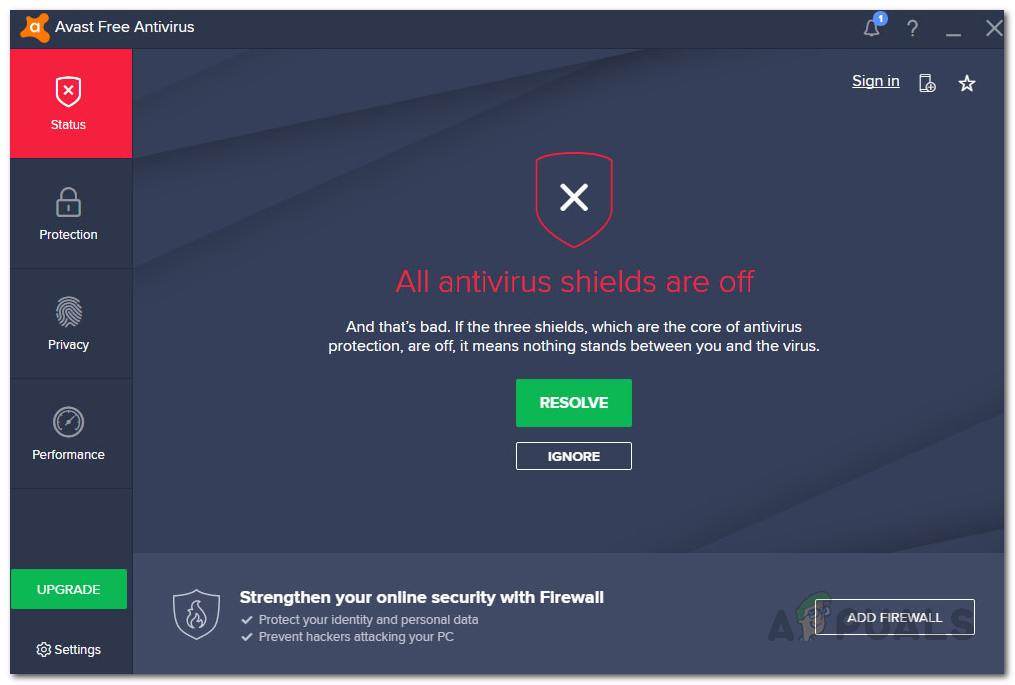
In case it works out and you don’t get the error message, then that means the issue is being caused by the third-party antivirus software on your system. If this is applicable to you, what you can do is completely remove the antivirus from your system and look for a better replacement. It is recommended that you uninstall the antivirus software and then reboot your system before checking if the issue has been resolved.
In addition, if you have a VPN running in the background, turning that off might also help as certain VPNs have poor connection or the connection could simply be blocked. Once you have turned it off, check if that resolves the issue for you.
Method 2: Reset Network Adapter Settings
In some scenarios, the issue can also be caused by your network setting as we have mentioned above. What you will have to do, in such a case, is to simply reset the network adapter settings on your system and then try to see if the issue has been resolved. The network adapter settings can be easily reset, just follow the instructions given down below:
- First of all, you will have to open up an elevated command prompt. To do this, search for the command prompt in the Start Menu and then right-click on it. Choose Run as an administrator from the drop-down menu.

Running Command Prompt as an Admin - Once you have done that and the command prompt window launches, type in the following command flush the DNS on your system:
ipconfig /flushdns
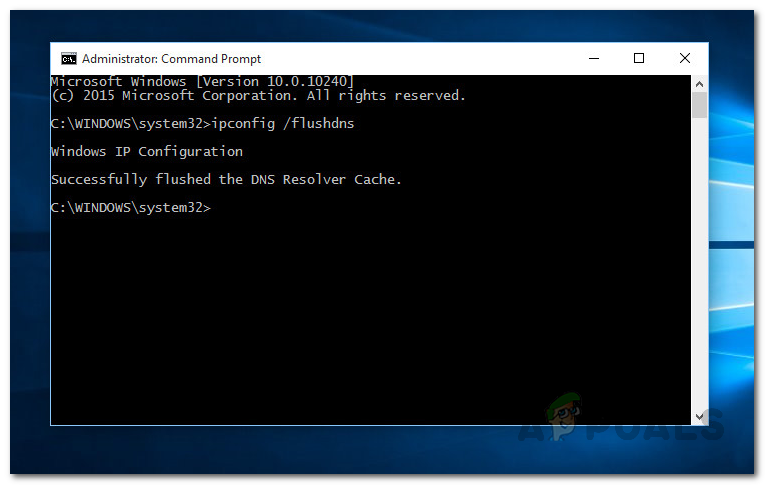
- After that, enter the following command to reset the Windows Socket (winsock):
netsh winsock reset
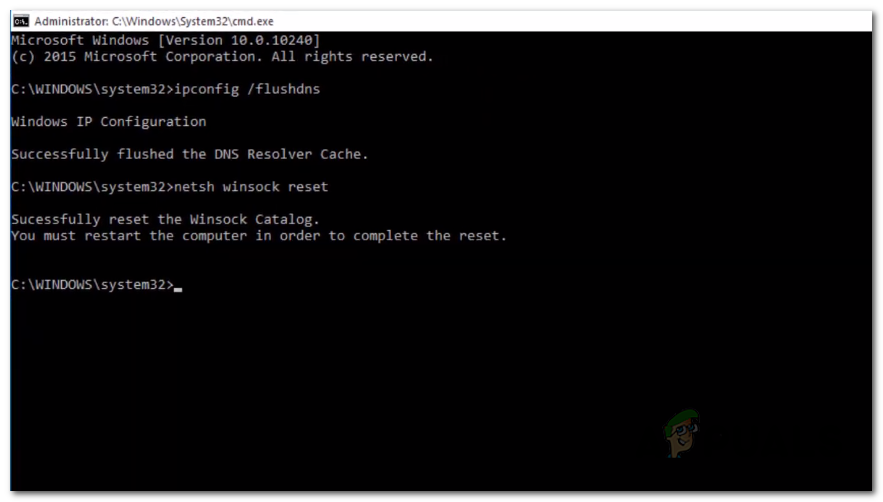
- Once you have done that, go ahead and reset the system as instructed on the command prompt screen.
- When your system boots up, open up the Zoom app and check if the issue persists.
Method 3: Change DNS
As it turns out, the issue can also be triggered by your DNS settings. In some cases, the DNS settings from your ISP could be blocking a connection with the Zoom servers due to which you are not able to establish a connection. This can be easily averted by simply changing your DNS or Domain Name Server from the Network settings window. To do this, just follow the instructions down below:
- First of all, right-click on the Network icon at the bottom-right corner on your taskbar and choose Open Network & Internet settings.
- On the Settings window, click on the Change adapter options option.
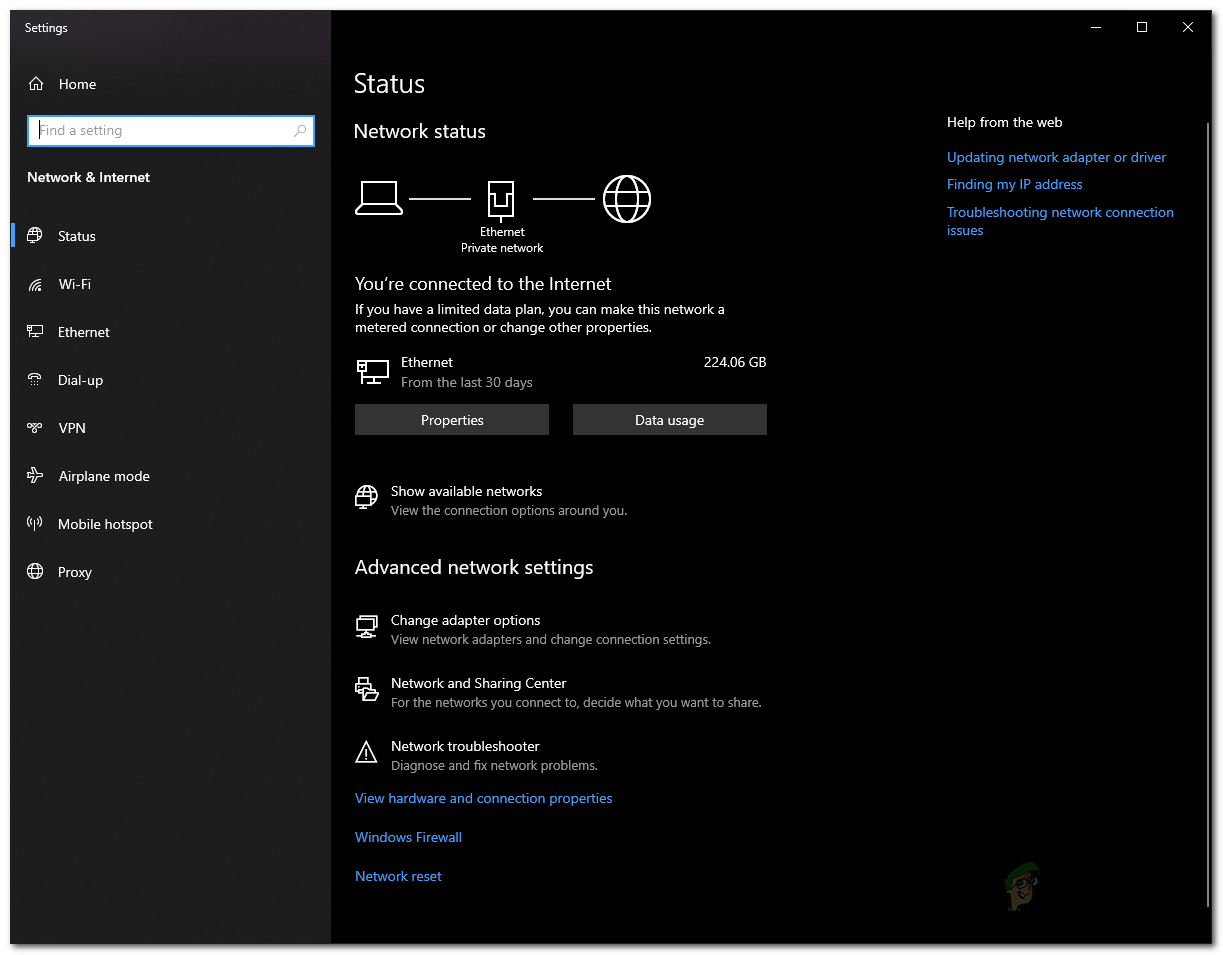
Windows Network Settings - This will bring up the Network Connections window. Right-click on your network adapter and choose Properties from the drop-down menu.
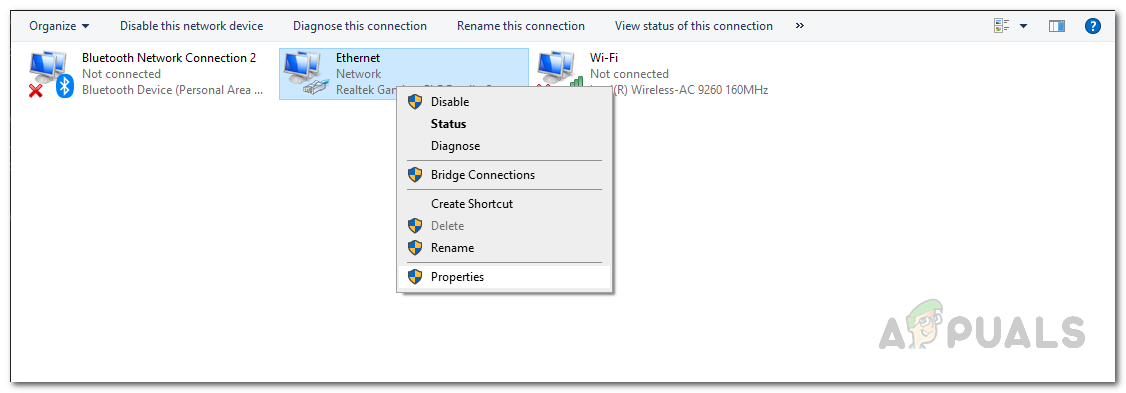
Network Connections - Then, highlight the Internet Protocol Version 4 (TCP/IPv4) option and click the Properties button.
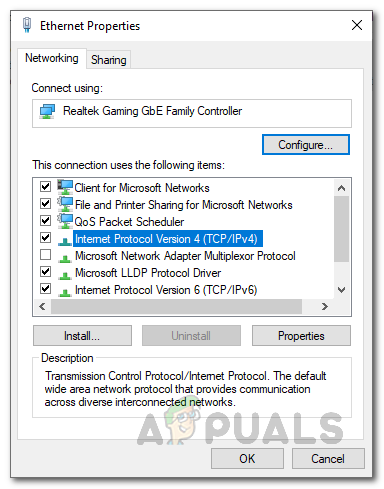
Network Adapter Properties - At the bottom, click on the Use the following DNS server addresses option.
- Enter 8.8.8.8 and 8.8.4.4 in the Preferred and Alternate DNS server fields respectively.
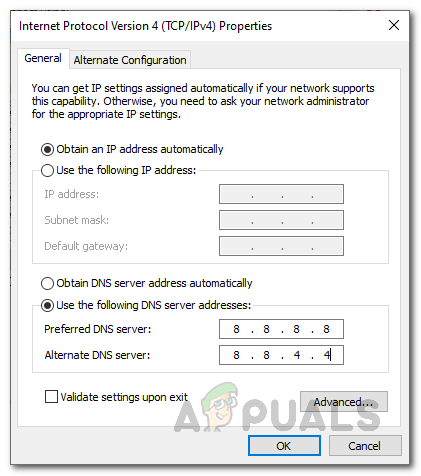
Changing DNS - Finally, click OK.
- Once you have done that, go ahead and open up the Zoom app. See if the issue persists.


