Fix: YouTube AutoPlay not Working
AutoPlay may not work on YouTube due to corrupt cache/data of the browser or corrupt installation of the YouTube mobile application. Moreover, an outdated browser or misconfiguration of your browser like DRM settings, etc. may also cause the error under discussion.
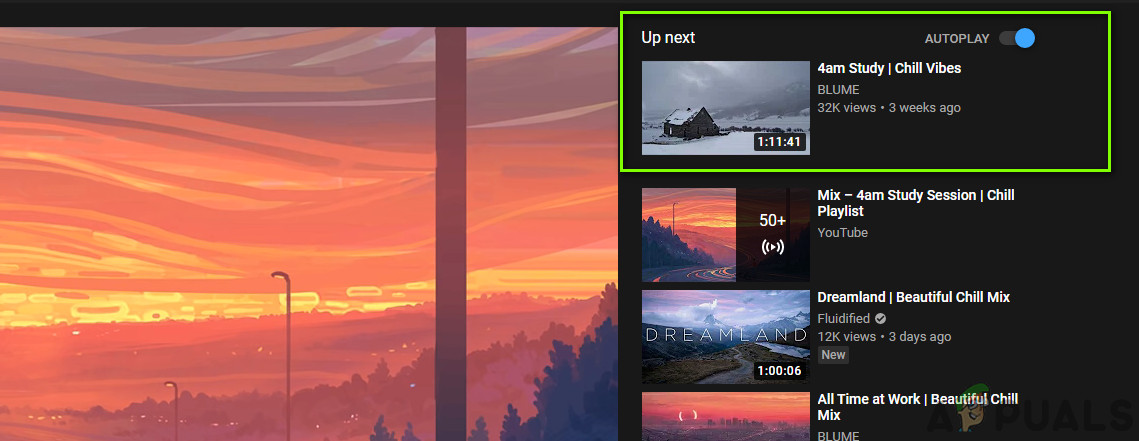
The user encounters the issue when he tries to play a video/playlist and YouTube stops (or starts repeating the first two videos of the playlist) after playing one or two videos.
For some users, the issue is that they cannot stop the AutoPlay of the videos while some encountered the issue only with playlists (not with the individual videos). This behavior is reported to occur on nearly all the operating systems and all the web browsers. Additionally, TV apps are also affected by the AutoPlay not working issue.
Before moving on with the solutions to solve AutoPlay issues, restart your devices (phone, computers, routers, etc.) to check if the issue is a temporary glitch. Moreover, when accessing YouTube, search it through a search engine (not through the bookmark/shortcut).
Additionally, keep in mind that AutoPlay will work for 30 minutes on a mobile network and for 4 hours on a Wi-Fi to prevent long AutoPlay sessions that a user might have forgotten.
For YouTube Web:
These solutions are for YouTube accessed through desktop browsers.
Solution 1: Toggle On/Off AutoPlay And Logout of the YouTube Account
You may encounter the error at hand if the AutoPlay setting for the video is not enabled at the backend of your account even though you might have enabled it in your application. In this context, enabling (or disabling) AutoPlay in the video settings may solve the problem.
- Launch the web browser and open the YouTube website.
- Now open any of the videos and then enable (or disable) the AutoPlay switch located on top of the suggested videos.

Enable AutoPlay for YouTube - Then click the Settings (gear icon) near the right corner of the video player and then make sure that the AutoPlay switch of the video is in the same state (enabled or disabled) as mentioned in step 3.
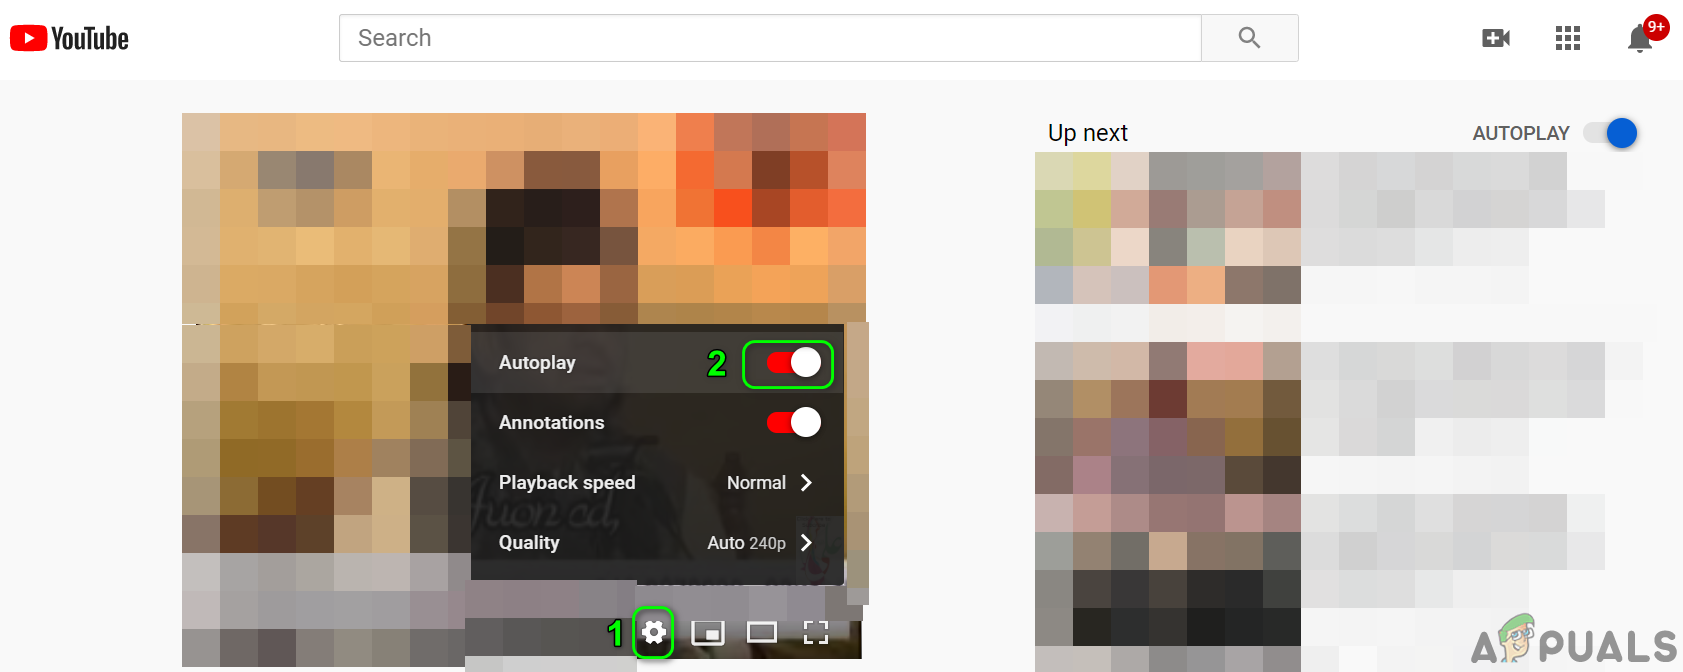
Enable AutoPlay in the Video Settings - Now check if YouTube is clear of the AutoPlay issue.
- If not, click on the profile icon (near the top right corner of the window), and then in the resulting menu, click on Sign Out.
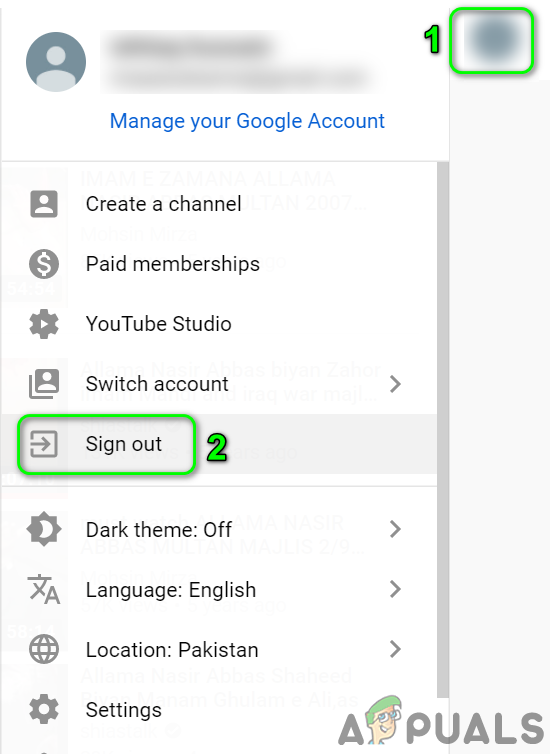
Sign Out of YouTube - Now check if you can AutoPlay videos/playlists on YouTube.
Solution 2: Clear the Cache and Data of Your Browser
Like many other applications, web browsers use a cache to improve the user experience and speed up things. AutoPlay might fail to work if the cache/data of your browser is corrupt or has bad configurations. In this context, clearing the browser’s cache/data completely may solve the problem. For elucidation, we will go through the process for the Chrome browser. You may check if the issue occurs in the private/ incognito mode.
- Launch the Chrome browser and open its menu by clicking on the vertical ellipsis near the top right corner of the window.
- Now, in the menu displayed, hover over More Tools and then in the sub-menu, click on Clear Browsing Data.
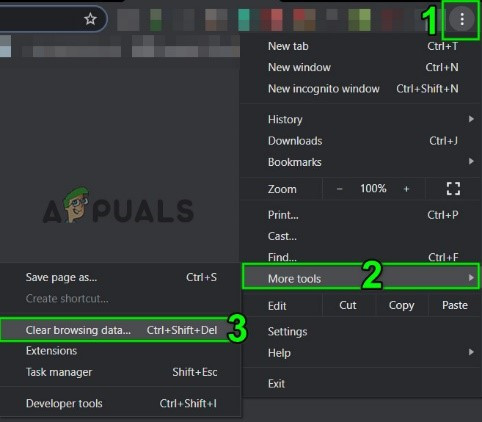
Open Clear Browsing Data in Chrome - Then click on the Sign Out link at the bottom of the window.
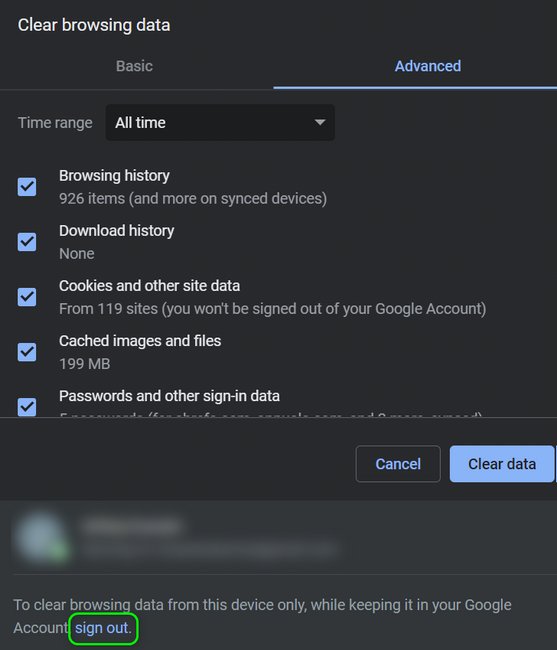
Sign Out of the Account Before Clearing Data and Cache - Now in the Advanced tab, select the Time Range of All Time (or for the time you are having the autoplay issue) and select the categories you want to clear (it is better to select all the categories).
- Now click on the Clear Data button and then relaunch the browser.
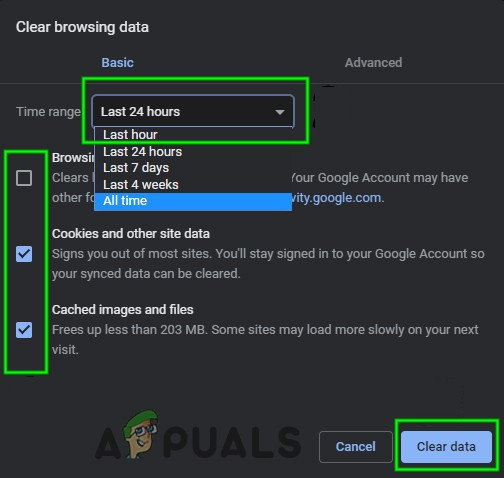
Clear Browsing Data in Chrome - Then check if the AutoPlay issue is resolved.
Solution 3: Update the Browser to the Latest Build
Browsers are updated regularly to cater to new technological advancements and patch the known bugs. You may encounter the issue under discussion if you are using an outdated version of the browser. In this context, updating the browser to the latest build may solve the problem. For elucidation, we will go through the process for the Google Chrome browser.
- Launch the Chrome browser and open its menu by clicking on the horizontal ellipses (3 vertical dots near the top right corner of the window).
- Now, in the menu displayed, click on Settings.
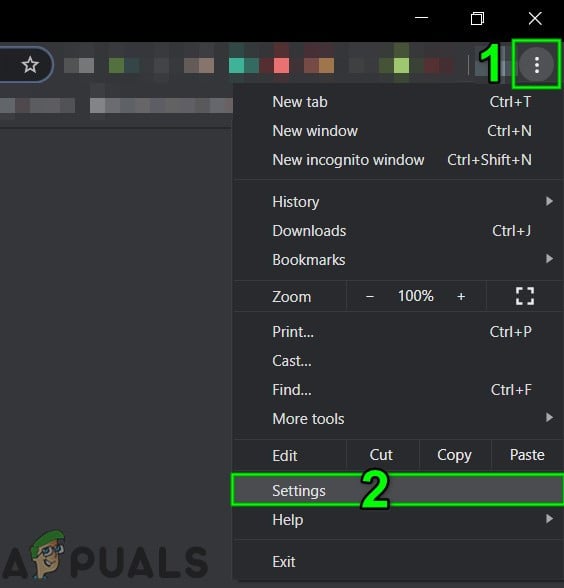
Open Chrome Settings - Then in the left pane of the window, click on About Chrome.
- Now, check if an update of Chrome is available, if so, then install the latest update and then relaunch the browser.
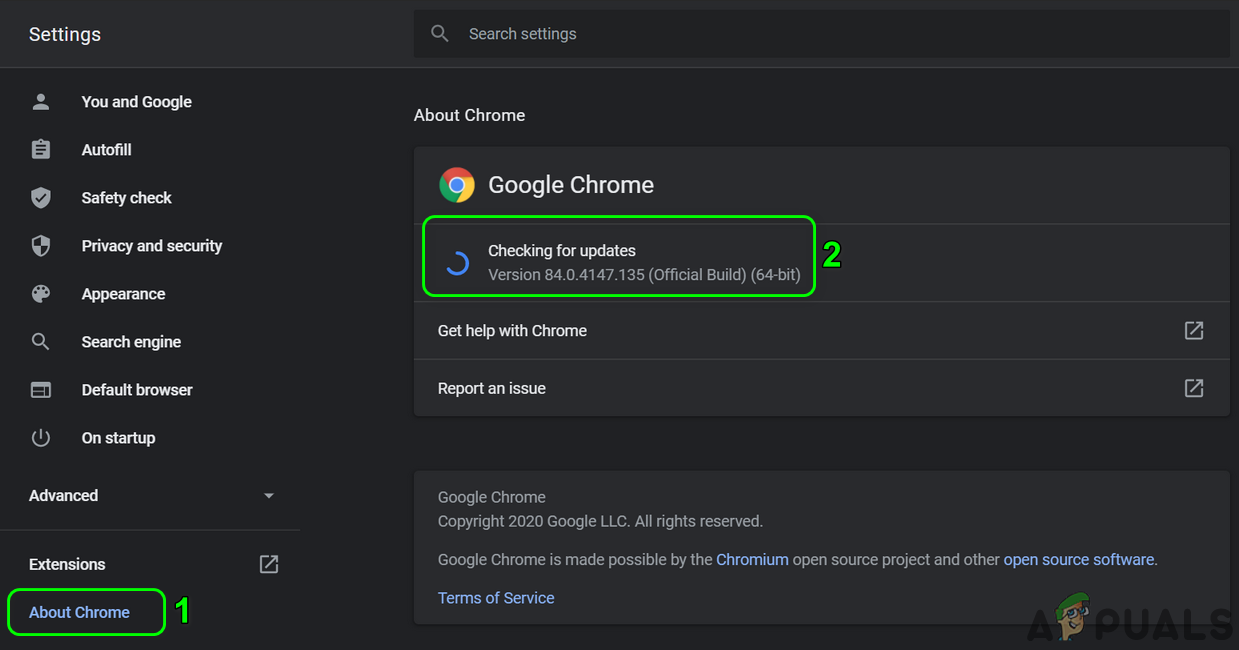
Update Chrome - After updating the browser, check if the YouTube AutoPlay issue is resolved.
Solution 4: Disable Adblocking Extensions/Addons
Extensions/ addons are used to add extra functionality to the browser. However, they also might have adverse effects and you may encounter the error at hand if an extension/addon is interfering in the normal operation of YouTube. In this context, disabling extensions/add-ons (especially adblocking extensions/addons) may solve the problem. For illustration, we will discuss the process for the Chrome browser.
- Launch the Chrome browser and then click on the icon of the Extensions (located at the right end of the address bar).
- Now, in the menu displayed, click on Manage Extensions.
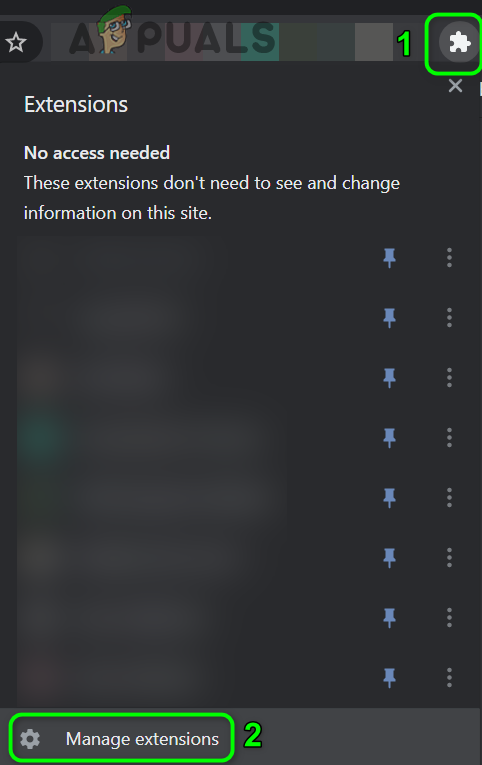
Open Manage Extensions in Chrome - Then disable your adblocking extension (Adblock or Ublock Origin, etc.) by toggling its switch to the off position.
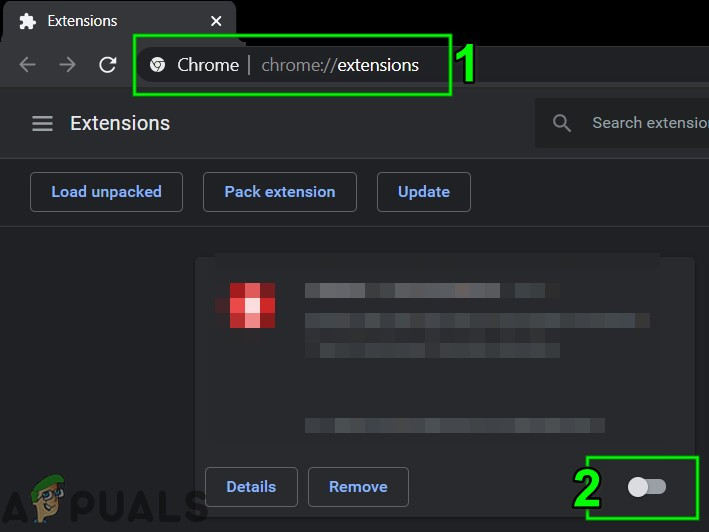
Disable a Chrome Extension - Now check if AutoPlay is operating normally for YouTube. If so, then enable the adblocking extension and add YouTube in its exceptions list.
- If the AutoPlay issue is not resolved after disabling the extension, then disable all the extensions and check if YouTube is clear of the AutoPlay issue. If so, then try to find the problematic extension by enabling one extension at a time, and when the problematic extension is found, either update the extension or disable it until the issue is resolved.
Solution 5: Disable DRM Settings of Your Browser
Browsers use DRM settings to protect the copyrights of digital media. AutoPlay may fail to work if the DRM settings of your browser are interfering in the routine operation of YouTube. In this scenario, disabling the DRM settings of your browser may solve the problem. For elucidation, we will go through the process for the Firefox browser.
- Launch the Firefox browser and type the following in its address bar:
about:config
- Now click on the button to Accept the Risk and Continue.
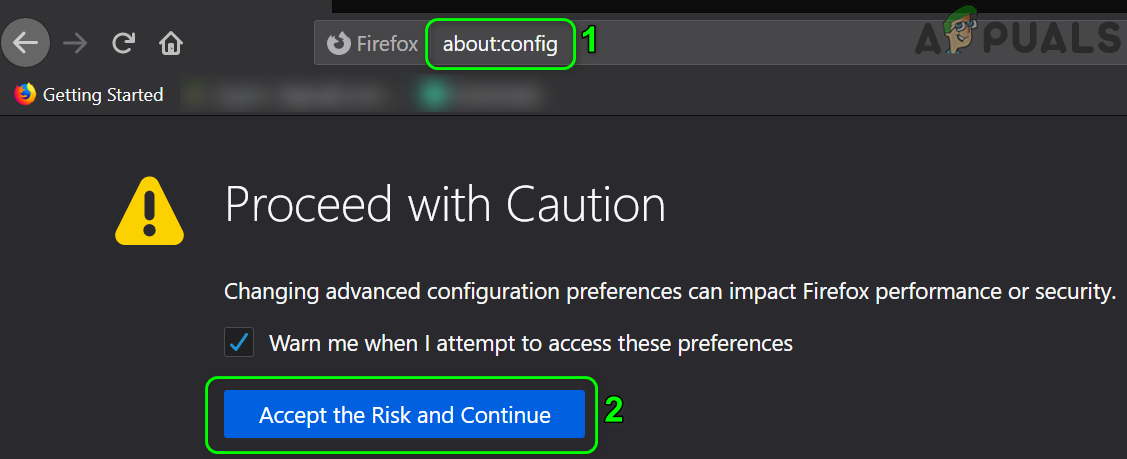
Accept the Risk and Continue to Open about:config Menu of Firefox - Then in the Search Preference Name, search for the following:
media.eme.enabled
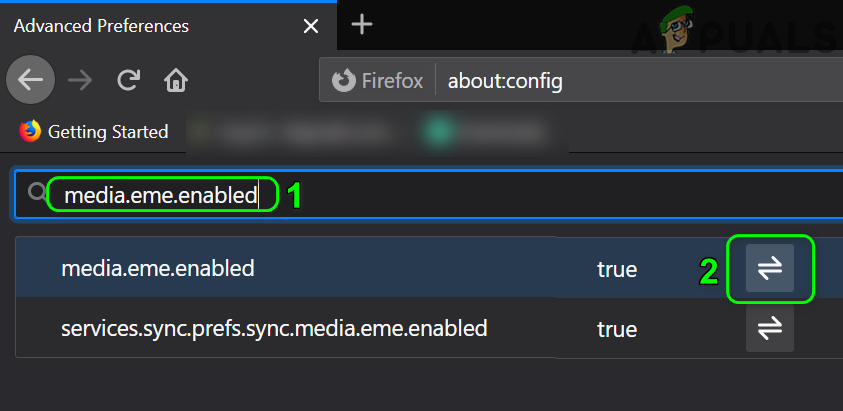
Enable media.eme.enabled Firefox Preference - Now click on the switch to change its value to False.
- Again, in the Search Preference Name, search for the following:
media.gmp-widevinecdm.enabled
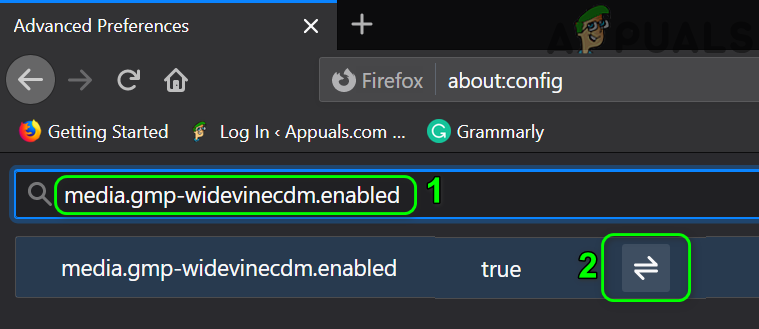
Disable media.gmp-widevinecdm.enabled Firefox Preference - Now click on the switch to change its value to False.
- Then check if YouTube can AutoPlay videos/playlists.
- If not, then enable the above-said both settings and check if YouTube is clear of the AutoPlay error.
Solution 6: Remove Videos from Your Playlist
AutoPlay might also not work if you a very big playlist with a lot of videos. In this context, removing some videos from your playlist may solve the AutoPlay problem.
- Launch the web browser and open the YouTube website.
- Now click on the hamburger menu and then click on the Library icon.
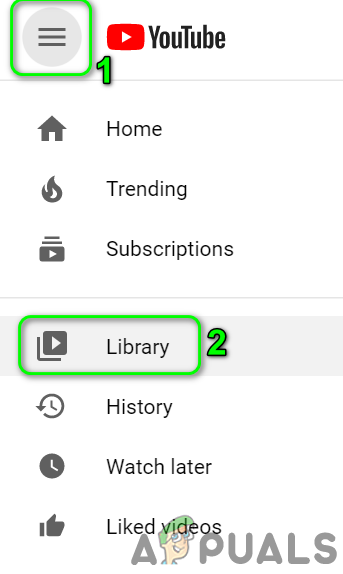
Open YouTube Library - Now navigate to your playlist and then hoover over any of the videos.
- Then click on 3 vertical dots (ellipsis menu) on a video that you want to remove from the playlist and click on Remove from the Playlist.
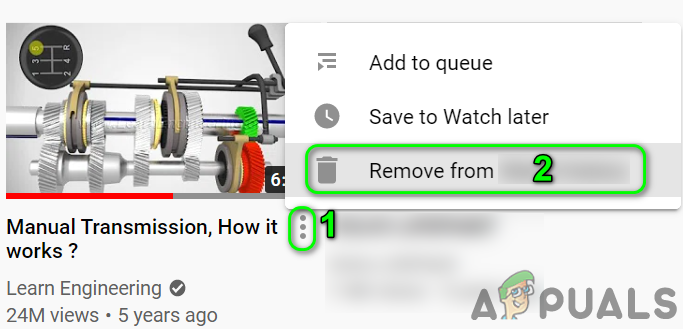
Remove Video from the Playlist - Repeat the process for some more videos and then check if YouTube can AutoPlay the videos.
Solution 7: Disable AutoPlay Blocking Features of the Browser
Web browsers keep on implementing different security features to safeguard its users from online threats. One such feature implemented by Firefox is blocking websites from automatically playing audio. We will discuss the process to disable the said Firefox feature. You may have to dig deeper to find out if any of the browser’s option is causing the AutoPlay issue.
- Launch the Firefox browser and open its menu by clicking on the hamburger menu (near the top right corner).
- Now click on Options and then in the left pane of the window, click on Privacy & Security.
- Then in the right pane of the window, scroll down till the Permissions section.
- Now in the permissions section, click on the Settings button in front of AutoPlay.
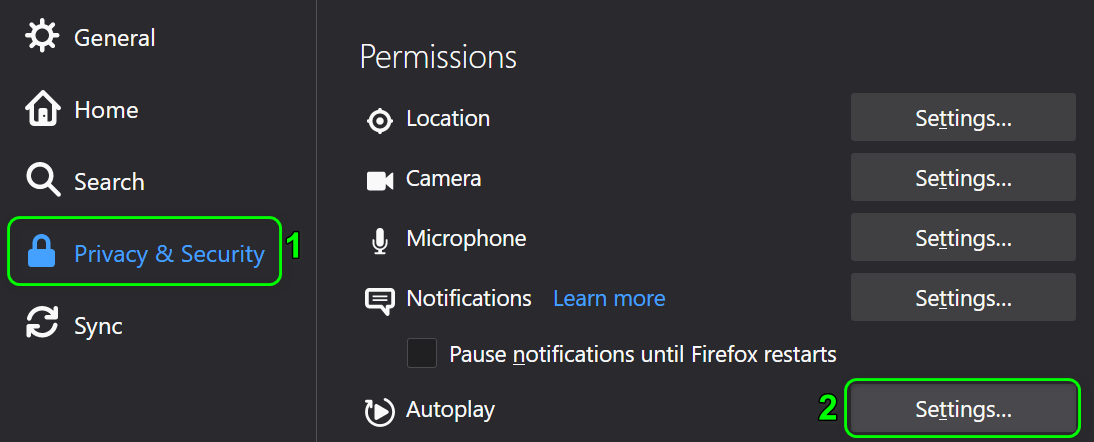
Open Permissions Settings of AutoPlay of Firefox - Then open the drop-down box of Default for All Websites and select the option of Allow Audio and Video.
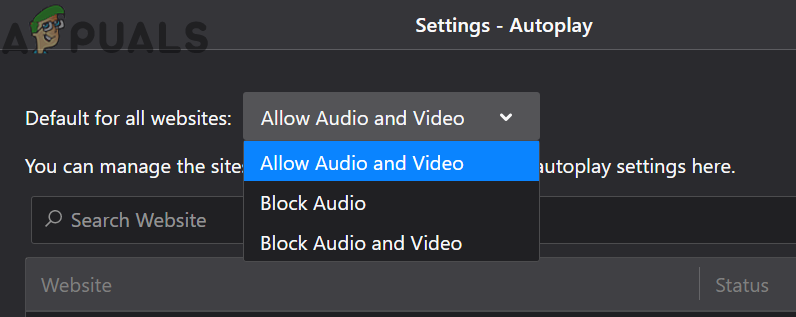
Allow Audio and Video in Permissions Settings of AutoPlay in Firefox - Now check if the AutoPlay issue of YouTube is resolved.
- If not, then type the following in the address bar of the Firefox:
about:config
- Then click the button to Accept the Risk and Continue.
- Now in the search preference type the following
media.autoplay.blocking_policy
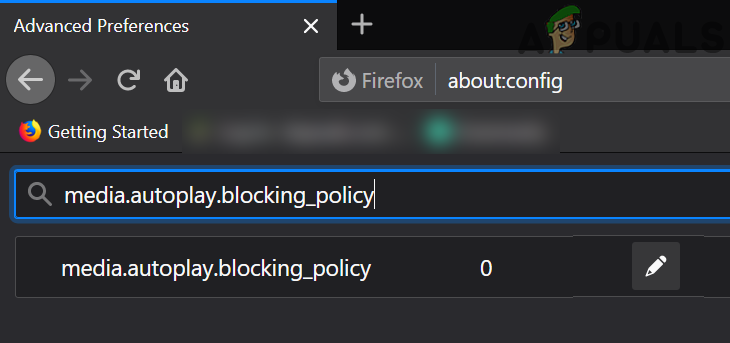
Enable the Firefox Preference of media.autoplay.blocking_policy - Then in the results, click on the edit icon of the setting and then change its value to 0 (if want to disable AutoPlay) or 1 (if want to enable AutoPlay).
- Again, in the Search Preference Name, search for the following:
media.block-autoplay-until-in-foreground
- Now click on the switch to change the setting value to True (if you want to disable AutoPlay if the window is not in focus) and False (if you want to enable AutoPlay when the window is not in focus).
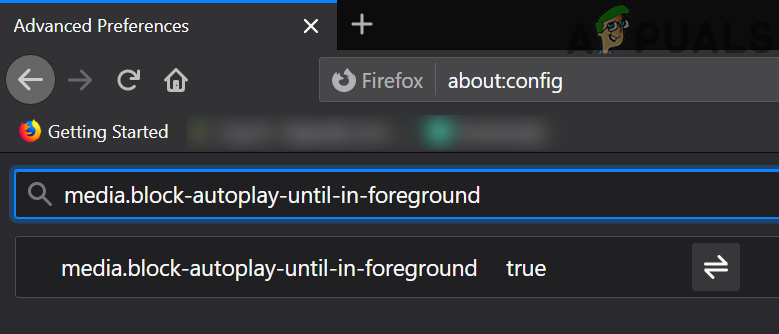
Enable the Firefox Preference of media.block-autoplay-until-in-foreground - Now check if videos/playlists can AutoPlay on YouTube.
- If not, then try another browser to rule out any bug in the browser you are using.
For YouTube Smartphone Applications:
These are valid for both iOS and Android.
Solution 1: Disable Muted Playback Feature
Google keeps on adding new features to the YouTube application to enhance user experience. One of such features is Muted Playback. If this option is enabled, the AutoPlay sometimes doesn’t work as expected. In this context, disabling the muted playback feature may solve the problem.
- Launch the YouTube application and tap on the profile icon (near the top right corner of the screen).
- Now open General and then tap on Muted Playback Feeds.
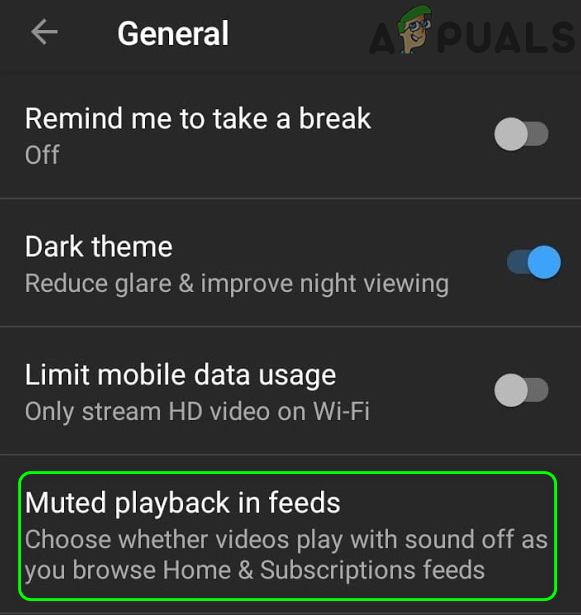
Open Muted Playback for YouTube - Then tap on Off (to disable the muted playback).
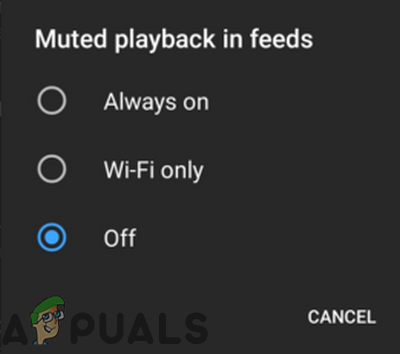
Disable Muted Playback - Now check if YouTube can AutoPlay the videos/playlists.
Solution 2: Uninstall Updates of the YouTube Application
Google keeps on adding new features to the YouTube application through application updates. However, buggy updates are a common issue in the application development/enhancement process and the same could be the reason for the current AutoPlay issue.
In this regard, uninstalling updates of the YouTube application may solve the problem. This method may not be available for all users. For elucidation, we will discuss the process for an Android phone.
- Open Settings of your phone and launch Applications/Application Manager.
- Now find and tap on YouTube.
- Then tap on the More button (either on the bottom of the screen or on the top right corner of the screen).
- Now tap on Uninstall Updates and then check if YouTube can AutoPlay videos/playlists.
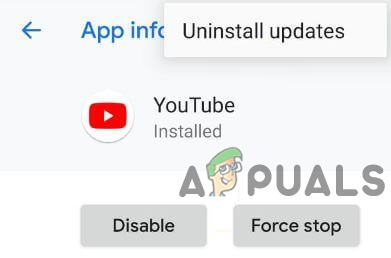
Uninstall Updates of YouTube
Solution 3: Reinstall the YouTube Application
You may encounter the issue at hand if the installation of the YouTube application itself is corrupt. In this context, reinstalling the YouTube application may solve the AutoPlay problem. This method may not apply to all users. For illustration, we will go through the process of the uninstallation of the YouTube application on an Android phone.
- Open the Settings of your phone and then launch its Application Manager/Apps.
- Now tap on YouTube and then tap on the Uninstall button.
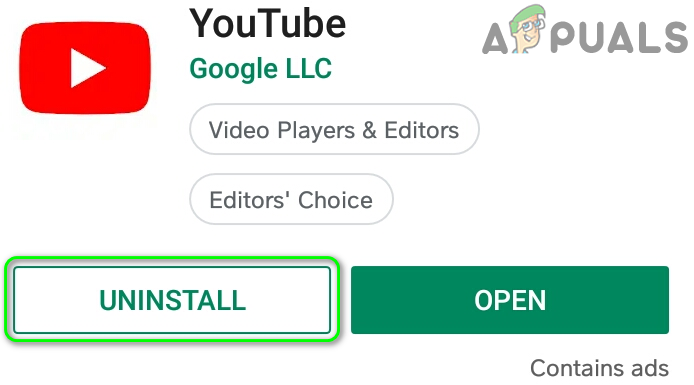
Uninstall the YouTube Application - Then restart your phone.
- Upon restart, reinstall the YouTube application and check if the AutoPlay is working fine.
If nothing has worked for you then try if the AutoPlay issue persists on another network or another device. If the issue is still there, then try to use a YouTube extension like Stop YouTube AutoPlay or Enhancer for YouTube.


